Yes, you can grow turkey tail mushrooms (Trametes versicolor) at home, including indoors. They are not the easiest mushroom to cultivate compared to oysters or shiitake, but they are absolutely doable with the right setup, substrate, and a serious amount of patience. The biggest thing to know upfront: turkey tail is slow. We are talking 1 to 2 months from inoculation to mature fans, sometimes longer. If you go in expecting oyster-mushroom speed, you will be disappointed. Go in expecting a slow, rewarding grow and you will do fine.
How to Grow Turkey Tail Mushroom at Home Indoors

Marcus Holloway
22 Apr 2026
Can you grow turkey tail mushrooms at home (and indoors)?
Turkey tail is a wood-rot fungus that naturally grows on dead hardwood logs and stumps. In the wild it breaks down lignin and cellulose over months. That biology tells you almost everything you need to know about how to grow it: it wants hardwood, it works slowly, and it does not need elaborate fruiting conditions to produce. The good news is that all of this translates well to a home setup. You do not need a lab or a commercial grow room. A grow bag or plastic bin in a spare room, a bathroom, or a grow tent is enough.
Indoor growing gives you control over temperature, humidity, and airflow, which is genuinely useful for this species. An outdoor log inoculation is also a legitimate option for turkey tail (it colonizes logs reliably), but if you want results this year on a predictable timeline, an indoor substrate bag or kit is the more controllable and practical choice. This guide focuses on the indoor approach because that is what most people searching for how to grow turkey tail mushrooms at home actually want.
Choosing your method: indoor vs at-home setups
For most home growers, there are two realistic paths: a pre-inoculated grow kit or a DIY substrate bag you inoculate yourself. Both work. The kit is faster to get started and has a lower contamination risk because the mycelium is already established. The DIY bag takes more preparation but gives you more control and is cheaper per grow once you have the process down.
| Method | Startup effort | Contamination risk | Cost | Control over variables | Best for |
|---|---|---|---|---|---|
| Pre-inoculated kit | Very low | Low (mycelium established) | Higher per grow | Low | Beginners, first-time turkey tail growers |
| DIY substrate bag | Moderate (sterilization required) | Moderate to high | Low once set up | High | Intermediate growers comfortable with sterilization |
| Outdoor log inoculation | Low effort, long wait | Very low outdoors | Low | Very low | Patient growers with outdoor space, 6–12+ month timeline |
If this is your first turkey tail grow, a kit from a reputable supplier is the most honest recommendation. You can focus entirely on fruiting conditions without worrying about sterilization failures. Once you have seen how the mycelium looks and how the fruiting process unfolds, doing a DIY bag is much less intimidating. If you are an intermediate grower already comfortable with grain spawn and pressure cooking, go straight to DIY bags.
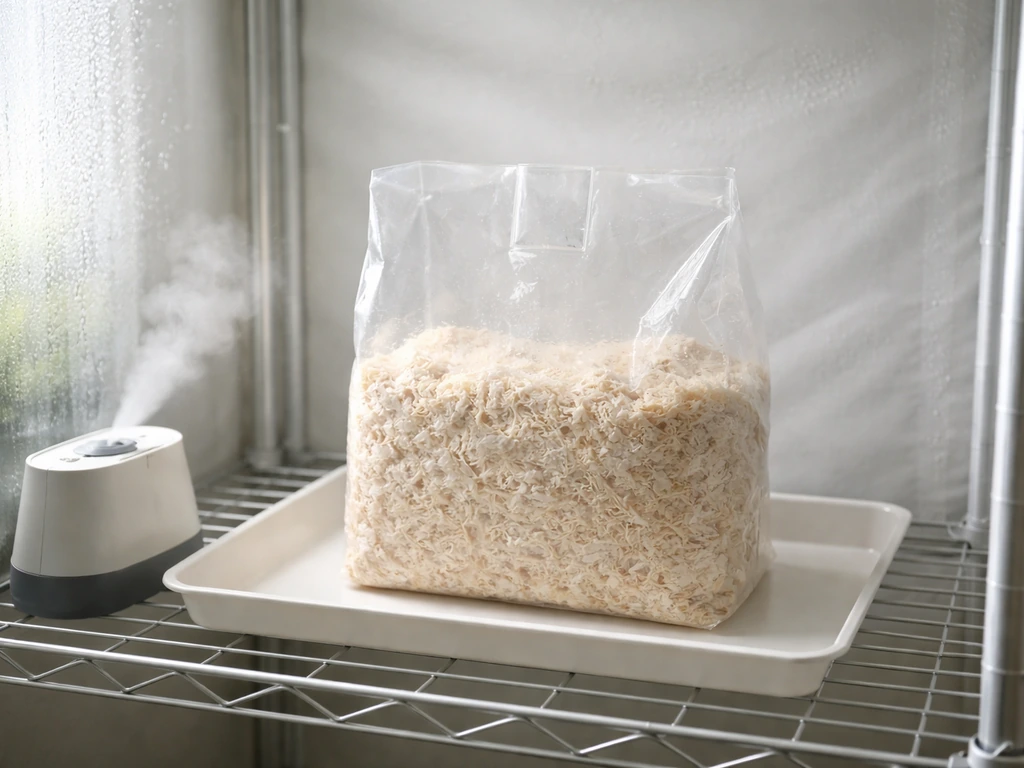
For the indoor setup itself, a grow tent works well because it keeps humidity contained and makes it easy to hang a hygrometer and control airflow. A clear plastic tote with a lid (with holes drilled for air exchange) also works fine and costs almost nothing. The main requirements are: something that holds humidity, some way to exchange fresh air, and a stable temperature. More on those targets in the environment section below.
Substrate choices and prep for turkey tail
Turkey tail is a strict wood decomposer. It wants hardwood-based substrate, full stop. Do not bother with straw or coco coir substrates that work for oysters. Hardwood sawdust is the standard, and hardwood fuel pellets (HWFPs) are the most accessible and affordable option for most home growers because they are widely available, pre-compressed (so very low contamination load), and just need water added to hydrate. A commercial guide defines hardwood fuel pellets (HWFPs) as compressed sawdust cylinders and gives a home-oriented pasteurization temperature window that can help set hydration and heat-treatment targets for your substrate hardwood fuel pellets (HWFPs) are the most accessible and affordable option for most home growers.
Hardwood fuel pellet substrate (the easy DIY route)
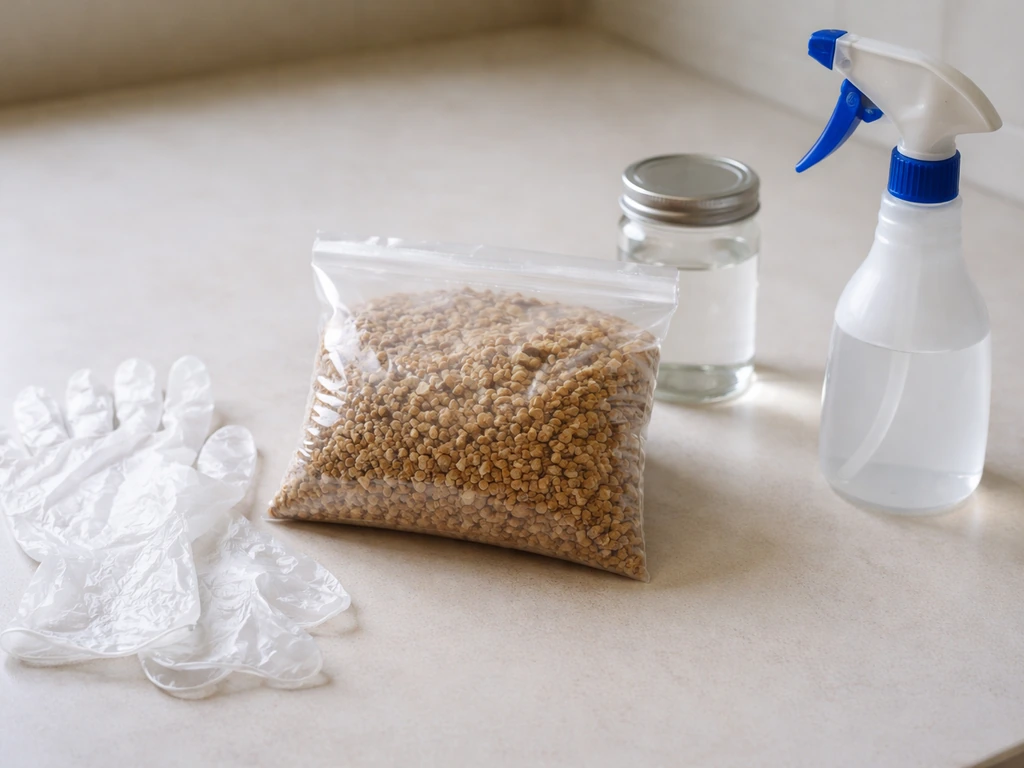
A reliable starter ratio is 2.5 lbs of hardwood fuel pellets hydrated with approximately 3 lbs of water. Let the pellets absorb the water fully, which takes 20 to 30 minutes, until they break apart into a loose sawdust texture. Field capacity is your target: squeeze a handful and only a few drops of water should drip out. Too wet and you are asking for bacterial contamination. Too dry and colonization stalls.
For a pure hardwood pellet substrate with no supplements (no bran, no rye), you can get away with pasteurization rather than full sterilization. The target is 160 to 180 degrees Fahrenheit held for 60 to 90 minutes. You can achieve this by pouring boiling water over the pellets in a sealed container and letting them sit insulated for a couple of hours, or by using a simple water bath. This is not a sterile technique but it knocks back most competing bacteria and molds enough to give your turkey tail mycelium a fighting chance.
If you are adding a supplement like wheat bran (which speeds up colonization and can improve yields), you must sterilize the mix rather than just pasteurize it. Supplemented substrates are a much richer food source for contaminants, especially Trichoderma (green mold). Sterilization means pressure cooking at 15 psi for 2 to 3 hours in a properly sealed autoclave or pressure cooker bag. This is the same principle used in professional sawdust spawn production: sterilized hardwood sawdust inoculated with grain spawn. Skip sterilization on a supplemented mix and you will likely lose the bag to green mold within a week.
Kit substrate (if you went the pre-made route)
Commercial turkey tail kits typically contain a mix of pure hardwood sawdust and organic wheat bran, already fully colonized with mycelium. There is no substrate prep needed. Your only job is to manage the fruiting environment. This is exactly why kits are valuable for first grows: you remove substrate and sterilization variables entirely and learn what healthy turkey tail mycelium looks and behaves like.
Inoculation (spawn/spores) and sterilization/sanitation basics
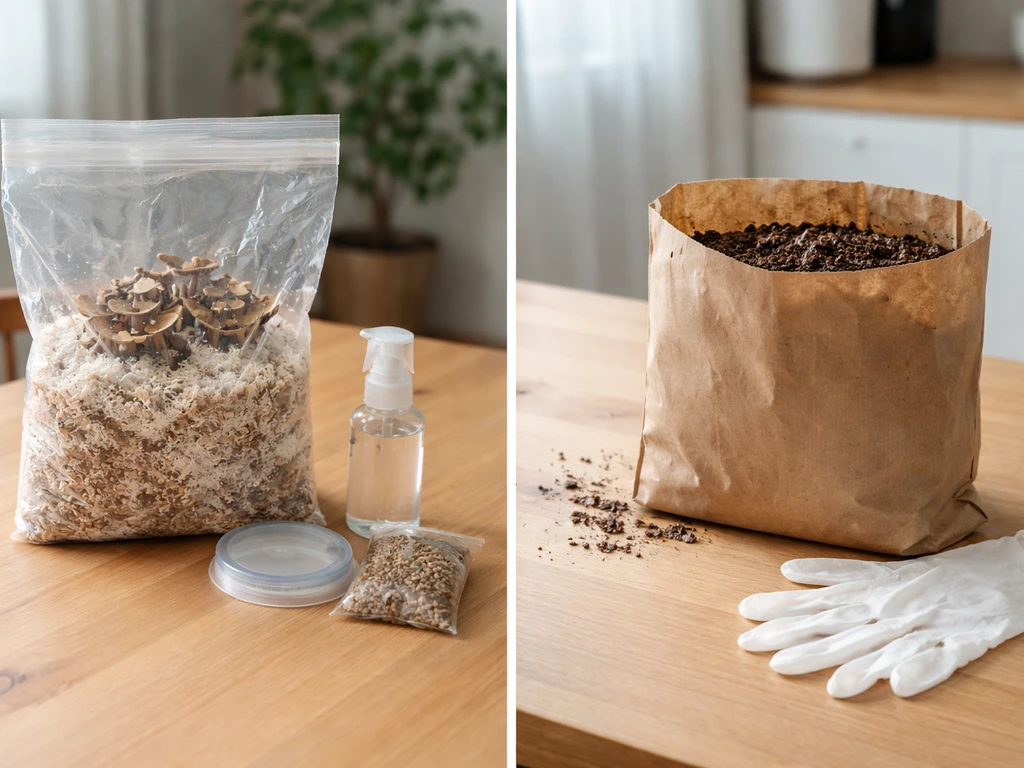
For a DIY bag, you have two main inoculation options: grain spawn or sawdust spawn. Grain spawn (rye, wheat, or millet colonized with turkey tail mycelium) is the most vigorous and common choice. You mix it into your sterilized or pasteurized hardwood substrate at roughly 10 to 20 percent spawn rate by weight. More spawn means faster colonization and less window for contaminants to get established. Sawdust spawn is a slightly slower-colonizing alternative but still works well for hardwood species.
Sanitation during inoculation is critical. Work in the cleanest environment you can manage. Still-air box (a clear plastic tote with arm holes cut in it) or a flow hood are your options at home. Wipe down all surfaces with 70 percent isopropyl alcohol. Flame-sterilize any metal tools to red hot, let them cool before touching substrate. Wear gloves. Move deliberately and avoid unnecessary airflow. You do not need a lab; you need to minimize the number of foreign spores landing in your substrate bag during the 60-second window it is open.
Spore syringes are an option for turkey tail but take much longer to colonize than spawn because mycelium has to develop from scratch. Unless you are specifically trying to culture a wild strain, start with established grain spawn from a reputable supplier. It cuts weeks off your timeline and dramatically improves success rates for beginners.
Indoor environmental targets for colonization and production
Colonization (the phase where mycelium spreads through the substrate) and fruiting (where the mushrooms actually form) have slightly different environmental needs. Getting both right is where most home growers succeed or fail with turkey tail.
Colonization phase
During colonization, keep the bag or container sealed and put it somewhere warm and dark. The target temperature range is roughly 75 to 85 degrees Fahrenheit (24 to 29 degrees Celsius). At this temperature, turkey tail mycelium colonizes actively, though still slowly compared to oysters. Expect 2 to 3 weeks to see solid white mycelium coverage throughout the substrate. Do not open the bag during this phase. You are protecting the colonizing mycelium from contamination and maintaining a stable microclimate inside the bag.
Fruiting phase
Once your substrate is fully colonized (fully white, firm, and consolidated), it is time to introduce fruiting conditions. The key parameters are:
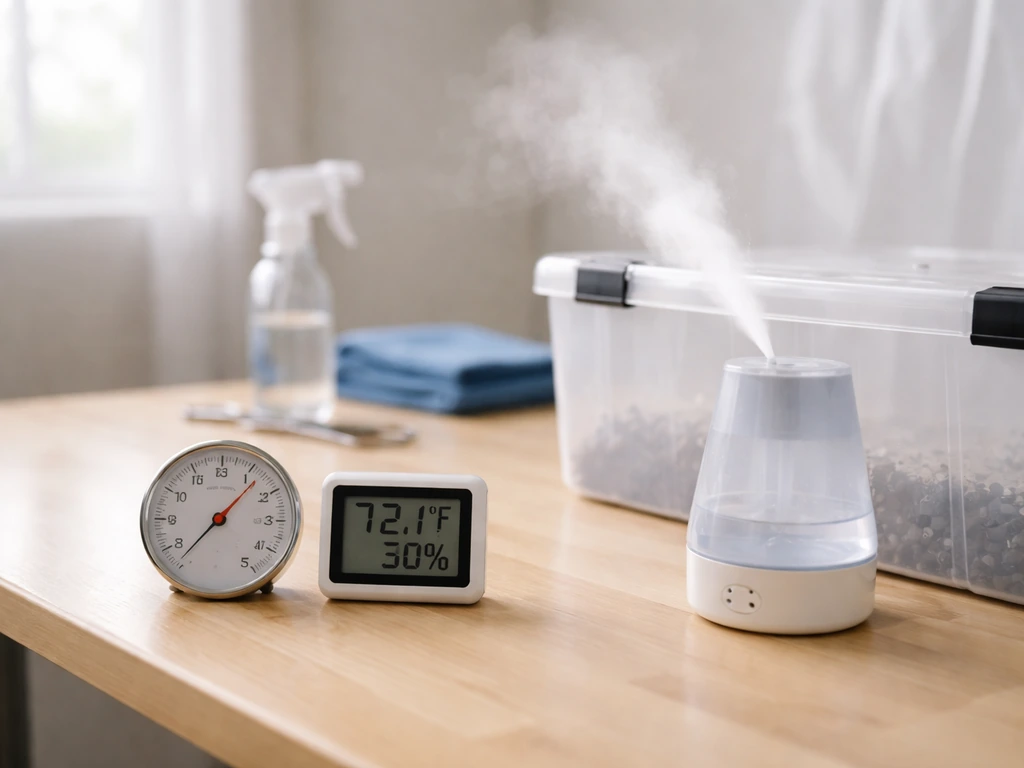
- Temperature: 59 to 75 degrees Fahrenheit (15 to 24 degrees Celsius). Cooler end of this range tends to favor fruiting initiation. Temperatures above 77°F (25°C) can stall fruiting.
- Humidity: 80 to 95 percent relative humidity inside your fruiting chamber. Shoot for condensation visible on the inside of your tent or bin walls as a rough indicator.
- Fresh air exchange: Aim for regular air exchange to keep CO2 levels low. For a hobby setup, opening your tent or container and fanning it 3 to 4 times a day works. A small USB fan set on a timer improves on this.
- Light: Indirect light is sufficient and necessary. You do not need grow lights. Enough natural or ambient light to comfortably read by is adequate. Avoid direct sunlight, which dries out the surface and overheats the substrate.
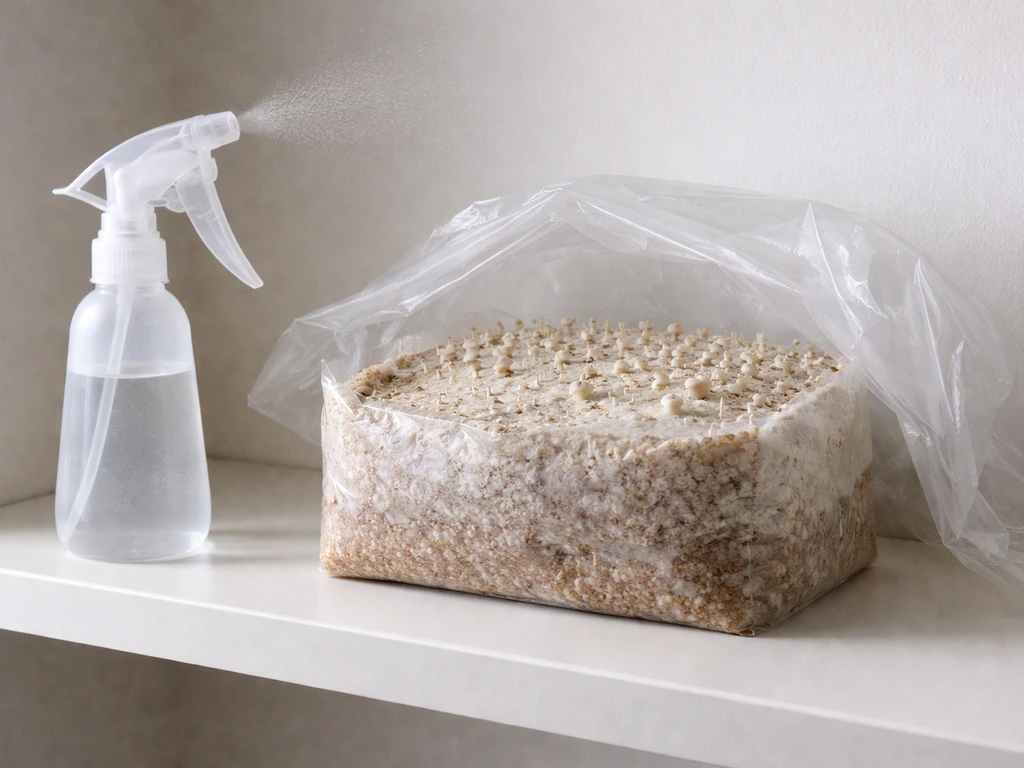
- Misting: Mist with non-chlorinated water 2 to 4 times daily. Tap water left out overnight works if you do not have filtered water. The goal is keeping the surface moist without waterlogging it.
A grow tent with a small ultrasonic humidifier and an inkbird humidity controller takes a lot of the manual work out of maintaining these conditions, but it is not required. A plastic tote or a clear bag humidity tent set up over your block works at low cost.
How to start fruiting and what to expect on the timeline
Once colonization is complete, you need to introduce the fruiting trigger: fresh air, lower temperature, and high surface moisture. ATTRA/NCAT notes that turkey tail fruiting benefits from steady humidity paired with good air exchange, since humidity and airflow are central drivers for forming brackets steady humidity and good air exchange. For a kit or DIY bag, this means opening the top or cutting slits in the sides. You have two main options for how to expose the substrate:
- Top-fruiting: Remove the tape or fold at the top of the bag. Leave about 2 cm (roughly an inch) of plastic rim above the substrate surface. This rim helps hold a micro-humidity pocket directly over the colonized surface. Cover the whole setup with a clear plastic humidity tent (a bag inverted over it works fine) and begin misting.
- Side-fruiting: Keep the top sealed. Cut 5 horizontal slits about 5 cm (2 inches) long in the sides and front of the bag. Place it inside a humidity tent with enough room around the sides for mushroom fans to form outward from the cuts. Mist the cut areas directly.
After introducing fruiting conditions, do not expect overnight drama. Turkey tail mycelium will first thicken and consolidate on the exposed surface over a period of several days to a couple of weeks. Then small, flat white or cream-colored primordia (pins) will begin to form. These slowly develop into the characteristic zoned, fan-shaped brackets over the following weeks.
Full mature fans with visible color zones typically take 1 to 2 months from the moment fruiting conditions were introduced. This is the normal pace for this species. For shiitake, the overall process is typically quicker than turkey tail, but the exact timeline depends heavily on your inoculation method and temperatures how long does it take to grow shiitake mushrooms. Turkey tail simply grows slowly, and that is not a sign that something is wrong.
Turkey tail is generally harvested for its medicinal properties (it is not commonly eaten as a culinary mushroom). If you are instead trying to grow psychedelic mushrooms, the timeline can be quite different and depends on the species and starting method. For magic mushrooms, the timeline can be very different from turkey tail, so you will want to look up the grow time for the specific species you plan to cultivate psychedelic mushrooms.
For magic mushrooms, the timeline can be quite different from turkey tail, so you will want to look up the grow time for the specific species you plan to cultivate how long to grow magic truffles. On average, turkey tail can take several weeks to fully colonize and then additional time in fruiting conditions before you see mature brackets how long to grow mushroom. Harvest when the fans are fully formed with visible concentric color bands and a firm texture. At that point you can dry them, make tea, or use them however suits your purpose. Unlike oysters or shiitake, you are not chasing a culinary peak moment.
The fans are ready when they look ready.
If you are curious how this timeline compares to other species, turkey tail is on the slower end of the spectrum. If you want to compare expected grow time, this patience-focused pace for turkey tail is why it takes longer than many other species. For faster timelines, other species offer much quicker results. Turkey tail rewards patience specifically.
Troubleshooting: contamination, no growth, and other common failures
Green mold (Trichoderma)
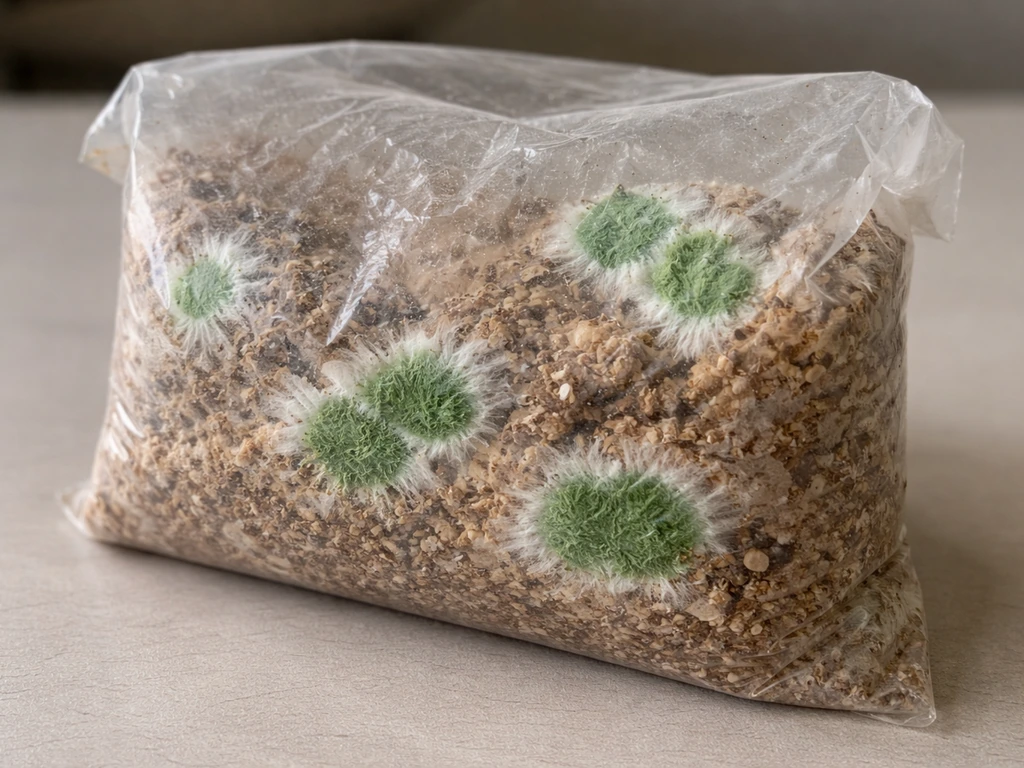
Green patches in your substrate bag almost always mean Trichoderma contamination. This is the most common failure mode for DIY hardwood bags. If it appears during early colonization and the green is localized to a small area, you can try isolating the block in a sealed plastic bag and monitoring, but honestly, once Trichoderma gets established, the block is usually lost.
Prevention is the real answer: sterilize supplemented substrates fully, inoculate with good sanitation practices, and use a higher spawn rate to help turkey tail mycelium outcompete mold. If you are wondering about the timing, expect this slow, patient pace similar to how long do wine cap mushrooms take to grow, rather than rapid culinary-mushroom results 1 to 2 months. If you used a pasteurization-only approach with a supplemented substrate, that is almost certainly where the contamination came from.
No visible fruiting after weeks of correct conditions
This is common with turkey tail and frustrating. The most likely culprits, in order of probability: the surface of the exposed substrate is drying out between misting sessions (the cut or top surface looks dry or cracked), the temperature is too warm (above 24 degrees Celsius stalls fruiting), or CO2 is building up because air exchange is not frequent enough. One grower's account worth noting: running at 24 degrees Celsius, 85 percent humidity, and fanning every three hours still produced no visible progress for weeks. The surface moisture was the missing variable. Increase misting frequency first, then check temperature, then improve air exchange.
Mycelium looks healthy but nothing is happening
If the colonized surface is bright white, looks healthy, and still nothing is forming after 3 to 4 weeks of fruiting conditions, try dropping the temperature by a few degrees (closer to 59 to 65 degrees Fahrenheit) and making sure the block is getting some indirect light. Turkey tail, like many wood-rotting polypores, uses light as a directional and developmental cue. A fully dark fruiting environment can slow or prevent pin formation.
Yellowing or browning mycelium
Yellow or brown liquid pooling on the surface (called metabolite secretion) is normal and not a contamination sign. It is metabolic byproduct from the mycelium. Wipe or absorb it and continue. If the mycelium itself is turning brown and receding, that usually means the substrate is too dry, too hot, or has bacterial contamination from poor sterilization. Increase moisture and check your temperature.
Surface mold on an otherwise healthy block
Small amounts of surface mold (black, white, or green spots) appearing at cuts or on the exposed top can sometimes be addressed early. Wiping with a dilute bleach and water solution on the mold spot directly (not soaking the substrate) can help. Some growers use a dilute bleach, water, and vinegar spray as a spot treatment. This is not a cure for deep contamination but can handle surface-level mold before it spreads. If mold is spreading rapidly or is green and fuzzy, discard the block, sterilize your growing area, and start fresh.
How to know it's actually working
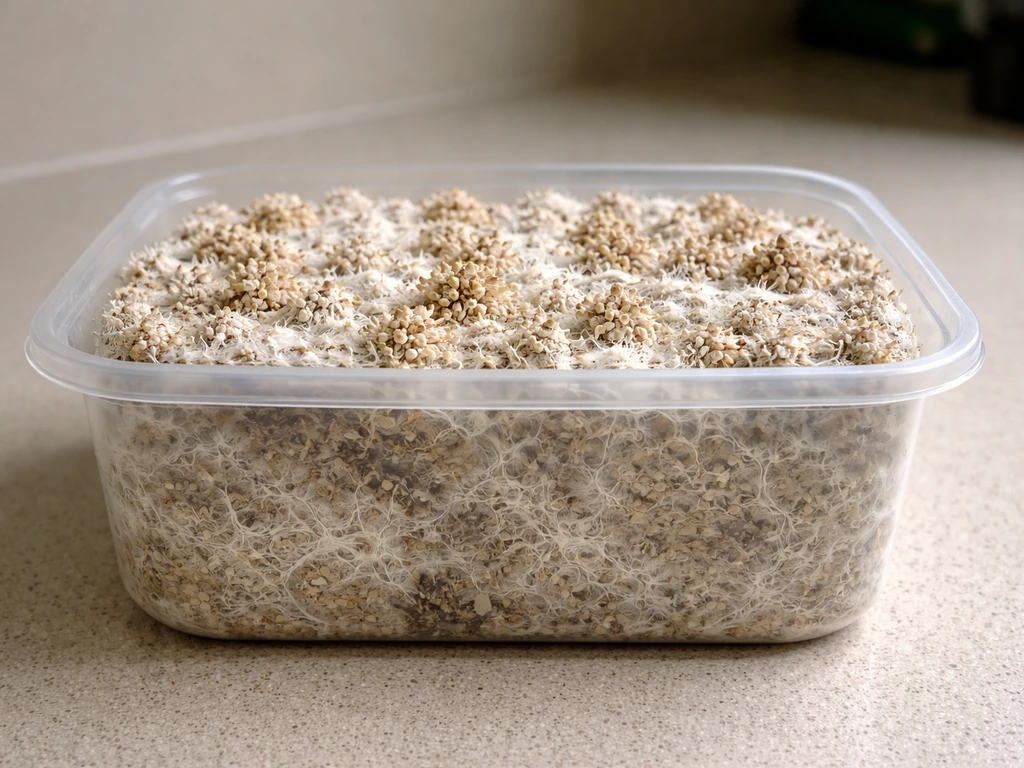
Healthy turkey tail colonization looks like dense, bright white, rope-like mycelium threading through the substrate. When fruiting conditions are introduced, the surface will first become denser and slightly raised, then small flat white growths will appear. These are not always obvious at first. Check your cuts or top surface daily in good light. The early primordia are thin, cream or white, and slightly rubbery. Once you see consistent color banding (brown, orange, blue, or green zones depending on your strain and conditions), the fans are developing correctly and you are on track.
FAQ
How do I know when my turkey tail block is truly ready to start fruiting? (It looks fully colonized)?
Yes, but you should not treat “fully white” as “ready to fruit” automatically. If the block is consolidated yet the surface is dry to the touch, add fruiting humidity and fresh air and wait for the thickening and pin stage, which can take several days to a couple of weeks.
Can I open the bag during colonization to mist or peek inside?
Do not open the bag during colonization, even to check progress. Instead, judge readiness visually through the plastic, and only switch to fruiting once the substrate is fully consolidated and firm, then expose to fresh air.
What should I check first if I have healthy white colonization but no pins after several weeks?
If pins never appear, focus on the surface conditions first: raise surface moisture until the exposed area stays evenly hydrated (not dripping), and increase fresh-air exchange (CO2 buildup is a common silent failure). Temperature tweaks help, but they are usually secondary to dry surface and low airflow.
Can I speed things up by dropping the temperature a lot right away?
Avoid chilling too aggressively. Use small temperature steps (a few degrees at a time) and keep humidity high, since a sudden cold shock combined with low humidity can cause the mycelium to stall and retreat.
Is higher humidity always better for turkey tail during fruiting?
Yes, but “too much” humidity can backfire if there is poor air exchange. Aim for a consistently wet-looking surface while still fanning enough to prevent CO2 buildup and to keep the exposed zone breathable.
How often should I fan or exchange air during fruiting?
A practical approach is to keep fresh air on a schedule and avoid just misting continuously. If you fan every few hours and maintain high surface moisture, you usually reduce the risk of stalling that comes from a CO2-heavy environment.
Does turkey tail need light, and should it be in direct sunlight?
For turkey tail, direct sunlight is not the goal. Indirect light or dim, consistent ambient light helps as a directional cue, while harsh direct sun can overheat and dry the surface.
Can my water quality affect turkey tail growth indoors?
It depends on how “hard” your water is and whether you have chlorine or chloramine. If your water tends to be very harsh, consider filtering or letting water sit so additives dissipate, since mineral buildup and chemical residues can irritate the exposed surface over time.
What’s the best way to handle Trichoderma if it shows up during DIY growth?
If you see green mold (Trichoderma), spot-treating usually works only for very superficial, localized issues. If the green is fuzzy, rapidly expanding, or appears deeper around the cuts, discard the block and redo sanitation, because it is hard to fully stop an established colony.
How can I tell whether my substrate is too wet or too dry during the fruiting stage?
Over-hydrating the block can encourage bacterial slime while under-hydrating stalls pin formation. Your best indicator is squeeze-test field capacity during substrate prep, and during fruiting aim for an evenly hydrated surface that does not run like water pooling all over.
My surface is browning and pulling back. What does that usually mean and what should I change first?
If the surface turns brown and recedes, treat it like a stress signal: check temperature first, then surface moisture, then contamination risk. Once bacteria start, they can progress quickly, so improve conditions immediately rather than waiting for a “recovery” that may not come.
Is pooling liquid on the surface always contamination? What do I do about it?
Turkey tail can produce metabolite secretion that looks like yellow or brown liquid, wiping is fine, but do not keep “over-misting” to compensate. After wiping, return to steady humidity and reliable fresh air so the surface stays hydrated without becoming waterlogged.
Can I spot-treat surface mold with bleach and save the block?
If a spot is only surface-level and truly localized, wiping with a dilute bleach solution can be a short-term containment step. Do not soak the whole block, and if it spreads within days, switch to discarding and sterilizing to protect future grows.
My environment conditions were inconsistent for a few days, can that permanently set me back?
Yes, especially if you keep the block sealed too long or switch fruiting conditions too slowly. When you have a sudden mismatch in moisture, fresh air, or temperature, you can get long delays in primordia formation even with otherwise good mycelium.
When exactly should I harvest turkey tail indoors?
Fans are typically ready when the brackets are fully formed with clear concentric zones and a firm texture. Wait for full coloration before drying, because partial development often means weaker structure and can affect your final dried yield.