From inoculation to harvest, a typical indoor magic mushroom grow takes roughly 4 to 8 weeks total. That breaks down to about 2 to 4 weeks for colonization, then another 1 to 2 weeks for pinning and early fruiting, and a few more days until your first flush is ready to pick. The exact number depends on your strain, your environment, and how clean your setup is, but if someone told you "about a month," they were probably being optimistic. Plan for 6 weeks and feel great if it's faster.
How Long Does It Take to Grow Magic Mushrooms?

Marcus Holloway
18 Apr 2026
The full timeline at a glance
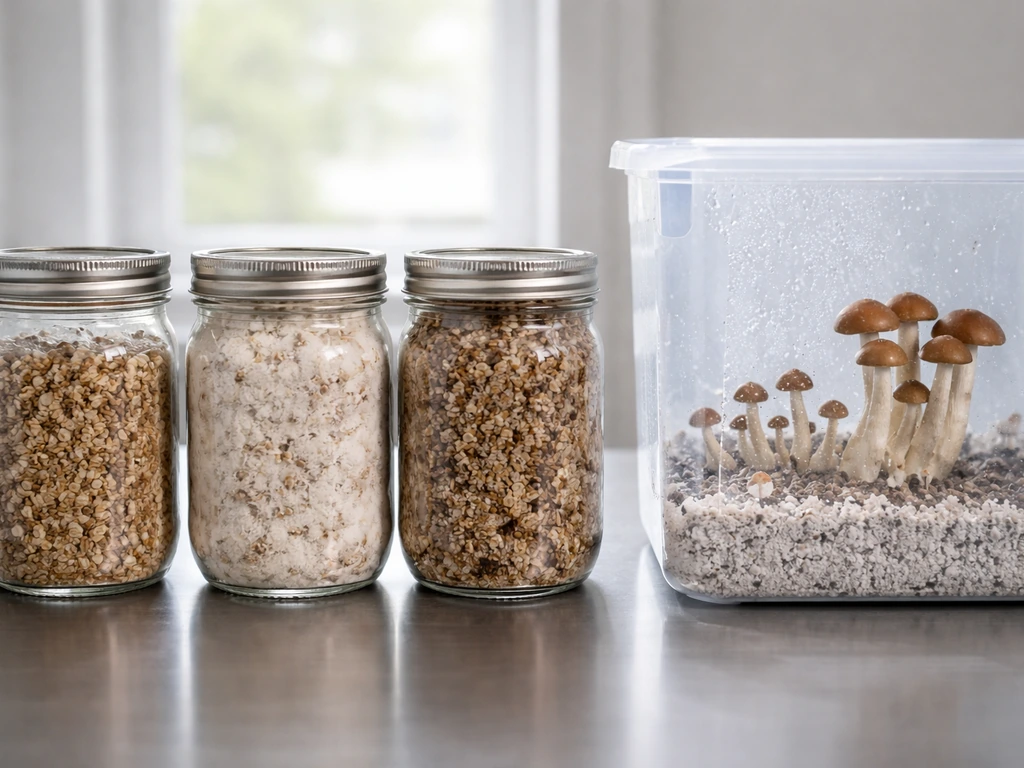
Before diving into each stage, here's the overall picture. Most home growers working with Psilocybe cubensis (by far the most beginner-friendly species) using grain spawn and a bulk substrate like coco coir or pasteurized straw can expect this rough schedule:
| Stage | Typical Duration | What's Happening |
|---|---|---|
| Inoculation to full colonization | 2–4 weeks | Mycelium threads through grain or substrate |
| Colonization to pinning | 5–14 days | Pins form after environmental shift to fruiting conditions |
| Pinning to harvest-ready | 5–10 days | Pins mature into full fruit bodies |
| Total inoculation to first harvest | 4–8 weeks | End-to-end typical range |
If you're curious how this compares to other species, the timing for magic mushrooms sits in a middle ground. Shiitake mushrooms, for instance, have a much longer colonization phase that can stretch several months depending on the substrate.
Stage by stage: what's actually happening (and how long each takes)
Colonization: weeks 1 through 4
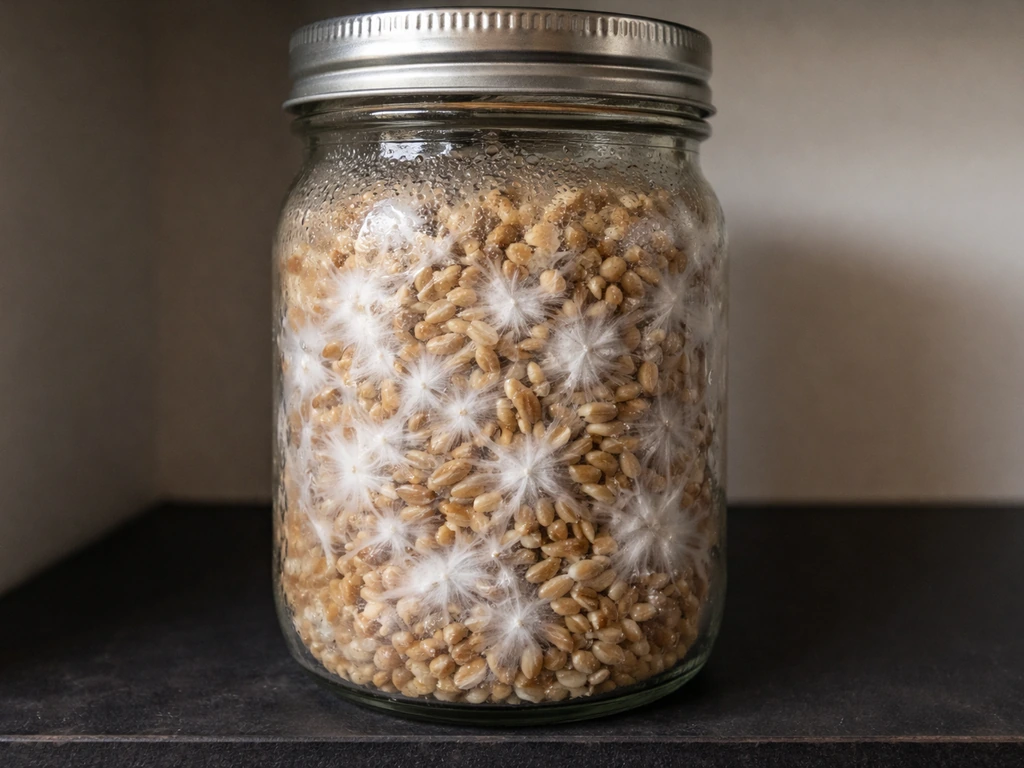
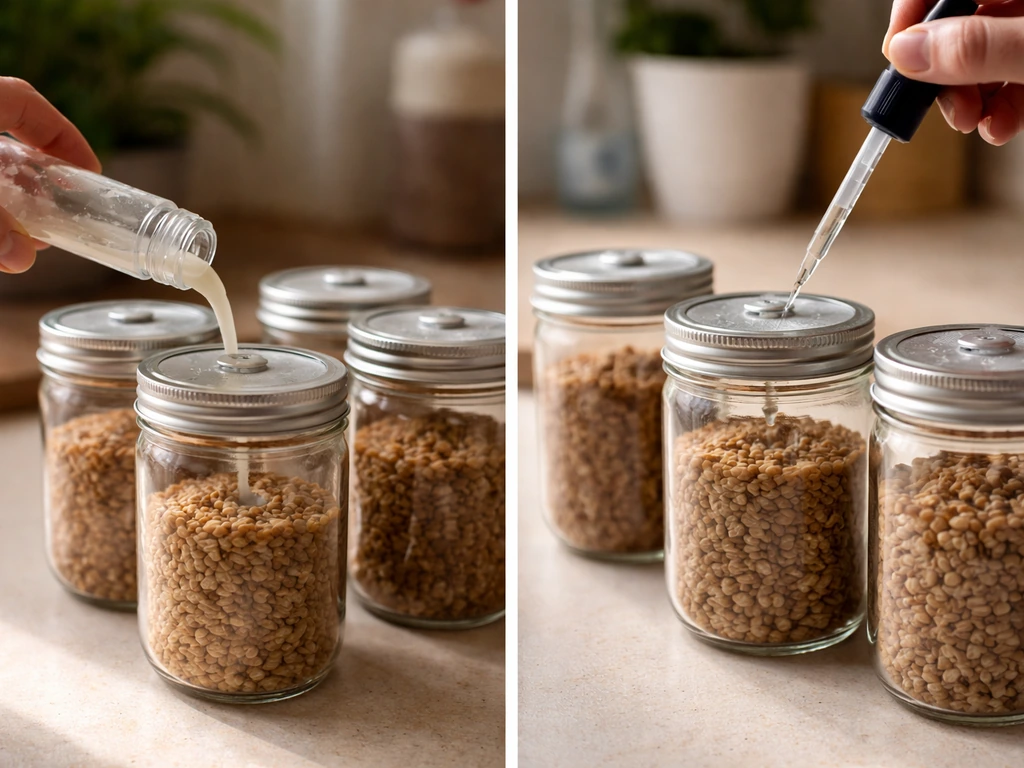
Colonization starts the moment your spore syringe (or liquid culture) makes contact with your grain spawn. The mycelium begins consuming the substrate, and you'll see white, fluffy threads spreading through the jar or bag. A healthy grain jar should be fully colonized in 2 to 4 weeks at room temperature. Wikipedia's description of small-scale Psilocybe cubensis cultivation puts grain colonization at roughly one month, which matches what most home growers experience. Fast genetics in a warm room (around 75 to 80°F) can colonize in as little as 14 days. Slow genetics or cooler temps can push it past 4 weeks.
During this stage, you want to keep the jars or bags in a dark, stable environment. You're not doing much except waiting and watching for signs of contamination. A fully colonized grain jar looks completely white or off-white, with no green, black, or pink patches. Once that's done, you move to bulk substrate, and colonization starts again, though it's usually faster the second time because you're using a much higher spawn-to-substrate ratio.
Pinning initiation: days 1 through 14 after fruiting conditions begin
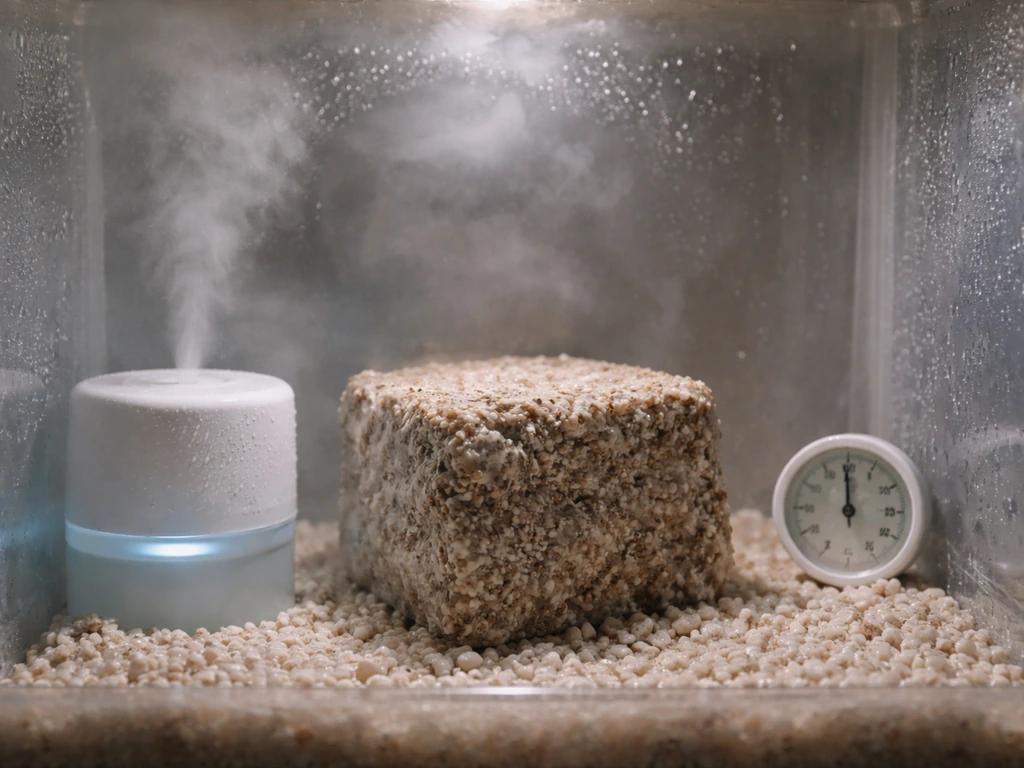
Once your bulk substrate is fully colonized, you flip the environment to trigger fruiting. This means dropping CO₂, raising humidity to around 90%, introducing indirect light for 12 to 16 hours a day, and letting fresh air exchange happen regularly. Pins (tiny primordia) typically appear within 5 to 14 days of making this shift. If you're not seeing pins by day 14, something in your environment needs attention. The most common culprit is high CO₂, which is almost always a fresh-air exchange problem.
Fruiting and harvest: days 5 through 10 after pinning

Once you have visible pins, the grow moves fast. Those tiny dots expand into recognizable mushrooms within 5 to 10 days. In a Shroomery discussion, a Psilocybe cubensis pin is reported to mature in roughly 2 to 5 days after pinning to reach a fully grown fruitbody [Psilocybe cubensis pin can mature in roughly 2 to 5 days](https://www. shroomery.
org/5179/How-long-does-it-take-for-a-pin-to-grow-into-a-fully-grown-fruitbody). The ideal harvest window is just before or as the veil underneath the cap starts to tear, which signals the mushroom is at peak potency and about to drop spores. Once you harvest a flush, you can soak the substrate (a process called dunking) and get additional flushes, usually 2 to 4 more, each spaced about 1 to 2 weeks apart.
Total yields and timing for subsequent flushes vary quite a bit, but your second and third flushes often come faster than the first.
The five things that change your timeline the most
Temperature
Temperature has an outsized effect on how fast the mycelium grows. For colonization, most P. cubensis strains move fastest between 75 and 80°F. For fruiting, the substrate temperature (not air temperature) should sit closer to 74 to 78°F, though some documentation points to substrate temps around 84 to 86°F for fruiting in more controlled setups. The practical takeaway: don't let your grow space drop below 70°F or you'll add days (sometimes weeks) to colonization. Don't let it spike above 85°F for extended periods or you risk killing the mycelium outright.
Humidity
Low humidity is one of the fastest ways to stall pinning. Fruiting requires relative humidity in the 80 to 95% range, with most growers targeting around 90%. If your fruiting chamber is drying out between mistings, pins either won't form or will abort early. A properly humidified chamber is the difference between a 7-day pin and no pins at all. Mist the walls (not the substrate directly) two to three times a day if you're running a simple shotgun fruiting chamber.
Fresh air exchange and CO₂

This is the one most beginners underestimate. High CO₂ levels suppress pinning and can cause mycelium to form a dense, leathery layer on the substrate surface instead of producing fruit bodies, a condition called overlay or overgrowth. Shroomery discussions have documented this pattern extensively: overlay is almost always linked to CO₂ buildup from insufficient fresh-air exchange, sometimes combined with high temps or low humidity. Fanning or opening your fruiting chamber several times a day drops CO₂ enough to trigger and sustain fruiting. Automated setups use small fans on timers to maintain low CO₂ consistently.
Light
Mushrooms don't photosynthesize, so light isn't about energy, it's a directional cue. About 12 hours of indirect or fluorescent light per day is enough to orient pin formation toward the surface and encourage even fruiting. A windowsill with indirect sunlight or a cheap LED lamp on a timer works fine. You don't need anything fancy. What you do need is consistency, irregular or no light exposure tends to produce uneven, poorly formed fruit bodies.
Genetics and strain
Not all P. cubensis strains behave the same. Fast-colonizing strains like Golden Teacher, B+, or Penis Envy variants can shave days off your timeline, while slower or more finicky genetics stretch it out. Starting material quality also matters: a fresh, active liquid culture will colonize faster than a spore syringe, which has to germinate before growth even begins. If you're new and want the fastest realistic timeline, stick with a beginner-friendly, fast-colonizing strain and use liquid culture over spore syringes.
What to watch for day by day (and week by week)
Staying on track means knowing what normal looks like at each stage. Here's a practical monitoring guide:
- Days 1 to 7 after inoculation: Look for the first signs of white mycelial threads spreading from inoculation points. No visible growth by day 7 can mean a bad spore syringe, contamination, or temps too low.
- Days 7 to 14: Colonization should be visibly progressing, ideally covering 30 to 50% of the grain jar. Growth that's stalled or patchy warrants a closer look for contamination.
- Days 14 to 28: Grain should be approaching or reaching full colonization. You may notice the mycelium consolidating and developing a 'consolidated' look rather than fluffy threads. This is normal.
- Days 1 to 7 after bulk transfer: Colonization of the bulk substrate begins. Expect visible growth across the surface within a week.
- Days 7 to 14 after bulk transfer: Bulk should be fully or nearly colonized. Once you see full white coverage with no green or black, it's time to initiate fruiting conditions.
- Days 1 to 14 of fruiting: Watch for pinning. Tiny white dots clustering at the surface or edges are a great sign. No pins by day 14 means your environment needs adjustment.
- Days 5 to 10 after pinning: Mushrooms grow fast now. Check twice daily. Harvest just before or as the veil tears.
Why your grow is running slow (and how to fix it)
Slow colonization and delayed pinning are the two most common frustrations. Most of the time, one of a handful of problems is responsible.
| Problem | Likely Cause | Fix |
|---|---|---|
| Colonization stalled after week 2 | Temps too low (under 70°F) | Move jars to a warmer spot or use a seedling heat mat set to 75–78°F |
| Contamination (green, black, pink patches) | Sterility issue during inoculation | Discard contaminated jars; improve glove/still air box technique |
| No pins after 14 days of fruiting conditions | High CO₂, low humidity, or temps too high | Fan more aggressively, mist more frequently, check ambient temps |
| Overlay (leathery surface, no pins) | CO₂ buildup, insufficient FAE | Score the surface lightly, improve fresh air exchange |
| Pins aborting before maturity | Humidity crash or temp spike | Check your misting schedule, add a hygrometer to the chamber |
| Very small or thin fruit bodies | Harvesting too early or poor genetics | Wait for veil to start tearing; try a different strain next time |
One thing worth noting: if your grow just seems generally sluggish compared to what you've read about, it might be a strain issue rather than an environmental one. Some genetics are genuinely slower. If speed matters to you, choosing your strain intentionally makes a big difference. The same principle applies to other species: if you've ever read about how long turkey tail mushrooms take to grow, you'll know that strain and substrate selection play a huge role in expected timelines across the board.
How to plan your actual grow schedule
Planning a grow schedule isn't complicated, but most beginners don't do it and then feel lost when they're two weeks in and nothing has happened yet. Here's a simple way to map it out.
- Set your inoculation date. This is day zero. Write it down.
- Mark week 2 as your first contamination check. If jars look bad, deal with them now.
- Mark week 3 to 4 as your expected colonization window. If you're not fully colonized by week 4, check your temps.
- Mark 1 to 2 weeks after bulk transfer as your expected bulk colonization date.
- Mark 1 to 2 weeks after initiating fruiting conditions as your pinning target.
- Add another 7 to 10 days for your first harvest estimate.
- Build in a buffer of 1 to 2 weeks for anything that runs slower than expected.
If you're just getting started and want a comprehensive walkthrough of the process, not just the timeline, growing magic mushrooms from scratch covers the full setup from materials to harvest in practical detail.
For growers interested in a related product with a different growth structure, growing magic truffles follows a completely different timeline and technique, since truffles develop underground rather than as surface fruit bodies.
Comparing timelines across cultivation approaches
There's more than one way to run a magic mushroom grow, and your method affects your timeline. Here's how the most common home approaches compare:
| Method | Colonization Time | Time to First Pins | Overall Inoculation to Harvest |
|---|---|---|---|
| Spore syringe to grain, then bulk | 3–4 weeks | 5–14 days after fruiting initiated | 6–8 weeks |
| Liquid culture to grain, then bulk | 2–3 weeks | 5–14 days after fruiting initiated | 4–6 weeks |
| All-in-one grow bags | 2–4 weeks | 7–14 days after casing/fruiting conditions | 5–8 weeks |
| PF Tek (brown rice flour cakes) | 2–3 weeks | 5–10 days after birthing cakes | 4–6 weeks |
PF Tek is the classic beginner method and still one of the fastest routes to a first harvest because the setup is simple and the colonization substrate is forgiving. Grain-to-bulk is slower upfront but produces significantly better yields. Liquid culture speeds up colonization noticeably and is worth the extra step once you've done a few grows.
How magic mushroom timelines compare to other species
Magic mushrooms are actually pretty fast compared to many other cultivated species. If you've grown other varieties, that context helps set expectations. If you look at how to grow turkey tail mushrooms, for example, you're dealing with a species that typically takes months to properly colonize and fruit on wood-based substrates, a very different pace from P. cubensis on grain and coco coir.
For a broader comparison across species, how long it takes to grow mushrooms breaks down timelines for a range of edible and specialty varieties, which is useful if you're thinking about growing more than one species. And if you're curious about a very different edible species on a longer outdoor schedule, wine cap mushrooms are a good example of how outdoor, season-dependent grows operate on a completely different timescale.
The short version: for magic mushrooms specifically, P. cubensis is fast, forgiving, and well-documented. If you're asking how long psychedelic mushrooms take to grow as a general category, the answer almost always comes back to cubensis as the benchmark because of how well-studied and consistent its grow cycle is compared to other psilocybin-containing species.
Realistic expectations: what actually happens vs. what the guides say
Most guides (including this one) give you ideal-condition ranges. Real grows in real homes with real temperature swings and imperfect technique usually land at the longer end of those ranges. Your first grow will almost certainly take longer than your second. That's not failure, that's the learning curve. The mycelium doesn't care about your schedule, it responds to its environment. Get the environment right and the timeline takes care of itself. Get the environment wrong and you could be waiting twice as long, or watching a contaminated grow go in the trash.
Set aside 8 weeks for your first grow. Be pleasantly surprised if it's 5. Focus on getting each stage right before worrying about speed: clean inoculation, full colonization before fruiting, stable humidity, and consistent fresh-air exchange. Those four things will do more for your timeline than any trick or shortcut.
FAQ
What should I check if my grow is slower than expected after 2 weeks?
A common “nothing is happening” moment is around days 10 to 14, when colonization can look slow if the room is cool or the inoculation is weak. If you see no healthy off-white spread by the time jars look like they should be halfway colonized, the issue is usually temperature or cleanliness rather than waiting longer.
Do different grow methods change how long it takes to get a first harvest?
Yes, PF Tek, grain-to-bulk, and fully grain-based approaches can shift the timeline, mainly because they change how quickly colonization reaches the point where you can trigger fruiting. In practice, PF Tek often gets to first fruit sooner, while grain-to-bulk tends to take longer to run but can deliver more consistent flushes.
How much faster is liquid culture compared with spore syringes for timing?
Liquid culture typically shaves time because the organisms are already active and can begin colonizing the grain sooner, while spore syringes require germination first. If you are comparing timelines, always compare like with like (liquid culture to liquid culture, spores to spores) because that one step can add days.
Can fruiting start too early and make the timeline longer?
If you switch to fruiting too early, you can delay or reduce pinning because the substrate may not be fully colonized and stable. If your bulk does not look uniformly colonized, wait until it does, then move to the fruiting conditions so pins have a fully “ready” surface to form on.
If I get no pins by day 14, what is the most likely cause and what should I do next?
During fruiting, an absence of pins by day 14 usually points to CO₂ or humidity problems. A practical test is to increase fresh-air exchange and verify humidity targets (around 80 to 95% with about 90% as a common target), then give the system a few days to respond.
What’s the difference between “slow pinning” and overlay, and how should I respond?
Overlay is often treated as a fresh-air issue, but it can also coincide with high substrate temperature or insufficient moisture. So instead of only fanning, check both fresh-air exchange and humidity consistency, then confirm you are not overheating the substrate.
How can I tell if my problem is CO₂ buildup versus contamination or poor humidity?
Yes, CO₂ buildup can make the surface look leathery or overly dense, even when other conditions seem “fine.” If you see that pattern, opening or fanning more frequently and using a small timer-based fan (if available) can correct it without repeatedly disrupting humidity.
Does harvesting early or late change how fast the next flush happens?
Harvest timing affects how quickly your next flush arrives, because a rushed or late harvest can throw off the substrate’s readiness. Pick in the window when the veil is about to tear, then move promptly into the post-harvest dunk or equivalent step to support faster subsequent flushes.
How sensitive is the timeline to temperature swings at home?
Yes, temperatures below about 70°F for colonization commonly add days, and extended high heat above about 85°F can damage the mycelium. If your grow room swings daily, stability matters more than hitting a perfect number, use insulation or a controlled heat source if needed.
How do contamination signs affect the timeline and what do colored patches usually mean?
If you sanitize less thoroughly, contamination often shows up as colored patches (green, black, or pink) rather than just slow growth. Contamination can make the timeline meaningless because you might need to discard jars, so cleanliness is the fastest “fix” in terms of not wasting weeks.
Can I have good colonization but still fail to fruit, and why?
Not always, because colonization can be fine while fruiting fails due to environment. It is possible for jars to be fully white yet still have delayed or absent pins if humidity, CO₂ exchange, or light consistency is off after the flip to fruiting.
What simple stage checkpoints should I use to keep my schedule on track?
If you want a decision aid, use 8 weeks as the planning baseline for your first grow, then assess stage-by-stage: colonization should be complete in about 2 to 4 weeks, pins typically within about 5 to 14 days after fruiting conditions start, and first flush soon after. If you miss a checkpoint, troubleshoot the specific stage rather than waiting indefinitely.