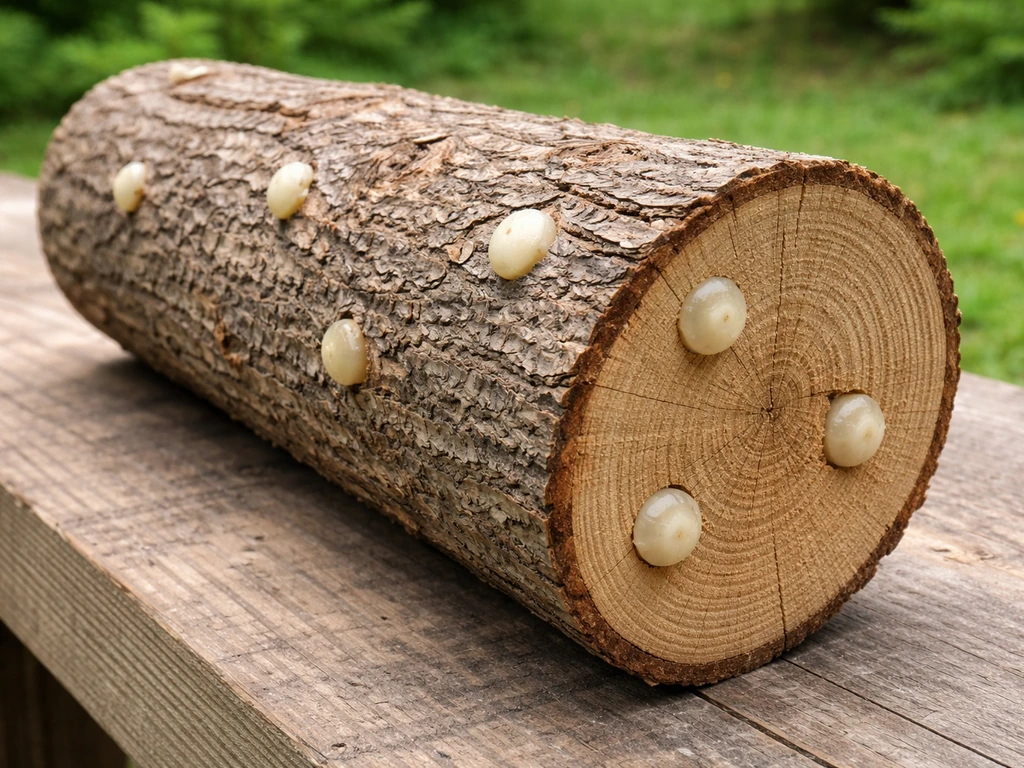
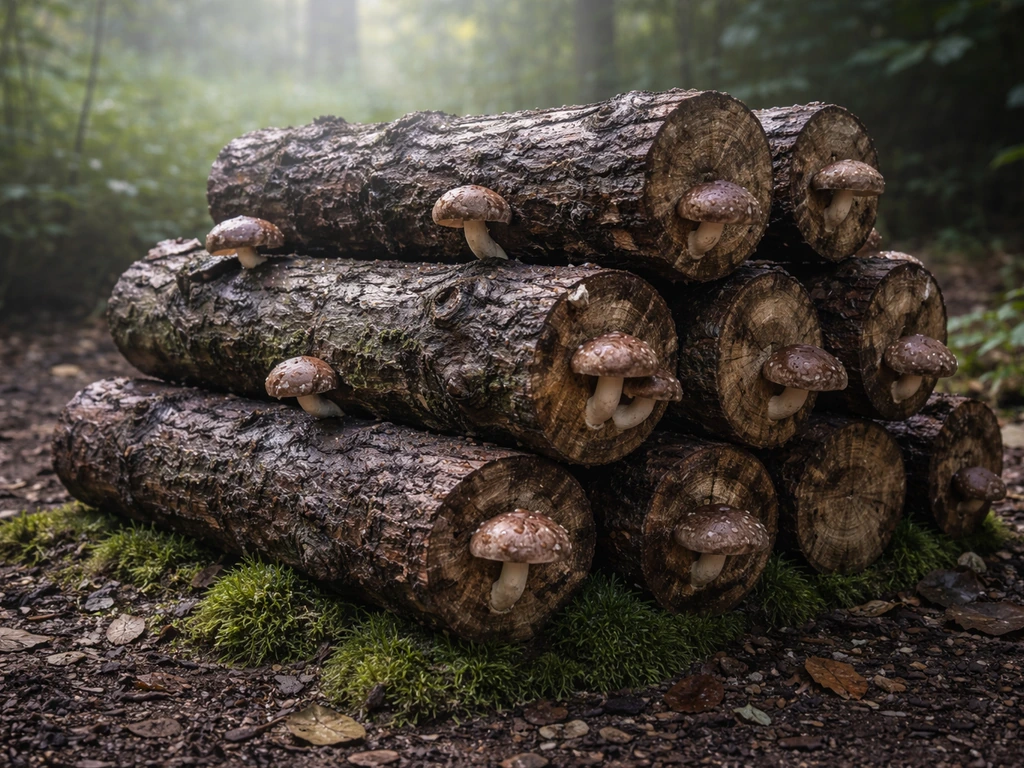
Mushroom dowels are small wooden plugs pre-colonized with fungal mycelium. You hammer them into drilled holes in a fresh log or stump, seal the holes with wax, and then let the mycelium slowly colonize the wood over several months. OSU Extension describes shiitake plug spawn as live spawn inserted into drilled holes in the log, then sealed with paraffin or cheese wax blank" rel="noopener noreferrer">sealed the holes with wax. Done right, a single inoculated log can produce multiple flushes of edible mushrooms for two to six years. It's one of the most beginner-friendly outdoor growing methods available, and the materials cost very little. Once you get the basics down, the same approach works for other wood-loving species, so you can experiment while you learn how to grow wood ear mushrooms.
How to Grow Mushroom Dowels: Step by Step Wood Inoculation

What mushroom dowels are and which mushrooms they're best for
Mushroom dowels (also called plug spawn) are birch or hardwood dowels about 1 inch long and 5/16 inch in diameter that have been fully colonized with mushroom mycelium. Each dowel is essentially a tiny inoculated substrate delivery system. You're not planting a spore, you're planting living fungal tissue directly into wood, which is why colonization is much more reliable than using spore-based methods.
Dowels work specifically for wood-loving (lignicolous) mushroom species. They're not suited for varieties that fruit from grain, straw, or sawdust substrates like oyster mushrooms or button mushrooms in typical indoor setups. If you want to grow mushrooms from sawdust specifically, you’ll need a different approach than this plug-spawn log method oyster mushrooms or button mushrooms. The species that genuinely thrive with the dowel method include:
- Shiitake (Lentinula edodes) — by far the most common and well-documented dowel species, with reliable colonization and strong consumer demand
- Lion's mane (Hericium erinaceus) — works well in fresh hardwood logs, slightly more moisture-sensitive
- Reishi (Ganoderma lucidum) — slower to colonize but very forgiving; great for stumps
- Oyster mushrooms (Pleurotus ostreatus) — can be grown on logs with dowels, though they colonize faster in softer wood or straw
- Wine cap (Stropharia rugosoannulata) — sometimes inoculated into woody chips or buried wood using spawn methods similar to dowels
- Chicken of the woods and hen of the woods — both can be established in logs or stumps, though dowel results can be slower and less predictable than with shiitake
Shiitake is the species I always recommend for beginners using dowels. The process is well-researched, the dowels are widely available, and the payoff, fresh shiitake from your backyard, is genuinely satisfying. If you're interested in hen of the woods or chicken of the woods, those species have their own quirks worth understanding separately before attempting the log method. If you want to grow chicken of the woods mushrooms with dowels, learn the species-specific quirks for your wood choice, incubation, and harvesting schedule before you inoculate chicken of the woods (Laetiporus). If you want how to grow hen of the woods mushrooms, plan for its own timing, wood preferences, and fruiting conditions before switching from shiitake.
Tools and supplies you'll need today
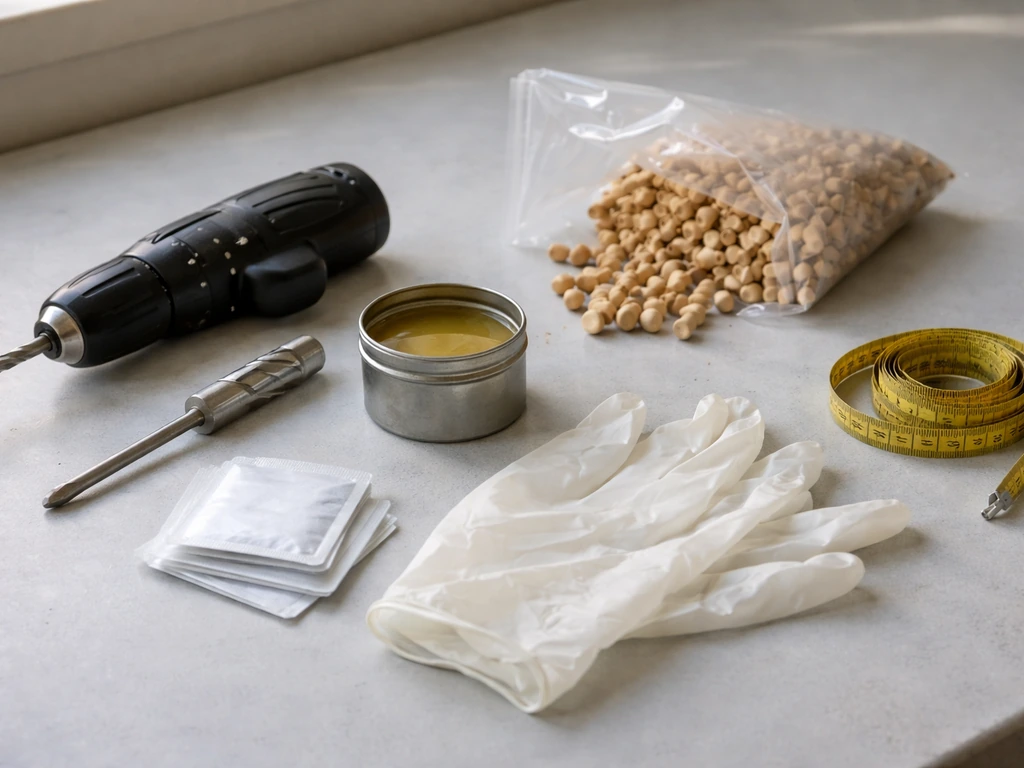
You don't need much. The total cost of a first inoculation setup is typically under $50, and most of these items are reusable.
| Item | Spec / Notes | Where to get it |
|---|---|---|
| Mushroom dowels (plug spawn) | Species-specific; usually sold in bags of 100 dowels | Online mushroom suppliers, garden centers |
| Fresh hardwood log(s) | 3–8 inches diameter, 3–4 feet long; cut within 2–4 weeks | Local firewood, tree trimming services, your yard |
| Drill + 5/16" drill bit | Standard wood bit works; angle drill bit helps on round logs | Hardware store or you likely already own one |
| Hammer or mallet | For tapping dowels flush with the bark surface | Any hardware store |
| Cheese wax or food-grade paraffin wax | Double boiler or small crockpot for melting | Online, grocery stores, or candle-making suppliers |
| Brush or dauber | For applying wax over holes; a cheap foam brush works well | Hardware or craft store |
| Marker or chalk | For marking hole spacing on the log | You probably have this |
| Gloves | Keep hands clean and protect from wax burns | Standard kitchen or work gloves |
One thing people overlook: buy species-matched dowels. Shiitake dowels will not grow oyster mushrooms. Most reputable suppliers label them clearly. If you're ordering online, confirm the strain and that the dowels are still within their use-by date (more on storage later).
Choosing and preparing your wood
This is where most beginners unknowingly set themselves up to fail. The wood you choose matters more than almost anything else in this process.
Fresh vs. seasoned wood
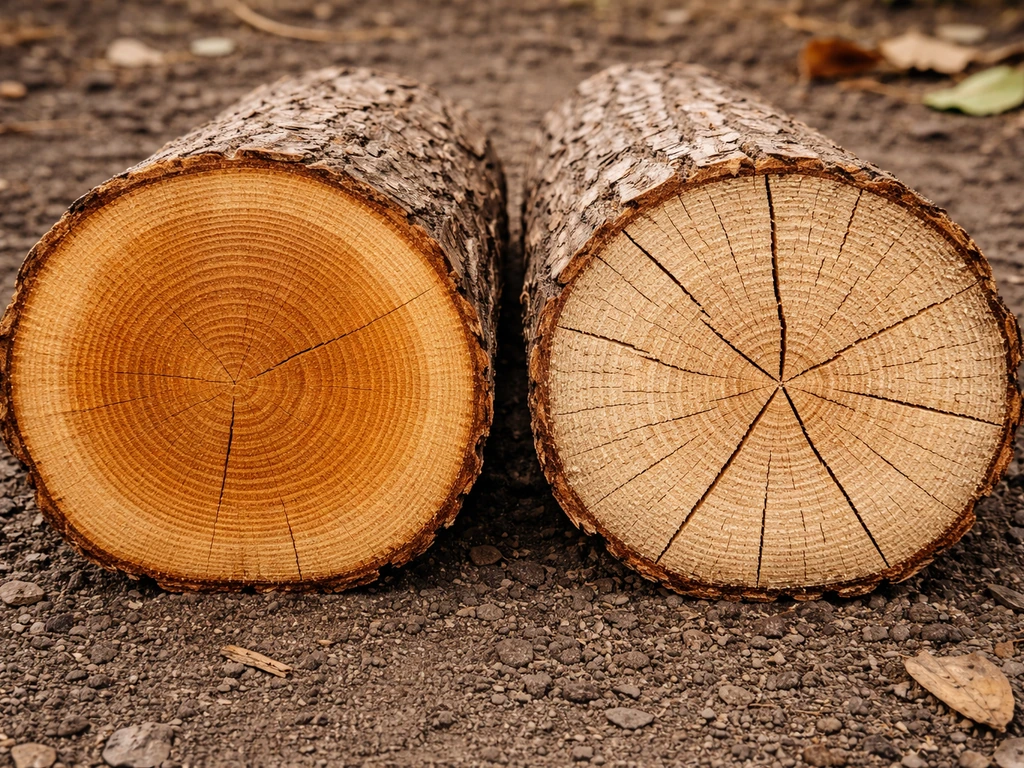
You want freshly cut logs, ideally harvested within two to four weeks of inoculation. Fresh wood retains moisture (target 35–45% moisture content), which the mycelium needs to colonize. Logs that have been sitting for more than six to eight weeks start drying out and can already be colonized by competing fungi. Kiln-dried firewood is a dead end, do not use it.
If your logs have dried out a little, you can rehydrate them by soaking them in clean water for 24 hours before inoculation. But truly dry logs (wood that sounds hollow when you knock on it) are rarely worth the effort.
Best wood species by mushroom
| Mushroom Species | Preferred Log Wood | Woods to Avoid |
|---|---|---|
| Shiitake | Oak (best), maple, beech, ironwood, alder | Softwoods like pine, cedar, fir |
| Lion's mane | Oak, beech, maple, walnut | Softwoods; very resinous hardwoods |
| Reishi | Oak, elm, maple, fruitwood | Softwoods |
| Oyster (log method) | Cottonwood, alder, aspen, willow, soft maples | Dense resinous woods |
| Chicken of the woods | Oak, cherry, locust | Softwoods |
Oak is the gold standard for most wood-loving mushrooms, especially shiitake. It colonizes relatively slowly but produces longer-lasting logs (up to 5–6 years of flushes). Softer woods like cottonwood colonize faster but exhaust sooner, sometimes in just one or two seasons.
Log sizing
Aim for logs between 3 and 8 inches in diameter and 3 to 4 feet long. Smaller diameter logs colonize faster but dry out faster and produce fewer flushes. Larger logs take longer to colonize but give you more productive years. A 4-inch oak log is a great beginner size, manageable to handle and fast enough to see results within 12 to 18 months.
Inoculation: drilling, packing dowels, sealing, and hygiene
This is the hands-on core of the whole process. Take your time here and you'll be rewarded later.
Hole pattern and depth
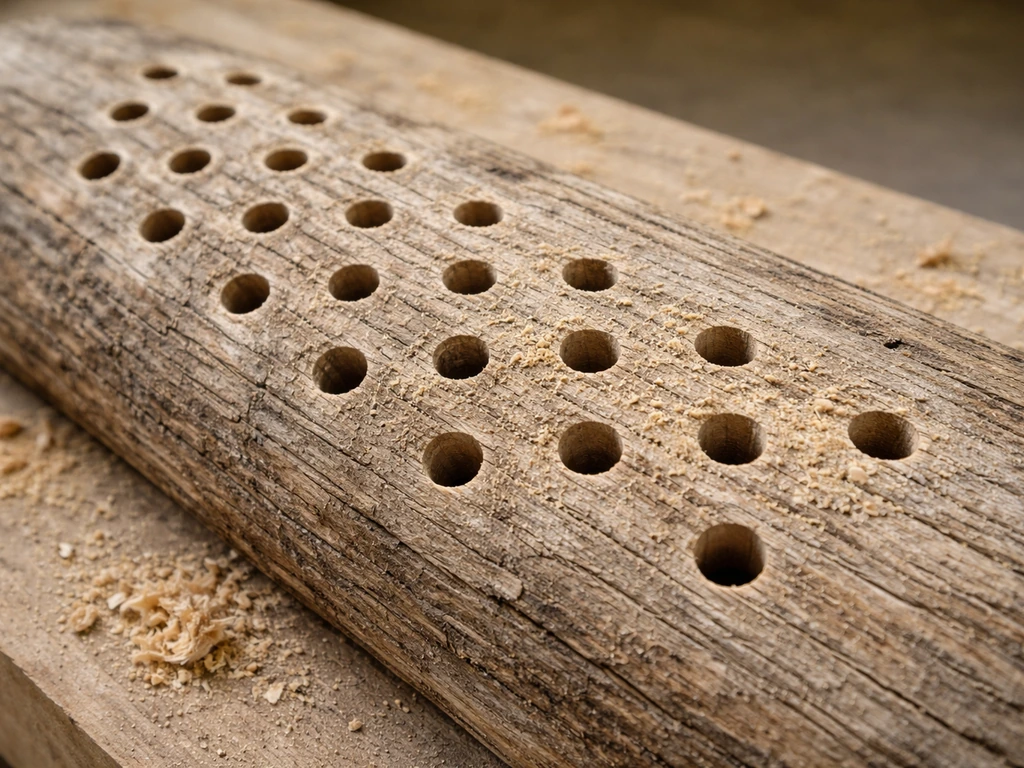
Drill your holes to about 1.25 inches deep using a 5/16-inch drill bit, that matches the standard dowel diameter recommended by extension researchers like those at Mississippi State University. Deeper holes waste inoculation potential; shallower holes leave dowels protruding and exposed.
Use a diamond or staggered pattern across the log. Space holes about 2 inches apart in each row, with rows spaced 4 to 6 inches along the length of the log, offset by about 1.5 inches so holes don't line up in a straight column. This distributes mycelium evenly and helps it colonize the full cross-section of the wood. For a standard 4-foot log, you'll typically drill 30 to 50 holes depending on diameter.
Inserting the dowels
Before you start, wash your hands and wipe your tools down. Contamination is less of an issue with log inoculation than with indoor substrate work (bark provides a natural barrier), but introducing mold from dirty hands into fresh holes is still a real risk. Work quickly once you start drilling, exposed holes are entry points for competing fungi.
- Drill all holes in the log before you open your dowel bag
- Open the dowel bag and tap one dowel into each hole using a hammer or mallet
- Drive each dowel until it sits just flush with or slightly below the bark surface — don't leave it sticking out
- Move down the row, working hole by hole, and keep uninserted dowels in their sealed bag until needed
- Once all dowels are in, move immediately to sealing
Sealing with wax
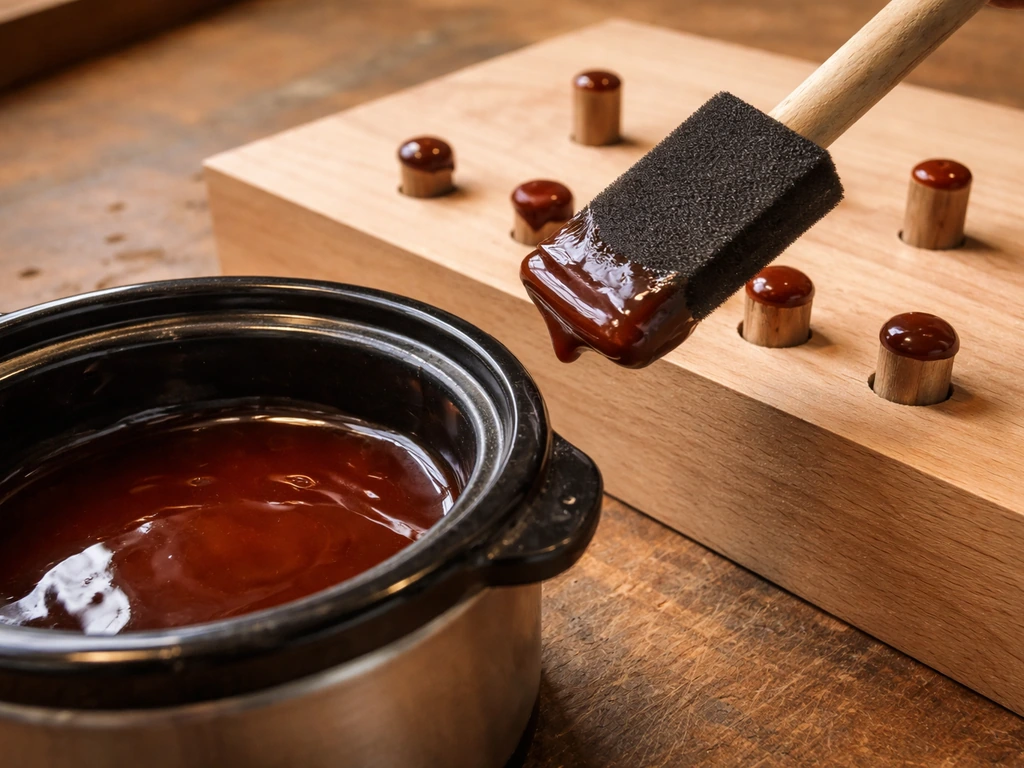
Sealing the holes is non-negotiable. It keeps the dowel moist, protects against contamination, and prevents the mycelium from drying out before it establishes in the wood. Cheese wax is ideal, it's food-safe, stays slightly flexible so it doesn't crack as the log expands and contracts, and is exactly what OSU Extension and USDA researchers recommend for this step. Regular paraffin wax works too, but can become brittle in cold weather.
Melt wax in a small pot or crockpot on low heat. Dip a foam brush or dauber into the wax and dab it over each hole, slightly overlapping the bark around the dowel. Apply one or two coats. A few tips: hold the log so the hole faces upward when you apply wax, which prevents the wax from running off before it sets and avoids bubbles or gaps from poor angle coverage. When waxing your inoculation holes, the Pacific Northwest Forest-Cultivated Mushroom Growers Network notes that hole orientation can matter because it helps prevent wax gaps and bubbles hole faces upward when you apply wax, which prevents the wax from running off before it sets and avoids bubbles or gaps from poor angle coverage. Let each coat cool and harden before adding a second. You're aiming for a solid, gap-free seal, not a thick blob.
Some growers also apply a thin bead of wax along any end cuts of the log to slow moisture loss from the exposed grain. This is especially worth doing if you're in a drier climate.
After inoculation: incubation conditions and placement
Once your log is inoculated and sealed, the mycelium needs stable conditions to grow through the wood. Think of this phase as the long game, there's not much to do except keep things right.
Outdoor placement
For most growers, outdoor incubation is the simplest and most effective approach. Stack logs in a shaded spot, deep shade under a tree canopy, a north-facing wall, or a covered woodpile area. Logs need protection from full sun (which dries them out and can overheat them) and from hard freezes (extreme cold can kill or significantly slow the mycelium). Ideal incubation temperature is roughly 50–75°F (10–24°C). Above 85°F starts stressing most species; sustained freezing below 25°F can damage unestablished mycelium.
Many growers lay logs on a pallet or wooden rack off the bare ground to allow airflow while keeping them from sitting in standing water. Others lean them against a shaded fence in an 'X' pattern. Either works. What you're avoiding is direct soil contact, which increases risk of weed mold competition early on.
Indoor incubation
If you're inoculating in early spring or late fall and temperatures outdoors are extreme, you can incubate logs indoors temporarily, a cool garage, basement, or shed works well. Keep temperature between 55–70°F and mist the logs lightly every few days to maintain surface moisture without soaking them. Move them outdoors once temperatures stabilize.
Humidity and watering
During incubation, your logs benefit from natural rainfall if they're outdoors. In dry spells longer than two weeks, soak logs with a hose for 15 to 20 minutes or submerge them in water for several hours. You're trying to keep the wood at that 35–45% moisture level throughout colonization. If the bark looks cracked or the log feels very light for its size, it's getting too dry.
Timing: colonization signs, fruiting, and harvest
Managing expectations here is really important, because this is where impatient beginners give up too soon. If you want the full step-by-step process, including choosing wood, inoculating, and timing your first flush, see how to grow chestnut mushrooms using the dowel log method.
Colonization timeline
Mycelium colonization of a log takes 6 to 18 months depending on the species, log density, and environmental conditions. Oak logs typically take 12 to 18 months before they're ready to fruit. Softer woods can colonize in 6 to 9 months. You won't see mushrooms forming during most of this time, and that's totally normal.
Signs that colonization is progressing include: white mycelium visible at the ends of the log or around wax seals, a faint musty or earthy smell when you put your face close to the log, and the log feeling slightly lighter as the mycelium begins breaking down the wood. If you peel back a small piece of bark after 6 months, you may see white fan-like mycelial threads running under it, that's a very good sign.
Triggering the first flush
Mushrooms typically need a trigger to fruit. In nature that trigger is a drop in temperature combined with increased moisture, essentially the conditions after a late summer or fall rain. You can replicate this by 'shocking' a fully colonized log: submerge it in cold water (below 55°F if possible) for 12 to 24 hours, then move it to a shaded, humid spot. Fruiting should begin within 5 to 14 days. You can also simply let nature do the work and wait for seasonal rain and temperature swings to trigger fruiting naturally.
Harvest timing
Harvest shiitake when the caps are 50–70% open and the veil underneath is still slightly intact. If you want to learn the full process for growing honey mushrooms from start to finish, follow the same log-inoculation basics but use honey-mushroom specific dowels Harvest shiitake. Once the veil tears fully and the cap flattens completely, quality drops and spore release starts. Twist and pull mushrooms off cleanly, or cut at the base with a clean knife. Don't leave stumps to rot on the log surface.
Troubleshooting: slow growth, contamination, and failed inoculations
Something not looking right? Here's what's most likely going wrong and how to fix it.
| Problem | Likely Cause | What to Do |
|---|---|---|
| No signs of mycelium after 6+ months | Log too dry, wrong wood species, or dead dowels | Soak log for 24 hrs, check dowel freshness, consider re-inoculating end holes |
| Green or black mold on log surface | Competing fungi from old wood or contaminated tools | Normal on bark exterior — only a problem if inside drill holes; ensure wax seals are solid |
| Log feels very light and dry | Moisture loss during incubation | Soak in water for several hours; move to shadier location |
| Log cracked or bark falling off | Log too old when inoculated, or too dry | Check logs within 4 weeks of cutting; rehydrate if possible |
| Colonization on one end but not the other | Uneven moisture or temperature | Rotate log position; soak and mist the dry end |
| Mycelium present but no fruiting after 18 months | Colonization complete but no trigger | Do a cold water soak for 12–24 hours to shock fruiting |
| Mushrooms growing but very small or stunted | Low humidity post-fruiting or harvesting too early | Mist daily around fruiting area; allow time for full flush development |
One lesson I learned the hard way: don't inoculate logs that have been sitting in your woodpile for months. I once spent a full afternoon drilling and sealing what turned out to be completely colonized-by-something-else logs. The mycelium couldn't compete. Fresh wood is everything.
Also, temperature extremes during early colonization are a real killer. Mississippi State University extension research specifically flags overheating as a way to destroy shiitake fungus in logs. If your logs are in direct afternoon sun in July, you're likely cooking the mycelium. Move them to shade immediately.
Storing unused dowels and managing logs for multiple flushes
Storing dowels you haven't used yet
Mushroom dowels are living organisms. They have a shelf life. Most suppliers ship them with a use-by window of 3 to 6 months from production date. To keep them viable until you're ready to inoculate, store the bag in your refrigerator (not freezer) at 35–45°F. Keep them in the original sealed bag. Freezing kills the mycelium. Heat above 80°F starts degrading it. If you open the bag and the dowels smell sour, look wet or slimy, or show black or green mold, they're compromised and will likely result in a failed inoculation.
If you bought a large batch and only need some now, keep the rest refrigerated and sealed. They should stay viable for 2 to 3 months post-opening if the bag is resealed tightly. But honestly, plan your inoculation before you order to avoid waste.
Managing logs across multiple flushes
After your first harvest, let the log rest for 8 to 12 weeks before attempting another shock or waiting for a natural weather trigger. This rest period lets the mycelium recover and rebuild energy reserves in the wood. Forcing too many flushes too quickly exhausts the log faster.
Between flushes, keep the log in a shaded, moderately humid location. Mist it during dry periods. Most shiitake logs will produce 2 to 3 flushes per year once fully colonized, for a total lifespan of 3 to 6 years depending on log size and wood density. Larger, denser oak logs last the longest. When a log stops fruiting and feels very light and crumbly, the mycelium has exhausted the wood. At that point you can break it up and add it to garden beds as a natural soil amendment.
If you're interested in expanding your setup to include substrate-based growing in addition to logs, growing mushrooms in wood chips or using sawdust methods can complement your log operation nicely, some species fruit faster in looser substrates while your logs are still in the colonization phase, giving you more consistent harvests across the year.
Getting the most out of your logs over time
- Keep a simple notebook or phone note tracking each log: species, inoculation date, first fruiting date, and flush count
- Stagger inoculation batches by 3 to 4 months so you're not waiting on all logs at once
- Re-wax any seals that crack or peel during the first year to prevent moisture loss
- In summer heat waves, move logs to the coolest shaded spot available or mist them more frequently
- In winter, a light mulch of straw or leaves over outdoor logs can protect them from hard freezes
- After each flush, clean off any remaining mushroom stubs at the log surface to reduce surface mold
The dowel method rewards patience more than almost any other growing technique. The setup is simple, the cost is low, and once your logs get going, they produce with minimal ongoing effort. Give the mycelium the time and conditions it needs, and it will do the heavy lifting for you.
FAQ
How many dowels do I need for a 4-foot log?
A common range is 30 to 50 holes on a 4-foot log, depending on diameter, with holes drilled about 2 inches apart in each row and rows offset along the length. If you want a quick decision aid, choose your log diameter first, then drill for full coverage rather than aiming for a specific total, since closer spacing on smaller logs can dry out less but may also increase competition if the seal is poor.
Can I use dowels in a partially dried log instead of rehydrating it?
It’s usually better to rehydrate if the log is only a bit dry. Soak in clean water for 24 hours before inoculation when wood still feels springy and not hollow. If the log sounds hollow when tapped, it is rarely worth it, because the mycelium typically cannot establish before the log’s moisture drops again.
What if I accidentally drill holes too shallow or too deep?
Too shallow leaves dowels protruding and more exposed, which increases drying and contamination risk, so plan to keep the hole depth close to about 1.25 inches for a 5/16-inch dowel. Too deep wastes usable wood contact and can make sealing harder because wax has to bridge a larger cavity; aim for consistent depth across the log rather than one-off corrections.
Do I need to sterilize my tools and drill bits?
Washing hands and wiping tools is enough for most log work, because bark offers natural protection and contamination pressure is lower than indoor substrate projects. The bigger practical mistake is drilling slowly and leaving holes exposed, so work in batches, keep holes covered with wax as soon as possible, and avoid drilling right after handling questionable materials like compost or bedding.
How can I tell if my log is becoming too dry during incubation?
Use sensory checks, not just the calendar. If the bark is cracking, the log feels noticeably lighter for its size, or the musty smell weakens after you have previously sealed it well, it is trending too dry. In that case, re-wet by soaking 15 to 20 minutes or submerging for several hours, then return it to shade with airflow.
Is it safe to incubate logs on the ground or against bare soil?
For most beginners, avoid direct soil contact. Soil contact increases the risk of competing molds early on and can create persistent moisture pockets that are harder to manage. A pallet, rack, or keeping the log off the ground with airflow is a simple improvement that often prevents “mystery failure” runs.
What moisture level should I aim for, and how do I maintain it?
The target is roughly 35–45% wood moisture during colonization. Practically, maintain that with shade, airflow, and rainfall when you can, then do controlled soaks during dry spells longer than about two weeks. If you consistently over-soak and logs stay wet for long periods, you may also invite surface issues, so dry down slightly between watering.
Do I need to shock logs for shiitake every time, or can I just wait for natural fruiting?
You can usually do either. Waiting for seasonal temperature swings and rain works for many growers, but a timed cold shock (cold-water submersion followed by a shaded humid spot) is useful when you want to kick off fruiting after full colonization. If you shock too often, you can exhaust the log faster, so use it only after a rest period of 8 to 12 weeks between flush attempts.
My dowels smell sour or look wet after opening the bag. Are they still usable?
If the dowels smell sour, look wet or slimy, or show black or green mold, they are likely compromised and will often fail to colonize. In that situation, the best move is to stop and discard rather than inoculating, because you might end up spending a day drilling and sealing logs that never recover.
Why are there mushrooms nowhere on the log ends or where I waxed most heavily?
A strong wax seal is important, but fruiting is driven by the mycelium’s progress and the environmental trigger, not just the wax coverage. If the log ends show good colonization but the sides do not, check moisture management and shade first, then consider whether the log was truly fully colonized before you shocked it. Also confirm you are using the correct species for your log type, since mismatch can lead to partial or stalled colonization.
Can I grow the same species on different wood types than oak?
Yes, but expect different timelines and log lifespans. Softer woods like cottonwood usually colonize faster but may exhaust sooner, while denser hardwoods like oak tend to produce longer-lasting results. If you are switching wood types, keep expectations realistic and do one batch at a time so you can compare colonization speed and number of flushes.
When should I stop trying to fruit a log and recycle it?
When fruiting stops and the log becomes very light and crumbly, the mycelium has typically exhausted most available nutrition. At that point, break it up and use it as a soil amendment rather than continuing to shock. This avoids repeating effort on logs that cannot realistically respond to triggers.