You can grow chestnut mushrooms at home from day 1 to harvest in roughly 6 to 10 weeks, using grain spawn mixed into sterilized hardwood sawdust, kept at 15 to 21°C during incubation and fruiting, with high humidity (88 to 100% depending on the stage) and good fresh air exchange. The process works well in a UK home, a spare room, or even a kitchen corner, as long as you can keep temperatures steady and humidity up. The trickiest part is not the growing itself, it is choosing the right spawn and understanding that chestnut mushrooms are slower and more sensitive to CO2 and dryness than oysters or shiitake.
How to Grow Chestnut Mushrooms at Home in the UK

Marcus Holloway
29 Apr 2026
Choosing chestnut mushrooms and getting the right spawn
Before you order anything, sort out one important thing: the name "chestnut mushroom" is used for at least two completely different species, and they have different growing requirements. The most commonly sold home-growing spawn labeled "chestnut mushroom" in the US market (including North Spore's product) is Pholiota adiposa, a rich, nutty-flavored species that grows on hardwood logs and blocks. Separately, Hypsizygus tessellatus, which is the Japanese beech mushroom or shimeji, sometimes gets sold under "chestnut" or "beech" branding depending on the retailer. Check the Latin name on any product you buy before you plan your substrate and conditions. If you want the shimeji-style cluster mushroom, you may actually want to look at a beech mushroom listing rather than a generic "chestnut" kit. Beech mushrooms (shimeji) can be grown from a similar indoor setup, but be sure to match the species-specific spawn and growing conditions for best results.
In the UK, spawn and kits for both types are available through specialist suppliers. Look for companies selling grain spawn with the species name clearly listed. Grain spawn is the standard format for home growers: it is colonized grain (usually wheat, rye, or oat berries) that you mix into your own substrate. If you are specifically wondering how to grow mushroom dowels, start with the same grain-spawn concept, then use the spawn to colonize your prepared hardwood dowels under sterile conditions grain spawn. Some UK suppliers also sell ready-to-fruit blocks or complete kits, which cut out the substrate prep step entirely and are a solid option if you are a first-time grower who wants to test the process before committing to the full DIY route. If you are using a kit, double-check the species name on the label because UK listings sometimes use "culinary mushroom" language broadly.
When your grain spawn arrives, handle it carefully from day one. Do not open the bag until you are ready to inoculate. Store it in the fridge (2 to 8°C) if you are not using it immediately, and it will stay viable for up to 4 months. When you first receive it, unfold the top of the bag to create some air space and check that the filter patch on the bag is clear and not blocked. A typical 6 lb bag of grain spawn will inoculate somewhere between 120 and 165 lb of sterilized sawdust, so unless you are planning a serious production setup, you will only need a portion of a bag for a home grow.
Setup for indoor growing (with UK-specific notes)
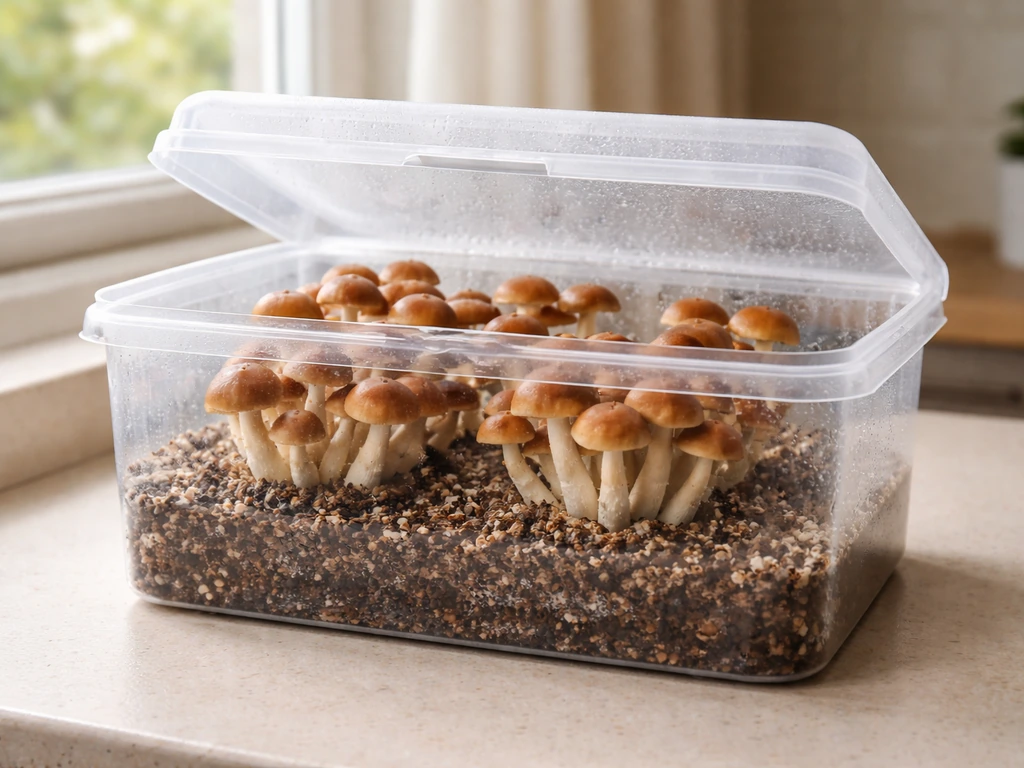
A small indoor setup is the most reliable approach for most UK growers, and you do not need a dedicated grow tent to get started. A clean spare room corner, a shelving unit inside a large clear plastic storage box, or a budget grow tent (60 x 60 cm is plenty for a few blocks) all work. The key environmental targets are temperature, humidity, and fresh air exchange, and the UK climate actually helps with the first one: the typical UK indoor temperature of 15 to 18°C in autumn and winter sits right inside the ideal fruiting range for chestnut mushrooms, which is 15 to 21°C.
For humidity, you will need a small ultrasonic humidifier or a regular hand-spray bottle if you are managing just one or two blocks. A basic hygrometer (under £10 from any hardware shop or online) is essential so you are not guessing. If you are using a grow tent or enclosed box, a small USB humidifier inside it combined with a couple of small holes or a low-power fan for air exchange covers your needs without any complicated kit. In summer or in centrally heated rooms, you will need to work harder to maintain humidity, especially after increasing ventilation.
Outdoors in the UK is an option in cooler months (roughly October through April) but is much harder to control. You lose the ability to manage humidity and CO2 reliably. I would recommend starting indoors first, then experimenting with outdoor growing on logs once you have one successful indoor flush under your belt. Wood ear mushrooms (Auricularia species) can also be grown on hardwood logs or blocks, typically with humidity that stays consistently high. If you are specifically aiming for how to grow chicken of the woods mushrooms, you can use the same basic indoor workflow but you will need chicken-of-the-woods, specific substrate and temperature targets start indoors first.
Substrate preparation for chestnut mushrooms
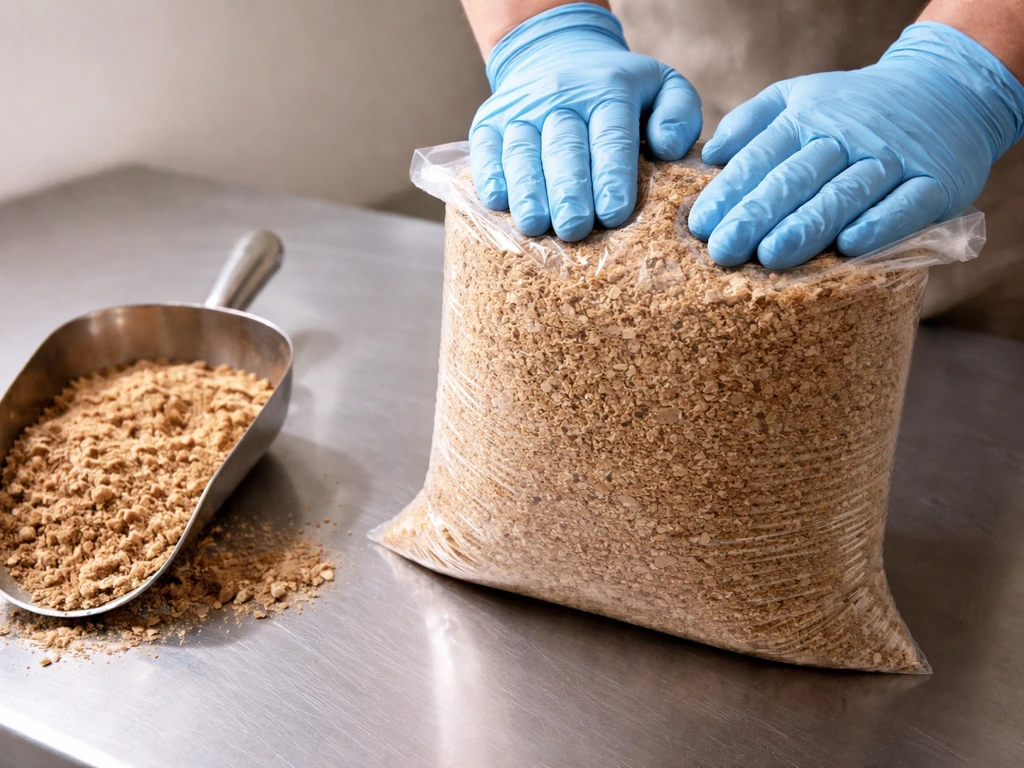
Chestnut mushrooms fruit best on hardwood sawdust, ideally oak, beech, or a mixed hardwood blend. Do not use softwood (pine, cedar, spruce) as the resins inhibit growth. The simplest substrate is hardwood sawdust supplemented with rice bran or wheat bran at around 20 to 25% by dry weight. This extra nutrition boosts yields noticeably. Your target moisture content at mixing is 65 to 70%, which means the mix should feel like a wrung-out sponge, damp but not dripping when you squeeze a handful.
Because chestnut mushrooms are more prone to contamination than oyster mushrooms (which can tolerate pasteurization), you need to fully sterilize your substrate rather than just pasteurize it. Sterilization means reaching 121°C for at least 2. As a rule of thumb, sterilization for grain or substrate in mushroom cultivation is typically done at 15 PSI, reaching about 250°F (121°C) 15 PSI (250°F / 121°C). 5 hours, which requires a pressure cooker. Load your damp substrate mix into polypropylene bags or Mason jars, seal them (with a filter patch or loose foil for gas exchange), and pressure cook them. Allow the bags or jars to cool completely to room temperature before inoculating, ideally down to below 25°C. Inoculating into warm substrate is one of the most common beginner mistakes and kills spawn viability.
- Hardwood sawdust (oak, beech, alder) as the base: aim for fine to medium particle size
- Add rice bran or wheat bran at 20 to 25% of dry substrate weight for supplementation
- Mix dry ingredients first, then add water gradually until you reach 65 to 70% moisture
- Pack into polypropylene bags or wide-mouth Mason jars
- Sterilize at 121°C (15 PSI) in a pressure cooker for at least 2.5 hours
- Cool completely before touching or opening
Inoculation and incubation
Inoculation should happen in the cleanest environment you can manage. You do not need a laminar flow hood at home, but you do need to reduce contamination risk. Work quickly, wipe down your workspace with isopropyl alcohol (70%), and wear disposable gloves. Open your grain spawn bag and your sterilized substrate bag in the same moment, mix the grain spawn into the substrate at roughly 5% of wet substrate weight (so about 50g of spawn per 1 kg of wet substrate), reseal the bag, and shake to distribute the spawn evenly. The filter patch on the bag handles gas exchange during colonization.
Incubation happens in the dark at 15 to 21°C. Put your inoculated bags somewhere stable, out of direct sunlight, and check them every few days. You should see white mycelium spreading through the substrate over 2 to 4 weeks. The colonized substrate will turn mostly white and feel firm. Do not disturb bags unnecessarily during this phase. If you see any green, black, or orange patches, that is contamination and those bags need to be removed immediately and disposed of outside your growing area. Once the block is fully colonized (fully white with no visible brown gaps), it is ready to fruit.
Fruiting conditions: temperature, humidity, fresh air, and light
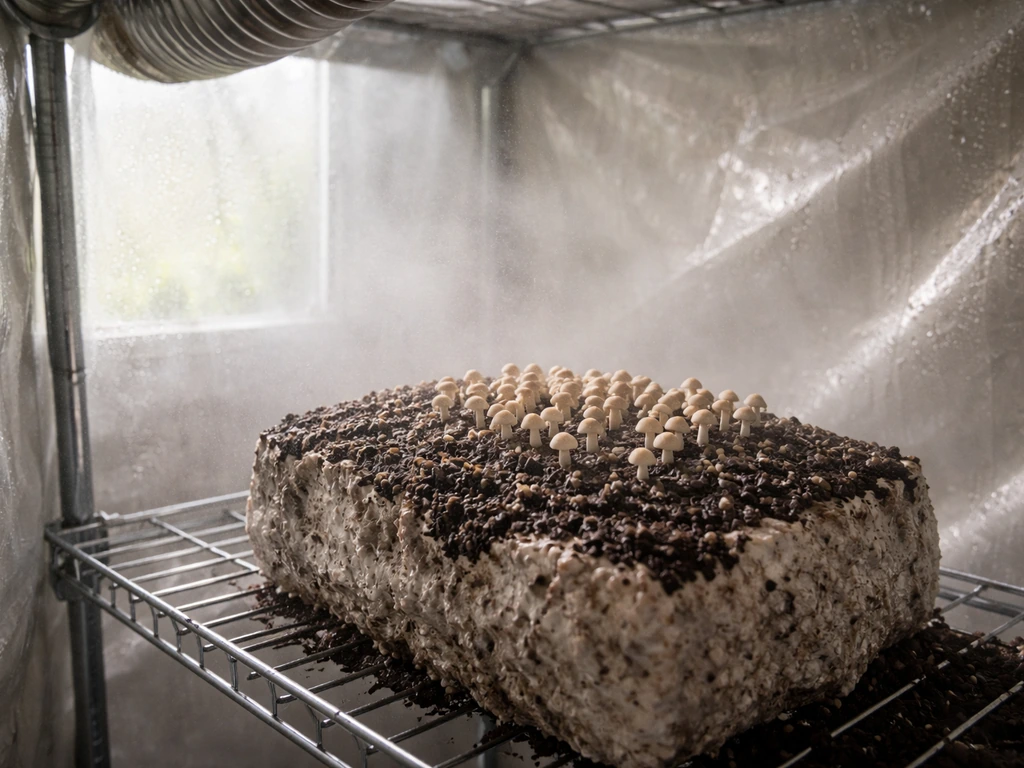
Shifting from incubation to fruiting is a deliberate trigger, not an automatic transition. To initiate pinning, expose your colonized block to a drop in temperature (moving it to a cooler space or dropping your grow space temp to the lower end of the range), increase fresh air exchange, and bring humidity up. Open or cut the bag to expose the colonized surface to air, or fully remove the block from the bag. This environmental shift signals to the mycelium that conditions are right to fruit.
| Phase | Temperature | Humidity | CO2 Target | Light |
|---|---|---|---|---|
| Incubation | 15 to 21°C | Not critical (keep bag sealed) | Not critical (bag sealed) | Dark |
| Primordia (pinning) | 15 to 18°C | 98 to 100% RH | 500 to 1,000 ppm | Indirect ambient light |
| Fruitbody development | 15 to 21°C | 88 to 95% RH | Below 1,000 ppm | 500 to 1,200 lux |
Fresh air exchange is not optional for chestnut mushrooms. High CO2 is one of the most common causes of problems: if CO2 climbs above 1,000 ppm during fruiting, you get long, stringy stems, tiny underdeveloped caps, and reduced yields. In a sealed plastic box or grow tent, fan out the space for at least 2 to 4 short periods per day or run a small fan on a timer. The trade-off is that more ventilation can dry out your space, so increase your misting frequency to compensate. In a UK home during winter, cold incoming air holds very little moisture, so you may need to mist more often than you expect after ventilating.
Light matters less as an intensity driver and more as a directional cue. Chestnut mushrooms do not need strong light to fruit, but ambient room light (or 12 hours of low indirect light per day) helps pins develop in the right direction and supports normal cap formation. A windowsill with indirect daylight or a basic LED on a timer at 500 to 1,200 lux is more than enough.
Harvesting, yields, and managing multiple flushes
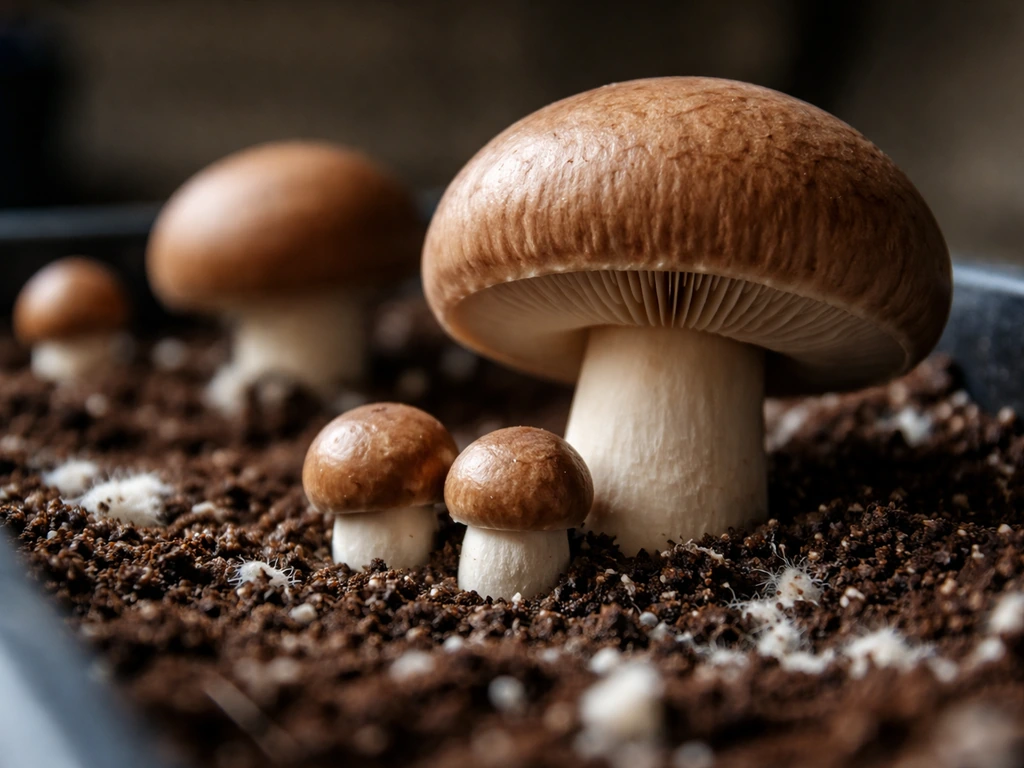
Harvest chestnut mushrooms before the veil under the cap breaks. Once the cap edges start lifting and the veil tears, quality drops quickly, spores release, and shelf life shortens. blank" rel="noopener noreferrer">For Pholiota adiposa, caps will be convex and firm at the ideal harvest point. Twist and pull clusters at the base, or cut cleanly with a clean knife. Do not leave stubs behind as they can rot and harbor contamination for the next flush.
Be honest about timelines: chestnut mushrooms are not a fast crop. If you are specifically trying to learn how to grow honey mushrooms, the setup is similar but you will need to match the right species requirements for your spawn and substrate chestnut mushrooms are not a fast crop. Unlike oyster mushrooms that can fruit in 10 to 14 days from colonization, chestnut and related species can take 6 weeks or more from inoculation to first harvest. If you are growing something closer to the Hypsizygus type, the total timeline from inoculation to first harvest can be 60 to 90 days. Plan around this, especially if you are comparing your experience to oyster grows.
After your first flush, the block needs a rest before it will produce again. Clean off any leftover mushroom stumps, move the block somewhere darker and slightly cooler than your fruiting space, and leave it for 4 to 7 days. Then resaturate it: either dunk the block in cold water for a few hours or soak it thoroughly and let excess water drain before returning it to fruiting conditions. Most blocks will produce 2 to 3 flushes before yields drop significantly. Each successive flush is usually smaller than the last.
Troubleshooting contamination and stalled growth
Most problems in chestnut mushroom growing come down to three root causes: contamination (usually from inadequate sterilization or inoculation hygiene), CO2 buildup (poor fresh air exchange), and dryness (humidity drops that cause pins to abort). Here is how to diagnose and fix each one.
| Problem | Likely Cause | Fix |
|---|---|---|
| Green, black, or orange patches on substrate | Trichoderma or other mold contamination | Remove the block immediately, dispose of it outside your grow space, sanitize the area, and review your sterilization time and inoculation hygiene |
| Mycelium colonizing but no pins after 4 to 6 weeks | CO2 too high, humidity too low, or block needs a cold shock | Increase fresh air exchange, raise humidity to 98 to 100%, and lower temperature slightly to trigger pinning |
| Long stringy stems with tiny or no caps | CO2 too high during fruiting | Increase ventilation frequency, check that CO2 stays below 1,000 ppm, and add a fan or manual fanning sessions |
| Pins start then turn brown and abort | Dry spell or humidity drop | Increase misting frequency, check your hygrometer, and avoid blowing dry air directly onto the block surface |
| Block goes slimy or smells bad | Bacterial contamination or overwatering | Remove and dispose of the block, reduce water saturation time, and ensure drainage between flushes |
| Second and third flushes not appearing | Block not properly rested or rehydrated | Do a full cold water dunk soak for 2 to 4 hours, drain thoroughly, rest for 4 to 7 days in dark cool conditions, then return to fruiting environment |
One thing worth knowing about chestnut mushrooms specifically: the mycelium will sit and wait through dry or suboptimal conditions rather than push through them. If growth stalls, your first diagnostic question is always whether humidity dropped or CO2 spiked, not whether the block is dead. Most apparent stalls are recoverable with an adjustment to conditions rather than a full restart.
If you find chestnut mushrooms genuinely challenging as a first grow (the slower timeline and sensitivity to CO2 trips up a lot of beginners), it is worth knowing that growing mushrooms on sawdust or wood chips with a faster species first can help you dial in your setup before committing 6 to 10 weeks to a chestnut grow. Once you have your humidity and air exchange dialed in, chestnut mushrooms become much more predictable and rewarding. Once you know your temperature, humidity, and fresh air routine, you can apply the same steps to how to grow hen of the woods mushrooms successfully as well chestnut mushrooms become much more predictable and rewarding.
FAQ
My chestnut mushroom blocks colonized but never started pinning, what should I check first?
If your spawn colonizes but nothing pins, check the triggers in this order: humidity first (target the same moisture feel you maintained earlier), fresh air exchange second (CO2 problems often look like stalled growth), then temperature drop (move to the lower end of 15 to 21°C). Also avoid leaving the block untouched, open it or cut the bag so the surface can receive air.
How often should I mist, and what’s the most common humidity mistake?
You do not generally need to mist the block surface heavily, but you do need a consistently humid microclimate. A common mistake is misting only right after venting, then letting humidity crash for hours, that causes aborted pins. Instead, mist in shorter, more frequent cycles and verify with a hygrometer in the growing space, not by feel.
My mushrooms are getting long stems and small caps, is that a CO2 issue and what should I change?
If you used a sealed box and see long thin stems with tiny caps, assume CO2 is high before you change other variables. Open more vents or run the fan on a timer for shorter, more frequent bursts (for example, multiple brief periods per day), then compensate for the dryness with slightly more frequent misting. If conditions swing wildly, growth quality usually worsens.
Is it ever OK to save a block with a small contamination spot?
Any green, black, or orange patches on the substrate are a discard signal, even if only small areas show up. Remove those blocks immediately and move them away from the rest, because chestnut mushrooms can take longer to show full symptoms and contamination can spread during fruiting and handling.
What causes slow or patchy colonization after inoculation, even when I used sterile technique?
Warming substrate is a major cause of failure, but it is not the only one. If you inoculated too warm and colonization is slow or patchy, check storage temperature of the grain spawn and whether the filter patch was unobstructed. Also confirm your sterilization time and pressure cooker reached and maintained the target temperature long enough.
How much should I disturb the blocks during incubation?
Stop handling the bags once they are colonizing. If you need to inspect, do it quickly and with clean gloves. Excessive shaking or frequent checking can interrupt surface colonization and increase the chance of contamination, which is especially costly for slower chestnut species.
How do I handle rehydration between flushes without causing rot or another stall?
Rehydration works, but do not dunk again until the flush is completely finished. When you resaturate, the goal is to soak the block thoroughly then drain so it is not dripping, then return it to fruiting conditions right away. If the block stays too wet, you can encourage rot, if it dries too much, the next flush may abort.
Can I switch between Pholiota and Hypsizygus using the same substrate and conditions?
Yes, but only if you match the species. Pholiota adiposa and Hypsizygus type mushrooms are sold under confusing common names, and the wrong spawn will not colonize or fruit correctly in your existing setup. The most practical approach is to buy spawn that lists the Latin name, then adjust temperature and timing to that species rather than relying on “chestnut” wording.
When exactly should I harvest to maximize quality and shelf life?
Harvest timing depends on quality and shelf life. If you pick before the veil breaks, the cluster should stay firm longer. If you wait too long, caps lift, spore release starts, and the next-day quality drops. When in doubt, harvest a little early rather than trying to maximize size.
What’s the hardest part of growing chestnut mushrooms outdoors in the UK, and how can I make it easier?
For outdoor attempts, the biggest edge case is humidity swings on windy days or after rain. Chestnut mushrooms need consistently high humidity and you still must manage CO2 and air movement, which is why indoor success is a better baseline. If you want to try outdoors, use shaded, sheltered locations and plan a simple humid cover to smooth out dry periods.