Yes, you can grow magic truffles at home indoors, and it's genuinely one of the more beginner-friendly psilocybin cultivation projects once you understand what you're actually growing. Magic truffles are not mushrooms in the traditional sense. They are sclerotia: dense, hardened masses of mycelium that certain Psilocybe species (most commonly Psilocybe tampanensis and Psilocybe atlantis) form underground as a nutrient reserve. Getting them to form indoors comes down to using the right strain, keeping contamination out, and holding the right temperature and moisture conditions for 6 to 12 weeks. If you want the practical step-by-step details, see our guide on how to grow truffles at home, including what to monitor during colonization and development holding the right temperature and moisture conditions. The kit route is the fastest path for beginners. The DIY route gives you more control and lower cost per grow.
How to Grow Magic Truffles Indoors: Step by Step Guide

Legality and feasibility: what you're actually dealing with
Before anything else, you need to know where you stand legally. blank" rel="noopener noreferrer">Psilocybin and psilocin are Schedule I controlled substances in the United States and are similarly restricted in most of the EU, UK, Canada, and Australia. Possessing, producing, or distributing magic truffles is illegal in most jurisdictions. There are narrow exceptions: the Netherlands permits the sale of fresh Psilocybe sclerotia as a legal grey area, and a handful of U.S. cities and states (including Oregon and Colorado as of 2026) have decriminalized personal use or licensed therapeutic contexts, but home cultivation for personal use remains a legal risk in the vast majority of places. Oregon Ballot Measure 109 created a state-licensed framework for therapeutic psilocybin services, administered through licensed providers, rather than a general “decriminalize at home and grow” model blank" rel="noopener noreferrer">Oregon voters legalize therapeutic psilocybin. Always research your local laws before proceeding.
On the feasibility side, magic truffle cultivation is actually more achievable at home than growing culinary truffles (like black Périgord or white Alba truffles), which require inoculated host trees and years of outdoor soil development. Sclerotia-forming Psilocybe species colonize grain or rye-based substrates indoors and produce truffle bodies in the dark without any tree symbiosis. The biology is closer to growing oyster mushrooms than to farming culinary truffles. If you've grown mushrooms at home before, you already have most of the skills you need.
One thing worth flagging: this guide is framed around indoor home cultivation of psilocybin sclerotia, which is distinct from growing edible culinary truffles outdoors (a completely different process involving mycorrhizal inoculation and multi-year tree cultivation). If edible truffle cultivation is what you're after, that's a separate topic entirely.
Setting up your indoor grow space
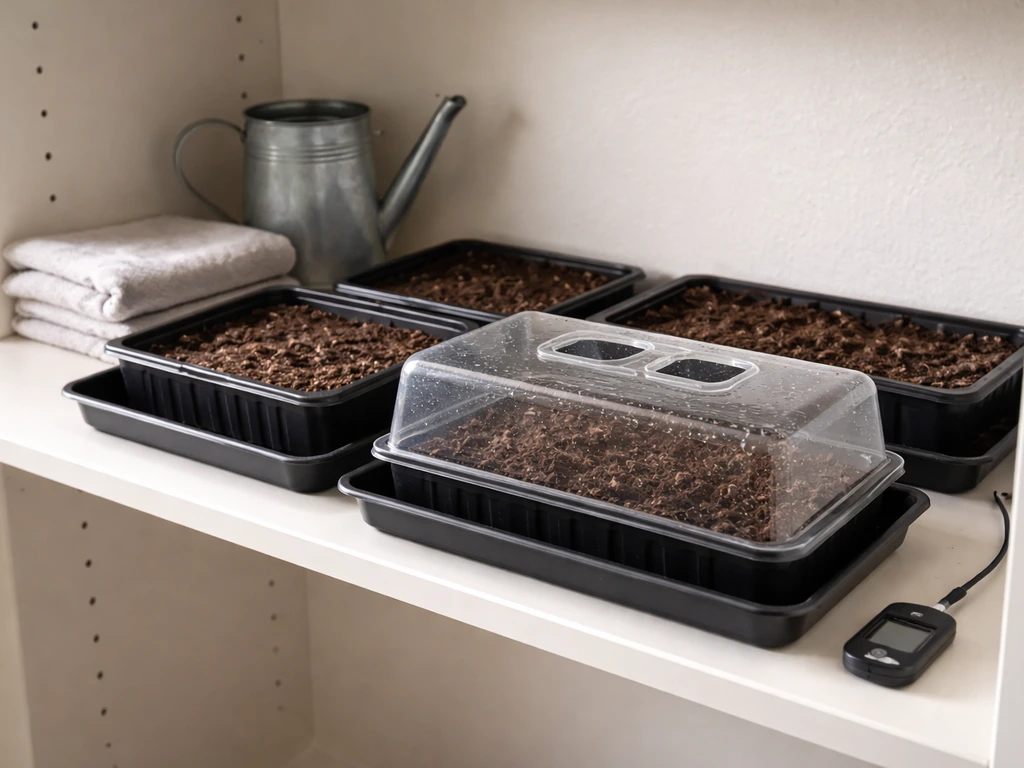
You don't need a dedicated grow room for magic truffles. A spare shelf, a closet section, or even a cabinet works well because sclerotia form underground in the substrate and don't require the fruiting chamber conditions (high humidity, fresh air exchange) that above-ground mushrooms need. That said, you do need to control a few key variables.
Temperature
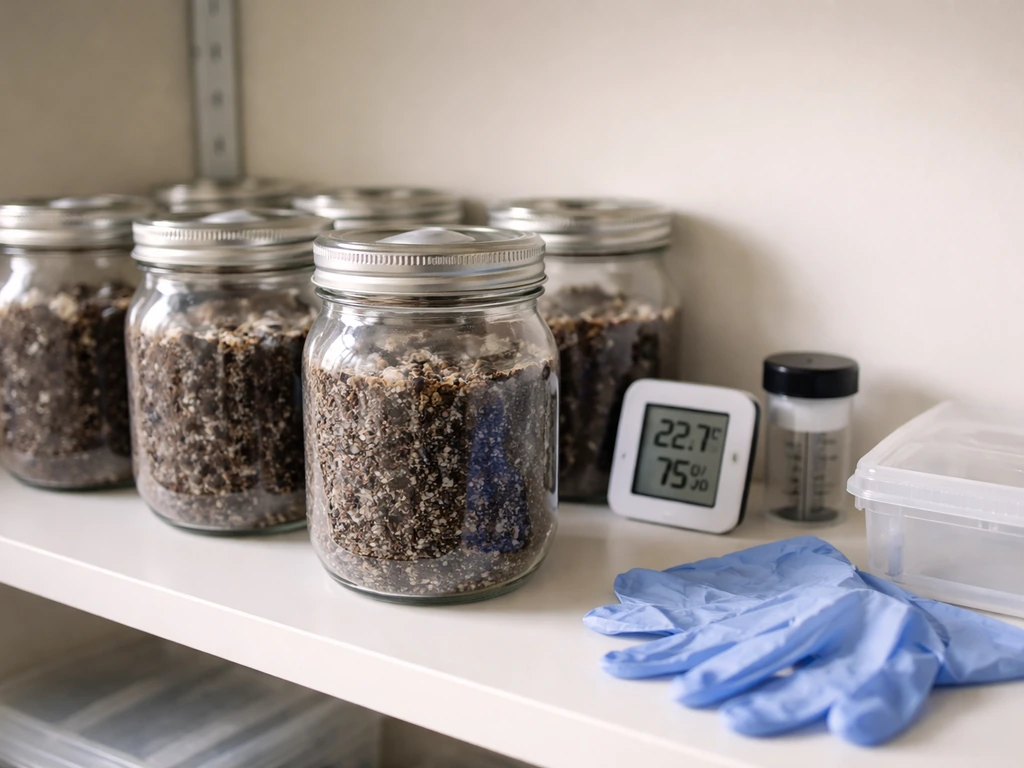
Temperature is the single most important variable. Most sclerotia-forming Psilocybe species want 21 to 24°C (70 to 75°F) during colonization and truffle development. Below 18°C, colonization stalls significantly. Above 27°C, contamination risk spikes and mycelium can overheat. A simple reptile heat mat set to 23°C under your container works well. If your space is already a consistent room temperature in that range, you may not need any heating at all. Pick up a basic digital thermometer with a probe so you can monitor the substrate temperature, not just the air temperature.
Humidity and moisture
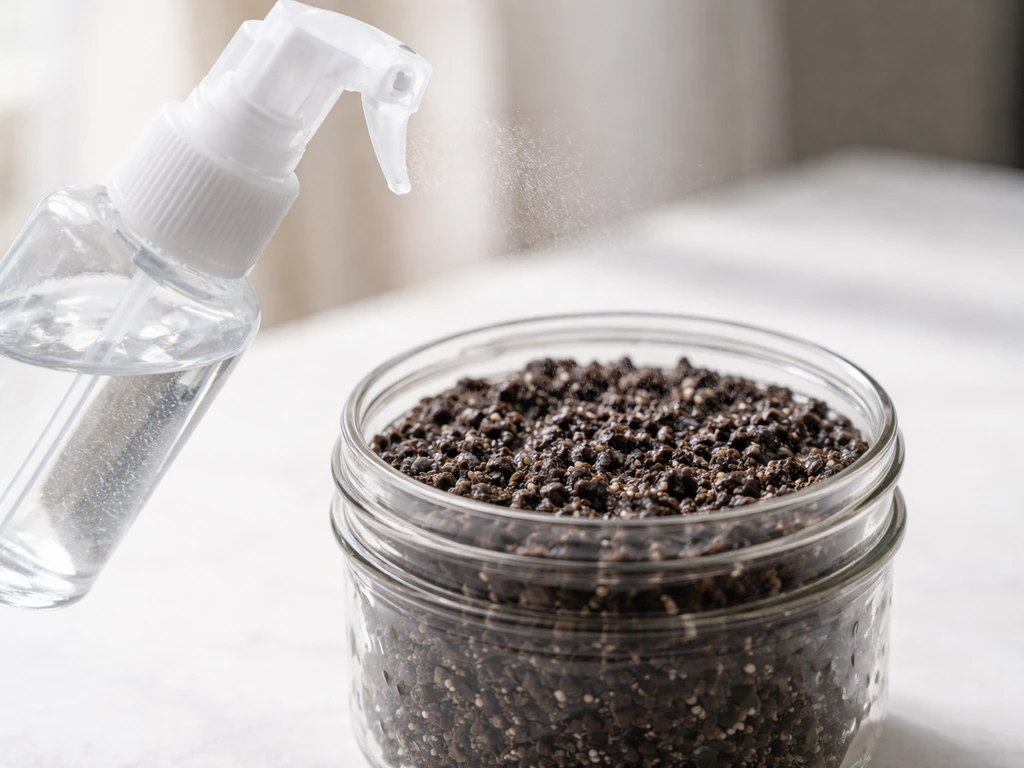
Sclerotia form inside the substrate, so you don't need to spray walls or maintain a fruiting chamber humid environment. What matters is substrate moisture content, not ambient humidity. That said, if you're growing in an open container with a casing layer on top, ambient humidity should sit around 80 to 90% to prevent the casing from drying out. A small hygrometer placed near your containers is enough to monitor this. If the casing surface looks dry or cracked, mist it lightly with distilled water using a spray bottle.
CO2 and airflow
Unlike fruiting mushrooms that need fresh air exchange to pin properly, sclerotia development actually benefits from slightly elevated CO2 levels. Many growers keep their containers loosely sealed or use lids with a small polyfill filter patch rather than leaving them wide open. You don't need a fan or active airflow system. Just make sure the grow area isn't completely airtight, since you still want some passive gas exchange to prevent bacterial buildup.
Light
Light exposure plays a minimal direct role in sclerotia formation compared to fruiting mushrooms. Indirect ambient daylight is fine. You don't need a grow light. Some growers report slightly better results keeping containers in total darkness during colonization and development, which also has the practical benefit of keeping the containers out of sight. A dark shelf or cabinet works perfectly.
Sanitation
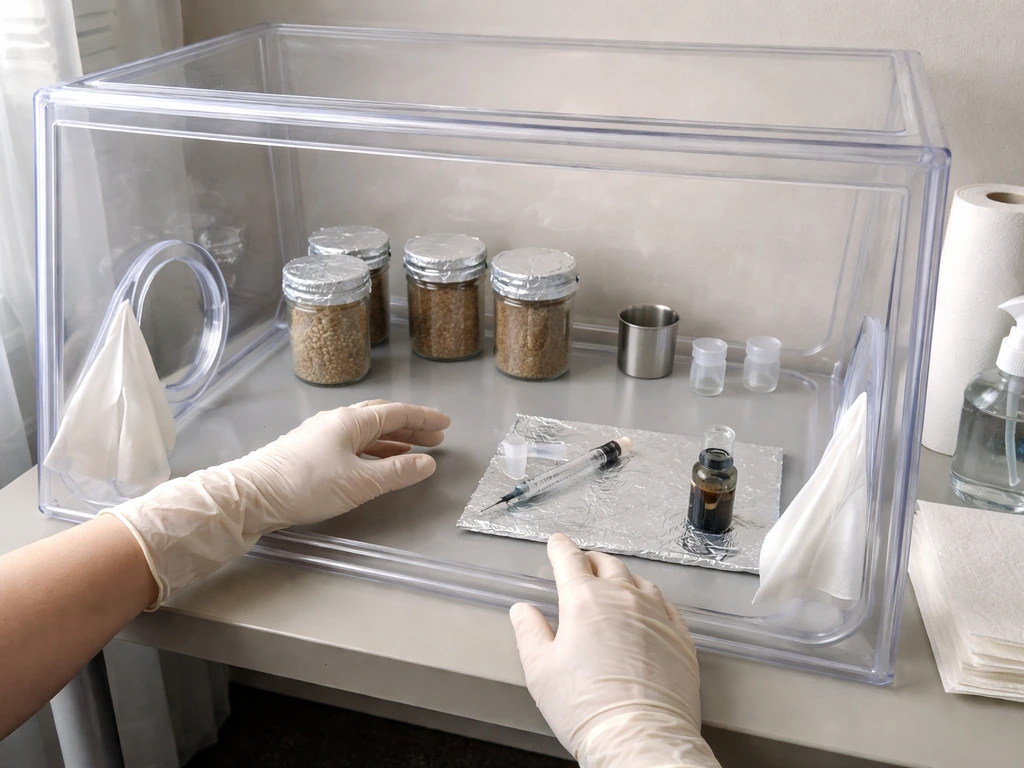
Your grow area should be wiped down with 70% isopropyl alcohol before you start and after any time you open containers. Work with clean hands or nitrile gloves. Still air box (SAB) technique, where you work inside a large clear tote with arm holes cut in the side to create a low-turbulence environment, is a cheap and effective contamination barrier for inoculation steps without needing a laminar flow hood.
Choosing your materials: substrate, casing, and kit vs DIY
Your two main decisions are what substrate to use and whether to start from a commercial kit or build your own workflow from scratch. Both work. The kit route is faster and has fewer failure points for beginners. DIY is cheaper at scale and gives you full control.
The kit route
Pre-colonized truffle grow kits (sold by suppliers primarily in the Netherlands, where they're legal) come in a sealed container with rye grain substrate already colonized by Psilocybe mycelium. You essentially open the kit, add a casing layer, seal it back up loosely, and wait. The supplier's instructions are minimal by design: place in indirect light, keep at the right temperature, and wait 6 to 12 weeks. These kits remove the inoculation and sterilization steps entirely, which eliminates the two biggest contamination risks. If you're new to this and can legally source a kit, it's genuinely the easiest starting point.
The DIY substrate route
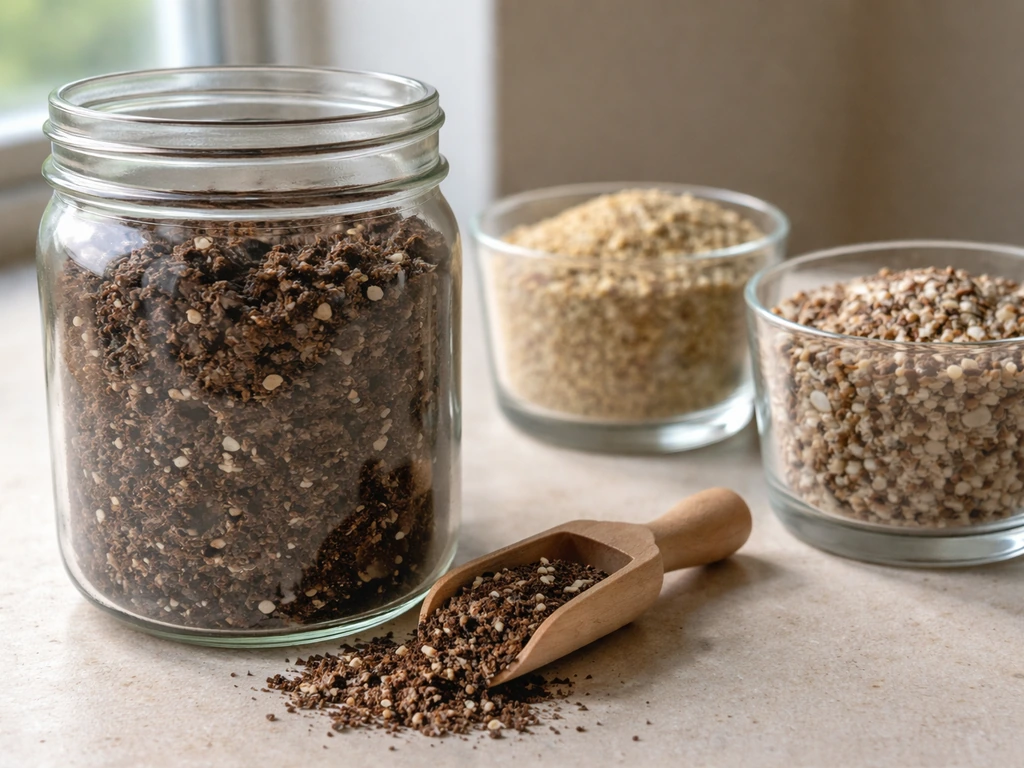
If you're building your own setup, rye grain is the most popular and effective substrate for sclerotia-forming Psilocybe species. Brown rice flour and vermiculite (BRF/verm) mix also works and is more forgiving for beginners because it has lower contamination risk than whole grain. Here's how the materials break down:
| Substrate | Contamination Risk | Sclerotia Yield | Best For |
|---|---|---|---|
| Rye grain (whole or cracked) | Higher (more nutrients = more bacteria) | High | Experienced growers, larger batches |
| BRF + vermiculite (50/50 mix) | Lower | Moderate | Beginners, smaller jars |
| Wheat berries | Medium | High | Good rye alternative |
| Brown rice (whole) | Medium-low | Moderate | Beginners with limited supplies |
Casing layer
A casing layer is applied on top of the colonized substrate to retain moisture and trigger sclerotia formation. The most reliable mix is peat moss and hydrated lime (pH adjusted to 7.5 to 8.0) at a 1:1 ratio. Coco coir mixed with vermiculite is a popular alternative and easier to source. Apply the casing about 1 to 1.5 cm thick after full substrate colonization. The casing should be moist but not soaking wet: it should clump lightly when squeezed without dripping water.
Containers
Half-pint mason jars (240 ml) are the standard for BRF tek. Wide-mouth quart jars work for larger grain batches. Clear plastic shoebox containers or 6-quart monotub-style bins work for bulk grain grows. Whatever you use, it needs to be sterilizable or at least thoroughly cleanable, and it should have some form of loose lid or filter patch to allow minimal gas exchange without letting in contaminants.
Sourcing spores or spawn and the inoculation process
This is where you actually start the grow. Your options are liquid culture (LC), spore syringe, or a pre-colonized substrate (kit). Spore syringes are the most widely available starting point in jurisdictions where spore possession is legal (spores don't contain psilocybin and are legal to purchase for microscopy in many U.S. states and parts of Europe, though germinating them is another matter legally). Liquid culture syringes colonize faster and with higher success rates than spore syringes but require a more established source.
Preparing your substrate jars (DIY route)
- Mix your substrate (e.g., BRF and vermiculite in a 2: 1 ratio with water until field capacity: it clumps but doesn't drip).
- Fill half-pint mason jars about 2/3 full. Add a dry vermiculite layer on top (about 1 cm) as a contamination barrier.
- Loosely cap jars and cover with foil. Pressure cook at 15 PSI for 60 to 90 minutes (BRF) or 90 minutes (grain). No pressure cooker? Steam sterilize in a large pot for 90 minutes on two consecutive days (less reliable but workable).
- Let jars cool completely to room temperature, ideally 12 to 24 hours. Inoculating into warm substrate will kill your mycelium.
- In a still air box or near a running flow hood, wipe the injection port with 70% IPA, let it dry, then inject 1 to 2 ml of spore or LC syringe per jar. Less is more: over-inoculating can increase contamination risk.
- Seal jars and move them to your incubation spot at 21 to 24°C.
Early incubation: what to watch for
In the first week, you'll see nothing. That's normal. White, fluffy, rope-like mycelium should start showing at inoculation points within 7 to 14 days. Full colonization of a BRF jar typically takes 3 to 6 weeks depending on temperature and strain. Green, black, or pink patches are mold contamination. Remove those jars from your grow area immediately and don't open them indoors. Yellow metabolite patches (a yellow-orange liquid sometimes called 'mushroom pee') are usually the mycelium's stress response and are often not a problem, but monitor closely. Healthy colonization is bright white, cottony, and smells earthy.
Creating and maintaining truffle-forming conditions
Once your substrate is fully colonized (no visible uncolonized areas, solid white mycelial mat), you're ready to add casing and transition to truffle development mode. If you want a complete walkthrough of the full process, this guide on how to grow sclerotia truffles covers the steps from substrate prep to harvest growing sclerotia. If you’re also interested in how to grow tremella mushroom, the setup and moisture control are quite different from truffle sclerotia growing tremella mushroom. This is where growing sclerotia diverges from standard mushroom fruiting.
Applying the casing and sealing
If you're working with jars, you can either leave the colonized substrate in the jar and apply casing on top, or birth the substrate (remove it from the jar), place it in a flat container, and apply casing over the whole block. The flat container approach gives you more surface area and is worth it for larger grows. Apply your pre-moistened casing mix to about 1 to 1.5 cm depth. Cover the container with a loose lid or plastic wrap with a few small holes poked in it. You're creating a slightly humid, slightly restricted-airflow environment.
Holding conditions for sclerotia development
Keep the container at 21 to 23°C. Check the casing surface every 3 to 4 days. If it looks dry (pale, cracked, or no longer damp to the touch), mist lightly with distilled water. If it looks waterlogged or has standing water, remove the lid for a couple of hours to allow some evaporation, then re-cover. The mycelium will start colonizing the casing layer within 1 to 2 weeks. After the casing is colonized, sclerotia begin forming beneath the surface and sometimes just below the casing level. You'll see small tan or brown lumps appearing.
Troubleshooting common problems during development
- Stalled colonization: Usually a temperature problem. Check substrate temp with a probe thermometer. If below 20°C, add a heat mat. If above 27°C, move to a cooler spot.
- Green or black mold: Trichoderma or Aspergillus contamination. The jar or container is lost. Remove it, and review your sterilization and inoculation technique.
- No sclerotia forming after 8 weeks of casing: Check moisture levels (too dry or too wet both stall development), confirm temperature is in range, and consider whether your strain is a known sclerotia producer. Not all Psilocybe strains produce sclerotia reliably.
- Bacterial contamination (wet, slimy, foul-smelling patches): Usually caused by under-sterilization or contaminated water. Use distilled water for all misting and substrate hydration.
- Casing colonizing unevenly: Thin spots in the casing can cause uneven development. Gently fill in thin areas with fresh moist casing material.
- Mycelium not colonizing casing layer: The casing pH may be off. Peat/lime casing should be pH 7.5 to 8.0. Test with a cheap pH strip and adjust with a pinch of hydrated lime if needed.
Knowing when to harvest and how to store truffles
Harvest timing indicators
Sclerotia are typically ready to harvest 6 to 12 weeks after casing, depending on species, temperature, and substrate richness. The key indicators are size (mature sclerotia are usually 1 to 5 cm in diameter, firm, and dense), color (ranging from pale tan to dark brown or walnut-colored depending on species), and surface texture (smooth to slightly rough, never soft or mushy). If you gently probe the substrate with a clean chopstick or gloved finger, you can feel the firm lumps beneath the surface. A good harvest weight from a quart jar of rye grain is typically 10 to 30 grams of wet sclerotia, though this varies considerably by strain and conditions.
How to harvest
Use clean gloved hands or a sanitized spoon to remove the casing layer carefully, then extract the sclerotia by hand. They detach fairly easily from the substrate. Rinse them gently under cool water to remove substrate debris. Don't soak them. Inspect each one: firm and dense is what you want. Soft or hollow sclerotia are either immature or starting to degrade.
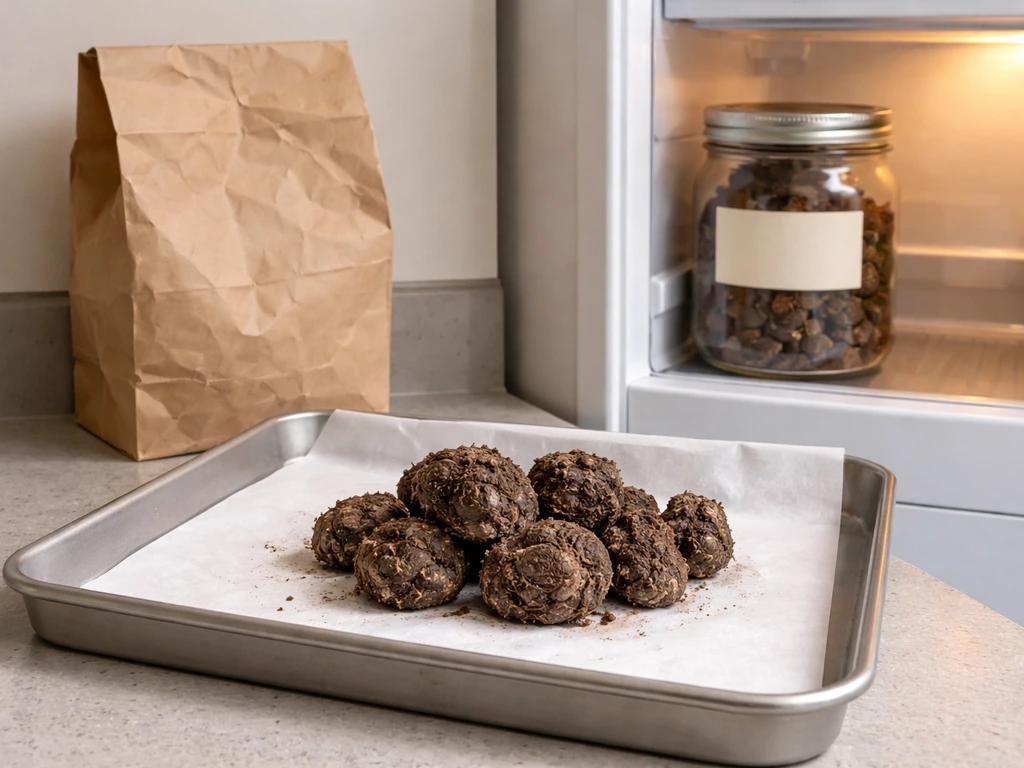
Storage
Fresh sclerotia can be stored in the refrigerator (2 to 4°C) in a paper bag or loosely wrapped in paper towel for 2 to 3 months. Avoid airtight plastic bags for fresh storage because trapped moisture causes bacterial degradation quickly. For longer-term storage, drying is the best option. Use a food dehydrator set to 35°C (95°F) or lower, or dry with a desiccant (silica gel) in a sealed container. Fully dried sclerotia stored in an airtight container with a desiccant packet will keep for 1 to 2 years. Note that drying at high heat (above 40°C) degrades psilocybin, so keep temperatures low.
The timeline you should actually expect
| Stage | Timeframe | Key Action |
|---|---|---|
| Substrate preparation and sterilization | Day 1 to 2 | Mix, fill jars, pressure cook, cool |
| Inoculation | Day 2 to 3 | Inject spore or LC syringe in SAB |
| Colonization (BRF) / (grain) | 3 to 5 weeks / 2 to 4 weeks | Monitor temp, watch for contamination |
| Casing application | After full colonization | Apply moist casing layer, loosely cover |
| Casing colonization | 1 to 2 weeks | Maintain moisture, check temp |
| Sclerotia development | 4 to 8 weeks after casing | Minimal intervention, check moisture |
| Harvest | Week 8 to 14 total | Probe substrate, extract firm sclerotia |
| Drying and storage | 24 to 48 hours drying | Dehydrate low and slow, store with desiccant |
The total time from inoculation to harvest is realistically 8 to 14 weeks for a DIY grow. Kit grows can shave 4 to 6 weeks off that because the colonization phase is already done. Don't rush it. The most common reason growers end up with small or no sclerotia is harvesting too early or disturbing the substrate too frequently during the development phase. Once your casing is on and conditions are dialed in, the best thing you can do is mostly leave it alone and check in every few days.
A note on how this compares to other truffle grows
If you've landed here while also researching culinary truffle cultivation (black Périgord, white Alba, or burgundy truffles), it's worth being clear that those are entirely different projects. Culinary truffles are mycorrhizal fungi that require inoculated host trees, specific outdoor soil chemistry, and years of waiting before any harvest is possible. Magic truffle cultivation is an indoor, substrate-based process with a timeline measured in weeks and months, not years. The two topics share a name but almost nothing else in terms of cultivation method. Similarly, growing sclerotia-forming Psilocybe species is also distinct from standard above-ground psilocybin mushroom cultivation, since the goal here is underground sclerotia development rather than cap-and-stem fruiting bodies. If you meant the edible black truffle instead, see a dedicated guide on how to grow black truffle for the correct host-tree and soil requirements.
FAQ
Why is there no visible growth after inoculation?
Not seeing mycelium for the first 3 to 7 days usually means the culture is still establishing or temperatures are a bit low. However, if you see no growth by about day 14, check substrate temperature (not room temperature) and confirm your jar or container was sealed with proper minimal gas exchange (loose lid or filter patch). Also ensure you are not working with a cold spot from storage or shipping.
Do I need high humidity like I would for regular mushroom fruiting?
Yes, but they must be handled differently. Higher humidity in the room does little if the substrate dries out. For casing stages, focus on the casing surface, not the air, and mist only lightly with distilled water when the casing looks pale, cracked, or no longer damp to the touch. Over-misting can lead to waterlogged casing and bacterial growth.
What should I do if I see mold or strange colors?
Taste and smell are not reliable for safety, and mold colors can vary by strain and conditions. If you get green, black, or pink growth patches, remove the entire container and do not open it indoors. If you are unsure, discard rather than attempting to salvage, because contamination can spread through airborne spores and surface contact during handling.
How often should I open the container to check progress?
It can be, especially during the development phase. For best results, avoid lifting lids repeatedly, and keep the grow closed enough to maintain a stable microclimate. If you must inspect, do it quickly and use clean gloves, and limit checks to once every few days once casing is applied.
Should I run a fan or add fresh air exchange during sclerotia development?
Usually not. If you maintain the recommended substrate moisture and casing is set correctly, you generally do not need fans or active airflow. Use passive or slightly restricted gas exchange instead, but avoid making the container fully airtight, since stagnant conditions can increase bacterial issues and stall healthy development.
What’s the right casing moisture level, and what if it gets too wet?
Wetter casing can look more “alive” at first but often causes waterlogging, stalled development, and bacterial slime. If standing water forms, remove the lid briefly to evaporate for a short window, then re-seal loosely. The target is a casing that clumps when squeezed without dripping.
How can I prevent temperature swings from ruining the grow?
Temperature swings matter more than exact setpoints. A stable range around 21 to 23°C during casing is ideal, and avoid hot surfaces that can push the substrate above about 27°C. If your room is variable, a probe thermometer plus a heat mat under the container is more effective than trying to heat the whole room.
How do I lower contamination risk without a laminar flow hood?
Plan to keep a strict cleanliness workflow. Sanitize the area before and after, use nitrile gloves or clean hands, and rely on a still air box during steps where you expose substrate. Also avoid cross-contamination from other mushroom projects by keeping tools and containers separate and storing them away from drafts and dust.
How do I know when to harvest if I want larger, denser sclerotia?
Harvest timing is one of the biggest success factors. If you harvest too early, you get smaller yields and less dense sclerotia. Use the cues described in the process, size range, firm density, and color maturity, and probe gently only to confirm firmness, since frequent disturbance reduces yields.
Does using jars vs shoeboxes change yield or consistency?
With jars versus flat containers, more surface area generally helps when you are chasing size and consistency at the same batch volume. Flat containers can expose more casing surface to colonization, which is why they’re often favored for larger grows. Jars can still work well, but you may see more variation across individual blocks.
What’s the best way to store fresh sclerotia after harvest?
Fresh storage works best with paper-based wrapping to allow controlled moisture buffering. Avoid airtight plastic for fresh sclerotia because trapped moisture accelerates bacterial degradation. Refrigerate around 2 to 4°C, and if you notice stickiness, off odors, or soft spots, discard.
How can I dry sclerotia without losing potency?
Drying too hot degrades psilocybin, even if the product looks dry on the outside. Keep dehydrator temps low, roughly 35°C or below, and ensure airflow is gentle enough to remove moisture without cooking. If you dry to the point of brittleness, package with a desiccant in an airtight container.
Which starting method is most forgiving for a first-time grow?
Spore syringes often work but may be slower or more variable than liquid culture, and starting from poor sources increases failure rates. If you use spore syringes, expect a wider range of outcomes and focus heavily on cleanliness during inoculation. Liquid culture tends to colonize faster and can reduce timing uncertainty.
Can I substitute casing ingredients safely, like swapping coco coir for peat moss?
Using the wrong casing pH can prevent proper development. Peat plus hydrated lime is used to target a specific pH band, around 7.5 to 8.0. If you substitute materials, you still need to ensure similar moisture and pH behavior, otherwise colonization can proceed but sclerotia formation may be weak or delayed.
I read about culinary truffles too, can I use the same indoor setup for both?
Yes, but treat it as a different goal with different constraints. Edible culinary truffles depend on host trees and long timelines, while magic truffles are grown via substrate-based sclerotia formation in indoor containers. If you are trying to grow edible black or white truffles, the indoor grain and casing approach will not match the required biology.