Aerial mycelium is the fluffy, cotton-like white growth you see rising up from the surface of your substrate or climbing the walls of your grow container. It forms when hyphae extend outward into the air rather than continuing to thread through the substrate below. To trigger it, you need high ambient humidity (90–95%), reduced fresh air exchange compared to fruiting levels, a stable temperature in the colonization range for your species, and a surface that stays moist but not waterlogged. Get those four dials right and most species will push visible aerial growth within days.
How to Grow Aerial Mycelium: Step-by-Step Home Guide

Marcus Holloway
4 Jun 2026
What aerial mycelium actually is and where it shows up
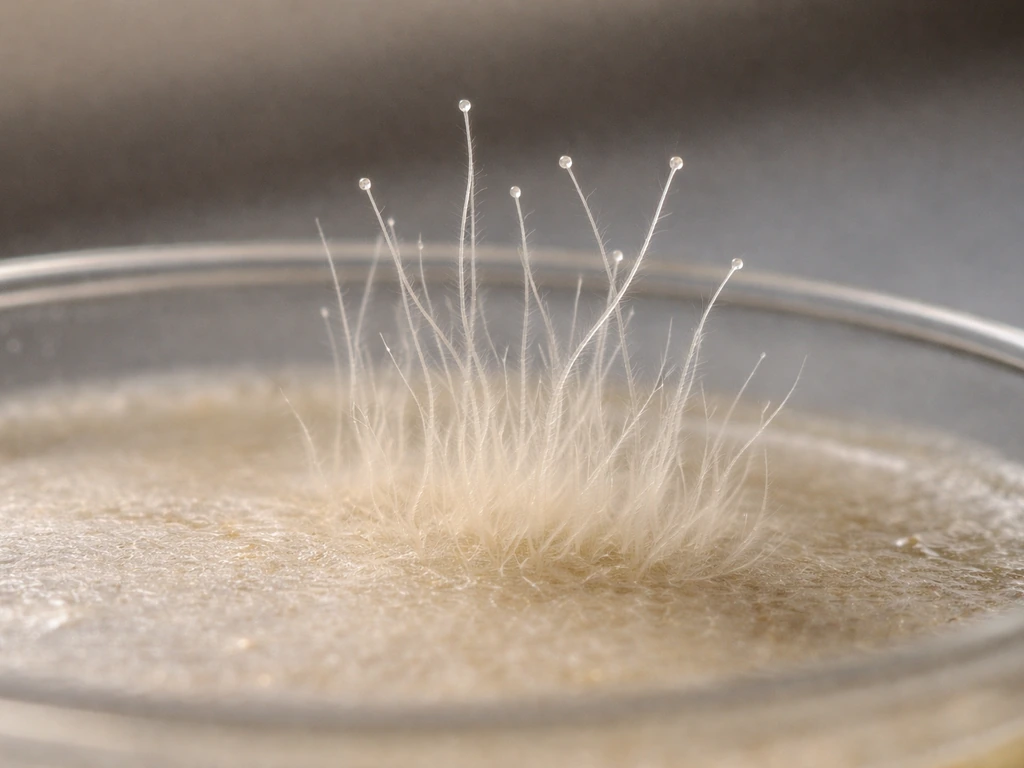
Technically, aerial mycelium is simply mycelium that grows above a surface rather than through it. Aerial mycelium is the portion of mycelium that grows upward or outward from the surface of the substrate and can contribute to producing propagative structures depending on the fungal group. In mycology textbooks it means hyphae extending above an agar surface; in a home grow context it means the same thing on substrate blocks, grain jars, cakes, or bags. It looks white, cottony, sometimes almost feathery, and it can be faint wisps or a dense, inch-thick mat depending on conditions and species.
You will most often notice it in a few specific spots: along the base of mushroom stems (this is what growers call 'fuzzy feet'), creeping up the inside walls of a fruiting chamber, blanketing the top of a colonized block before pinning begins, or covering a freshly exposed grain surface. All of these are the same thing: the mycelium has found air, humidity, and no physical barrier, so it grows outward into space instead of downward into food. That distinction matters because it tells you exactly which variables to manipulate.
Aerial growth is completely normal and usually healthy. It sometimes confuses beginners who mistake it for contamination, but healthy aerial mycelium from a clean culture is bright white or off-white, uniformly fluffy, and odorless or faintly earthy. Green, black, pink, or slimy patches are contamination. If you are unsure how to tell the difference, compare it to what substrate colonization looks like deeper in the block: aerial hyphae are lighter, airier, and more three-dimensional.
Which species and setups actually produce aerial mycelium well
Not every species produces dramatic aerial mycelium, and some produce almost none. Choosing the right species is the single biggest factor in whether you get that lush, visible surface growth or just a dense colonized block with no aerial show.
Oyster mushrooms (Pleurotus ostreatus, P. djamor, P. eryngii) are the champions here. They throw long, ropy aerial hyphae aggressively and will cover a block in white fluff within 48 hours of hitting humid air.
Lion's mane (Hericium erinaceus) produces extraordinarily dense aerial growth, almost like a solid foam mat, which is part of why it looks so different from other mushrooms. Shiitake (Lentinula edodes) grows aerial mycelium during the colonization phase but often forms a thick white mat on the outside of logs or blocks before bruising brown. Reishi (Ganoderma lucidum) produces visible aerial hyphae at the base of antlers and during the early stages of fruiting body formation.
Portobello and cremini (Agaricus bisporus) produce finer, less dramatic aerial growth but it is still present under the right conditions.
For a dedicated aerial mycelium grow, oysters or lion's mane on a supplemented hardwood block or a standard straw substrate are your best entry points. If you want something purely visual or for propagation experiments, lion's mane on a hardwood block in a humid chamber is the most impressive option a home grower can easily replicate.
Container and setup choice
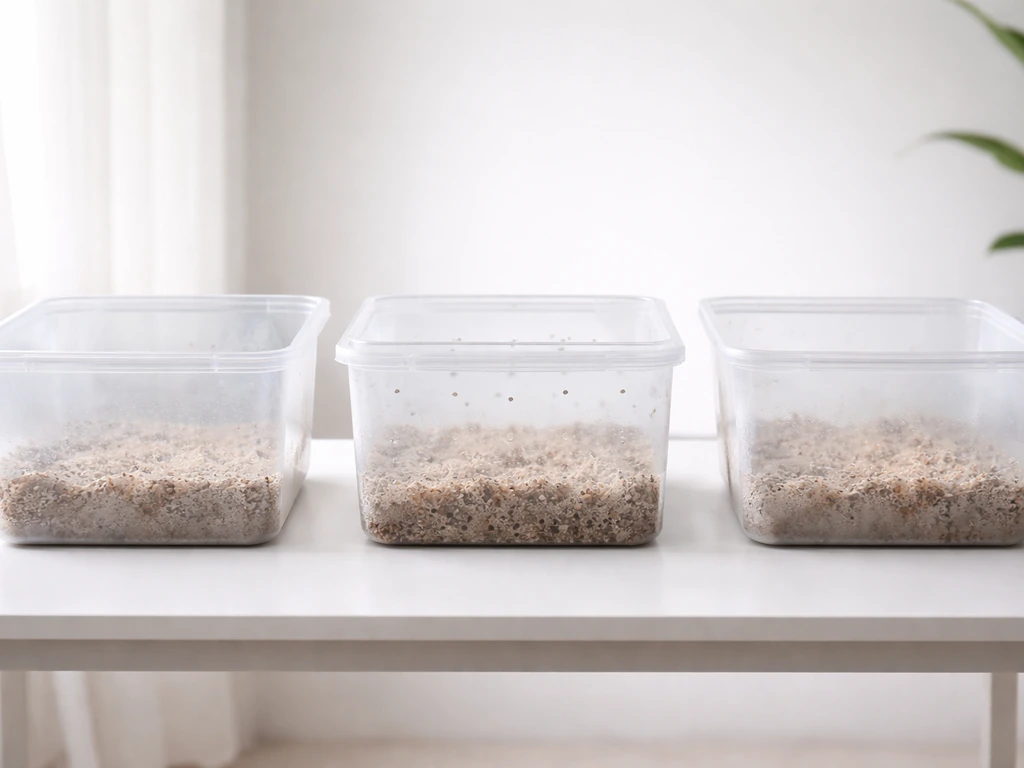
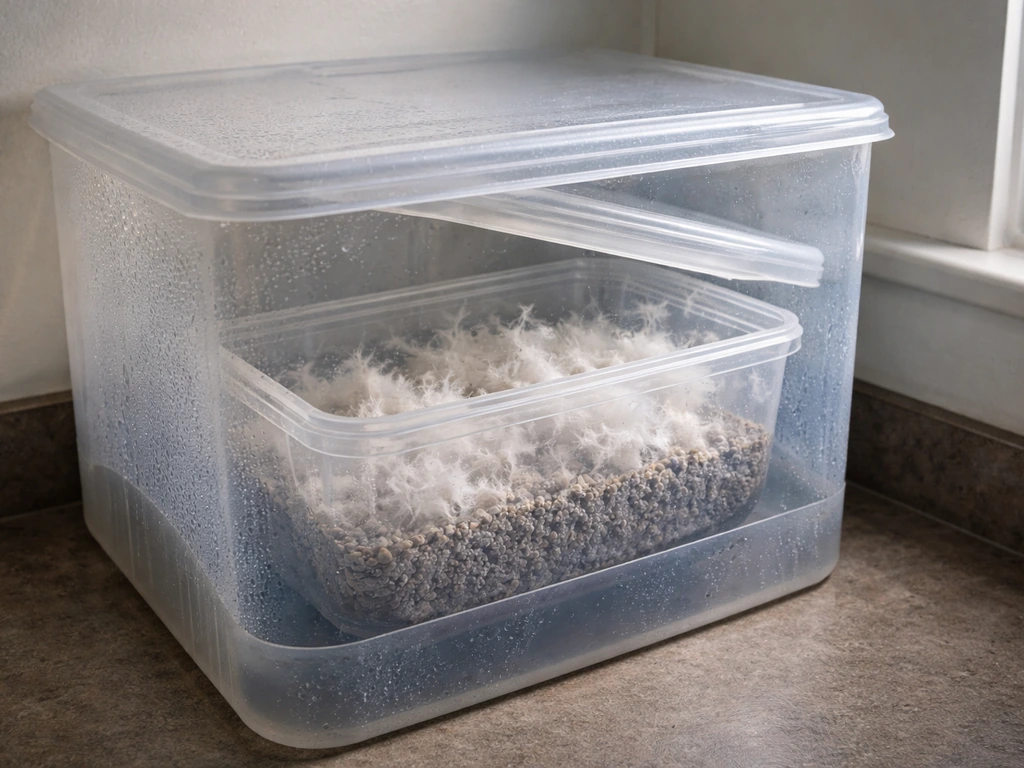
Open-top fruiting chambers, shotgun fruiting chambers (SFGCs), monotubs, and even simple clear plastic storage bins all work. The key is that you need a container where you can control humidity and limit (but not eliminate) airflow. Fully open containers dry out too fast and you get no aerial growth. Fully sealed bags or jars suppress it because CO2 builds up and there is no air interface for hyphae to extend into. The sweet spot is a semi-enclosed container with small ventilation holes or a loose-fitting lid that allows a slow exchange of air.
Clear-sided containers are worth the small extra cost because you can watch aerial growth climbing the walls without disturbing anything. That feedback loop is genuinely useful for learning what your specific species and conditions produce.
The four conditions that matter most: humidity, FAE, temperature, and surface moisture
| Condition | Aerial Mycelium Target | What Goes Wrong If Off |
|---|---|---|
| Relative humidity | 90–95% | Below 85%: hyphae desiccate and retract; above 97%: surface becomes waterlogged, inviting bacteria |
| Fresh air exchange (FAE) | Low to moderate (1–3 manual fans or brief passive vents per day) | Too much: dries the surface and halts aerial growth; too little: CO2 buildup suppresses extension and pins |
| Temperature | Species-specific colonization range (see below) | Too cold: growth stalls; too hot: contamination risk rises sharply |
| Surface moisture | Moist but not wet; no pooling water | Standing water on substrate: bacterial contamination, rotting; bone dry surface: no aerial growth |
Species temperature targets
| Species | Colonization Temp | Fruiting Temp |
|---|---|---|
| Oyster mushroom (Pleurotus spp.) | 70–75°F (21–24°C) | 55–65°F (13–18°C) for blue/grey; 70–80°F for pink/yellow |
| Lion's mane (Hericium erinaceus) | 70–75°F (21–24°C) | 65–75°F (18–24°C) |
| Shiitake (Lentinula edodes) | 70–80°F (21–27°C) | 55–65°F (13–18°C) |
| Reishi (Ganoderma lucidum) | 75–85°F (24–29°C) | 75–85°F (24–29°C) |
| Agaricus bisporus | 75–80°F (24–27°C) | 60–65°F (15–18°C) |
Humidity is the biggest lever. If you do nothing else, get your chamber to 90–95% RH and keep it there. A cheap digital hygrometer (under $10) is not optional here; you need real numbers, not guesses. Ultrasonic humidifiers are reliable for home setups, and a simple spray bottle works for smaller chambers if you mist 2–3 times a day without directly soaking the substrate surface.
Step-by-step: how to set up and encourage aerial mycelium today
- Prepare your substrate and inoculate as normal. For oysters or lion's mane, a supplemented hardwood block or pre-pasteurized straw works well. Fully colonize the substrate in a sealed bag or container before attempting to trigger aerial growth. Trying to push aerial hyphae on an under-colonized block leads to contamination.
- Once colonization is at least 80–90% complete (white throughout, smells clean and earthy), transfer the block to your fruiting chamber or cut a generous opening in the bag. The exposure to humid air is what triggers the transition from substrate growth to aerial growth.
- Set your chamber to 90–95% RH using an ultrasonic humidifier, a damp perlite layer on the chamber floor, or regular misting. Check with a hygrometer placed near the substrate surface, not at the chamber wall.
- Reduce but do not eliminate FAE. During active aerial growth you want low CO2 buildup to keep hyphae extending, but not so much airflow that the surface dries. Passive vents (small holes or a slightly cracked lid) are usually enough at this stage. If you are using a fan, run it for no more than 30–60 seconds twice a day.
- Keep temperature in the colonization range for your species. Dropping temperature slightly (2–4°F below colonization temp) can trigger the transition from colonization to fruiting and encourages the mycelium to push outward before pins form.
- Check every 12–24 hours. Aerial hyphae should appear within 24–48 hours of exposure to humid air in fast-moving species like oysters. You will see them as white wisps first, then a thicker mat. If the surface looks wet or slimy, reduce misting. If the surface looks dry or the aerial growth is retracting, increase humidity.
- Once aerial mycelium is well established and you want to push toward fruiting, increase FAE to its normal fruiting level, drop temperature to the species fruiting range, and introduce indirect light for 12 hours per day. This signals the fungus to start forming pins.
One thing I always tell beginners: the single biggest mistake is misting directly onto the substrate surface. If you follow that rule and keep humidity and airflow right, you will know how to grow mycelium at home with fewer issues misting directly onto the substrate surface. Aerial hyphae are delicate and get physically knocked down by water droplets. Mist the walls of the chamber and let the humidity rise naturally around the block. That one change made a visible difference in the density of aerial growth I got on my oyster blocks.
What to look for day by day and realistic timelines
Timing varies significantly by species, but here is a general progression you can use as a reference. Oysters move fast; lion's mane and shiitake move more slowly but produce more dramatic results.
| Day | What to Expect | What to Adjust |
|---|---|---|
| Day 1 | Freshly exposed surface, possibly some white at cut edges | Confirm humidity is at 90–95%; no misting on substrate directly |
| Day 2–3 | First wisps of aerial hyphae visible (oysters); surface may look slightly fuzzy | Check for any slimy or discolored patches (contamination warning sign) |
| Day 4–7 | Dense white aerial mat forming on oysters; early wisps on lion's mane or shiitake | If no aerial growth by day 5, increase humidity and slightly reduce FAE |
| Day 7–14 | Aerial mat may reach 0.5–2 inches thick on fast species; pins may begin forming at surface | If pins are forming earlier than desired, reduce temperature drop and FAE |
| Day 14–21 | Full aerial mat, early pinning, and formation of primordia on most species | Transition to fruiting conditions: more FAE, slight temperature drop, 12h light |
Monitor the color and texture of the aerial growth daily. Healthy aerial mycelium stays bright white or clean off-white throughout. If it starts to look yellowish, that often signals excess moisture or CO2 buildup. If it turns gray and retreats, you have a drying problem. Brown or green patches are contamination and need to be addressed immediately by removing the contaminated area or isolating the block.
Troubleshooting: why aerial mycelium isn't forming (or is forming wrong)
No aerial growth after 5–7 days
First, check your humidity. A reading below 85% almost always explains absent aerial growth. Second, check that colonization was actually complete before you opened the block: if the interior is still white-patchy with visible grain or substrate, seal it back up and give it another 5–7 days. Third, make sure the surface is actually exposed to air. A bag that is only slightly slit gives very little air interface.
Aerial mycelium forming then aborting or collapsing
This is usually a humidity crash combined with excess airflow. The hyphae extend when conditions are right, then desiccate and collapse when a fan runs too long or the chamber is opened too often. Reduce FAE and mist the walls more frequently. Also check for temperature swings: a 10°F drop at night in an unheated room will stress the mycelium and cause die-back.
Slimy, wet surface with no aerial growth
This is the opposite problem: too much surface moisture, usually from direct misting onto the substrate or from condensation dripping from the lid. Wipe the lid dry, reduce misting frequency, and increase FAE very slightly (not enough to dry the block, but enough to move that surface moisture). If the slime has a smell beyond earthy mushroom, you likely have bacterial contamination and the block needs to be removed from the chamber.
Green, black, or pink patches in the aerial growth
These are contamination. Trichoderma (green), Aspergillus (black/grey), and Neurospora (orange/pink) are the most common culprits. Isolate the block immediately, seal it in a plastic bag, and remove it from your grow space. Do not try to cut away contamination on a soft substrate block; by the time you see surface contamination it has usually penetrated deeper. Disinfect your chamber thoroughly before starting a new block.
Stalled colonization with no aerial growth
If the substrate itself has stopped colonizing AND there is no aerial growth, the most common cause is temperature (too cold), inadequate inoculation rate, or a dry substrate interior. Check that your substrate was hydrated properly before inoculation (field capacity: squeeze a handful and only a few drops of water should emerge). If it was too dry at the start, the mycelium simply will not have the moisture to run.
What to do with aerial mycelium once you have it
For aesthetics and monitoring
Dense aerial growth on a block is a strong visual indicator that colonization is complete and fruiting is imminent. Many growers use it as their trigger to switch to fruiting conditions. It is also just satisfying to look at, especially with lion's mane or oysters on a straw block. Clear-sided containers exist partly for this reason: watching the mycelium grow is one of the most enjoyable parts of home cultivation.
For propagation and agar transfers
Aerial mycelium is actually ideal for agar transfers. Because it is growing in relatively clean air (as opposed to through nutrient-dense substrate where bacteria thrive), it tends to be cleaner and easier to isolate on agar plates. Use a sterile scalpel to take a small piece of the aerial mat, transfer it to a nutrient agar plate in front of a flow hood or inside a still air box, and seal the plate. This is a legitimate propagation technique and one reason experienced growers deliberately encourage aerial growth before making transfers.
If you are interested in growing mushrooms from mycelium transfers rather than from spores, the aerial mat gives you a reliable, visually distinct source that is easy to handle. For a deeper walkthrough on growing mushrooms from mycelium transfers, follow a step-by-step approach to preparing, colonizing, and then fruiting your new substrate. This connects directly to the broader practice of mycelium propagation that many home growers explore once they move past simple kit grows.
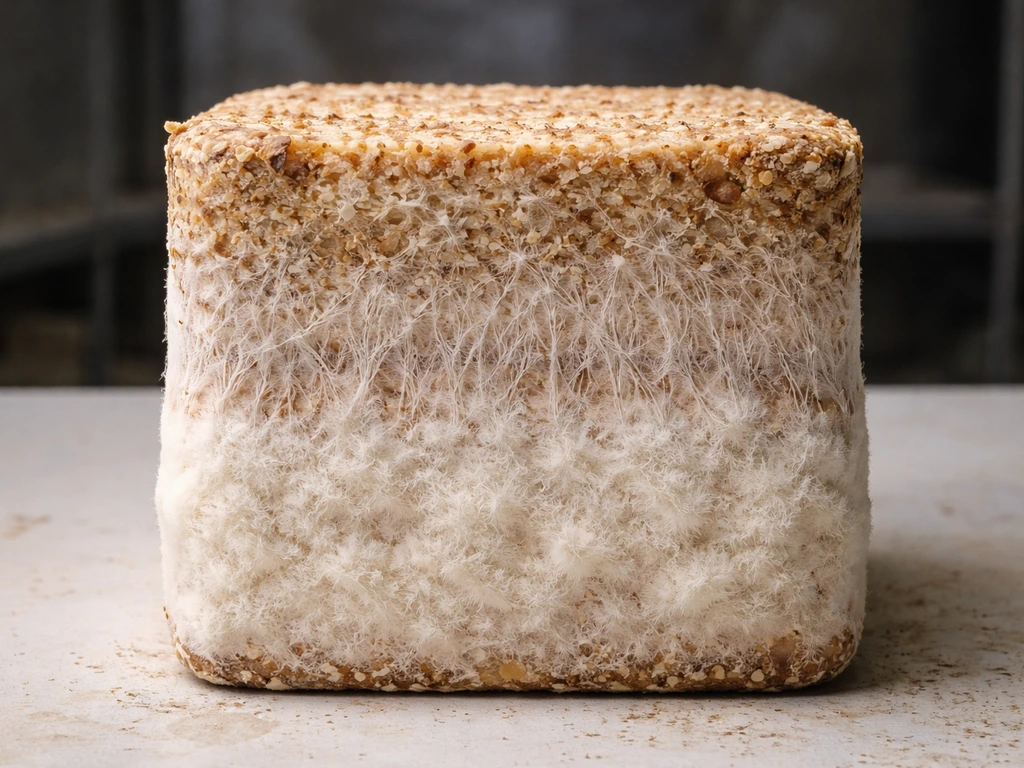
For mycelium bricks or material projects
Some growers deliberately cultivate blocks with heavy aerial growth to produce mycelium composite materials or 'bricks'. To make mycelium bricks, you can follow the same aerial mycelium principles, then extend colonization to build a dense, cohesive surface mycelium composite materials or 'bricks'. In these projects, aerial growth helps bind the outer surface of the substrate into a denser, more cohesive mat. If this is your goal, maintain colonization-phase conditions (high humidity, low FAE, no fruiting triggers) for a longer period, typically 3–6 weeks, to encourage maximum surface coverage before drying or heat-killing the block.
Safety and hygiene
- Aerial mycelium from healthy edible species is not toxic to handle, but anyone with mold allergies or respiratory sensitivities should wear a dust mask when working close to active blocks with heavy aerial growth.
- Always wash hands before and after handling blocks. Aerial hyphae are fragile and your hands carry bacteria that can contaminate the surface.
- Do not eat raw mycelium. Even from edible species, raw mycelium should be cooked before consumption. The same species-specific toxin rules that apply to fruiting bodies apply to mycelium.
- If you are growing in a shared living space, keep your grow area ventilated and separate from food prep surfaces. Spores and fine mycelial fragments become airborne when blocks are disturbed.
- Never consume aerial mycelium from an unidentified culture or a culture that has shown any signs of contamination.
A note on how this fits into the bigger picture of mycelium growing
Aerial mycelium is just one part of the broader mycelium growth story. If you are newer to cultivation, understanding how mycelium grows generally (both in substrate and in air) gives you a much stronger foundation for diagnosing problems and making confident adjustments. To grow mycorrhizal fungi effectively, you also need a compatible host plant and the right soil or growing medium conditions for symbiosis.
If you want the practical steps for how to grow mycelium under the right conditions, follow the setup and humidity guidance in this guide. The skills you develop dialing in humidity and airflow for aerial growth are exactly the same skills you will use for getting consistent pins, managing fruiting conditions, and troubleshooting contamination across any grow setup.
Once you can read what your mycelium is telling you by how it looks, you will spend a lot less time guessing.
FAQ
Is aerial mycelium only a colonization sign, or can I make it during fruiting too?
Yes, but use it differently. If you are fruiting, keep CO2 low and conditions stable so aerial growth does not stall or yellow. If you are only trying to build aerial hyphae, use longer colonization style conditions (high humidity, limited airflow) before switching to fruiting targets.
What does it mean if I get aerial mycelium but no pins follow soon?
If it is bright white and dry to the touch, you can usually keep going. If it stays fluffy but the block stops producing or turns yellow, gray, or retreats, adjust humidity and surface moisture first, then check that colonization inside is fully complete before expecting pins.
How do I know if my fan or fresh air exchange is too strong for aerial growth?
Slightly. Too much airflow can cause a fuzzy mat to dry and collapse, especially on the first week after exposure to air. Instead of eliminating FAE, reduce fan time and keep air exchange gentle, then mist the chamber walls rather than the surface.
Why does my aerial mycelium look good one day and shrink the next?
It happens often with rapid humidity swings and chilled nights. If you see morning die-back or thinning wisps, stabilize temperature and avoid opening the chamber frequently during the first days of aerial development. A small insulation wrap around the chamber can help buffer night drops.
How can I tell the difference between healthy aerial mycelium and early contamination when I am unsure?
Don’t rely on color alone. Check for a consistent, cottony texture and no offensive smell. Also compare to deeper block colonization and look for progression (outward spread) rather than patchy blotches that suddenly appear.
How often should I open my grow chamber to check aerial growth?
If you have to open for inspection, do it quickly and keep the block mostly untouched. Re-seal and return to your humidity target right away. For repeated checks, use clear containers so you can monitor without frequent openings.
Can I use aerial mycelium for agar transfers, and where on the mat should I sample?
Yes. If you are using aerial growth to transfer onto agar, take tissue from clean-looking, bright aerial hyphae on the outer layer. Avoid any areas that look matte, discolored, or slimy, because that increases the chance of carrying contaminants onto the plate.
My block is fully colonized inside, but there is no aerial growth, what should I adjust first?
Often. If aerial growth is absent but the interior is fully colonized, the mycelium may not be getting an air interface. Increase exposure to air by loosening the lid slightly or improving vent placement, while keeping humidity in range so the surface does not dry out.
Should I cut away contamination on the aerial layer, or is it always time to discard the block?
It is safer to remove the affected area rather than trying to “rescue” a contaminated brick or block. For soft substrate blocks, cutting is unreliable because contamination can spread beneath the surface. Isolate the whole block immediately and discard contaminated material according to your sanitation routine.
How wet is too wet for aerial mycelium?
Generally, more humidity helps you build the mat, but there is a line where moisture becomes bacterial or mushy. If you see pooling condensation, water droplets on the aerial surface, or a wet, sour smell, reduce mist frequency and wipe condensed surfaces dry before increasing airflow slightly.
Why is my aerial mycelium turning yellow, but not showing green or black spots?
If the aerial layer turns yellowish and stays that way, your environment may be too damp or CO2 may be too high for long stretches. Fix by stabilizing humidity, ensuring gentle but consistent airflow, and correcting temperature before you assume the species cannot produce aerial growth.
What is the best way to troubleshoot aerial growth when multiple factors could be wrong?
For most setups, target the humidity dial first (commonly 90 to 95 percent during aerial-building). Once you see stable growth, adjust airflow in small steps. A practical approach is to change only one variable per day, then observe for 24 hours to avoid chasing noise.