To grow mushrooms from mycelium, you need to get that mycelium established first, either from spores, from a tissue sample cut from a fresh mushroom, or from existing grain spawn. If you're wondering how to grow mycelium at home, the next step is making sure your substrate is clean and properly colonized before you move into bulk growing. Mycorrhizal fungi are different because they need compatible host plants and specific soil or root-inoculation methods to establish. Once you have a clean, white, fully colonized substrate, you transfer it into bulk growing material and eventually trigger fruiting. The whole process from inoculation to harvestable mushrooms typically takes anywhere from 4 to 12 weeks depending on species, method, and how clean your setup is. The single biggest variable is contamination control, so that's where most of your attention should go.
How to Grow Mushrooms From Mycelium: Step by Step

What mycelium actually is and what you're trying to grow
blank" rel="noopener noreferrer">Mycelium is the vegetative body of a fungus, the network of white thread-like filaments (called hyphae) that spread through a substrate to digest and colonize it. What you see on a petri dish or inside a jar of grain is the fungus doing the slow, invisible work that eventually leads to mushrooms. blank" rel="noopener noreferrer">Mushrooms are just the fruiting bodies, the reproductive structures the mycelium produces when conditions are right. So when you're "growing mycelium," you're really cultivating the organism itself, building up enough healthy fungal biomass to then trigger mushroom production.
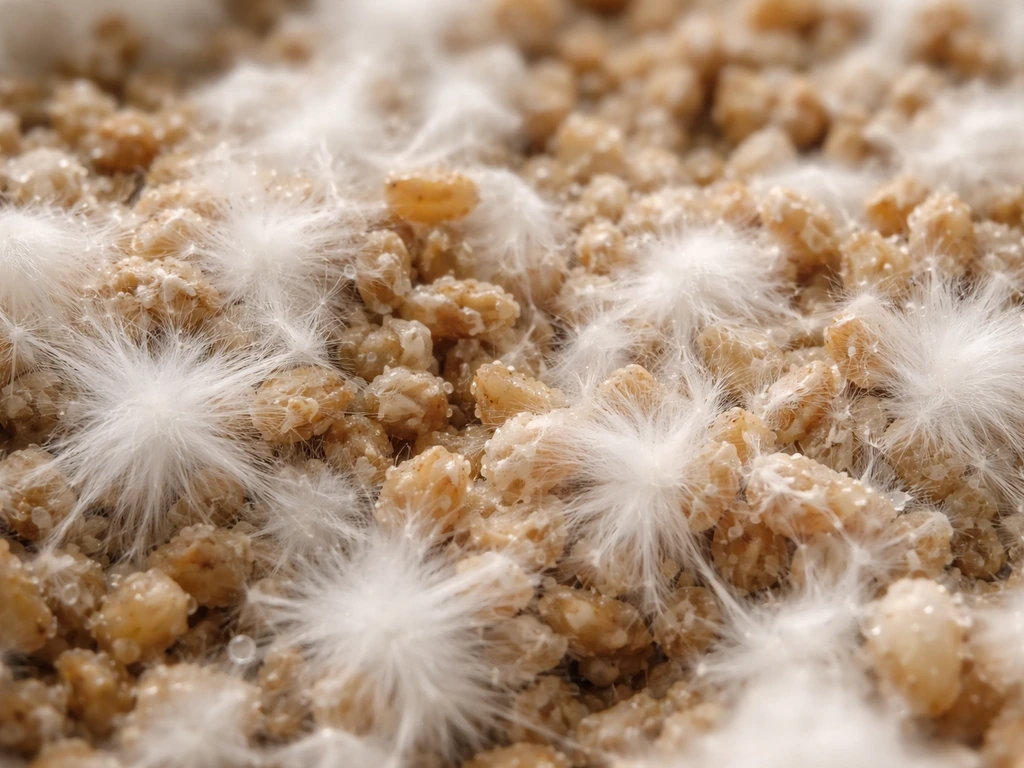
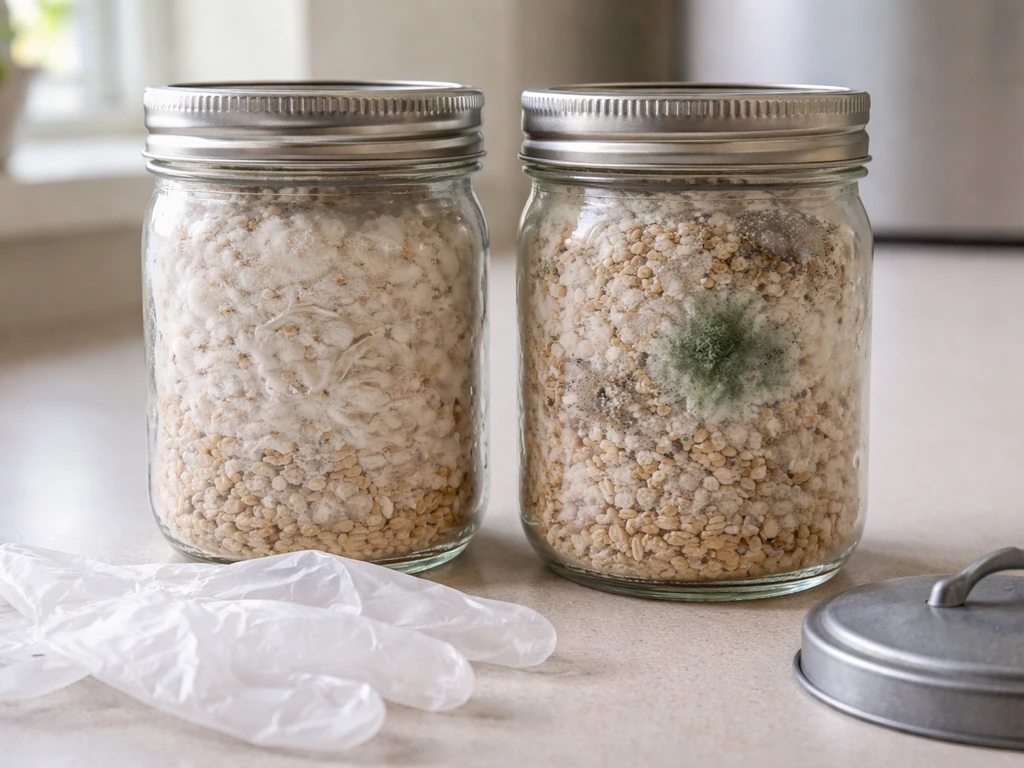
Healthy mycelium looks bright white and has a structured, fluffy or ropey texture. It should smell mild and earthy, a little like fresh soil or clean forest floor. If it looks shiny or wet, smells sour or rotten, or shows any colors other than white (green, black, orange, pink), you're likely dealing with contamination. That visual and smell check is your most important diagnostic tool throughout this whole process. Success means a jar or bag that's fully covered in clean white growth, no patches, no weird smells, no off colors.
Picking your starting point: spores, a fresh mushroom, or existing spawn
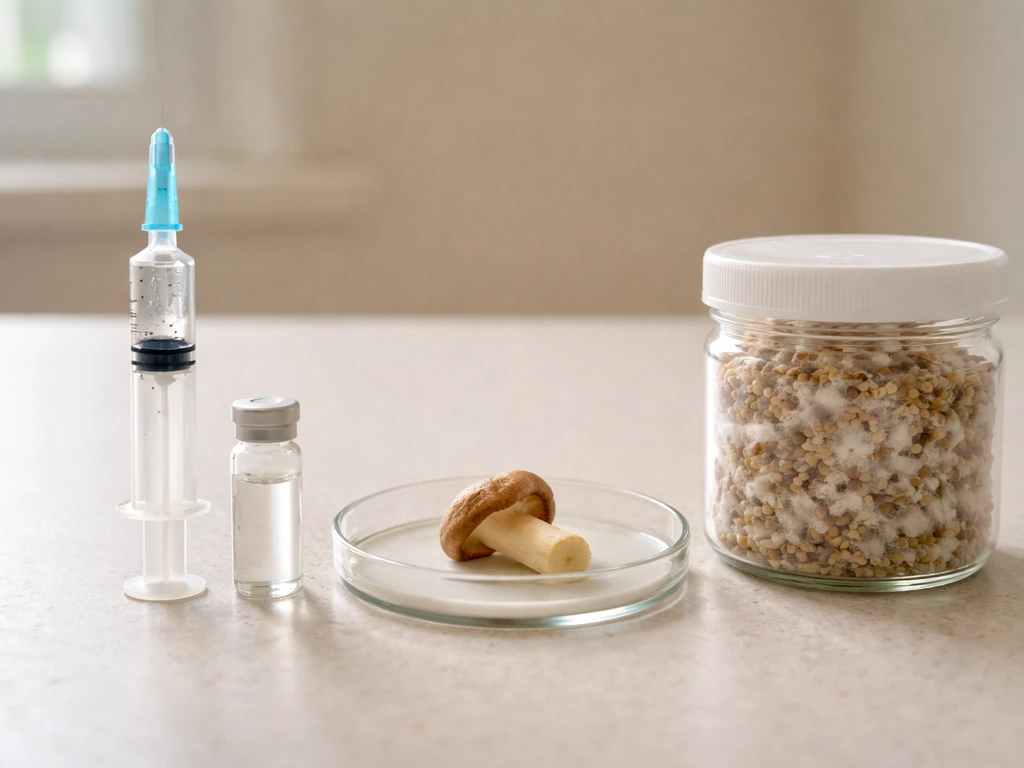
You have three realistic starting points at home. Each has tradeoffs, and the right one depends on what you already have and how much risk you're willing to manage.
| Starting Material | Difficulty | Time to Mycelium | Contamination Risk | Best For |
|---|---|---|---|---|
| Spore syringe or spore print | Beginner-friendly | 7–21 days to visible growth | Moderate (spores carry no active mycelium, so contamination competes equally) | Beginners with no existing cultures |
| Fresh mushroom tissue (clone) | Intermediate | 5–14 days on agar | Moderate-high (surface bacteria can hitchhike in) | Growers who want to replicate a specific specimen |
| Existing grain spawn or agar culture | Easiest | Immediate (just expand it) | Low (mycelium already has a head start) | Anyone with access to a trusted spawn source |
If you're starting completely from scratch, a spore syringe into a grain jar is the most beginner-friendly path. It's forgiving, widely documented, and you can get good results without agar or advanced technique. Tissue cloning gives you more control over genetics and is great if you have a mushroom you want to replicate, but it requires at least a basic agar setup. Working with existing spawn (either bought or transferred from a colonized jar) is the fastest route, but you need a clean source to start from. The rest of this guide covers all three routes.
Setting up a clean workspace and gathering your materials
You don't need a lab, but you do need to think about airflow and surface contamination. Airborne mold spores and bacteria are everywhere, and the moment you open a sterile container, you're exposed to them. The standard home solution is a Still Air Box (SAB), which is just a clear storage tote with arm holes cut into the side. You let the air inside settle for 5 to 10 minutes before working, which drops the airborne particle count dramatically. It's not as good as a laminar flow hood, but it's genuinely effective for most home work and costs almost nothing.
Before any work session, spray or wipe the inside of your SAB with 70% isopropyl alcohol (not bleach, which can off-gas and cause its own problems). Wipe down your gloves, your tools, and any containers you're bringing in. Flame-sterilize any metal inoculation tools until they glow, then let them cool for 30 seconds before touching any substrate. Work slowly and deliberately, fast movements stir up air and defeat the whole purpose of working in a still environment.
Materials list
- Clear storage tote (SAB) with arm holes, or a laminar flow hood if you have one
- 70% isopropyl alcohol and spray bottle
- Nitrile gloves and a face mask
- Pressure cooker (15 PSI) for sterilizing grain and agar media
- Wide-mouth mason jars (quart or half-pint) with modified lids (polyfill or injection ports)
- Rye berries, wheat berries, or wild bird seed for grain spawn substrate
- Agar media (PDA or PDYA if doing tissue cloning or spore-to-agar work)
- Petri dishes or agar plates (if working with agar)
- Spore syringe or spore print (for spore route) OR fresh mushroom specimen (for tissue route)
- Scalpel or razor blade for tissue work
- Alcohol lamp or butane torch
- Parafilm or micropore tape for sealing plates
- Thermometer and incubation space (ideally 70–77°F / 21–25°C for most species)
For grain preparation specifically, moisture content is critical. You want grains that are fully hydrated but surface-dry so individual grains don't stick together. The standard method is to simmer rye or wheat berries for 15–20 minutes, drain them, then spread them on a towel and let them air-dry for 30–60 minutes until the surface looks matte. Then load them into jars to about two-thirds full, cap with modified lids, and pressure cook at 15 PSI for 90 minutes. Let them cool fully (at least 8 hours or overnight) before inoculating. Grain that's too wet becomes a bacterial breeding ground, and that's one of the most common failure points I see.
Growing mycelium from spores: inoculation and incubation step by step
The spore-to-grain route skips agar entirely and works well for beginners. You're injecting a spore solution directly into sterilized grain jars, then waiting for germination and colonization. The tradeoff is that spores are genetically diverse, so you don't know exactly what genetics you're working with, but for eating mushrooms it doesn't really matter.
- Let your sterilized grain jars cool completely to room temperature. Inoculating warm grain is a fast track to contamination.
- Bring your spore syringe, gloves, alcohol spray, and torch into your SAB. Let everything settle for 10 minutes before starting.
- Shake the spore syringe vigorously for 30 seconds to distribute spores evenly.
- Flame-sterilize the needle until it glows red, let it cool for 30 seconds.
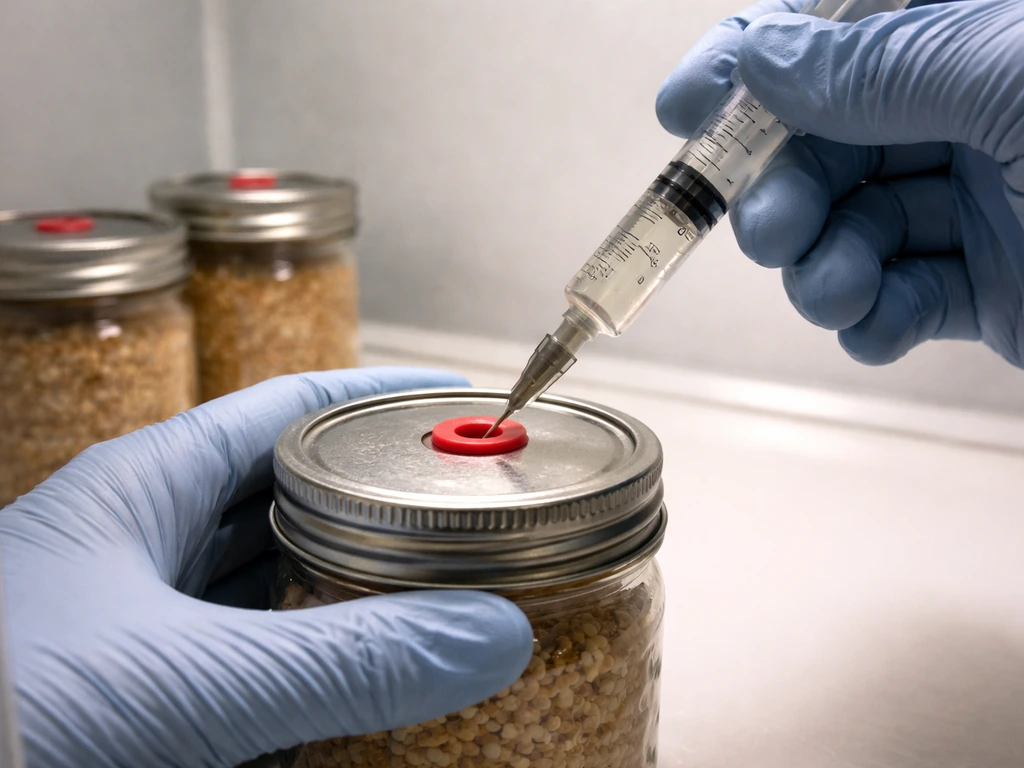
- Wipe the injection port on your jar lid with an alcohol-soaked cotton ball.
- Inject 1–2 cc of spore solution per quart jar through the injection port. Multiple injection points around the jar speeds up colonization.
- Seal the injection holes with micropore tape if they're not self-healing ports.
- Label each jar with species and date, then move them to your incubation space.
- Incubate at 70–77°F in a dark location. Mycelium doesn't need light to grow, and some growers find darkness reduces contamination detection anxiety (though checking is fine).
- First signs of germination (white specks or fuzzy patches) typically appear within 7–14 days for fast species like oysters, potentially 14–21 days for slower ones.
- Shake or "break and shake" jars once the mycelium has covered about 30% of the grain to redistribute colonized grain and speed up the rest of the jar.
- Full colonization typically takes 3–5 weeks for most grain jars depending on species and temperature. Do not rush this stage.
For a spore-to-agar route (which gives you more genetic selection options), you'd inoculate a petri dish with agar media instead, wait for individual germination points to appear, then cut and transfer the most vigorous sectors to fresh plates. This is how you eventually isolate a single genetic line, but it adds 2–4 weeks to your timeline. If you're curious about the broader topic of how to grow mycelium from scratch including agar workflows, that's a rabbit hole worth going down once you've nailed the basics.
Growing mycelium from a fresh mushroom: the tissue transfer (clone) method
Tissue cloning lets you take a live mushroom, pull a small piece of internal tissue, and use it to start a mycelium culture that's genetically identical to that mushroom. It's a powerful technique because you can replicate a high-yielding or particularly good-tasting specimen. The key is working from interior tissue, not the outer surface, because the inside of a healthy mushroom is essentially sterile while the outside is covered in environmental contaminants.
- Choose a fresh, firm mushroom that's not quite fully mature. Avoid any with signs of decay, bruising, or surface mold.
- Tear (don't cut) the mushroom in half with clean gloved hands inside your SAB. Tearing exposes interior tissue without dragging surface bacteria inward.
- Flame-sterilize your scalpel, let it cool, then cut a small piece of tissue (about 2–4mm) from deep inside the stem or the junction between cap and stem.
- Quickly transfer that tissue piece onto the center of a prepared agar plate. Work fast but smoothly to minimize exposure time.
- Seal the plate with Parafilm or micropore tape and label it with species and date.
- Incubate plates upside-down (to prevent condensation dripping onto the culture) at 70–75°F.
- Within 3–7 days you should see white mycelium radiating outward from the tissue piece. This is your clone establishing itself.
- Watch carefully for any off-color growth near or around the tissue piece. Surface bacteria will often show up as wet, shiny, or colored patches in the first few days.
- Once clean mycelium has grown outward and away from any contamination near the tissue, cut a wedge from the clean leading edge and transfer it to a fresh agar plate. This "isolation" step moves your culture away from any initial contamination.
- After 1–2 clean agar transfers, your culture is ready to move to grain.
Tissue cultures from store-bought mushrooms work reliably for oysters, shiitake, lion's mane, and king trumpet varieties. Wild-foraged specimens can also be cloned but carry higher contamination risk from their environment. I've had good luck with oysters from the grocery store, less consistent results with older shiitake that have been sitting in the fridge for a few days. Freshness matters a lot here.
Moving from mycelium to colonized spawn you can actually use
Once you have clean mycelium on agar or a colonized grain jar, the next job is expanding it into enough spawn volume to inoculate a bulk fruiting substrate. This is the spawn production phase, and the workflow follows a staged approach: agar to grain, then grain to more grain or directly to bulk substrate.
Agar to grain transfer
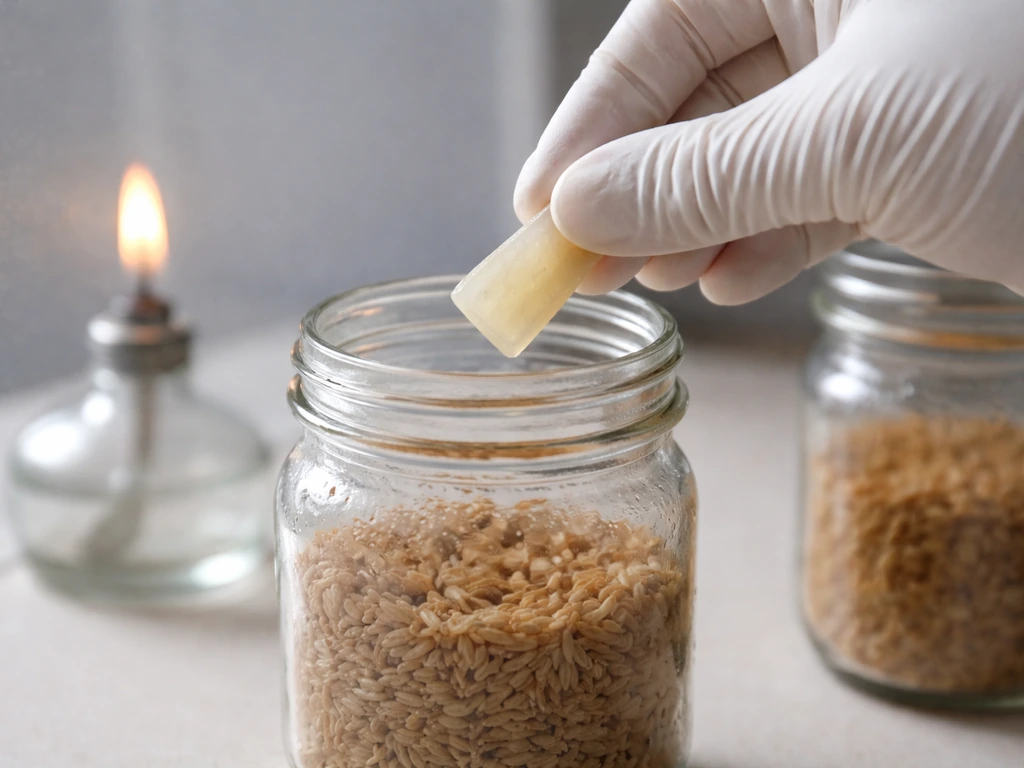
When your agar culture looks clean and vigorous (fully covering the plate or at least 70% covered with healthy white growth), it's ready to move to grain. Inside your SAB, flame-sterilize your scalpel, cut 4–6 wedges from the leading edge of your agar culture, and drop each wedge into a sterilized grain jar through an injection port or briefly opened lid. The mycelium will then colonize the grain over the next 2–4 weeks. You're essentially using agar as a starter and grain as the amplifier.
Grain to grain transfer (spawn multiplication)
One fully colonized grain jar can inoculate 4–10 additional grain jars. This is how you multiply your spawn without starting over from spores or agar each time. Open both jars inside your SAB, pour about 20% of the colonized grain into each new sterilized jar, cap them, shake to distribute, and incubate. Because colonized grain already has an established mycelium network with a significant head start over any competing contaminants, these subsequent jars colonize much faster, often in 1–2 weeks. This is the grain-to-grain shortcut that most experienced home growers use routinely.
Grain spawn to bulk substrate (final transfer)
Fully colonized grain spawn goes into your bulk fruiting substrate, whether that's sterilized or pasteurized hardwood sawdust, coco coir, straw, or a species-specific blend. Those same grain-and-substrate steps are the foundation for how to grow mycelium bricks at home. When you move to soil, you still follow the same idea: use a clean, fully colonized spawn to inoculate soil that is properly prepared and pasteurized bulk fruiting substrate. A common ratio is 1 part spawn to 4–5 parts bulk substrate by volume. Mix thoroughly in a clean environment, pack into your fruiting container (a monotub, a grow bag, or a log-style block), and seal it for the colonization phase. Once the bulk substrate is fully white with mycelium (typically 1–3 weeks), you initiate fruiting by introducing light, fresh air exchange, and a humidity boost. That's when mushrooms start to pin.
A note on timing: if you're using purchased grain spawn rather than making your own, use it within 1–2 weeks for best results. If it's been refrigerated, let it come to room temperature over 24–48 hours before inoculating, cold spawn is sluggish and can give you a false sense of slow colonization when really the mycelium just needs to warm up.
When things go wrong: contamination, slow growth, and weak colonization
Even experienced growers deal with contamination. The question isn't whether it'll happen, but whether you catch it early enough to salvage the situation. Here's what to watch for and what to do.
Contamination identification
| What You See | Likely Culprit | What To Do |
|---|---|---|
| Green patches or powdery green growth | Trichoderma (green mold) | Discard immediately and bag/seal before removing from grow area to avoid spreading spores |
| Wispy cobweb-like growth spreading very fast | Cobweb mold (Hypomyces or similar) | Increase fresh air exchange; cobweb mold often retreats with more airflow, unlike Trichoderma |
| Wet, shiny, slimy areas, often colorless or yellowish | Bacterial contamination | Discard. Bacteria spread fast and cannot be reliably stopped once established in grain |
| Black, pink, orange, or any non-white color | Various molds or yeast | Discard unless the discoloration is from mycelium metabolites (some species produce yellow/brown exudate when stressed, which is different from mold growth) |
| Sour, sweet, or rotten smell when opening a jar | Bacterial or fungal contamination | Do not open in your grow area. Bag and remove immediately |
Slow or no growth
If you see nothing after 3 weeks, first check your temperature. Mycelium stalls below about 60°F and some species are more temperature-sensitive than others. A reliable digital thermometer in your incubation spot is worth having. Also check that your spore syringe was viable (old or poorly stored syringes lose viability), that your grain wasn't too wet or too dry when sterilized, and that your pressure cooker actually reached 15 PSI. Under-sterilized grain is a very common beginner problem that looks like slow growth but is actually contamination that just hasn't become obvious yet.
Weak or uneven colonization
If mycelium starts strong then stalls or leaves patchy areas, the grain may have dried out (check for condensation patterns and make sure your lid's polyfill filter isn't pulling too much moisture), or the inoculation points may have been too few. Breaking and shaking a jar at the 30–40% colonization mark usually solves patchy colonization by distributing active mycelium throughout the jar. After shaking, the remaining colonization typically finishes quickly. Just don't shake too early (before mycelium has a foothold) or too late (very dense colonization can seal grain together and make shaking ineffective).
Aerial mycelium and thick surface growth
Sometimes you'll see thick, dense, upward-growing white fuzz forming on the surface of a grain jar or agar plate. This is aerial mycelium and it's usually a sign of low CO2 and slightly stressful conditions. To grow aerial mycelium intentionally, you typically need to manage CO2 and fresh air exchange while keeping conditions stable and clean. It's not contamination, but very thick aerial growth can sometimes indicate the culture is being pushed to produce before it's fully colonized. A small amount of aerial growth is normal and even healthy. If it's extremely thick and covering the entire surface before the substrate is colonized, increase fresh air exchange slightly and make sure temperatures aren't too high.
Realistic timelines from start to finish
Here's a rough timeline for the full workflow from inoculation to first harvest, assuming clean technique and a fast-colonizing species like oyster mushrooms. If you want to build from scratch, focus first on getting healthy, contamination-free mycelium established, then expand it into colonized spawn how to grow mycelium. Slower species like reishi or lion's mane will add time at almost every stage.
| Stage | Oyster Mushrooms (fast) | Shiitake / Lion's Mane (slower) |
|---|---|---|
| Spore germination or tissue establishment on agar | 5–10 days | 7–21 days |
| Agar culture ready for grain transfer | 7–14 days | 14–28 days |
| Grain jar colonization | 10–21 days | 21–35 days |
| Bulk substrate colonization after spawn inoculation | 7–14 days | 14–28 days |
| First pins after colonization complete | 3–7 days after initiation | 7–21 days after initiation |
| Total from scratch to first harvest | 5–8 weeks | 8–16 weeks |
These timelines assume things go reasonably well. Your first attempt will probably take longer because you'll second-guess yourself, redo steps, or deal with at least one contaminated jar. That's normal. The muscle memory and intuition for what healthy mycelium looks and smells like builds over a few grows, and after that things get faster and more consistent. Start with oysters or king stropharia if you want relatively forgiving first attempts. Save shiitake and lion's mane for when you've got the workflow down.
FAQ
Can I grow mushrooms directly from a spore syringe without making agar or spawn?
Yes, but only if your goal is to grow more mycelium, not guaranteed mushrooms. Spores need a compatible environment and are slower to establish, while from-colony grain or agar transfers are more predictable. If you want mushrooms from the process, plan on a later fruiting stage with fresh air exchange and high humidity, since mycelium alone will not reliably produce fruiting bodies.
When is the right time to start fresh air exchange so my mycelium pins instead of stalling?
A good rule is to wait until the bulk substrate is fully colonized before increasing fresh air exchange for pinning. Introducing airflow too early can dry the surface and stall colonization, especially for slower species. If you see heavy aerial growth early, that is a sign you may be stressing the culture before it is ready.
Is it okay to shake jars early to prevent patchiness?
Yes. If you pour or shake too much and over-agitate before the culture has several growth points, you can break up developing mycelium and lose the “head start” it needs. For jar-to-jar transfers, use the timing window the article describes, and don’t shake at low colonization unless you are trying to rescue a patchy jar.
How can I tell the difference between healthy mycelium smell and contamination smell?
Slight off smells can happen, but strong sour, rotten, or ammonia-like odors usually mean bacterial contamination, even if the jar still looks mostly white. Also check for slimy wetness or colored spots that spread, not just harmless condensation. If you’re unsure, treat it as contaminated and do not reuse that culture as an inoculant.
My spawn was refrigerated, and colonization is slow. How long should I wait before deciding it failed?
Cold spawn can look like it is “doing nothing” because colonization slows down while the culture warms. To avoid misdiagnosis, let refrigerated spawn reach room temperature for the full 24 to 48 hours mentioned, then give it time before assuming failure. If growth still does not start, re-check incubation temperature and substrate moisture.
Can I still use a culture that has minor discoloration if the rest looks white?
Typically no, not if your aim is consistent mushrooms. Color changes on grain or agar are a warning sign, and “learning” by repeatedly culturing questionable mycelium often spreads contamination through your workflow. A safer approach is to isolate what is clearly healthy and discard anything that shows persistent non-white colors or spreading colonies.
What are the most common reasons jars stall even when they look clean at first?
Dryness and over-sterilized, overly hydrated, or uneven substrate hydration can all cause stalled or patchy colonization. A practical check is to look for the surface behavior over time, condensation patterns in the incubator area, and whether grain looks matte versus clumped. If jars stall, first rule out temperature and moisture before changing your whole method.
How do I troubleshoot under-sterilized grain if contamination only shows up after weeks?
Pressure cooking is necessary to reliably sterilize grain, and incomplete cycles can create low-level contamination that only becomes obvious later. If you suspect under-sterilization, don’t “push through” with transfers, because you can move contaminants into your spawn. For troubleshooting, verify the cooker actually reached and maintained 15 PSI for the full stated time.
My grain formed thick aerial mycelium early, is that contamination, and what should I change?
Usually a small amount of aerial growth is normal, especially if the container has imperfect gas exchange. Very thick aerial mycelium covering most of the surface before colonization is complete suggests stressed conditions, often too much fresh air, too high temperature, or CO2 imbalance. The fix is to stabilize conditions rather than repeatedly opening jars.
How long does purchased grain spawn stay reliable after delivery or refrigeration?
Use the freshest spawn you can, and treat transfers like time-sensitive inoculation. If purchased spawn must be stored, plan to use it within the stated 1 to 2 week window, and bring it to room temperature before inoculating. Mixing very old spawn with fresh substrate can make colonization uneven and complicate troubleshooting.
How do I improve yield consistency when starting from spores?
If agar is an option, you can improve consistency by isolating the fastest and healthiest sectors and re-using those for grain. Without agar, you can still select indirectly by choosing the best colonized grain jars for your next stage, but genetic variability from spores remains. Agar selection is the most direct way to lock in performance traits.
Can I skip the bulk colonization phase and just add spawn to fruiting conditions?
No, not in the way most people mean. Grain and bulk fruiting mixes generally come from two different stages, and using the “wrong” ratio or skipping the colonization seal step can prevent proper pinning. Stick to the spawn-to-bulk concept, and only adjust ratios once you are consistently seeing full colonization and then pinning.