To grow mycelium in soil, you need to introduce live mushroom spawn (not spores) into a prepared, partially amended soil environment, then keep it moist, dark, and at the right temperature while the fungal threads colonize outward. The soil itself is never sterilized the way a lab substrate would be, so your job is to give the mycelium a competitive head start by choosing the right species, prepping the site, and keeping conditions stable for 4 to 12 weeks depending on what you're growing.
How to Grow Mycelium in Soil: Step by Step Guide

Marcus Holloway
16 May 2026
What 'mycelium in soil' actually means (and what you'll get)
When people search for how to grow mycelium in soil, they usually have one of two goals: establishing a living fungal network that will eventually fruit mushrooms, or creating an outdoor mushroom bed that keeps producing year after year. Both are achievable, but it helps to understand what's actually happening underground.
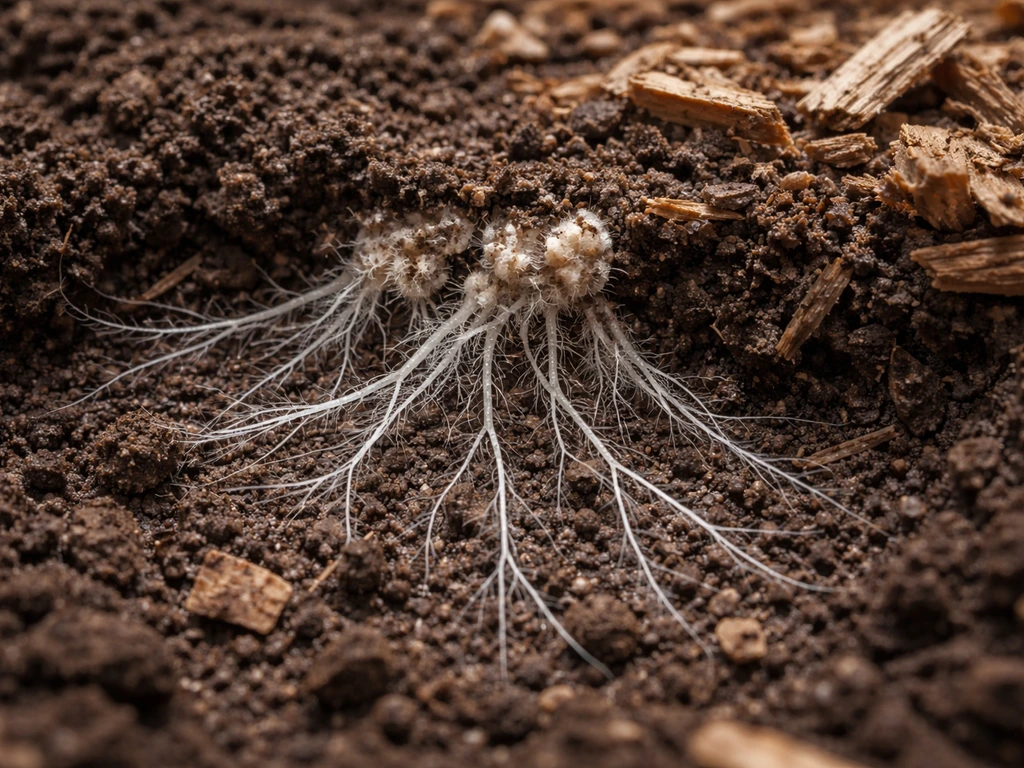
Mycelium is the living, thread-like network that makes up the vegetative body of a fungus. It's what colonizes a substrate, breaks down organic matter, and eventually produces mushrooms. When you inoculate soil, you're introducing this living network in the form of blank" rel="noopener noreferrer">spawn, which is mycelium already cultivated onto a carrier medium like grain or wood chips. The mycelium then spreads outward through the soil, consuming organic material and establishing a colony. Mushrooms don't appear until that colonization phase is complete and the right environmental triggers (moisture spikes, temperature shifts, light changes) kick fruiting into gear.
This is worth spelling out because spreading spores into soil rarely works as a reliable method. Spores need to germinate, find a compatible mating partner, and then start building mycelium from scratch in a competitive microbial environment. Spawn gives you a head start with established, actively growing mycelium. If you want consistent results, always start with spawn.
Two phases to expect: first, colonization (the mycelium quietly threads through the soil, invisible to you), then fruiting (mushrooms push up once conditions trigger the switch). Some species do both in the same bed. Others, like most wood-loving varieties, need a wood-rich amendment or buried logs to anchor the mycelium before you'll ever see fruiting bodies. Knowing which phase you're in helps you avoid the most common mistake: disturbing the bed too early because you don't see anything happening.
Pick the right mushroom species for soil inoculation
Not all mushrooms grow in plain soil, and this is where a lot of first-time outdoor growers go wrong. Most popular edibles like oyster mushrooms and shiitake are wood decomposers. They need woody cellulose to survive, so plain garden soil won't work for them without heavy wood-based amendments. A handful of species are genuinely soil-tolerant or soil-preferring, and those are your best starting points.
| Species | Soil Compatibility | What It Needs | Difficulty |
|---|---|---|---|
| Wine caps (Stropharia rugosoannulata) | Excellent — thrives in soil + wood chip beds | Wood chips mixed into soil, moderate moisture | Beginner-friendly |
| Agaricus bisporus (button/portobello) | Good — needs composted substrate with casing layer | Well-composted manure, casing layer to trigger fruiting | Intermediate |
| Garden giant (King Stropharia) | Excellent — same as wine caps | Wood chip beds, partial shade | Beginner-friendly |
| Morels (Morchella spp.) | Possible — often associated with specific trees/soil | Sandy loam, decaying wood nearby, specific mycorrhizal partners | Advanced/unpredictable |
| Oyster mushrooms (Pleurotus spp.) | Poor in plain soil | Buried wood, heavy straw or wood chip amendment needed | Easy on wood, hard in soil |
| Shiitake (Lentinula edodes) | Poor in plain soil | Needs hardwood logs or sawdust beds | Moderate on wood, not a soil grower |
If you're just getting started, wine caps (Stropharia rugosoannulata) are the single best species to attempt in outdoor soil beds. They colonize aggressively, tolerate imperfect conditions, produce large flushes, and actually improve soil biology as they grow. I've seen wine cap beds fruit reliably for three or four years from a single inoculation. They're the gateway drug for outdoor mushroom growing.
If you're interested in mycorrhizal species like morels or truffles, be aware that these form partnerships with living plant roots and can't be cultivated the same way saprotrophic species can. If you are growing species that form mycorrhizal partnerships, follow the specific steps in how to grow mycorrhizal fungi before you start preparing a site. The approach for those is fundamentally different and much less predictable. That type of cultivation is covered separately in guides on how to grow mycorrhizal fungi.
Soil prep and site selection
You don't need perfect soil, but you do need to give the mycelium a fighting chance against competing bacteria, molds, and other fungi already living in the ground. The goal is to create a zone that's rich in organic matter, drains well, and won't dry out or waterlog between watering cycles.
Picking your location
- Partial to full shade is ideal for most species. Direct afternoon sun dries beds out too fast and can overheat the top layer.
- Choose a spot that doesn't flood after rain, but also doesn't drain so fast that it dries within a day or two.
- Under deciduous trees or on the north side of a building or fence works well for most outdoor beds.
- Avoid sites recently treated with herbicides, fungicides, or heavy synthetic fertilizers. These compounds persist in soil and inhibit mycelium.
Soil texture and amendments
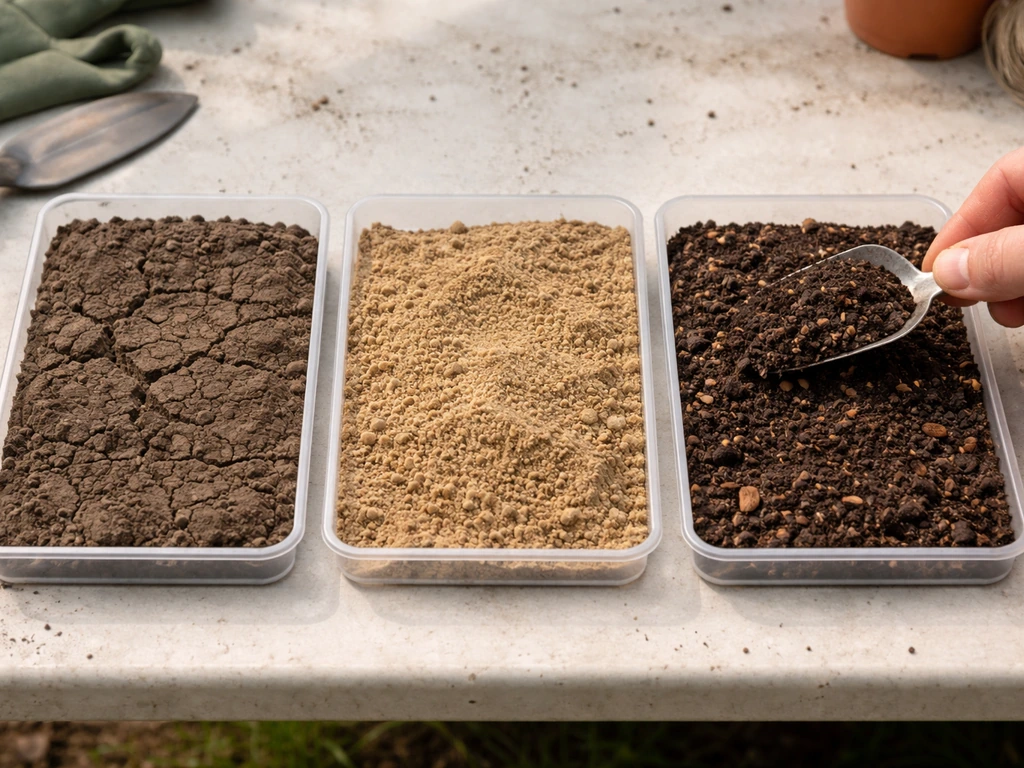
Heavy clay soil compacts and suffocates mycelium. Pure sand drains too fast and holds no nutrients. You're aiming for a loamy, crumbly texture that holds moisture without getting waterlogged. If your existing soil is heavy clay, mix in hardwood wood chips, straw, or aged wood shavings to open up the structure. If it's sandy, add compost to improve water retention.
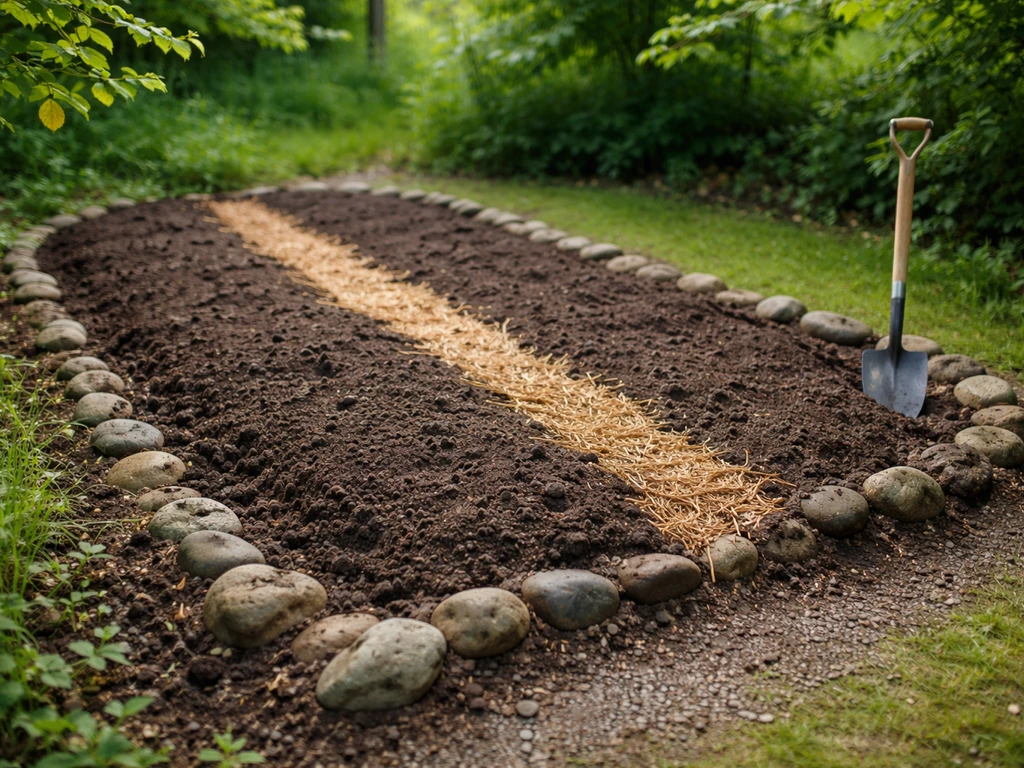
For wine cap beds, the classic setup is 4 to 6 inches of hardwood wood chips mixed into or layered over the top of garden soil. The wood chips are the real food source for the mycelium. The soil underneath provides the stable, moist environment. For Agaricus species, you want well-composted horse or mushroom manure as the main substrate, with garden soil mixed in at roughly a 60/40 ratio (compost to soil).
One thing to avoid: don't add fresh manure or fresh grass clippings right before inoculation. These heat up as they decompose, which can cook mycelium and spike bacterial contamination. Let any hot materials cool and finish composting before your inoculation date.
Managing contamination risk
You can't sterilize outdoor soil, and you shouldn't try. Instead, you're tipping the odds in favor of your chosen mycelium by giving it a rich food source and reducing competing pressure. Pasteurizing small batches of wood chip or straw amendments (holding them at 160 to 180°F for one hour using boiling water or a steam setup) before adding to the bed gives your spawn a cleaner zone to establish in before wild fungi and bacteria colonize the fresh organic matter. This step is optional but helpful if you've had contamination problems before.
How to inoculate soil with spawn
There are four common ways people introduce mycelium into soil, and they vary in effort, cost, and success rate. Here's how each works and when to use it.
Method 1: Grain spawn mixed into prepared soil or wood chip beds
This is the most reliable and widely recommended approach for beginners. Grain spawn is mycelium grown onto wheat, rye, or millet. You mix it directly into your prepared bed at a spawn rate of roughly 10 to 15 percent by volume (so for every 10 pounds of substrate, use 1 to 1.5 pounds of spawn). Spread the spawn in layers: lay down 2 to 3 inches of your wood chip or compost mix, scatter spawn across the surface, cover with another 2 to 3 inches of substrate, and repeat once more. Finish with a 1 to 2 inch topping of plain wood chips or straw to act as a moisture-retaining cap and barrier from birds.
Method 2: Plug spawn or cake pieces pressed into soil
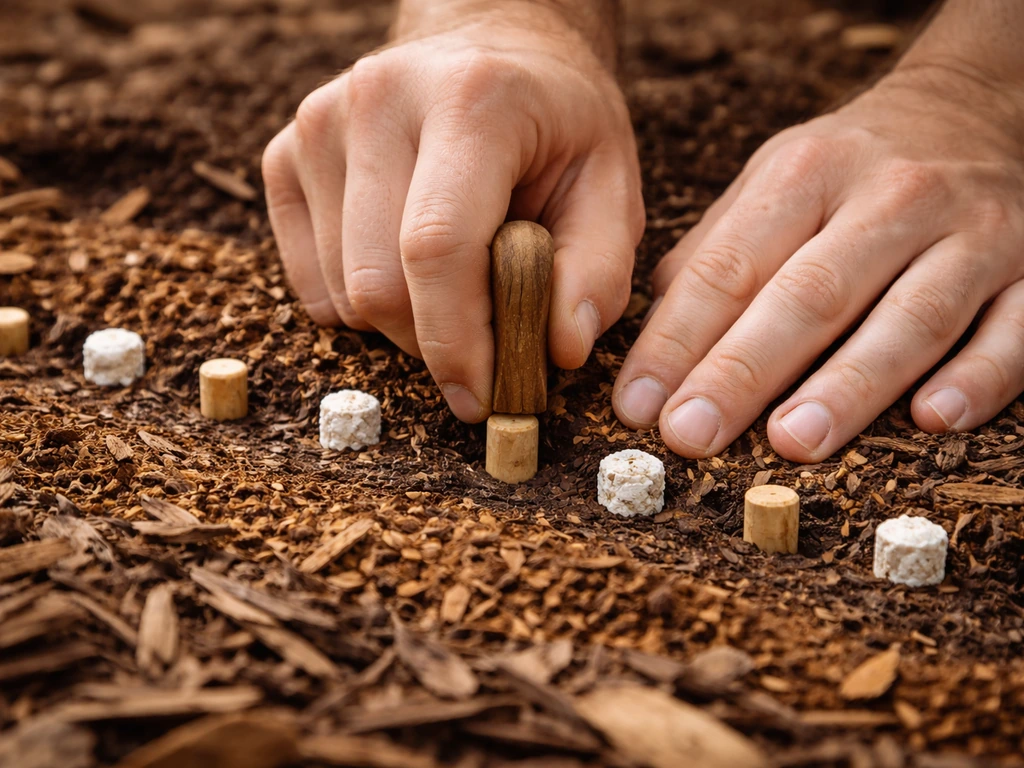
Plug spawn (wooden dowels colonized with mycelium) and spent grain or sawdust cakes from previous grows can be pressed into soil at intervals. Space plugs or cake pieces every 6 to 8 inches in a grid pattern, at a depth of 1 to 2 inches. Press them into contact with the surrounding amended soil, then cover with your mulch cap. This method works well when you have limited spawn but want to cover a larger area. It colonizes more slowly than full mixing but costs less material.
Method 3: Transferring mycelium from existing cultures
If you're already growing mushrooms indoors, fully colonized grain or sawdust blocks can be broken up and used as spawn directly. This is essentially the same as using commercial spawn, just sourced from your own grows. The colonized material transfers to the outdoor bed as long as it isn't contaminated and the mycelium is still white and healthy (not green, black, or sour-smelling). Break the block into walnut-sized pieces and mix or layer as you would with grain spawn.
Method 4: Spore-based inoculation
Spore slurries (spores suspended in water and poured over prepared beds) do work, but success rates are much lower than spawn-based methods. Spores must germinate, form compatible pairings, and build a mycelial network from scratch in a competitive outdoor environment. You might get lucky, especially with wine caps or oysters, but expect much longer timelines and less predictable results. Treat it as a low-cost supplemental method rather than your primary inoculation strategy.
Managing moisture, temperature, and light after inoculation
Outdoors
After inoculation, your main job is keeping the bed at consistent moisture without soaking it. The substrate should feel like a wrung-out sponge: damp but not dripping. Check moisture by pressing a handful of the top layer in your fist. If no water drips but it holds together, you're in the right zone. In dry weather, water every 2 to 3 days. A 2 to 4 inch layer of straw or wood chip mulch on top dramatically reduces evaporation and is worth doing at every bed.
Temperature is mostly managed by site selection outdoors. Most productive soil species colonize best between 55 and 75°F (13 to 24°C). Wine caps are especially forgiving and will continue colonizing even into cooler fall temps. In summer, shade is your main tool for keeping beds from overheating. A piece of burlap or shade cloth over the bed in peak heat works well. In colder climates, a thick straw mulch (4 to 6 inches) insulates the bed and extends the active colonization window into late fall.
Indoors (container beds and raised planters)
Growing mycelium in soil indoors, in containers or planters, gives you much tighter control but also more ways to go wrong. If you're wondering about the same concept above ground, learn how to grow aerial mycelium from a small starter culture and the right humidity Growing mycelium in soil indoors, in containers or planters, gives you much tighter control but also more ways to go wrong. .
Use containers at least 8 to 12 inches deep to give mycelium room to spread. Drainage holes are non-negotiable, as standing water causes rot and bacterial contamination. Keep indoor beds in a cool, dim location, ideally 60 to 70°F. A plastic humidity tent or loose plastic sheeting draped over the container helps maintain humidity around 80 to 90 percent during colonization.
Lift it for air exchange once a day to prevent CO2 buildup and anaerobic conditions.
Light matters less during colonization than most people think. Mycelium doesn't need light to grow. However, once you're trying to trigger fruiting, indirect natural light or a low-wattage daylight bulb on a 12-hour cycle helps cue fruiting in many species. This is different from how to grow mycelium at home in jars or bags, where darkness throughout colonization is standard. If you want, follow the same high-level principles for outdoor or indoor beds, but adjust your setup for jars, bags, or containers based on the space you have how to grow mycelium at home. In soil beds, ambient light is fine as long as it doesn't dry the surface.
Expected timelines and signs of success vs. problems
Patience is the hardest part of outdoor mushroom growing. Mycelium is doing a lot of work underground before you see anything, and it doesn't always give you obvious signs it's alive.
| Species | Colonization Timeline | First Fruiting | Signs of Active Colonization |
|---|---|---|---|
| Wine caps (Stropharia rugosoannulata) | 4 to 8 weeks | 6 to 16 weeks after inoculation | White threads visible in wood chips, sweet earthy smell |
| Agaricus bisporus | 3 to 5 weeks in compost | 8 to 12 weeks (after casing layer applied) | Dense white mycelium matting through compost |
| Oyster (in amended soil/straw) | 2 to 4 weeks | 4 to 8 weeks | Fast-spreading cottony white growth |
| Morels | Months to years | Unpredictable, often next season | Very difficult to observe |
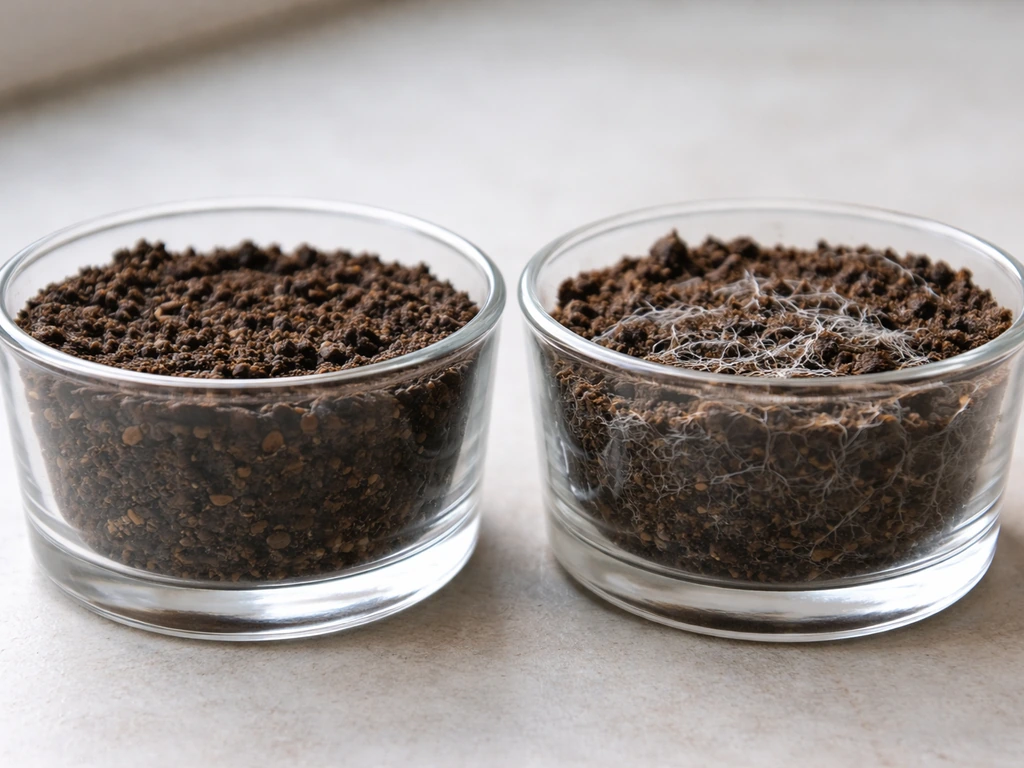
Signs your bed is colonizing successfully: white, thread-like mycelium visible when you gently pull back the top mulch layer, a pleasant earthy or mushroom-like smell, and the substrate knitting together slightly into a cohesive mat. Small pins (baby mushrooms) will appear at the surface or along the edges of the bed when conditions trigger fruiting, often after a rainfall, temperature drop, or when you increase watering frequency.
For Agaricus species grown indoors, the colonized compost needs a casing layer applied over the top to trigger the switch from vegetative mycelium growth to fruiting. A standard casing is a 1 to 2 inch layer of peat moss mixed with hydrated lime (adjusted to pH 7.5) applied once the compost is fully colonized. Then moisture levels are raised toward field capacity to bring on pinning. Without the casing layer, Agaricus mycelium tends to stay in vegetative mode indefinitely.
Troubleshooting when things go wrong
Mycelium isn't showing up after 6+ weeks
The most common causes are too dry, too cold, or contaminated spawn. Check moisture first. If the bed dried out significantly even once in the first two weeks after inoculation, the spawn may have died off. Re-water thoroughly and check again in 10 to 14 days. If still nothing, do a deeper dig and look at the spawn pieces themselves. If they're slimy, green, or black, you had contamination at inoculation. Pull them out and restart with fresh spawn.
Sour or rotten smell
A sour, alcoholic, or ammonia-like smell means anaerobic bacterial activity, which kills mycelium. This usually happens from overwatering, poor drainage, or fresh (not composted) organic material heating up in the bed. Let the bed dry out slightly, fluff the top layer to introduce oxygen, and improve drainage if needed. If the smell is severe, you may need to remove the top 2 to 3 inches of substrate and re-inoculate into the healthier material below.
Green or black mold taking over
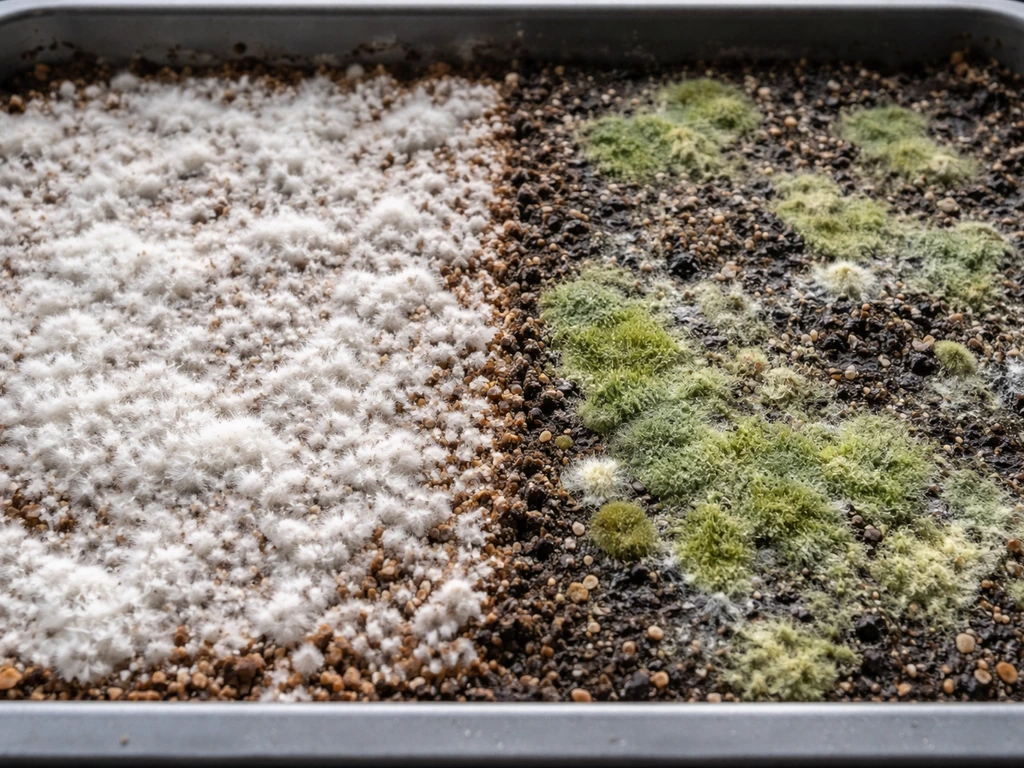
Trichoderma (green mold) and other competitive molds thrive in too-moist, warm conditions or when the spawn was already weakened. Remove visibly molded sections, improve airflow, and reduce surface moisture. Healthy mycelium can sometimes outcompete mold if you catch it early, but widespread green mold usually means a restart is needed. Next time, pasteurize your amendments before inoculation.
Birds, slugs, and insects disturbing the bed
Birds will scratch through loose mulch looking for insects, ripping up spawn in the process. A simple wire mesh or hardware cloth laid flat over the bed and held down with rocks for the first 4 to 6 weeks solves this. Slugs eat emerging pins and young mushrooms. Diatomaceous earth sprinkled around the perimeter (not on the mycelium itself) or copper tape along container edges are effective deterrents. Check for slug activity at night if your pins are disappearing.
When to call it and restart
If 10 to 12 weeks have passed with no visible colonization, persistent bad smells, or widespread contamination, cut your losses and restart. Remove the top 3 to 4 inches of substrate, replace with fresh amended material, and re-inoculate with new spawn. A late spring or early fall restart often works better than a mid-summer inoculation attempt anyway, since moderate temperatures favor mycelium over competing organisms.
What to do today: a practical checklist and starter plan
Here's the fastest path from zero to an inoculated soil bed that has a realistic chance of fruiting. If you want to move beyond beds, the process can be adapted for how to grow mycelium bricks as well. If you want a step-by-step path, follow this guide on how to grow mycelium in soil from choosing the right spawn to managing moisture and timing.
Materials you need
- Grain spawn or plug spawn of your chosen species (wine caps are the best default choice for outdoor soil beds)
- Hardwood wood chips (1 to 3 cubic feet for a 4x4 ft bed) or well-composted manure for Agaricus
- Garden fork or trowel for mixing and layering
- Straw or extra wood chips for the surface mulch layer
- Water source and watering can or hose with gentle spray
- Wire mesh or hardware cloth (optional, for bird protection)
Your step-by-step starter plan
- Choose your site today: partial shade, no recent pesticide use, decent drainage.
- Order or source wine cap grain spawn if you don't have it. It ships well and stays viable for several weeks refrigerated.
- Prepare your bed: loosen the top 4 to 6 inches of soil, mix in or layer 3 to 4 inches of hardwood wood chips.
- Check moisture: the amended layer should feel like a damp sponge before you inoculate.
- Layer in spawn at a 10 to 15 percent rate by volume, buried 1 to 2 inches below the surface, distributed evenly.
- Cap the bed with a 2 to 3 inch layer of wood chip mulch to lock in moisture and block light.
- Set a reminder to check moisture every 2 to 3 days and pull back the mulch at 4 weeks to look for white mycelial threads.
- After full colonization (white threads throughout the substrate), start slightly increasing watering frequency and watch for pins at the bed edges or surface.
Quick conditions check before you inoculate
- Soil or amendment temperature is between 55 and 75°F (13 to 24°C)
- Substrate moisture is at damp-sponge level, not soaking wet
- Site gets no more than 2 to 3 hours of direct sunlight per day
- No fresh, unfinished compost or manure that's still heating
- Spawn is white, smells mushroomy, and shows no green or black patches
- Bed has adequate drainage (no pooling after watering)
Once you've got a soil bed colonizing, you'll start to see how mycelium behaves in a living environment differently than in the sterile grain bags or jars used for indoor cultivation. If you're also running indoor grows, transferring colonized material from those to your outdoor beds (as described in Method 3 above) is a great way to expand cheaply. And if you want to eventually move from mycelium establishment into full fruiting blocks and more controlled production, the guides on how to grow mushrooms from mycelium and how to grow mycelium at home are natural next steps once your outdoor bed is running.
FAQ
How can I tell if my “spawn” is live and usable? Should I buy grain spawn or something else?
For soil beds, “spawn” usually means live mycelium already grown on grain, sawdust, or wood dowels. Spores are not the same thing and often take much longer. If you buy from a supplier, confirm the label specifies inoculated spawn (grain spawn, plug spawn, or similar) and that it is stored according to their instructions before you use it.
What’s the risk if my soil gets waterlogged after I inoculate?
Mycelium generally colonizes best when soil stays in the moisture range you described, damp like a wrung-out sponge. Avoid soaking, especially right after inoculation, because water-filled pores reduce oxygen and can trigger anaerobic bacteria. If rain is likely to flood the bed, add a slight berm or improve drainage so excess water can move away.
Can I dig to check progress, and when is it safe to disturb the bed?
If you disturb the bed early, you mainly disrupt contact between spawn pieces and the surrounding amended soil. That contact is what allows threads to spread. Instead of digging right away, wait until you see colonization through a gentle mulch lift, and re-check at 2 to 3 week intervals during the colonization phase.
How deep should I place the wood chips or amendments for better colonization?
For wine caps and other wood-loving species, the depth matters because mycelium needs wood-rich material to anchor in. Thin amendments can lead to weak colonization and poor long-term yields. As a rule, follow the layered approach (a few inches of wood chips or compost mix over a stable soil base) rather than just sprinkling a small amount on top.
If my yard soil is poor, can I fully replace it to improve mycelium growth?
Yes, but only partially. In-ground beds usually rely on established local soil biology, so overcorrecting with lots of amendments can unbalance drainage or create heat as organics break down. The safer approach is to improve texture (loam, crumbly structure) and add wood-based or compost-based food sources appropriate to the species, then keep watering consistent.
Is it possible or worth it to sterilize my outdoor soil to eliminate competition?
No, you generally shouldn’t pasteurize the entire outdoor soil. Pasteurizing is best for small amendment batches (wood chips, straw, or similar) to reduce initial competitor load, while leaving surrounding soil intact. Trying to sterilize or heavily treat the whole area often backfires by reducing beneficial organisms and leaving the bed more vulnerable later.
What should I do if weather swings from very dry to heavy rain soon after inoculation?
You can increase success by targeting the “critical window” early: keep moisture and temperature stable for the first 2 to 4 weeks, and only adjust watering gradually after that. If you get a sudden dry spell, re-wet thoroughly to restore contact, then avoid repeated cycling between very wet and very dry.
How do I prevent anaerobic smells or slime from forming in the bed?
Oxygen levels are indirectly affected by water, compaction, and mulch thickness. If you suspect anaerobic conditions, stop overwatering, fluff the top layer slightly (without exposing and drying the spawn), and improve drainage. For prevention, keep mulch in place to reduce evaporation, but avoid packing the bed or creating a sealed surface.
If I see green mold, is cleanup enough, or should I restart?
Green mold early can sometimes be localized, but widespread trichoderma usually means the bed is losing the competition. Removing visibly molded sections helps only if the underlying material still looks healthy and isn’t sour or fully overrun. If smell is strong or contamination spreads beyond small spots, it’s usually faster and more reliable to restart with fresh spawn and pasteurized amendments.
Do I need a casing layer for every soil-grown mushroom, or only certain species?
The casing layer you described applies to Agaricus-type species. For wood-loving outdoor beds like wine caps, you typically do not case the bed, because the fruiting trigger comes from colonization plus seasonal moisture and temperature cues. If you’re not growing Agaricus, adding peat-lime casing can be unnecessary and may change surface moisture behavior.
My bed shows no pins after months, how do I diagnose whether it failed from dryness, cold, or contamination?
If nothing appears for 10 to 12 weeks, the most useful diagnostic is to check spawn health at the bottom of a small test section. If it smells bad, looks slimy, green, or black, the issue is often contamination or moisture failure at inoculation. If the substrate smells normal and you see no white colonization, cold or drying is a common culprit.
Can I reuse colonized material from indoors, and what signs mean I should not transfer it outdoors?
Yes, but treat it as a “phase mismatch” risk. You can use a colonized block, but only if it is healthy and fully colonized, with no off colors or sour odors. If the indoor block was kept too wet, overgrown, or contaminated, you can introduce the problem to the soil bed, where it spreads into the amendments.
Will wildlife protection be necessary only when pins appear, or should I start earlier?
If wildlife pressure is high, protecting the bed early matters more than during pinning only. Lay hardware cloth before you inoculate and keep it on for at least the first several weeks, because birds can rip up uncolonized spawn. For slugs, focus on perimeter barriers and night checks so you don’t miss early pin losses.
If results are slow, should I add more spawn, adjust watering, or restart first?
For most outdoor soil species, a realistic improvement comes from correcting the limiting factor: species choice, amendment type (wood vs compost), moisture stability, and temperature range. Rather than adding more spawn immediately, first verify the bed is still alive by gently checking for healthy white threads, then adjust one variable at a time before taking drastic steps.