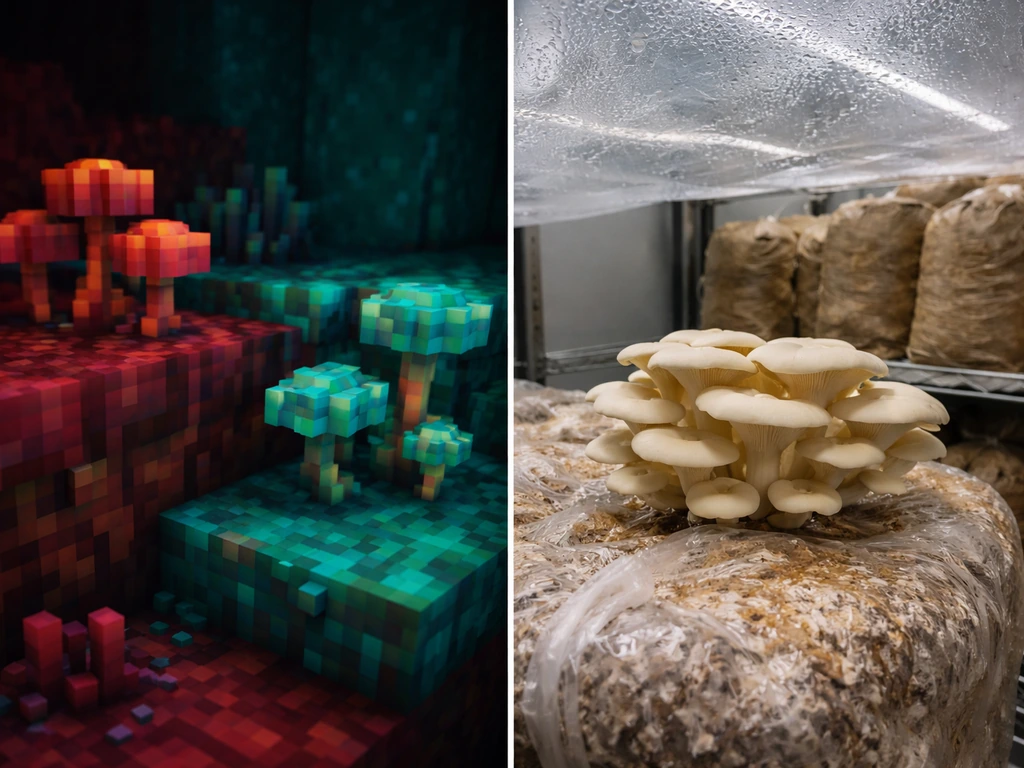
Nether fungus is a Minecraft block, not a real-world mushroom species. Fungus in real soil grows when spores land on organic matter and the moisture and temperature are favorable how do fungus grow in the soil. In the game, crimson and warped fungi grow in the Nether's Crimson Forest and Warped Forest biomes, and you can bone-meal them on their matching nylium blocks to grow them into huge tree-like structures.
How to Grow Nether Fungus in Minecraft and Real Life

Marcus Holloway
7 Jun 2026
In Minecraft's “Around the Block: Warped Forest,” warped fungus is described as common in the biome, including warped fungus types like huge, tree-like fungi that resemble an Overworld forest warped fungi grow in the Nether's Crimson Forest and Warped Forest biomes. There's no direct real-world equivalent you can buy spawn for.
But if you landed here hoping to actually grow something fungal at home, oyster mushrooms are your best match: they fruit in dramatic clusters, grow fast, tolerate beginner mistakes, and have a similar bold, otherworldly look that makes them the closest thing the real world has to Nether fungus energy. Caterpillar fungus has different growing requirements than oyster mushrooms, so it helps to follow a dedicated caterpillar fungus guide before you start.
What nether fungus actually is (and isn't)
In Minecraft, there are two types of Nether fungus: crimson fungus (red, found in Crimson Forests) and warped fungus (blue-green, found in Warped Forests). Both are tied to nylium, a special block infused with fungal spores. Plant the right fungus on the right nylium, apply bone meal, and it shoots up into a giant mushroom-tree. Nether wart is a separate but related Nether ingredient used in brewing potions. None of these have direct scientific counterparts in the real world. They're fantastical, but they're clearly inspired by real fungi, and that's the spirit we're going to work with here.
If you searched for 'how to grow nether fungus' and you want something real to grow, keep reading. If you specifically want to learn how to grow foxfire fungus in the real world, the process differs from oyster mushrooms and requires matching the right cultivation conditions how to grow nether fungus. Oyster mushrooms (Pleurotus ostreatus and related species) are the practical pick. They colonize fast, fruit on cheap substrates, and produce striking cascading clusters that honestly do look like something from another dimension.
The real-world alternative: growing oyster mushrooms indoors
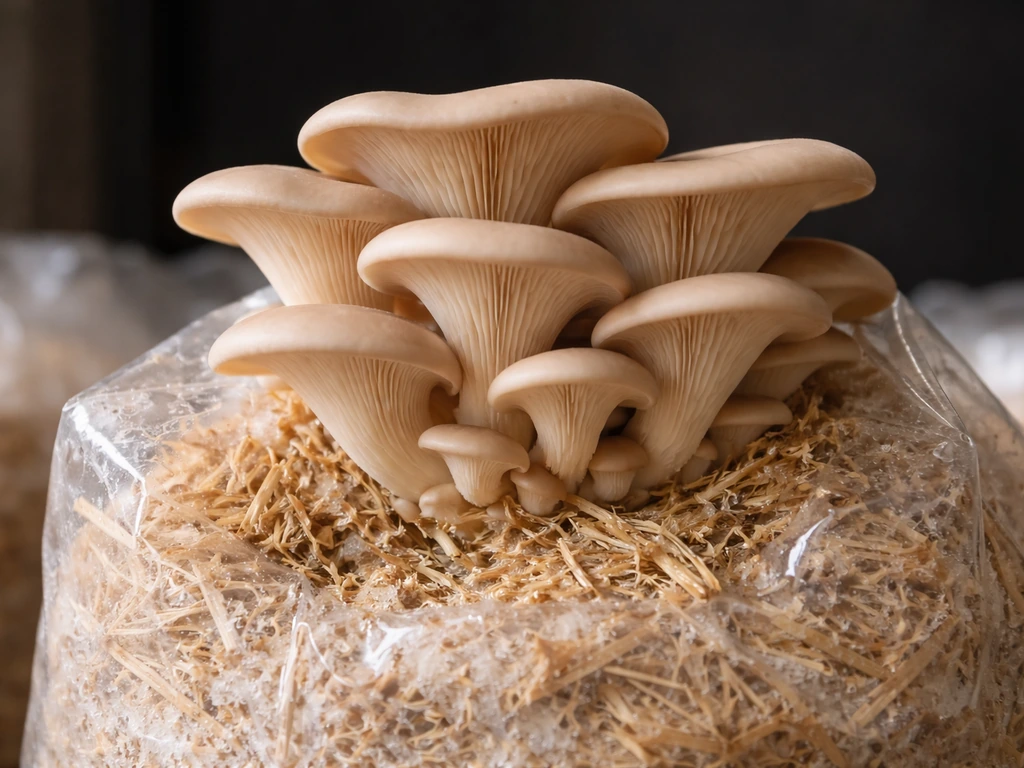
Oyster mushrooms are the go-to beginner species for a reason. They colonize straw, cardboard, or supplemented sawdust aggressively, fruit within a few weeks of inoculation, and tolerate the mild temperature swings of a typical home. Blue oysters (Pleurotus ostreatus) fruit best at 55 to 65°F (13 to 18°C), which is ideal for a basement or garage in cooler months. Pink oysters (Pleurotus djamor) prefer warmer conditions around 70 to 80°F and are better for summer grows.
Either way, you're looking at a beginner-friendly crop that gives you a real harvest in 4 to 8 weeks from inoculation. If you're curious about other unusual species, there are guides on this site covering black fungus mushrooms and other specialty varieties worth exploring once you've got a few oyster grows under your belt.
If you specifically want to learn how to grow termite mushroom, apply the same fundamentals but follow that species' ideal substrate and climate requirements other specialty varieties.
Choosing your grow setup
You don't need a fancy lab. Most home growers start with one of three setups, and all three work. Pick based on your budget and how much space you have.
| Setup | Best For | Cost Range | Humidity Control | Drawback |
|---|---|---|---|---|
| Monotub (modified bin) | Beginners, small batches | $10–$30 | Passive (polyfill ports) | Needs manual misting |
| Martha tent (wire rack + humidity controller) | Multiple bags, scaling up | $80–$200 | Ultrasonic humidifier + controller | Takes more space and wiring |
| Automated Boomr Bin-style box | Set-and-forget approach | $150–$350 | Built-in sensors and fans | Higher upfront cost |
| Simple bag or bucket with holes | Ultra-low budget | $5–$15 | Manual misting only | Most labor-intensive |
For a first grow, a modified plastic tub with two 2-inch polyfill-stuffed holes on the sides is genuinely enough. Drill the holes, stuff with polyfill (this acts as your filter), and you have passive fresh air exchange. Mist the inside walls two or three times a day during fruiting to keep humidity up. If you want to skip the babysitting, a basic inkbird humidity controller paired with an ultrasonic humidifier inside a small tent is the upgrade that makes the biggest difference.
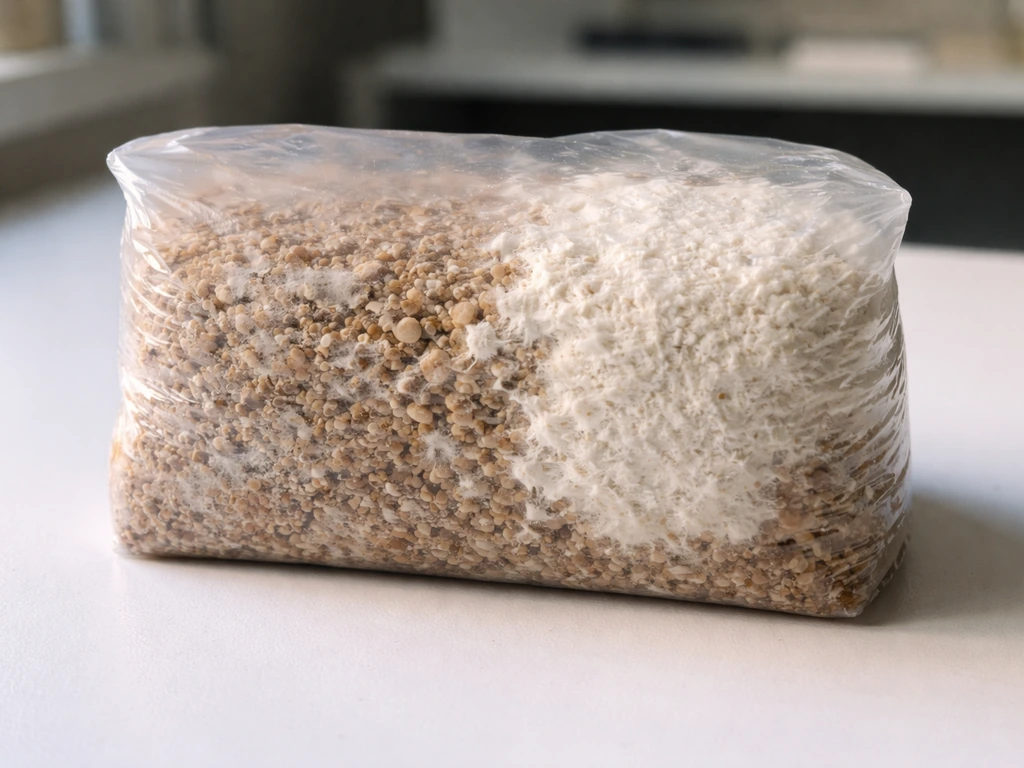
Substrate and inoculation
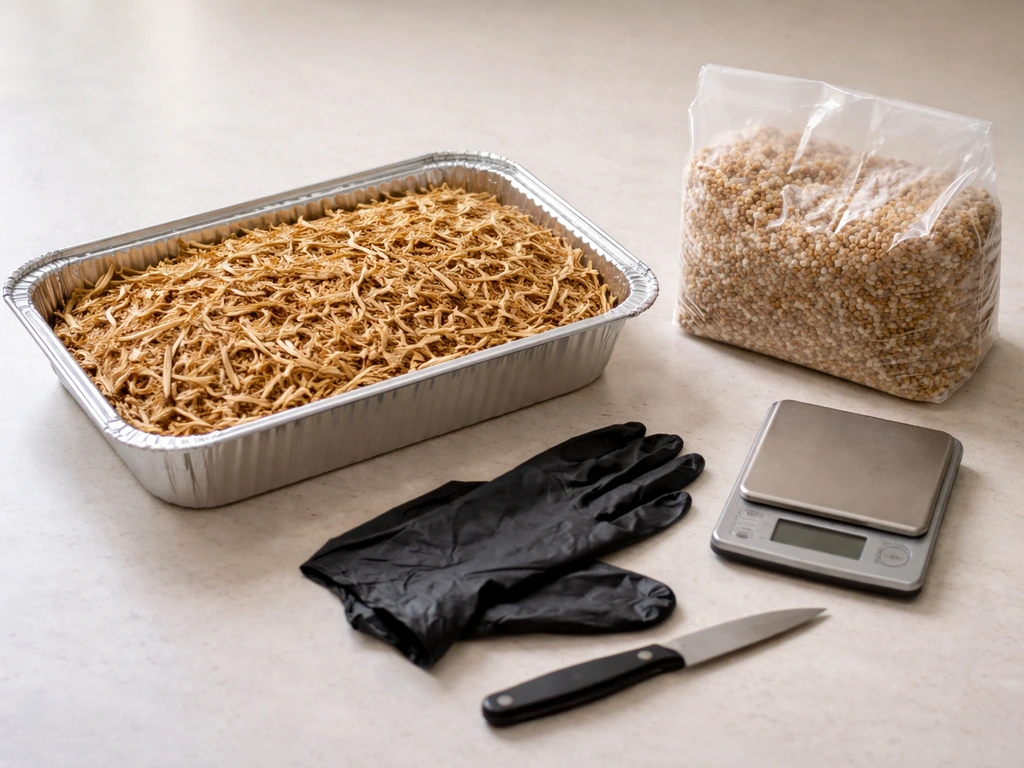
Picking your spawn
Spawn is mushroom mycelium already colonizing a carrier material. For oysters, grain spawn and sawdust spawn are the two most common types. Grain spawn (usually rye or wheat berries) colonizes faster and is better for mixing into bulk substrate. Sawdust spawn is slower but cheaper and works well for log or straw inoculation. Buy grain spawn from a reputable supplier like Fungi Ally, North Spore, or a local mycology shop. Avoid anything that looks slimy, smells off, or has visible green, black, or orange patches; those are contamination red flags before you even open the bag.
Substrate prep
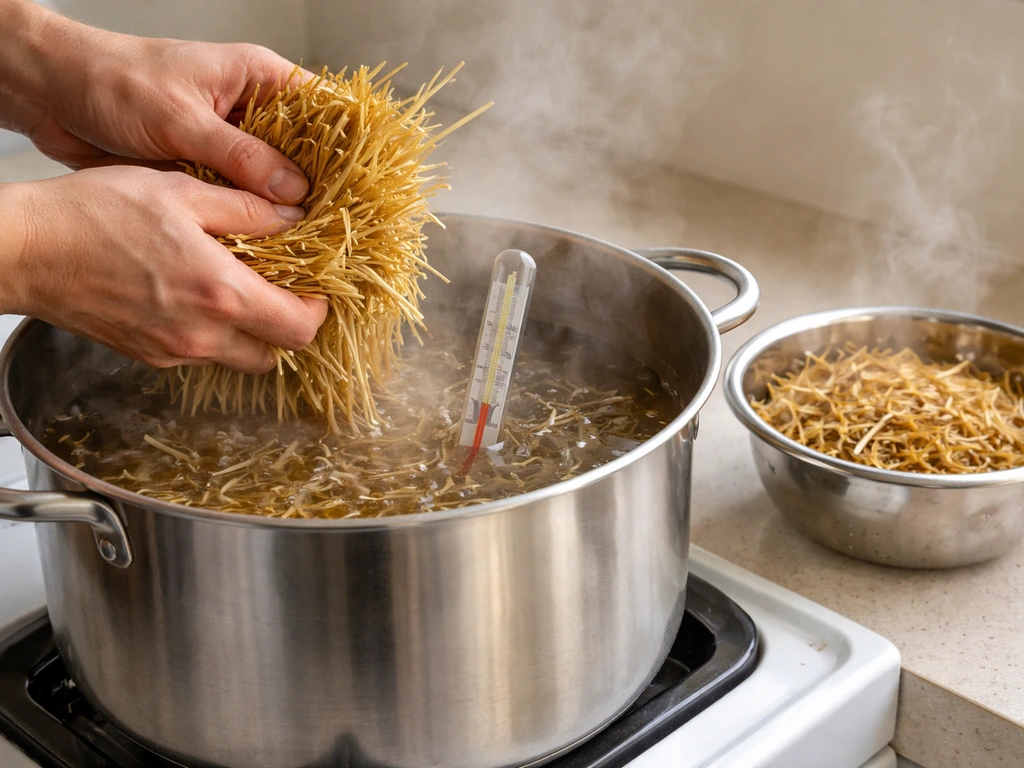
Straw is the easiest substrate for oyster mushrooms. Chop it into 2 to 4 inch pieces, then pasteurize it by soaking in 160 to 180°F water for 1 to 2 hours, or pour boiling water over it and let it sit for 2 hours covered. Pasteurization kills competing organisms without nuking the beneficial bacteria that actually help oysters get established. For a more nutritious mix, use supplemented hardwood sawdust and sterilize at 250°F (121°C) for 2 to 2.5 hours in a pressure cooker. The higher the nutrition in your substrate, the more you need sterilization rather than pasteurization, because contamination risk goes up with nutrient density.
After pasteurization, let the substrate cool to below 80°F before inoculating. This is the step people rush and then wonder why they got green mold. Squeeze a handful of substrate: it should hold its shape and release only a couple of drops of water. That's field capacity. Too wet and you're inviting bacterial rot; too dry and the mycelium can't travel.
Inoculation
Work as cleanly as possible. Wipe your hands, tools, and work surface with isopropyl alcohol. Mix grain spawn into your cooled substrate at a ratio of about 10 to 20 percent by weight (so 100g spawn per 500 to 1000g dry substrate). Layer it into your container, seal or close it up, and label it with the date. That's inoculation done. The mycelium will start spreading through the substrate within 3 to 7 days.
Environmental targets for fruiting
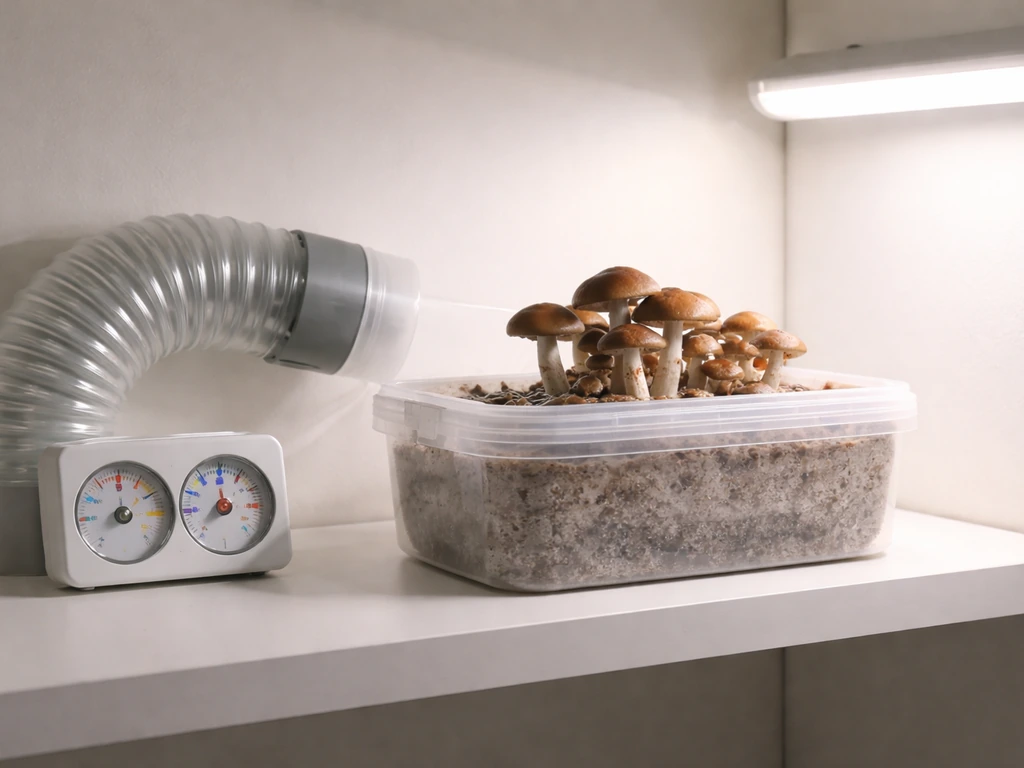
Getting colonization right is mostly about not messing things up. Getting fruiting right requires you to actively manage four things: temperature, humidity, fresh air, and light. ATTRA (NCAT) emphasizes that fruiting success depends on controlling temperature, humidity, light, and air exchange, and that mushrooms need oxygen while carbon dioxide is removed during fruiting temperature, humidity, fresh air, and light.
| Factor | Colonization Target | Fruiting Target |
|---|---|---|
| Temperature (blue oyster) | 70–75°F (21–24°C) | 55–65°F (13–18°C) |
| Relative Humidity | Keep substrate moist; ambient RH less critical | 85–95% RH |
| CO₂ Level | Elevated CO₂ is fine (keep container sealed or nearly sealed) | 800 ppm or lower (0.08% or less) |
| Fresh Air Exchange | Minimal; limit contamination entry | 4–8 FAE events per day or continuous low flow |
| Light | Not needed | 500–1,000 lux, 12 hours on / 12 off |
The CO2 target is the one growers overlook most. High CO2 during fruiting causes long, spindly stems and tiny caps, which is the classic sign your grow isn't getting enough fresh air. Penn State Extension puts the target at 0.08 percent CO2 or lower, which is roughly 800 ppm. If you can afford one, a cheap CO2 sensor pays for itself in better harvests. During fruiting, you want stale air leaving and fresh air coming in regularly, whether that's manual fanning a few times a day or a small automated fan on a timer.
Humidity during fruiting is non-negotiable. Low humidity is the most common reason pins abort or caps crack. Target 85 to 95 percent relative humidity and mist the walls of your container (not the mycelium directly) to keep it up. A hygrometer costs about five dollars and removes all the guesswork.
Step-by-step grow timeline
- Day 1: Pasteurize or sterilize your substrate, let it cool completely to below 80°F.
- Day 1–2: Inoculate with grain spawn at 10–20% spawn rate, pack into container, seal.
- Days 3–7: White mycelium threads (rhizomorphs) become visible spreading from spawn points. Keep at 70–75°F. No light needed. Minimal disturbance.
- Days 7–21: Full colonization underway. Substrate will look fully white and feel firm. Some metabolic heat is normal. Check for contamination (green, black, or slimy patches).
- Days 15–40: Full colonization complete (oysters colonize faster, closer to 15–21 days on straw). Time to initiate fruiting conditions.
- Fruiting initiation: Drop temperature to 55–65°F (blue oyster), increase humidity to 85–95%, introduce fresh air exchange, and add 12 hours of indirect light per day.
- Days 3–7 after fruiting initiation: Tiny pinheads appear. Do not disturb. Keep humidity up.
- Days 7–14 after pinning: Clusters grow rapidly. Harvest when caps are still slightly cupped inward and before the edges wave outward and start releasing spores.
- Harvest: Twist and pull the entire cluster at the base. Do not leave stubs, as they rot and invite contamination.
- Post-harvest: Remove any leftover substrate debris, let the block rest for 5–10 days with reduced watering, then resume fruiting conditions to trigger a second flush.
- Second and third flushes follow the same cycle, typically 7–14 days apart. Yields decrease with each flush.
Harvest and storage
Fresh oyster mushrooms store in a paper bag in the refrigerator for 5 to 7 days. Avoid plastic bags as they trap moisture and accelerate decomposition. For longer storage, slice and dehydrate at 95 to 115°F until fully dry and brittle, then store in an airtight jar away from light. Dried oysters rehydrate well in soups and sauces and keep for up to a year. If you want to use them fresh, do it within the first 3 days for the best texture.
Troubleshooting common failures
No visible mycelium growth after 7 days
Check temperature first. If the substrate was too hot when you inoculated (above 85°F), you may have killed the mycelium. Also check the spawn itself: if it smells sour or shows any color other than white, it was likely already contaminated when you received it. Finally, check moisture. Substrate that is too dry will stall colonization almost completely.
Colonization stalled partway through
This usually means the temperature dropped too low, the substrate dried out, or a pocket of contamination is blocking the mycelium's path. If you can see a clear line where the white mycelium stopped, look just beyond it for any discoloration. Cut that section out if it's a bag grow, or accept partial colonization and try to initiate fruiting with what you have. Partial colonization still fruits, just with lower yields.
Green, black, or pink mold
Green mold is almost always Trichoderma, which outcompetes mushroom mycelium and spreads fast. If it's a small spot early in colonization, you can sometimes isolate it with tape, but honestly, once Trichoderma gets going, that container is done. Toss it outside, away from your grow area, in a sealed bag. Black mold and pink bacterial blotch usually mean the substrate was too wet or not pasteurized long enough. The fix for future grows: longer pasteurization, correct field capacity moisture, and cleaner inoculation technique.
Pins form but abort before developing
Aborted pins are almost always a humidity crash or a CO2 spike. Check your hygrometer during the fruiting phase. If humidity drops below 80 percent for even a few hours, early pins die. Increase misting frequency or dial in your humidifier. If humidity is fine, the problem is CO2: fan or ventilate more aggressively. Long, thin stems with tiny caps confirm the CO2 diagnosis. More fresh air exchange is the fix.
Fungus gnats or other pests
Fungus gnats are the most common pest problem in home grows. Their larvae burrow into substrate and eat mycelium. Yellow sticky traps near your grow area catch adults before they lay eggs. Keep your grow space clean, remove spent substrate promptly after final flushes, and consider adding a fine mesh or screen over any passive air holes. Avoid overwatering, since consistently wet substrate is exactly the environment gnats prefer.
Your next steps right now
Order grain spawn today from a reputable supplier. While you wait for it to arrive, source your substrate (straw bales are at most farm supply stores), grab a monotub or a large plastic bin, and pick up a cheap hygrometer and a spray bottle. That's a complete beginner setup for under $40. If your first grow has a contamination issue, treat it as a learning run and adjust one variable at a time on the second.
Most growers get a solid harvest by their second or third attempt. If you want to branch out after oysters, black fungus mushrooms, lion's mane, and other specialty species follow similar principles with some species-specific tweaks. The fundamentals you learn on an oyster grow transfer directly. If you want, you can use the same indoor approach to grow other fungus varieties at home too, not just oysters grow fungus at home.
FAQ
Is there any way to grow Minecraft nether fungus blocks as a real plant at home?
No, the crimson and warped “nether fungus” from Minecraft do not correspond to a real, purchasable organism or a one-to-one species that can be cultivated like a mushroom crop. The closest practical substitute is growing a fast, clustered edible mushroom (like oysters) that gives a similar dramatic, otherworldly look.
Can I grow nether fungus style in the Nether biome sense, by using extreme heat or low humidity?
For real-world substitutes, no. Mushrooms generally need stable humidity during fruiting and the right temperature range for the specific oyster type. Extreme conditions typically cause aborted pins, cracked caps, or stalled colonization, even if the substrate is nutritious.
If my substrate smells sour or looks different, should I throw it out immediately?
If you see green, black, or orange patches, or you notice strong off-odors, do not “wait and see.” Isolate the bag or bin, remove it from your grow area, and start fresh, because common competitors like Trichoderma can spread quickly through nearby containers.
What is the quickest sign that my CO2 is too high during fruiting?
Watch the stem and cap shape. Long, thin stems with tiny caps is the classic pattern of excessive CO2. The practical fix is increasing fresh air exchange (more frequent fanning or a timer-controlled exhaust), not adding more mist.
How often should I mist, and should I mist the mycelium directly?
Mist the container walls, not the mycelium. During fruiting, misting can be multiple times per day depending on your space and humidity, and the goal is to keep relative humidity roughly in the 85 to 95 percent range, so measure with a hygrometer if possible.
My humidity drops at night. Will that ruin the whole grow?
It can, especially for early pins. If you cannot manually mist reliably overnight, use a small tent plus a controller and humidifier so the environment stays within range. Even a few hours below about 80 percent RH can abort pins.
Should I use pasteurization or sterilization, and how do I decide?
Use pasteurization for lower-nutrition straw and typical basic mixes, since it suppresses competitors without fully removing beneficial microbes. Use pressure-cooker sterilization for higher-nutrition supplemented substrates, because dense nutrition increases contamination risk if you only pasteurize.
What happens if I inocize before the substrate has cooled enough?
If the substrate is still hot (commonly above the mid-80s °F range), you can damage or kill the mushroom mycelium, causing colonization to stall or fail. Always cool below 80°F before mixing spawn, then verify field capacity moisture.
How do I know my substrate moisture is correct (not too wet, not too dry)?
Use the squeeze test for field capacity: it should hold its shape and release only a couple of drops. If it pours water or feels dripping, reduce moisture in future batches, because wet conditions raise bacterial blotch risk.
What should I do if only part of my bag or bin colonizes white mycelium?
Partial colonization usually can still fruit, but yields are lower. If you see a clear stop line, inspect just beyond it for discoloration, remove infected sections if the setup allows, and initiate fruiting with the clean portion rather than discarding everything automatically.
Are fungus gnats preventable without pesticides?
Yes. Use yellow sticky traps for adults, keep the area clean, remove spent substrate promptly, and consider adding fine mesh over passive air openings. Also avoid overwatering, since consistently wet substrate makes gnats more likely to establish.
When should I harvest, and how do I store oysters for best quality?
Harvest when caps are fully formed but not overly mature. For storage, refrigerate fresh oysters in a paper bag for about 5 to 7 days, but avoid plastic bags because trapped moisture speeds up spoilage.