If you're searching for how to grow black fungus mushroom, you're almost certainly trying to cultivate Auricularia polytricha (wood ear or cloud ear), Auricularia auricula-judae (Jew's ear), or possibly black trumpet (Craterellus cornucopioides). “Black trumpet” commonly refers to Craterellus cornucopioides (also called horn of plenty or trumpet of the dead) black trumpet commonly refers to Craterellus cornucopioides.
How to Grow Black Fungus Mushroom at Home Step by Step

Marcus Holloway
15 May 2026
These are legitimate edible and medicinal mushrooms with a long history in Asian cooking and herbal medicine. What you're NOT trying to do is grow household mold, which is a completely different organism, a health hazard, and something you'd clean up rather than cultivate. This guide covers the full grow process for the most popular black fungus mushroom: Auricularia polytricha, which is the easiest to grow at home and the most rewarding.
What 'Black Fungus' Actually Means (and What It Doesn't)
The term 'black fungus' gets used loosely for a few very different things, so it's worth being specific before you buy anything or start building a grow setup.
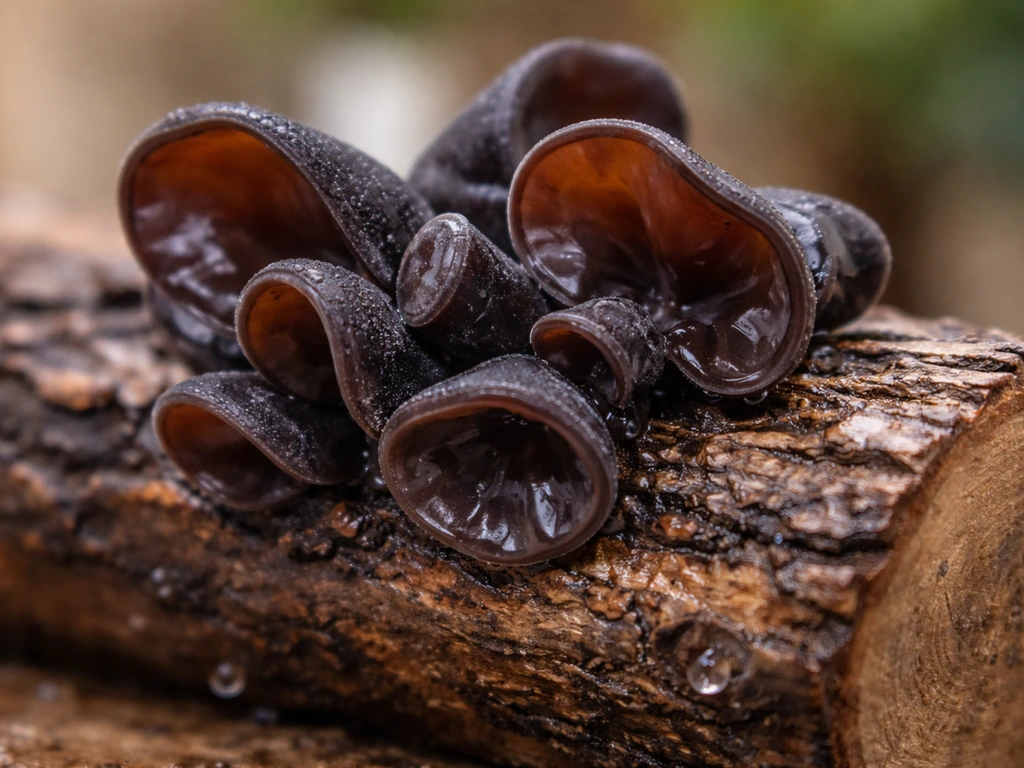
- Auricularia polytricha (cloud ear, wood ear, black fungus): A rubbery, ear-shaped edible mushroom common in Chinese stir-fries and hot-and-sour soup. Dark brown to black when fresh, shrinks dramatically when dried. This is what most people mean when they say 'black fungus mushroom.' It's a wood-decomposing species that fruits on hardwood logs and sawdust substrates.
- Auricularia auricula-judae (Jew's ear / wood ear): Very similar to A. polytricha, often used interchangeably in recipes and cultivation. Slightly smaller ear shape, same cultivation requirements.
- Black trumpet (Craterellus cornucopioides): A hollow, funnel-shaped wild mushroom also called horn of plenty. Highly prized in culinary circles, but almost impossible to cultivate at home because it forms a mycorrhizal relationship with tree roots. You forage this one, you don't farm it.
- Household black mold (Stachybotrys, Cladosporium, Aspergillus): None of these are edible, all are potentially harmful, and the CDC explicitly recommends N95 respirators, goggles, and gloves just for cleaning it up. You are not trying to grow this. If you see it in your grow space, remove it and discard affected materials.
For this guide, we're focusing on Auricularia polytricha because it's the easiest true 'black fungus' to grow indoors, colonizes reliably on sawdust, fruits quickly, and handles a wider temperature range than many other specialty mushrooms. If you're curious about growing other unusual fungi, the cultivation approach differs significantly from what you'd use for a wood-decomposing species like this one. If you want a quick, practical overview of the full process, follow this step-by-step guide for how to grow foxfire fungus from start to harvest growing other unusual fungi.
Pick Your Grow Method and Get Good Spawn
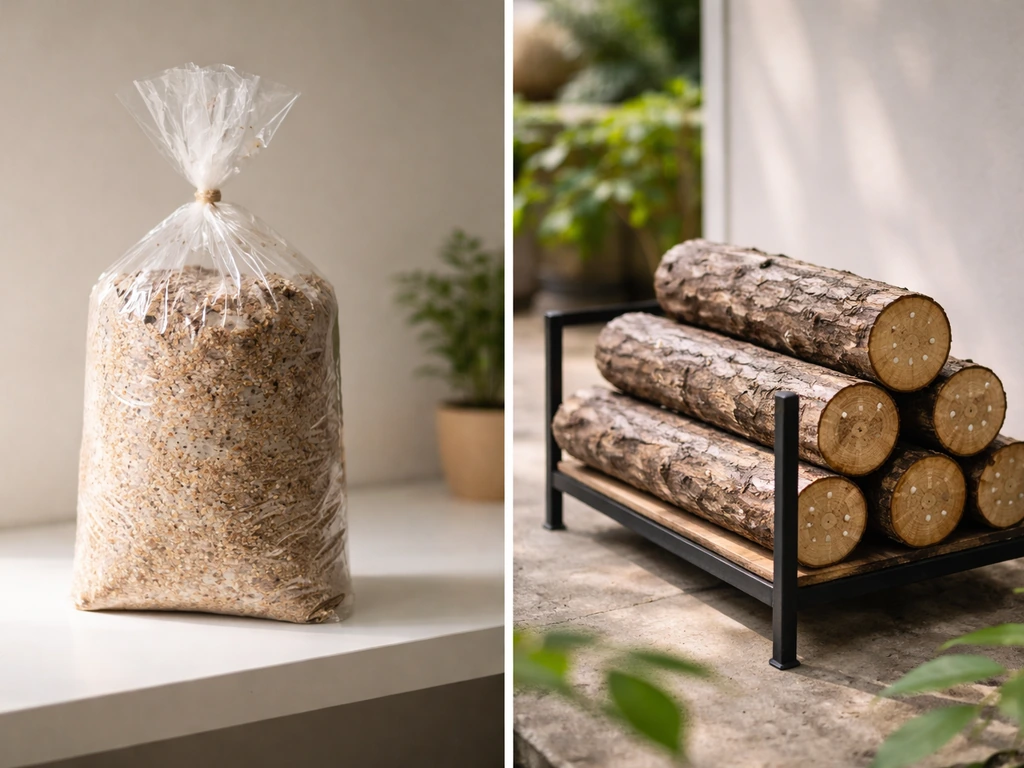
You have two realistic options for home cultivation: inoculated sawdust grow bags (indoor, faster, year-round) or inoculated hardwood logs (outdoor or indoor, slower, longer fruiting lifespan). For a first grow, bags are the better call. They colonize in 3 to 5 weeks, are easy to set up in a spare closet or tent, and give you results before you've lost motivation. Logs take months to colonize but will fruit for 3 to 5 years once established, so they're worth considering once you've got a feel for the species.
For spawn, buy grain spawn or sawdust spawn from a reputable supplier. Don't try to make your own culture from dried black fungus you bought at an Asian grocery store for your first grow. Contamination from an unverified culture is the most common reason beginners get nothing but green mold. Reputable online spawn suppliers will sell Auricularia polytricha grain spawn in 1 lb to 5 lb quantities.
One pound of grain spawn will inoculate roughly 5 lbs of dry substrate in sawdust bags. If you want to start even simpler, some suppliers sell pre-inoculated ready-to-fruit bags that just need humidity and airflow. These are a great way to learn what healthy mycelium and fruiting bodies look like before you run your own inoculations.
Substrate: What to Use and How to Prepare It
Auricularia polytricha is a wood-decomposing fungus, so it needs a wood-based substrate. It grows naturally on dead hardwood in humid forests, and your substrate needs to mimic that. The two most reliable substrate recipes for home growers are:
- Basic hardwood sawdust mix: 85% hardwood sawdust (oak, alder, or beech work well) + 15% wheat bran or rice bran. This is the workhorse recipe used commercially and in most research. The bran adds nitrogen and accelerates colonization.
- Supplemented sawdust mix (slightly more aggressive): 75% hardwood sawdust + 15% cottonseed hulls + 10% wheat bran. Penn State's specialty mushroom production guides highlight cottonseed hulls as a useful addition for Auricularia species. Expect faster colonization but also higher contamination risk if sterilization is sloppy.
Target moisture content is 50 to 65%. The squeeze test works fine: grab a handful and squeeze hard. A few drops of water should come out, but not a steady stream. Too wet and you'll breed bacteria. Too dry and colonization stalls. Mix your dry ingredients first, then add water gradually and mix thoroughly.
Sterilization vs. Pasteurization: Which Do You Need?
For supplemented sawdust bags (anything with bran added), you need full sterilization at 121°C (250°F) for 1 to 2.5 hours in a pressure cooker or autoclave. The supplementation makes the substrate rich enough for competitor molds to take over if you only pasteurize. A standard 23-quart pressure cooker can handle two to four 5-lb bags per run. Out Grow's cultivation protocols for Auricularia polytricha specify 80 minutes at 121°C for sawdust bags as a minimum. I'd go 2 hours to be safe, especially if your bags are packed tightly. Let bags cool completely to room temperature (below 25°C) before inoculating. Inoculating warm bags is a fast track to contamination.
Inoculation and Incubation: Getting Colonization Right
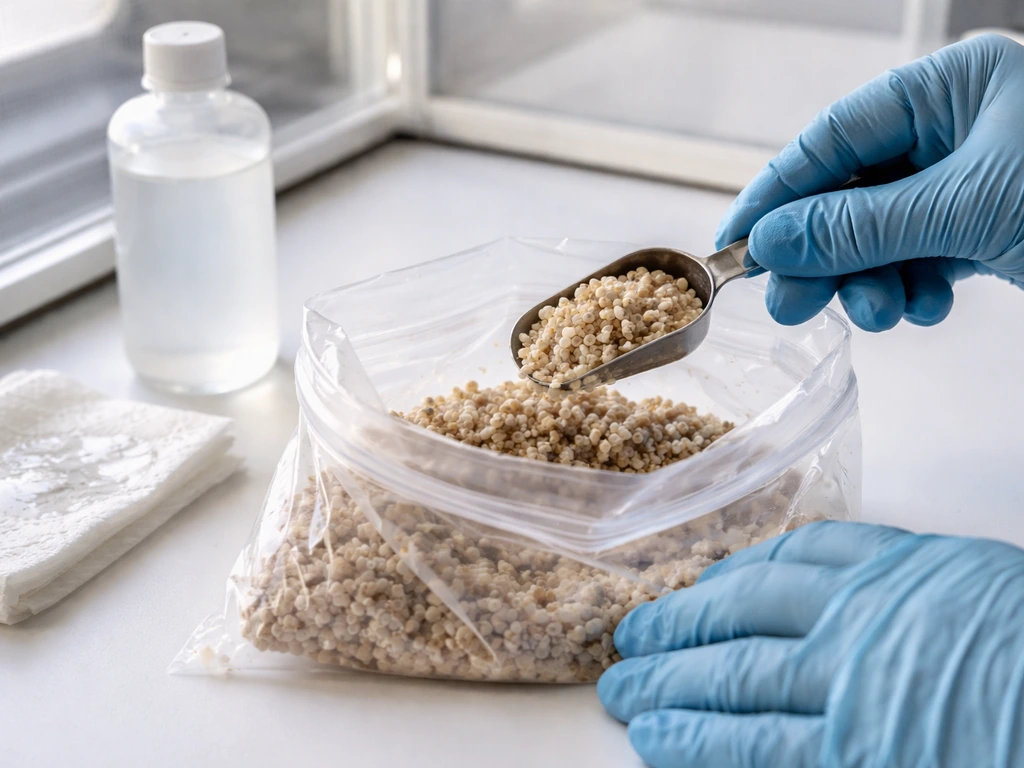
Inoculation is the riskiest step in terms of contamination. If you’re trying to grow termite mushroom instead, you’ll want to research its specific substrate, incubation, and fruiting requirements since they can differ from typical black fungus how to grow termite mushroom. Work as cleanly as possible: wipe surfaces with 70% isopropyl alcohol, wear gloves, and work near a still-air box or laminar flow hood if you have one. For grain spawn inoculated into sawdust bags, a spawn rate of 15 to 20% by weight is a good target (about 1.5 to 2 lbs of grain spawn per 10 lbs of dry substrate in bags). Higher spawn rates mean faster colonization and less opportunity for contaminants to get established.
Once inoculated and sealed, move bags to your incubation space. Auricularia polytricha incubates well at 22 to 28°C (72 to 82°F). Keep them in the dark, because light during colonization doesn't help and can stress early mycelium. Humidity during incubation should stay around 90 to 95%. The bags themselves maintain internal humidity, so if you're using sealed poly bags, you mostly just need to control room temperature. Expect full colonization in 3 to 5 weeks. You'll see white to grayish mycelium spreading through the substrate. If you see green, black patches (that aren't the natural darkening of colonized substrate), or a sour smell, that's contamination.
One thing worth knowing about Auricularia: the mycelium can look patchy or uneven compared to oysters or shiitake. It's not the most visually reassuring colonization you'll ever see, but if it smells earthy and neutral, trust the process.
Fruiting Setup: Humidity, Airflow, Light, and Timing
Once bags are fully colonized, it's time to trigger fruiting. The key shift is: lower CO2, raise fresh air exchange, drop temperature slightly, and maintain high humidity. Here's what that looks like in practice.
| Parameter | Incubation Target | Fruiting Target |
|---|---|---|
| Temperature | 22–28°C (72–82°F) | 21–28°C (70–82°F), slightly cooler end preferred |
| Relative Humidity | 90–95% | 85–95% |
| CO2 / Fresh Air | High CO2 OK, low FAE | Low CO2, regular FAE (2–4x daily minimum) |
| Light | Dark or dim | Indirect light, 12 hrs on/off cycle |
| Bag/Block Status | Sealed | Open or scored to expose substrate surface |
To initiate fruiting, cut or poke the bags open (X-cuts or circular holes work well) to expose the colonized substrate surface. In a fruiting chamber or grow tent, mist the exposed areas two to three times daily to maintain humidity. If you already have the right humidity and airflow in place, the next thing to manage is timing, so your mushrooms develop ears instead of drying out how to grow fungus at home.
Auricularia polytricha responds well to high humidity: 85 to 95% is your range. If your hygrometer drops below 80%, you'll get cracked, dried-out fruiting bodies. A small ultrasonic humidifier on a timer and a fan on the opposite wall running intermittently will get you there. Avoid misting directly onto the fruiting bodies once they're forming, as pooling water promotes bacterial rot.
Fruiting pins will appear within 7 to 14 days of initiating fruiting conditions. They start as tiny dark knobs, then unfurl into the characteristic ear or ruffled sheet shape. Full development from pinning to harvest takes about 10 to 14 more days, depending on temperature and humidity.
Harvesting, Drying, and Getting a Second Flush
Harvest when the fruiting bodies are fully expanded but before the edges start to curl under or the surface shows any sliminess. Twist and pull, or use a clean knife at the base. Don't leave stubs behind as they'll rot and invite contamination. A single bag can produce 100 to 200+ grams of fresh black fungus per flush, though your first flush is often smaller as the mycelium establishes.
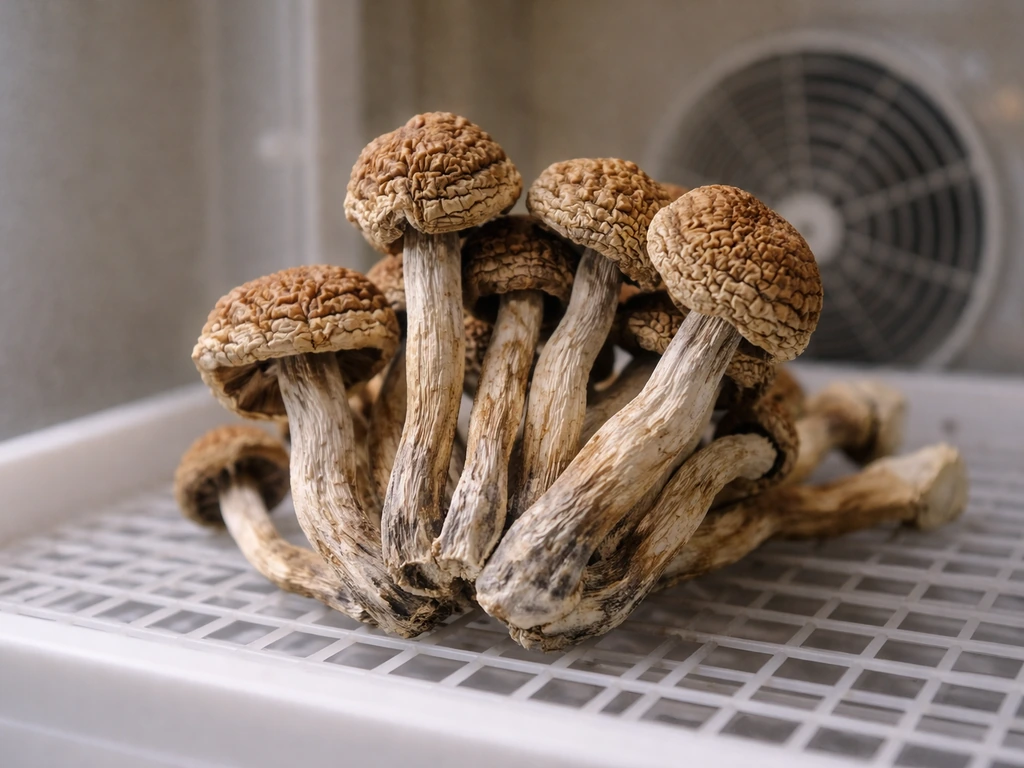
Fresh black fungus keeps in the fridge for 3 to 5 days. The best way to store a larger harvest is to dry it: a food dehydrator at 45°C (113°F) for 6 to 8 hours works perfectly. Dried black fungus shrinks to about 10% of its fresh weight and rehydrates in 20 to 30 minutes in warm water before cooking. Dried and stored in an airtight container away from light, it keeps for 12 months or more.
After the first flush, scrape off any old stubs and dried mycelium from the cut surfaces, then resume misting and fruiting conditions. Most bags will give 2 to 3 good flushes before yields decline significantly. Between flushes, some growers soak their bags in cold water for 12 hours (a technique called cold shocking) to rehydrate the substrate and stimulate the next flush. It genuinely helps, especially for later flushes.
Troubleshooting: What Went Wrong and How to Fix It
Green, Black, or Pink Patches (Contamination)
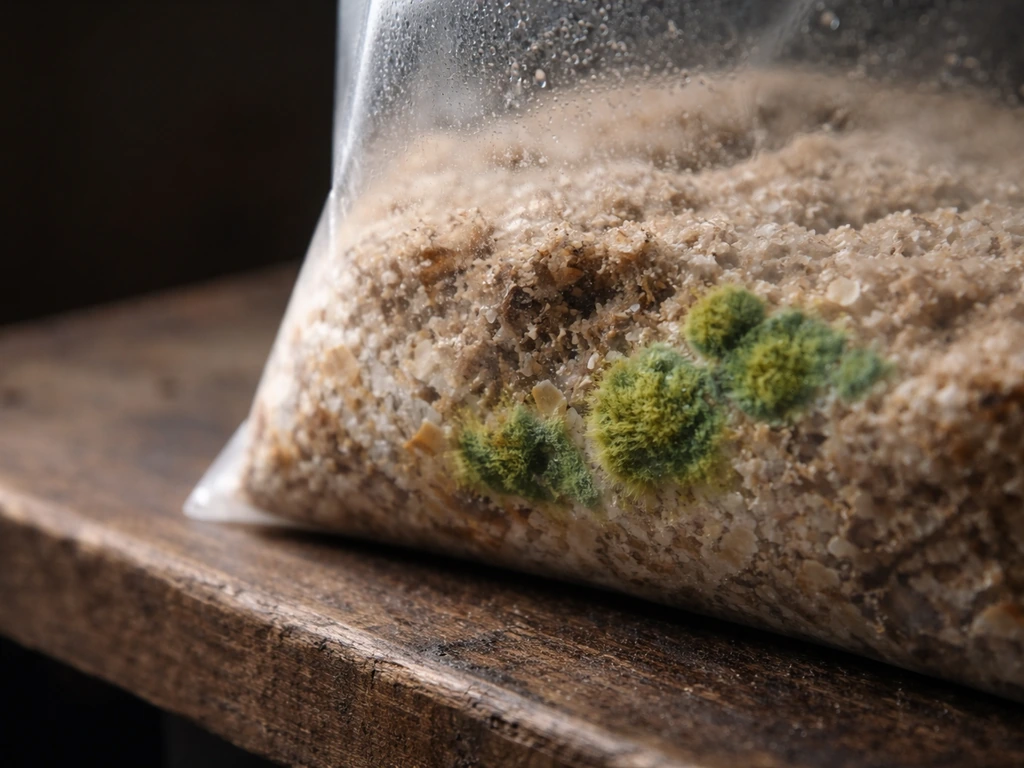
Green mold (Trichoderma) is the most common contaminant in sawdust grows. It appears as bright green patches, usually near inoculation points or cuts in the bag. If you catch it early and it's isolated to a small area, you can seal that section with micropore tape and monitor. If it's spreading, remove the bag from your grow space immediately and bag it in a sealed trash bag before disposing.
Don't open contaminated bags in your grow room or near other cultures. Remember that the black fungus mycelium itself can look grayish or dark, so don't confuse normal colonization with contamination. If it smells earthy and the dark area is uniform and spreading outward from the inoculation point, that's your mushroom. If it smells sour, ammonia-like, or has a dusty colored patch, it's not.
No Growth or Very Slow Colonization
Check temperature first. Below 18°C and colonization slows to a crawl. Check that your spawn was healthy when you received it (white and fluffy, not green or slimy). Check moisture content: substrate that's too dry or too wet will both stall colonization. If you're past week 5 with no visible mycelium at all, the spawn likely died (possibly from inoculating into still-warm substrate) or was contaminated before you started. Start fresh with new spawn.
No Fruiting Bodies After Full Colonization
This is almost always a fruiting trigger issue. Make sure you've actually opened the bags to expose the substrate surface. Increase fresh air exchange: CO2 buildup from sealed or poorly ventilated spaces inhibits pinning. Double-check your humidity is genuinely at 85%+ with a calibrated hygrometer (cheap ones drift). Try a temperature drop of 3 to 5°C for 24 to 48 hours to simulate the natural temperature fluctuation that triggers fruiting in the wild.
Fruiting Bodies Drying Out or Cracking
Humidity is too low or airflow is too aggressive and direct. Reposition your fan so it circulates air in the chamber without blowing directly onto fruiting bodies. Increase misting frequency. If you're in a dry climate, a second humidity source in the tent can help stabilize levels.
Slimy or Rotting Fruiting Bodies
Usually caused by water pooling on or around the mushrooms combined with poor air exchange. Back off on direct misting of the fruiting bodies themselves, increase fan time to move more air through the chamber, and harvest promptly when mushrooms are mature. Auricularia polytricha is a bit more rot-resistant than oysters but will still succumb to bacterial wet rot in stagnant, overly wet conditions.
Your Next Steps Today
If you're starting from scratch, here's the practical order of operations to get your first black fungus grow underway this week:
- Order Auricularia polytricha grain spawn from a reputable supplier (1 lb to start).
- Source hardwood sawdust (fuel pellets made from hardwood work perfectly and are easy to find at hardware stores), wheat bran, and polypropylene filter patch bags.
- Mix your substrate (85% sawdust, 15% bran), adjust to 60% moisture, fill bags, and pressure cook at 121°C for 2 hours.
- Cool completely, inoculate at 15-20% spawn rate in a clean environment, seal bags.
- Incubate at 24–26°C in the dark for 3 to 5 weeks.
- When fully colonized, move to your fruiting chamber, cut the bags open, and initiate fruiting conditions (85-95% humidity, fresh air exchange, indirect light).
- Mist 2 to 3 times daily and harvest when fully expanded.
The whole process from inoculation to first harvest typically takes 5 to 8 weeks. Black fungus is genuinely one of the more beginner-friendly specialty mushrooms once you understand the substrate and humidity requirements. It's more forgiving on temperature than many species, colonizes aggressively, and the dried product stores so well that you'll always have something useful from the harvest. If you enjoy the process and want to branch out, the cultivation fundamentals you learn here transfer directly to other wood-loving species and will serve you well as you explore more challenging grows. If you also want the practical steps specifically for termite mushroom, the setup and substrate choices will differ, so plan accordingly other wood-loving species.
FAQ
Can I grow black fungus from dried grocery “black fungus” instead of buying spawn?
For most beginners, no. Dried products are not reliable cultures, and starting from them can introduce unknown contaminants or species. Use purchased, labeled Auricularia polytricha spawn (grain or sawdust), or start with pre-inoculated ready-to-fruit bags so you learn the growth pattern before doing any inoculation.
What’s the best substrate wood to use for Auricularia polytricha at home?
Stick to hardwood sawdust that is free of treated or painted wood. Untreated hardwoods like oak, beech, alder, or maple are common choices. Avoid softwoods and anything that smells like chemicals, resin-heavy woods, or lumber treated with preservatives, because they can inhibit colonization or add unwanted compounds.
How do I know if my “patchy” mycelium is normal or contamination?
Auricularia often colonizes in uneven patches and can look grayish or dark, especially where the bag is more humid. The decision aid is smell and spread: healthy growth should look consistently like mushroom mycelium spreading outward from inoculation points, with an earthy or neutral odor. Green, fuzzy spots with a sour or ammonia-like smell, or contamination that rapidly expands, indicates a problem.
My bag smells bad but the mycelium looks mostly white or gray, what should I do?
Don’t keep waiting if the odor is sour, ammonia-like, or distinctly unpleasant. Smell is an early contamination indicator even before obvious color appears. Isolate the bag immediately, and if it worsens, discard it sealed to avoid spreading spores.
Do I need a pressure cooker, or can I pasteurize instead for simple sawdust bags?
If your substrate is supplemented (bran added), pasteurization is risky, full sterilization at about 121°C is the reliable route. Unsupplemented sawdust can sometimes work with careful pasteurization, but outcomes are less consistent. If you want the most forgiving first run, sterilize supplemented bags and follow the stated sterilization time for your bag size.
What humidity should I target during incubation versus during fruiting?
Incubation should be high humidity (around the mid-90% range), but often you rely on the sealed bag to maintain it, with the main control being temperature. Fruiting needs active management, target roughly 85% to 95% and ensure fresh air exchange is present to prevent CO2 buildup.
My mushrooms look dry or cracked, why, and what’s the fastest fix?
This usually means humidity is below target or airflow is too strong and directly drying the surface. First, verify your hygrometer with calibration or at least compare it against a known reliable reading. Then increase misting frequency, reduce direct fan blast onto the fruiting area, and stabilize the chamber so humidity stays consistently above 80%, ideally mid-80s to 90%.
Do I mist the fruiting bodies directly, or only the chamber?
Avoid soaking the fruiting bodies once ears are forming. Pooling water can lead to bacterial wet rot. Mist the exposed substrate surface or chamber air enough to keep humidity high, and aim for gentle, frequent humidification rather than heavy direct wetting.
How much fresh air exchange is enough to start pins without drying everything out?
You want CO2 down but humidity up. In practice, use intermittent fan cycles rather than continuous strong airflow, and place the fan to circulate air across the chamber without blasting the mushrooms. If pins fail to appear, increase fresh air exchange slightly, but if fruits dry or curl, reduce air velocity and compensate with humidity.
My bag has no pins after I open it, what should I troubleshoot first?
Check the basics in order: confirm the bag was actually opened to expose colonized substrate, verify humidity with a calibrated hygrometer, ensure fresh air exchange is occurring, and confirm temperature shift is present (a small drop, a few degrees for a day or two, can help). Also confirm the bag is fully colonized and that you did not accidentally cut too deeply and expose non-colonized material.
Can I reuse the same grow space between contaminated and clean bags?
Yes, but you should treat it like a bio-containment problem. Remove contaminated bags immediately, then clean and disinfect surfaces and let the area dry thoroughly before introducing healthy cultures. Do not open contaminated bags in the same room as active clean grows, because spores can settle and cause new contamination events.
How do I handle micropore tape sealing if green mold appears early?
Seal only a small, localized area, keep the bag isolated, and monitor closely for expansion over the next days. If green mold spreads, remove the entire bag sealed. Do not assume the tape stops contamination, especially if the problem is already widespread under the surface.
When should I harvest, and does waiting too long affect quality?
Harvest when the ears are fully expanded and the edges are not curling inward, and before the surface becomes slimy. Leaving them too long usually increases wateriness and can accelerate degradation and spoilage. Remove stubs at the base to reduce rot and improve the chance of subsequent flushes.
How do I maximize flushes after the first harvest?
After harvesting, scrape off old stubs and dried mycelium on the cut surface, then return to the fruiting trigger conditions. Many growers also cold shock between flushes (soak in cold water for around half a day) to rehydrate the substrate and stimulate later fruiting, especially for the second or third flush.
Is it safe to eat black fungus that was exposed to contamination but the green patch is small?
If green mold appears, safety is not guaranteed for the whole bag. If contamination is localized and you choose to keep it, only harvest from parts that remain clearly healthy, and if you are uncertain, discard. When in doubt, do not eat questionable fruiting bodies, because microbial byproducts can be unpredictable.