Growing sclerotia at home is absolutely doable, but you need to start with the right species and the right expectations. In the mushroom cultivation world, when people talk about growing sclerotia, they almost always mean Psilocybe tampanensis or its close relative Psilocybe mexicana, both of which produce dense, truffle-like sclerotia (often called "philosopher's stones" or "magic truffles") as underground food-storage organs. If your goal is specifically how to grow Psilocybe zapotecorum, you'll need to tailor the same sclerotia framework to that species' preferred conditions and sourcing Psilocybe tampanensis. The full process, from inoculation to harvest, takes roughly 3 to 5 months, and success comes down to substrate choice, clean technique, and patience during incubation. Get those three right and sclerotia formation is reliable. Skip corners on any one of them and you'll end up with contaminated jars or mycelium that just won't densify into the nodule structures you're after.
How to Grow Sclerotia: Step-by-Step Cultivation Guide

What sclerotia actually are (and which fungi produce them)
A sclerotium (plural: sclerotia) is a compact, hardened mass of fungal mycelium packed with nutrient reserves. Think of it as the mushroom equivalent of a survival pod. The fungus creates it as a long-term energy store that can stay dormant in soil for years and then germinate when conditions improve. Several fungi across many species produce sclerotia, including pathogens like Sclerotinia sclerotiorum and Rhizoctonia solani, but those aren't what home cultivators are growing. In the cultivation hobby, sclerotia production is almost exclusively associated with Psilocybe tampanensis and, to a lesser extent, Psilocybe mexicana. These species reliably produce walnut-shaped to irregular sclerotia underground in the substrate rather than, or in addition to, fruiting bodies above it.
What makes sclerotia distinct from regular mycelium is their structure: a dense, melanin-rich outer rind (the cortex) surrounding a compact interior. That melanin layer is part of why mature sclerotia are so resilient once formed. They resist drying, temperature swings, and handling far better than active mycelium. But getting to that hardened stage requires providing the right conditions throughout the incubation window. If you've been reading about growing Psilocybe tampanensis specifically, know that sclerotia formation is the primary goal of that cultivation project, and this guide covers it from start to finish.
Choosing your inoculation route and realistic timeline
You have two main starting points: spore syringes/prints or live mycelium (agar cultures or grain spawn). For sclerotia production, starting from live mycelium culture gives you a faster, more reliable path. Spore syringes work, but spores first need to germinate and establish mycelium before colonization even begins, which adds weeks and introduces more contamination windows. If you can source a verified P. tampanensis grain spawn or an agar culture from a trusted supplier, take it.
Here's what a realistic timeline looks like from inoculation to harvest:
| Stage | Timeframe | What you're watching for |
|---|---|---|
| Inoculation and early colonization | Weeks 1-2 | White mycelial growth spreading through substrate |
| Full colonization | Weeks 3-5 | Substrate fully white/off-white, mycelium dense throughout |
| Sclerotia initiation | Weeks 4-8 | Small white nodes or pinheads forming at substrate mass |
| Sclerotia bulking | Weeks 8-16 | Nodes grow and harden, turning yellow-brown to dark brown |
| Harvest-ready | Month 3-5 | Firm, brown, walnut-like structures throughout substrate |
If you're starting from spores, add 2 to 4 weeks to the colonization stages. Starting from grain spawn, I've seen colonization complete in under 3 weeks in good conditions. Don't rush the bulking stage. Pulling sclerotia too early (before they've fully hardened and darkened) gives you soft, wet nodes that don't cure well and don't store long.
Setting up and sterilizing your substrate
Substrate composition matters a lot for sclerotia yield. A mix that works well is rye grain or brown rice flour combined with vermiculite, kept at moderate moisture. Some growers use a mix of rye berries and a small amount of coco coir or worm castings to add nutrients without making the substrate too rich (overly rich substrates favor fast mycelial growth but can actually suppress sclerotia formation). A simple, proven substrate is sterilized rye grain at field capacity moisture level, nothing fancy needed.
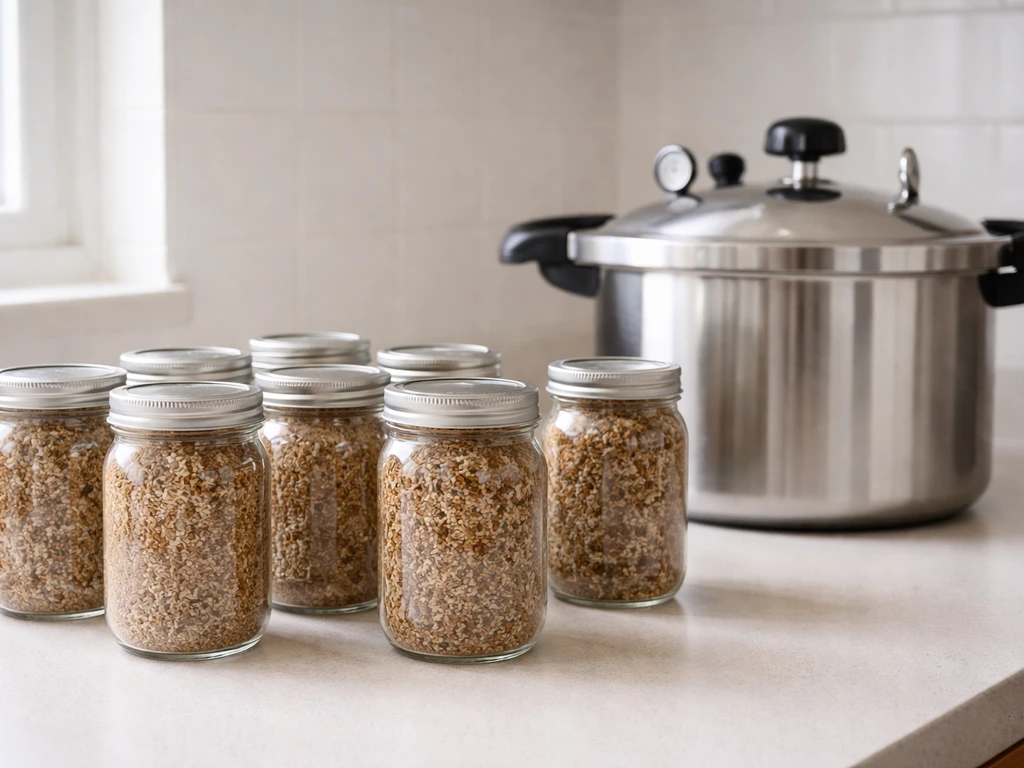
Sterilization is non-negotiable, not just pasteurization. Sclerotia grow slowly, meaning any competing bacteria or mold introduced at inoculation has weeks to establish before your mycelium can outcompete it. Use a pressure cooker at 15 PSI for at least 90 minutes for grain substrates. Let jars cool completely (minimum 8 hours, ideally overnight) before inoculating, because injecting into warm substrate creates condensation that invites contamination.
- Use wide-mouth mason jars (half-pint to quart size) for easy access at harvest
- Fill jars to about two-thirds full to leave room for mycelial expansion
- Moisture level: grain should feel firm and not clump when squeezed. A handful that holds shape briefly then falls apart is about right
- Add a polyfill or Tyvek filter patch to the lid for gas exchange without contamination risk
- Flame-sterilize your inoculation needle and work in front of a still-air box or flow hood
Incubation conditions and keeping contamination out
Temperature is the single biggest lever during incubation. For P. tampanensis sclerotia, aim for 21 to 24 degrees Celsius (70 to 75 Fahrenheit) throughout. Sclerotia formation in related fungi has been documented at temperatures in this range, and going significantly warmer (above 27 C) tends to accelerate mycelial spread but can suppress the differentiation signals that trigger sclerotia formation. Think of it this way: comfortable room temperature is your target. No heating mat needed in most homes during summer; a basic seedling mat set to low works well in winter.
Unlike fruiting mushrooms, sclerotia formation doesn't require a light cue or a fruiting trigger. You actually want to keep jars in the dark or at most ambient indirect light during colonization and bulking. Light stress has been shown to influence sclerotia development in multiple species, but for home cultivation purposes, darkness during incubation is simply safer and less variable. Keep jars undisturbed on a shelf away from direct sun.
Airflow matters too. Your jars need gas exchange (CO2 out, O2 in) but not a strong air current. The filter patch on the lid handles this passively. Don't open jars during colonization. Every time you lift a lid you introduce contamination risk. If you're using grain spawn in a sealed jar with a filter patch, just leave it alone. Check progress by looking through the glass, not by opening.
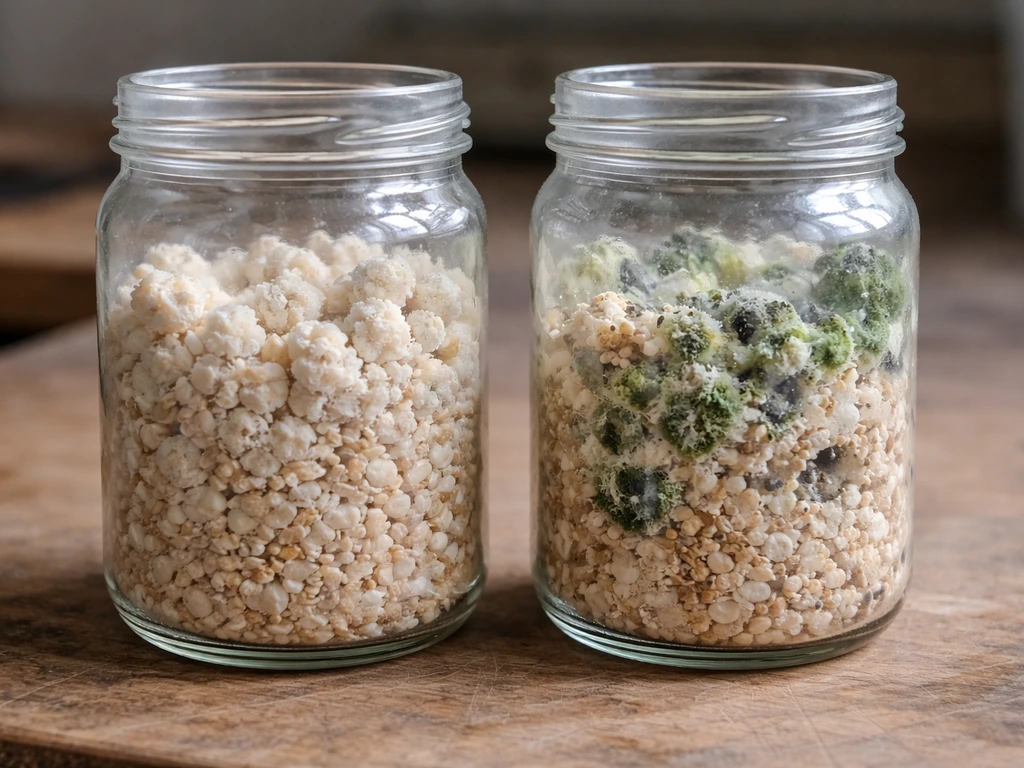
Contamination is most visible in the first two weeks. Green, black, or orange patches in the jar are mold. Pink or slimy areas are bacterial contamination. Both mean discard, not salvage. I know it's hard to throw out a jar you've been watching for two weeks, but cross-contamination to other jars is a real risk, and a contaminated jar will never produce healthy sclerotia anyway. Seal it in a bag and remove it from your grow space immediately.
How to harvest and cure sclerotia properly
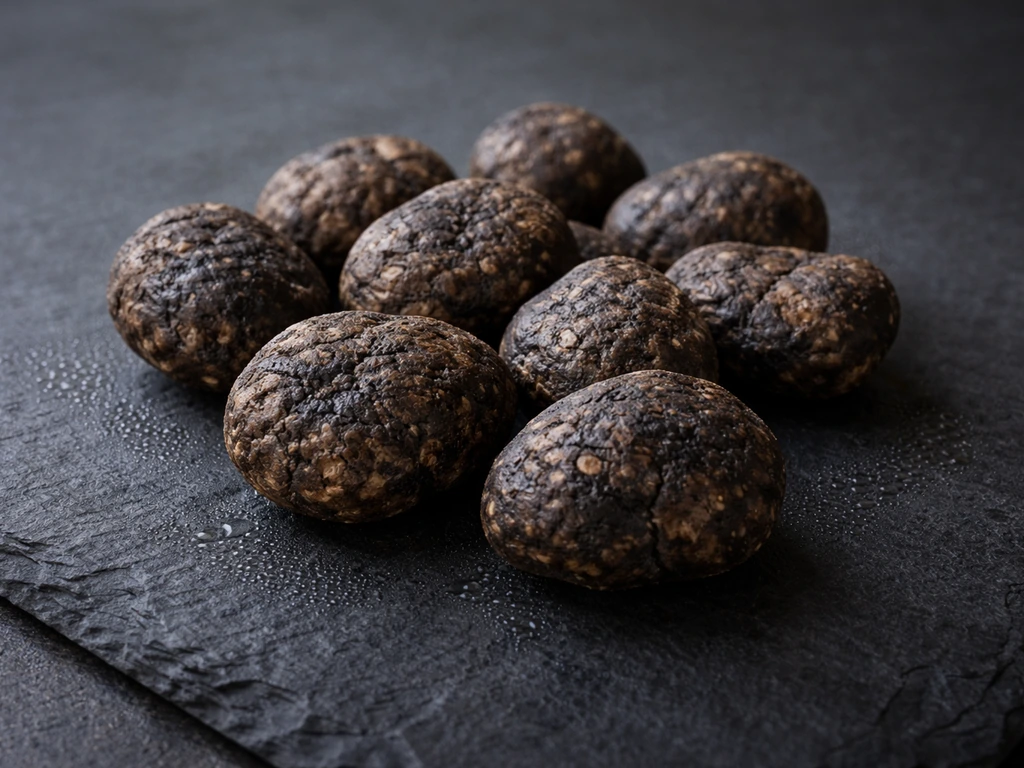
Knowing when sclerotia are done is mostly visual and tactile. Mature sclerotia are firm to hard when squeezed, ranging from pale yellow-brown to deep brown or almost black on the outside, with a dense, moist interior. They look like small irregular truffles, ranging in size from a pea to a large grape depending on how long you let them bulk. Soft, white, or very pale nodes aren't ready yet. Give them more time.
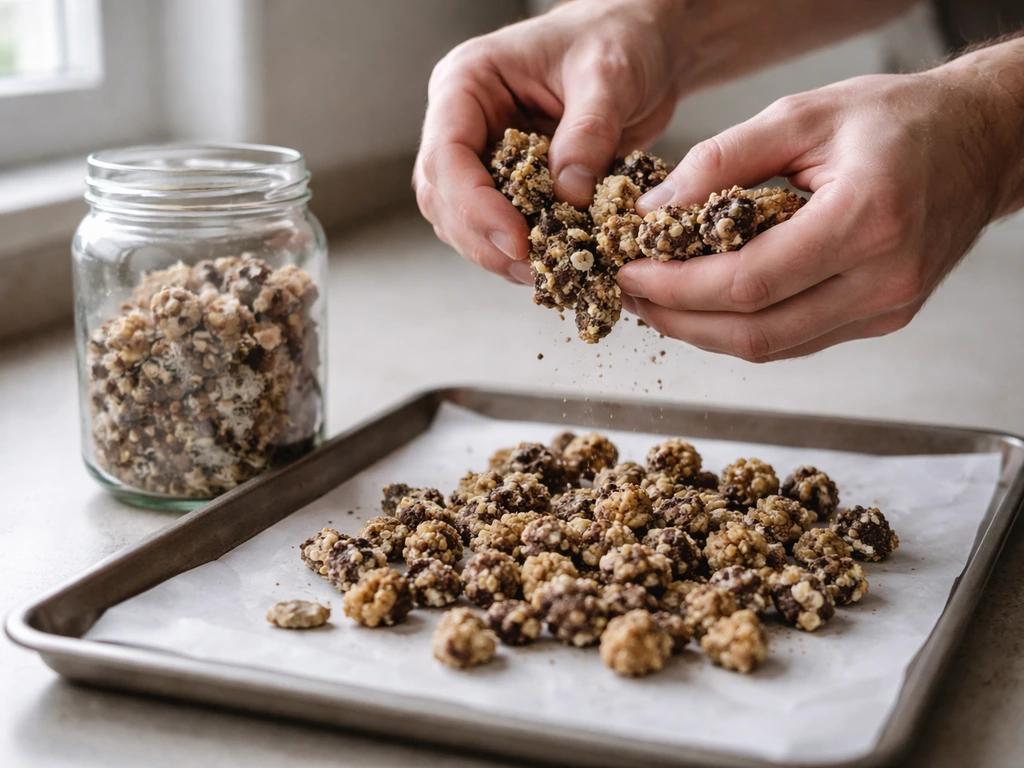
To harvest, break open the jar and crumble the colonized substrate apart with clean gloved hands. Sclerotia will be embedded throughout the grain mass. Separate them by hand, removing any clinging substrate material. If you're working with a coco coir or mixed substrate, you can do a light rinse with clean water to remove substrate particles, then pat dry immediately. Don't soak them.
Curing is simple but important. Spread harvested sclerotia on a clean paper towel or mesh rack in a cool, dry area with gentle air circulation. A small fan on low a few feet away works perfectly. Cure for 2 to 5 days until the outer surface feels dry to the touch. The interior will still have some moisture, which is normal. You're removing surface moisture, not fully desiccating them. Fully dried (bone-dry) sclerotia lose potency and vitality faster than properly cured ones.
Storing sclerotia and deciding what to do with them
For short-term storage (up to 2 to 3 months), refrigerate cured sclerotia in a sealed glass jar or airtight container at 2 to 4 degrees Celsius with a small food-safe desiccant packet to control humidity. Check them weekly for any signs of mold development. Research on Sclerotinia sclerotiorum sclerotia (a closely related structure biologically) has confirmed that refrigeration after proper desiccation maintains viability well, while freeze-drying was found to be unsuitable for preserving germination potential. Home freezing of fresh (uncured) sclerotia is also risky for viability.
For longer storage, properly cured sclerotia can be kept at -80 C in a lab setting, but most home growers don't have that option. Realistically, refrigerator storage at 4 C with a desiccant is the best home option, and you can expect good viability for 2 to 4 months this way. After 6 months, viability becomes more variable. Studies have shown that sclerotia of related species can maintain anywhere from 40% to near 100% germination rates over time depending on storage conditions, so curing and cold storage really do matter.
What you do with the sclerotia depends on your goals. If you grew P. If you want the practical steps for how to grow mushrooms psilocybin, focus on starting culture choice, clean sterilization, and the incubation conditions discussed here P.. If you want a full, step-by-step walkthrough, follow this guide on how to grow Psilocybe tampanensis specifically. tampanensis or P. mexicana sclerotia for personal or culinary interest, use them fresh or within a few weeks of harvest for best quality. If you want to use them to re-initiate a cultivation cycle, you can place a sclerotium directly onto a fresh sterile agar plate, allow mycelium to regenerate from it, then use that mycelium as spawn for your next substrate batch. This "sclerotia-to-culture" approach is a great way to preserve genetics without maintaining a live agar culture long-term.
Troubleshooting: when things go wrong
No sclerotia forming after full colonization
This is the most frustrating outcome and usually has one of three causes. First, check temperature: if your incubation space has been running above 26 to 27 C, the mycelium may have prioritized vegetative growth over sclerotia differentiation. Move jars to a slightly cooler spot and give them another 3 to 4 weeks. Second, check moisture: substrate that's too wet discourages the consolidation signals that trigger sclerotia formation. In Athelia rolfsii, sclerotial development is linked to blank" rel="noopener noreferrer">oxidative stress and ROS dynamics during differentiation. If grain is visibly wet or there's free moisture on the glass, your substrate was over-hydrated at preparation. There's no fix for this mid-run, but adjust your moisture level next time. Third, the most common issue: too short a timeline. Many first-time growers check at week 6 and panic when they see no nodes. Sclerotia often don't start forming visibly until week 8 to 12. If you are specifically looking for how to grow boletus edulis, many of these incubation, contamination-control, and timing ideas translate, but the substrate and temperature targets will be different timeline. Leave the jars alone and check again in two more weeks.
Slow growth or aborted sclerotia nodes
Small nodes that start forming then stop growing or turn mushy usually mean a contamination event happened during the bulking phase, or humidity inside the jar dropped too much. If your filter patch is too large or too porous, the substrate can dry out over a 3 to 4 month incubation. A small strip of Tyvek or polyfill is enough. You don't need aggressive gas exchange for jars, just enough to prevent CO2 buildup. If the jar feels significantly lighter than when you started, the substrate has dried out and you may see aborted development. Unfortunately this is hard to reverse once colonized without re-introducing contamination. Going forward, seal jars more conservatively and store in a slightly higher humidity environment (a closed cupboard works well).
Mold or bacterial contamination
Green mold (Trichoderma) is the most common contaminant and spreads fast. If you see any green or black patches, the jar is done. Discard it outside your grow space. Don't try to cut out the bad sections and continue. Bacterial contamination (slimy, sour-smelling, often pink or orange-ish) usually comes from inadequate sterilization time or pressure, or from grain that was too wet going into the pressure cooker. Verify your pressure cooker is actually reaching 15 PSI (get a pressure gauge if yours doesn't have one) and extend cook time to 120 minutes if you're consistently seeing bacterial issues.
A contamination rate above 20 to 30 percent usually points to a technique problem, not just bad luck. Common culprits are inoculating while the jar is still slightly warm, not flame-sterilizing the needle between jars, working in a drafty space, or using a spore syringe that was contaminated at the source. Upgrade to a still-air box (a clear tote with arm holes cut in the side) if you've been inoculating on an open countertop. The difference in contamination rates is significant.
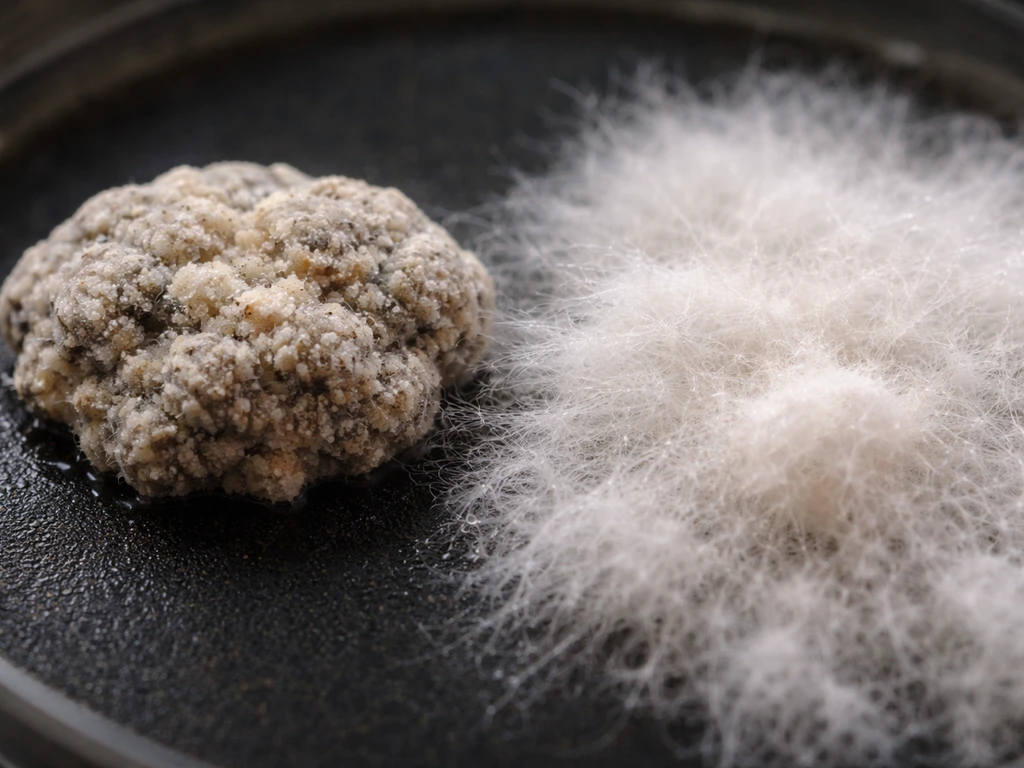
Mycelium looks healthy but stays fluffy, never consolidates
Fluffy, aerial mycelium that never knots or consolidates into sclerotia is often a sign of overly rich substrate or a strain that's not a reliable sclerotia producer. If you're using a substrate with a high nutrient content (like straight compost or manure-based material), try switching to plain rye grain or a BRF/vermiculite mix next run. Leaner substrates tend to trigger sclerotia formation as a stress response, which is exactly what you want. Also double-check your starting culture: not all Psilocybe tampanensis cultures are equal in their sclerotia-forming tendency. Some isolates are more prolific than others, and if you're consistently getting lush mycelium but no consolidation, sourcing a different culture lineage may be the answer.
If you're interested in the broader world of specialty mushroom cultivation, it's worth knowing that the genus Psilocybe includes other species with distinct cultivation profiles. Psilocybe tampanensis and Psilocybe mexicana are the go-to choices specifically for sclerotia, while species like Psilocybe semilanceata have very different substrate and environmental needs and don't produce sclerotia at all. If you are specifically trying to grow Psilocybe semilanceata, you will need a different approach than the sclerotia-focused methods used for tampanensis and mexicana. Matching your cultivation method to the specific species you're working with makes all the difference in what you actually end up growing.
FAQ
Can I grow sclerotia in a grow bag instead of jars?
Yes, but jars usually give more predictable gas exchange and less drying. If you switch to bags, keep humidity more stable, use a breathable filter area sized for slow exchange, and expect longer troubleshooting if the bag dries out unevenly, since sclerotia formation is sensitive to moisture consistency.
How much darkness is actually needed during incubation?
Absolute darkness is not required, but avoid direct sun and strong light sources. Ambient indirect room light is fine, the key is minimizing light stress during bulking so the fungus keeps prioritizing the differentiation steps that lead to mature nodes.
What should I do if my jars smell sour or “off” but I do not see mold yet?
Don’t wait for visible mold. Sour, fermented, or sharp odors usually indicate bacterial activity, even if colors look normal at first. Isolate the jar immediately and discard it if odor persists, because bacterial contamination often becomes visually obvious later but will still ruin sclerotia quality.
My sclerotia look dark, but they are still soft. Should I harvest anyway?
Soft, wet nodes typically need more bulking time. Harvesting early usually leads to poor curing and faster spoilage, since the outer rind never fully hardens. If there is no green or bacterial discoloration, give them additional time at the target incubation range.
Can I rehydrate sclerotia if they overdried while curing?
Light rehydration by a brief mist or dampening is risky because it can restart mold-friendly surface moisture. Instead, adjust your future curing conditions (less airflow, slightly higher ambient humidity) and consider discarding severely overdried samples, since fully potently dry material can also lose vitality for regeneration.
Does substrate “richness” always prevent sclerotia formation?
Not always, but it frequently shifts the fungus toward faster vegetative growth. The more the substrate encourages rapid spread, the less consistent the consolidation into nodules tends to be. If you get lush growth but no nodes, move to a leaner base like rye grain or a BRF plus vermiculite approach and keep moisture at field-capacity levels.
How do I tell the difference between slow sclerotia development and a stalled contamination problem?
Stalling usually looks like inert, uniform colonization with no new structure after the expected onset window. Contamination shows changing patterns, spreading spots, unusual colors, sliminess, or persistent odor, often within the first couple weeks. If you see any color streaking, patch growth, or wetness spreading, treat it as contamination rather than delay.
Why does my grain fully colonize, but sclerotia only form in some areas?
This often comes from uneven moisture or uneven gas exchange. Check for condensation on the glass, regions that stayed wetter or drier, and lid or filter patch seating issues. Ensure consistent hydration at packing, and do not stack jars tightly so temperature and airflow conditions remain similar across the batch.
Is verification of 15 PSI on the pressure cooker really necessary?
If your pressure cooker sometimes fails to reach and hold target pressure, bacterial contamination becomes much more likely during long incubation. A pressure gauge helps you confirm performance, and if you consistently see bacterial issues, extend the run time as a corrective measure rather than reducing sterilization effort.
Can I cut off moldy sections and keep the rest of the jar?
For home cultivation, no. Mold can spread microscopic contamination beyond visible patches, and cutting often leaves a compromised core that will not produce healthy or reliably curable sclerotia. The safest approach is to discard immediately to prevent cross-contamination.
What container should I use for short-term refrigeration storage?
Use an airtight container or sealed glass jar plus a small food-safe desiccant packet. The desiccant helps stabilize humidity, and airtight storage prevents odors and moisture swings. Check weekly, because a failed desiccant strategy is a common reason for late mold growth even after successful curing.
How long does it take for sclerotia to regenerate on agar from harvested nodules?
Regeneration timing varies by how mature and dry the sclerotia were at harvest. If they were properly cured (outer surface dry, interior not bone-dry), regrowth on sterile agar typically begins within days to a couple of weeks under clean conditions. If nothing appears after a few weeks, the culture may be stressed or the nodes may be too dried or contaminated.
What’s the most common mistake that causes “no knots” even when contamination is low?
Overheating, overly wet substrate, or checking too early. Incubation temperature above the optimal range can bias the fungus toward vegetative growth, and too much moisture can disrupt consolidation signaling. Also remember that visible node formation may not show up until later in the incubation window.