
To consistently grow big Psilocybe cubensis, you need three things working together: a high-potential strain, a well-colonized and nutrient-rich substrate, and a fruiting environment where humidity, fresh air exchange, and temperature are all dialed in at the same time. Miss any one of those and you'll get small, spindly fruits or weak second flushes regardless of how good your genetics are. The good news is that every variable is controllable at home with basic gear, and once you understand why each one matters, bigger mushrooms stop feeling like luck.
How to Grow Big Cubensis: Step-by-Step for Larger Fruits
Marcus Holloway
31 May 2026
What 'big cubensis' actually means in practice
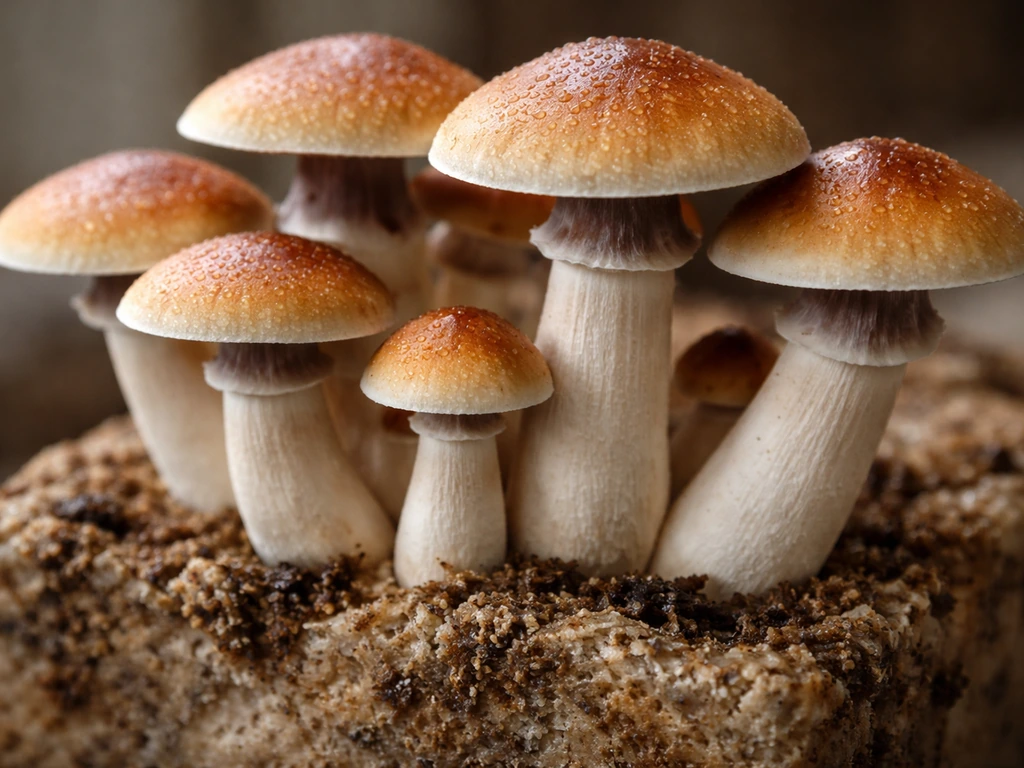
When growers talk about growing 'big' cubensis, they usually mean one of three things: individual fruit size (large caps, thick stipes), total yield per flush, or strong flush performance across multiple rounds. These goals are related but not identical, and the tactics you use to chase them overlap a lot.
In terms of morphology, a healthy Psilocybe cubensis stipe runs roughly 4 to 15 cm tall and 0.4 to 1.4 cm thick depending on strain and conditions. The cap can range from a tight button to a fully flattened disc several centimeters across. 'Big' to most home growers means caps that open wide, stipes that are meaty rather than stringy, and a first flush that comes in dense rather than sparse. A typical cubensis grow from inoculation to first harvest takes about a month, with pins usually appearing within 5 to 12 days of introducing fruiting conditions. Second and third flushes follow with rest periods in between.
The honest benchmark most experienced growers use is yield per gram of dry substrate, and a well-run grow should produce multiple flushes with each one being reasonably dense. If your fruits are consistently small and thin, that's almost always an environmental or substrate problem, not a genetics problem, though strain choice does set your ceiling.
Choosing your strain and spawn to start strong
Strain choice matters more than people admit, but it's also one of the most overhyped parts of the hobby. For raw size and visual impact, strains known for large individual fruits include Penis Envy variants (which are slower but produce chunky, dense fruits), Tidal Wave, and Golden Teacher, which is a reliable all-around performer and genuinely forgiving for beginners. If you want high yields over many flushes rather than single giant fruits, look at prolific strains like B+, Z-Strain, or Koh Samui. APE (Albino Penis Envy) is another option that produces visually striking fruits but grows slower and requires tighter environmental control.
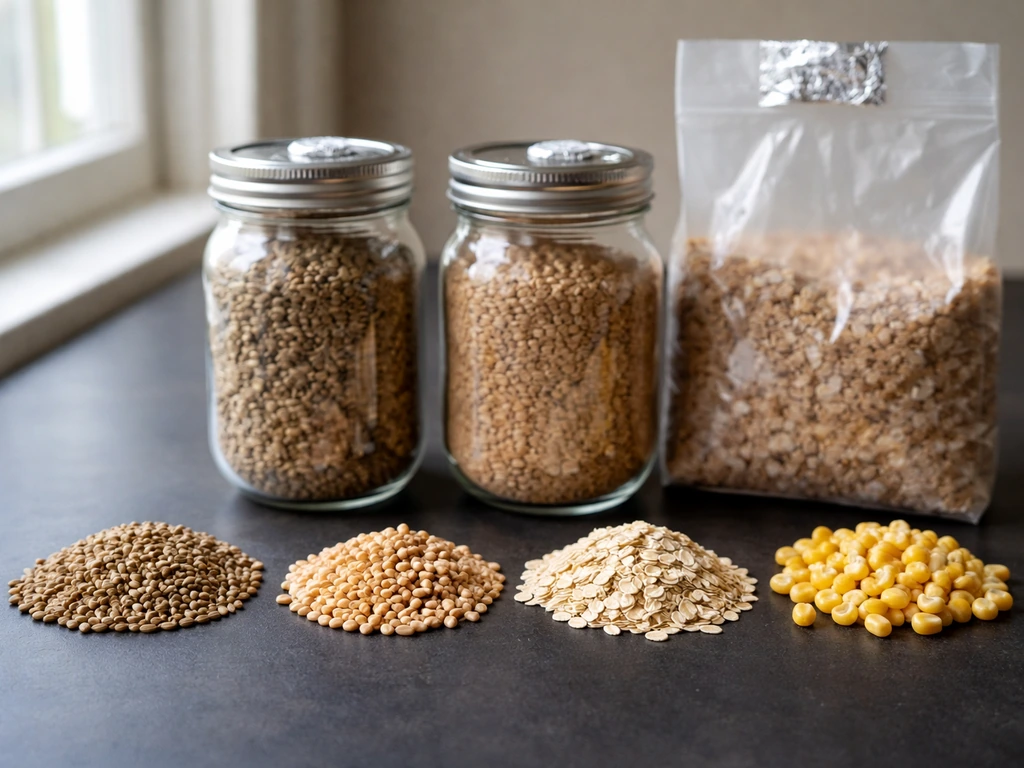
For spawn, grain spawn (rye, wheat berries, oats, or popcorn) is the best starting point for home growers. It colonizes evenly, breaks apart easily for mixing into bulk substrate, and gives the mycelium a strong nutrient base to launch from. Liquid culture syringes inoculated onto agar or directly into grain jars are the cleanest starting method. Spore syringes work fine too, just expect a slightly longer colonization time and a small contamination risk if you're not working clean.
If you want to avoid spores entirely, you can start from culture-based methods like liquid culture or tissue alternatives that don't rely on spore injection Spore syringes. Whatever you use, get your spawn from a reputable source or cultivate it yourself from a trusted culture, because weak or contaminated spawn is the single fastest way to guarantee a disappointing grow.
Substrate preparation: what to use and how to do it right
Substrate is your mushroom's food source, and for cubensis the two most common approaches are CVG (coco coir, vermiculite, gypsum) and manure-based bulk substrates. CVG is beginner-friendly, low-contamination risk, and works well for decent yields. Manure-based substrates (often pasteurized horse or cow manure mixed with coco coir, straw, or similar) are more nutritious and generally push larger, heavier fruits on first flush.
Low-nutrient substrates like CVG and straw are pasteurized rather than fully sterilized. The target range is 160 to 180°F (about 71 to 82°C) held for 60 to 90 minutes. You can do this in a large pot on the stove or in an oven in a foil-covered tray. Let it cool to room temperature before inoculating, which means below 80°F so you don't kill your mycelium. High-nutrient substrates like grain jars or Masters Mix (hardwood sawdust plus wheat bran, 50/50 by weight) need full sterilization in a pressure cooker at 15 PSI for 2.5 hours. Skipping sterilization on high-nutrient substrates is the number one contamination mistake beginners make.
Substrate comparison at a glance
| Substrate | Prep Method | Yield Potential | Contamination Risk | Best For |
|---|---|---|---|---|
| CVG (coco coir + vermiculite + gypsum) | Pasteurize 160–180°F, 60–90 min | Moderate | Low | Beginners, reliable flushes |
| Manure + coco coir mix | Pasteurize 160–180°F, 60–90 min | High | Moderate | Large first-flush fruits |
| Rye grain / wheat berries | Pressure cook 15 PSI, 90–150 min | High (spawn) | High if not sterilized | Spawn production, jar grows |
| Masters Mix (hardwood + wheat bran) | Pressure cook 15 PSI, 2.5 hrs | Very high | High if not sterilized | Experienced growers, big yields |
Inoculation rates, colonization targets, and keeping contamination out
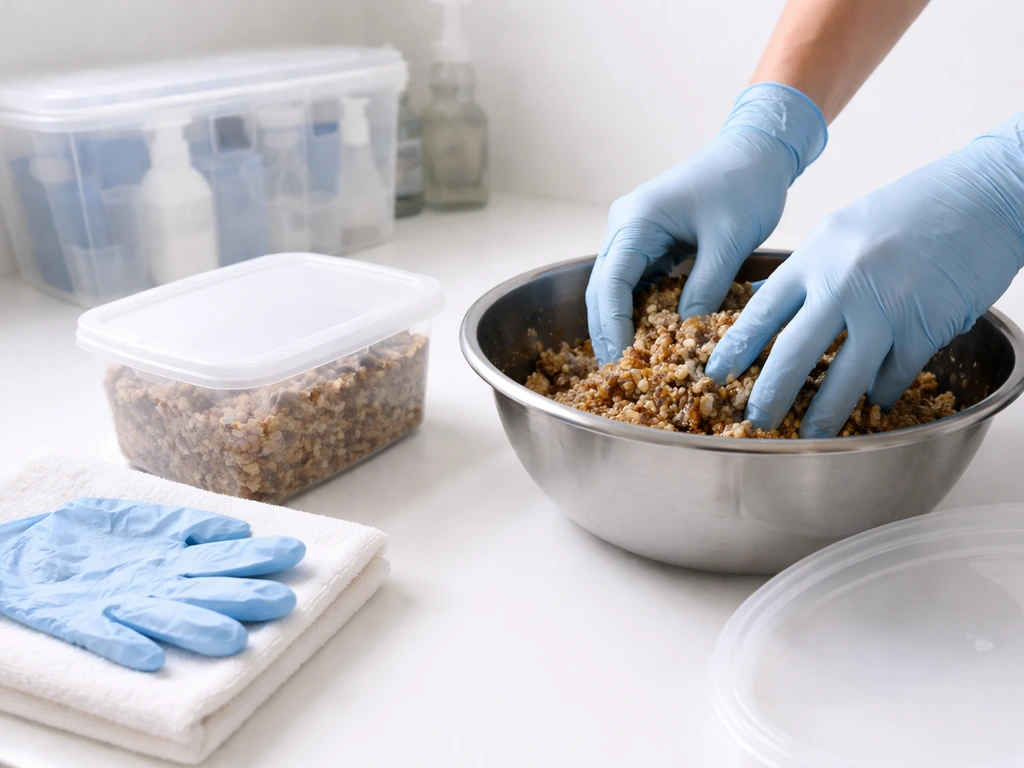
When mixing spawn into bulk substrate, aim for a spawn-to-substrate ratio of around 1:3 to 1:5 by volume. Going heavier on spawn (closer to 1:2 or even 1:1.5) speeds colonization and reduces the window for contaminants to take hold, which is worth doing if you've had contamination problems in the past. Mix thoroughly so there are no dead zones in the block, then pack it into your container, level it off, and cover loosely to allow some gas exchange while colonizing.
Colonization temperature for cubensis should sit around 75 to 80°F (24 to 27°C). Keep the block in the dark during colonization; light isn't needed and doesn't help at this stage. You're looking for the substrate to become fully white with mycelium throughout, which typically takes 10 to 21 days depending on spawn rate and temperature. Don't rush it. The mycelium needs to fully consolidate before you introduce fruiting conditions, otherwise you'll get weak, uneven pinning.
Work clean at every step. Use gloves, wipe down your surfaces with isopropyl alcohol, and ideally work near a still-air box or flow hood when handling open grain jars or mixing substrate. Any hint of green, black, or pink in your block is contamination and that block should be removed immediately, sealed in a bag, and binned outside your grow space. Contamination spreads fast. Don't try to 'save' a contaminated block.
Building your fruiting environment
This is where most home growers leave the most gains on the table. Getting fruiting conditions right is what separates a grow with big, well-developed fruits from one with thin, elongated pins that abort halfway through. If you want a detailed indoor setup, focus on fruiting humidity, fresh air exchange, and temperature control as outlined in the indoor growing sections Getting fruiting conditions right.
Humidity
Target 90 to 95% relative humidity during fruiting. Below 85% and your pins start to stall or abort. Above 95% with no airflow and you're inviting bacterial blotch and overlay. The practical way to hit this at home is a monotub or shotgun fruiting chamber (SGFC) with perlite in the base kept wet, misted walls, and a lid that holds moisture but allows some exchange. A cheap hygrometer inside the chamber is non-negotiable; don't guess at humidity.
Fresh air exchange and CO2
Fresh air exchange (FAE) is the most underestimated variable in cubensis cultivation. CO2 builds up fast in a sealed chamber, and high CO2 causes mushrooms to grow tall and spindly with elongated stipes and tiny caps. Inadequate fresh air exchange can lead to elongated, fuzzy stems, while adequate FAE supports normal cap and stipe development.
The telltale sign is stems that look like they're reaching for the sky, sometimes with fuzzy, myceliated surfaces. Adequate FAE is what gives you fat, wide-capped fruits. For a monotub, fanning the lid open two to four times a day for 30 to 60 seconds is a simple method. For an SGFC, the holes in the sides provide passive exchange.
If you're running a Martha tent or similar setup, a small fan on an intermittent timer that moves air across (not directly onto) the substrate surface every few hours works well.
Temperature and light
Fruiting temperature for cubensis sits at 75 to 81°F (24 to 27°C). Staying in this window promotes normal development. Dipping below 70°F slows fruiting noticeably; going above 85°F stresses the mycelium and can cause aborts. Light during fruiting is not about photosynthesis since mushrooms don't photosynthesize, but indirect ambient light (even just room light for 12 hours a day) helps signal directionality to developing pins. You don't need a grow light, but total darkness during fruiting is slightly suboptimal compared to a normal day/night cycle of dim ambient light.
The specific tweaks that actually grow larger fruits
Growing big fruits comes down to a few targeted decisions made at key moments in the cycle. These aren't exotic techniques; they're just the points where most growers make small mistakes that cap their fruit size.
The cold shock and fruiting induction
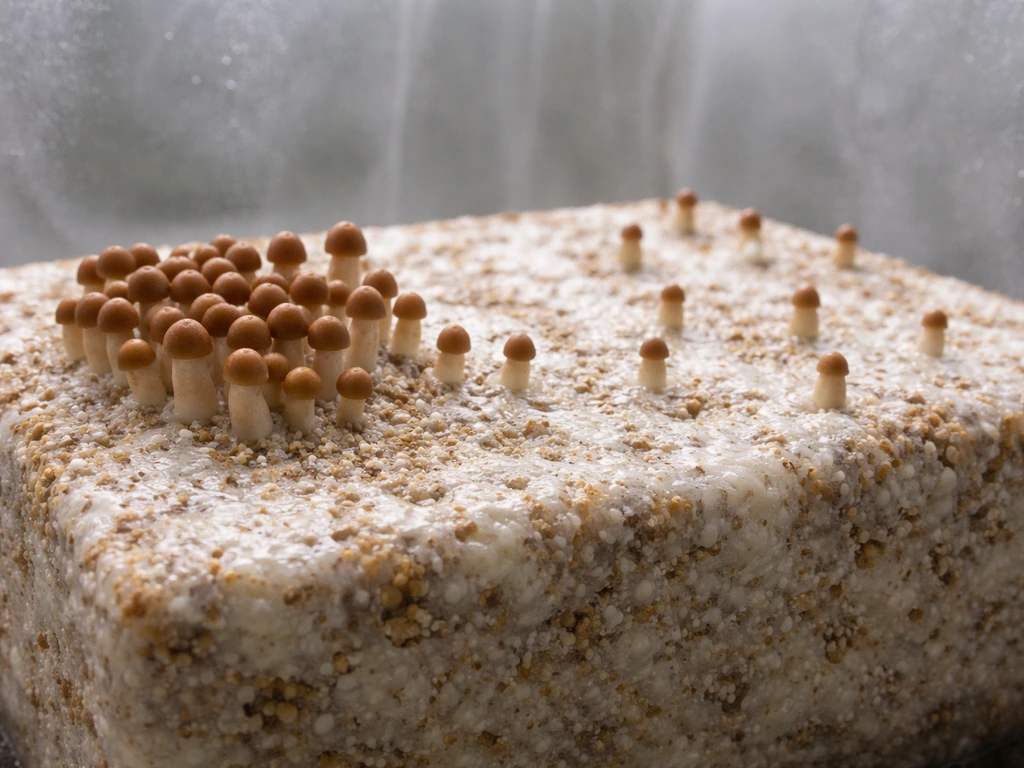
Once your block is fully colonized, introducing a temperature drop of 5 to 10°F for 24 hours before transitioning to fruiting conditions is a widely used pinning trigger. Moving a colonized block from a warm colonization space to a slightly cooler fruiting chamber accomplishes this naturally. Some growers also do a 'dunk and roll,' where they submerge the colonized block in cold water for 12 to 24 hours before first fruiting. This rehydrates the substrate and delivers a cold shock simultaneously, often producing a strong, even first pinset.
Pinset density and thinning
This is counterintuitive but important: too many pins competing for resources produces a lot of small fruits instead of fewer large ones. If you see a very dense pinset forming, you can remove the smallest, weakest pins early (a technique called thinning) to redirect the mycelium's energy into fewer, larger fruits. Use clean tweezers or gloved fingers. This is more common practice in cake-style grows but applies to bulk blocks too, especially on first flush when the block has maximum energy to put into individual fruits.
Misting and moisture balance
Mist the walls of your chamber, not directly onto the substrate or developing pins. Direct misting onto pins is a common cause of aborting and bacterial blotch spots on caps. The goal is to keep ambient humidity up and the substrate surface from drying out without waterlogging. If you see pooling water on the substrate surface, your drainage or moisture balance is off. A light scrape of the top casing layer between flushes (removing old stipe bases, dead pins, and any discolored areas) followed by a fresh mist and another cold dunk sets up subsequent flushes well.
Flush timing and realistic expectations
First flush is almost always the heaviest. Second and third flushes are smaller but still meaningful, and the block needs a rest and rehydration period between each one. A healthy first flush should appear within about 5 to 12 days of introducing fruiting conditions. If you're past day 14 with no pins and conditions are correct, something is off with either colonization completeness or environmental parameters. Most growers get three solid flushes from a well-prepared block before yield drops off significantly. Some substrates like Masters Mix can produce four or more.
Harvest timing, drying, and setting up bigger next flushes
When to harvest
Harvest cubensis just before or as the veil underneath the cap begins to tear, while the cap is still slightly bell-shaped and the edges haven't fully flattened out. Once the veil tears and the cap opens wide, spores drop and the fruit starts losing weight fast. Harvesting a little early gives you slightly lower fresh weight but better dry weight preservation and cleaner caps. To harvest, grip the base of the stipe and twist-pull gently rather than cutting, which leaves less stipe material behind to rot on the surface.
Drying and storage
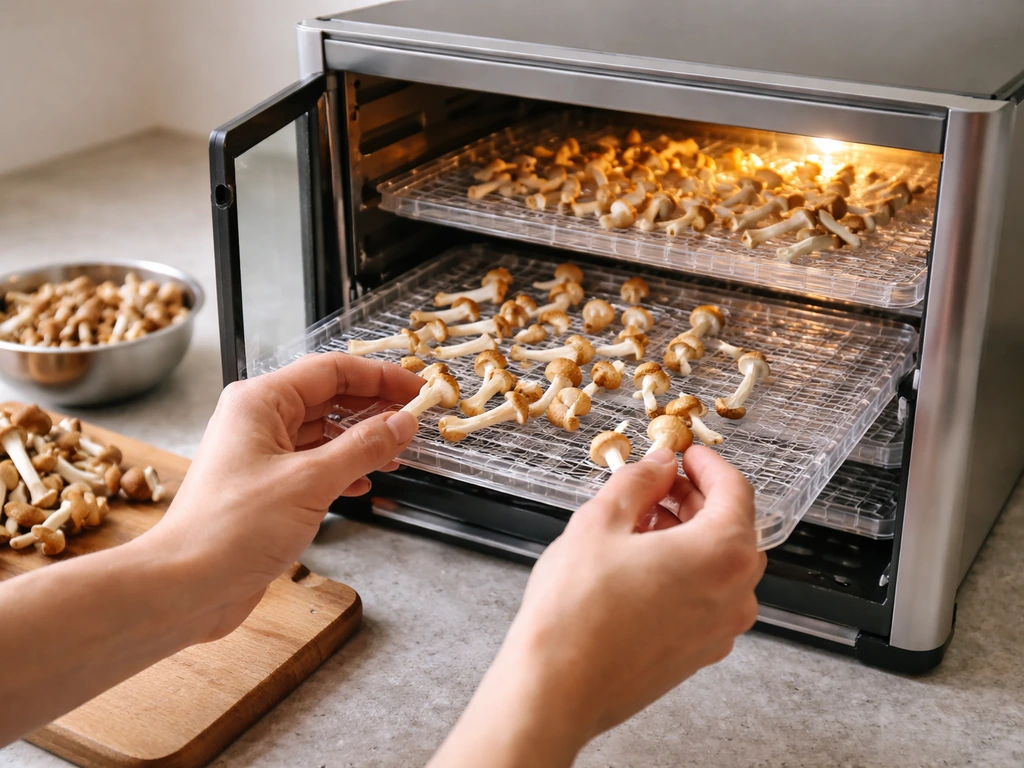
Fresh cubensis are about 90% water. Dry them immediately after harvest; leaving them sitting fresh causes rapid degradation. A food dehydrator set to 95 to 115°F (35 to 46°C) is the best tool for this. Spread fruits in a single layer and run for 4 to 8 hours until they snap rather than bend (cracker dry). Store in an airtight container with food-grade desiccant packets in a cool, dark location. Properly dried and stored cubensis maintain quality for a year or more.
Troubleshooting small fruits and weak flushes
If your fruits are consistently small, work through this checklist before blaming your genetics:
- Humidity below 90%: pins will stall and abort. Check with a hygrometer, not a guess.
- CO2 buildup from inadequate FAE: spindly, tall stems with tiny caps are the giveaway. Fan more aggressively.
- Temperature outside 75 to 81°F: both low and high temps slow development and reduce fruit size.
- Over-misting directly onto pins: causes aborts and spotting. Mist walls only.
- Block not fully colonized before fruiting: leads to weak, patchy pinsets. Wait for full consolidation.
- Too many pins competing: thin aggressively on second and third flush for bigger individual fruits.
- Substrate not rehydrated between flushes: soak or dunk the block for 12 to 24 hours before each subsequent flush.
- Old stipe bases and dead material left on surface: scrape and clean between flushes to prevent bacterial contamination.
Most growers who fix small fruit size find the answer in FAE or humidity, not in switching strains or buying new spawn. Get those two right, stay consistent with temperature, and rehydrate properly between flushes, and your next run will look noticeably different. If you're interested in pushing further, exploring other cubensis-adjacent cultivation projects like growing indoors with more complex environmental setups or trying demanding strains like APE can teach you a lot about the environmental margins that matter most. If you want a true indoors setup, the same fruiting principles apply, but you'll need tighter control of humidity, fresh air exchange, and temperature growing indoors with more complex environmental setups.
These indoor environmental principles also translate to how to grow amanita muscaria indoors, especially around humidity and fresh air exchange growing indoors. If you want to understand outdoor cultivation specifically, the same focus on fruiting conditions becomes the basis for how to grow Amanita muscaria outdoors. If you want a more focused walkthrough, see our guide on how to grow azurescens mushroom indoors, including the key environmental targets for this species.
A complete indoor setup helps you control humidity, fresh air exchange, and temperature so your cubensis can fruit reliably growing indoors. For a focused walkthrough on APE specifically, see our guide on how to grow ape mushrooms growing demanding strains like APE.
FAQ
What should I change first if my cubensis are bigger on one flush but smaller on the next flush?
Focus on rehydration and surface moisture balance. After the first harvest, let the block rest fully, then increase humidity gradually (misting walls, avoiding direct pin contact) and consider a short cold rehydrate like a dunk before the next fruiting cycle. If the substrate surface dries out between flushes, you usually see small, aborted pinsets even when humidity during fruiting later looks correct.
How do I tell whether my issue is too much fresh air exchange or too little?
Use cap shape and stipe thickness as clues. Too little fresh air exchange typically produces tall, narrow fruits with elongated stipes and tiny caps. Too much airflow, especially if it dries the surface, can cause smaller caps with rough or cracked-looking surfaces and slower pin development. If you see both under humidity and under FAE symptoms, fix humidity first, then fine-tune airflow.
Can I just run higher humidity to force bigger caps?
Not reliably. Above about 95% relative humidity without enough fresh air exchange often leads to overlay and bacterial blotch risk, which can reduce size and ruin cap development. A safer strategy is keeping humidity in the 90 to 95% band and ensuring consistent fresh air exchange, so pins develop normally instead of competing under poor gas conditions.
Is it worth thinning pins to get bigger fruits if I am growing in a monotub or SGFC?
Yes, but only when the pinset is clearly over-dense. Thin early, before fruits begin to crowd and before you see many weak, small-looking pins. Use clean handling, remove the smallest and weakest pins only, and avoid disturbing the rest of the surface. In less dense pinsets, thinning can reduce total yield without increasing average fruit size enough to justify the extra risk.
Why do my fruits grow tall but the caps never expand much?
That pattern strongly suggests elevated CO2. Even if humidity and temperature look right, poor fresh air exchange causes spindly growth and caps that stay underdeveloped. Increase fresh air exchange slightly, keep airflow indirect, and confirm your chamber lid or venting is not overly sealed. A simple indicator is whether the stipes look like they are reaching upward with fuzzy mycelium on them.
When should I introduce the temperature drop to trigger pinning, and what if I trigger too early?
Introduce the 5 to 10°F drop only after the block is fully consolidated, meaning it is fully white with mycelium throughout. Triggering early before the mycelium completes consolidation often results in uneven pinning and weak second-stage growth, even if the environment during fruiting is otherwise ideal. If you are uncertain, wait until colonization is clearly complete rather than rushing for timing.
What do I do if I see green, black, or pink colors on a block? Can I salvage it?
Remove it immediately and do not try to save it. Seal the contaminated block in a bag, discard outside your grow area, and sanitize the surfaces and tools you used. Contamination spores and residues can cross-contaminate nearby healthy blocks, so the cleanup step matters as much as the disposal decision.
My humidity and temperature are in range, but I still get very small fruits. What’s the next most likely cause?
Check spawn quality and colonization completeness. Weak spawn can lead to slower or incomplete consolidation, and even if you later fruit correctly, the block may not have enough vigor to produce large fruits. Also verify you actually reached full colonization before switching to fruiting, because rushed transitions commonly cause smaller, thinner development.
How can I prevent surface drying without overwatering my substrate during fruiting?
Mist the walls rather than the substrate. If you see pooling water on the surface, reduce misting frequency and improve drainage or airflow balance so excess moisture does not sit on the casing or substrate surface. A good target is damp, not wet, especially where pins are forming.
Should I cut or twist-pull when harvesting, and does it affect next flush size?
Twist-pull gently rather than cutting to reduce leftover stipe material that can rot on the surface. Less rotting material typically means less contamination pressure between flushes and cleaner surfaces going into the next rehydration cycle, which can help preserve fruit quality and size.
How soon after harvest should I start drying, and what happens if I wait too long?
Dry as soon as practical, ideally right after harvesting. Leaving fruits at room conditions too long accelerates degradation and can reduce long-term quality. Waiting can also make caps degrade and lose desirable texture, which is especially noticeable for later rehydration and storage performance.