Growing Psilocybe cubensis without spores means you skip spore prints and spore syringes entirely and start from already-living mycelium instead. The most practical options are grain spawn (sterilized grain fully colonized with cubensis mycelium), liquid culture (a suspension of live mycelium in nutrient water), or agar wedges (mycelium growing on a gel medium). Each of these gets you to the same place: a colonized substrate ready to fruit, just without the spore germination step. Whether you're trying to sidestep the legal gray area around spore procurement, working from an existing culture, or simply want faster and more reliable colonization, this guide walks you through the entire process from sourcing your starting material to harvesting your first flush.
How to Grow Psilocybe Cubensis Without Spores

What "without spores" actually means for your grow
Spores are the reproductive "seeds" of fungi. When people talk about growing from spores, they mean using a spore syringe or spore print to inoculate a substrate, then waiting for those spores to germinate and form mycelium. That germination step is exactly what "without spores" skips. Instead, you start with mycelium that already exists and is ready to colonize new substrate immediately.
In practical terms, your non-spore starting options are: grain spawn (the most beginner-friendly), liquid culture (fast and economical for scaling up), and agar cultures or mycelium wedges (more of an intermediate technique, but great for keeping a live culture going indefinitely). All three are forms of vegetative propagation. You're essentially cloning mycelium rather than germinating a new organism from scratch.
One important note on legality: in the United States, ungerminated spores occupy a legal gray zone because they don't yet contain psilocybin or psilocin. However, once those spores germinate and grow into mycelium, you are working with a controlled substance under federal law. Starting from grain spawn or liquid culture means you are working with mycelium from the outset, which carries the same federal legal status as the fruiting bodies themselves. Local and state laws vary significantly.
Oregon, for example, has established a regulated therapeutic framework with its own definitions for cultivation. Colorado has its own decriminalization language. Always understand the laws in your specific jurisdiction before proceeding. This guide is written for educational purposes within regions where cultivation is permitted or decriminalized.
Picking your non-spore starting material
Your choice of starting material shapes how the rest of your grow goes, so it's worth thinking through before you order anything.
| Starting Material | What It Is | Best For | Speed to Colonization | Main Downside |
|---|---|---|---|---|
| Grain Spawn | Sterilized grain fully colonized with cubensis mycelium | Beginners; direct bulk inoculation | Fastest (already colonized) | Must use quickly; can degrade if stored poorly |
| Liquid Culture | Live mycelium suspended in a nutrient liquid (e.g., honey water) | Scaling up; inoculating multiple jars cheaply | Fast germination into grain or substrate | Requires syringes and sterile technique to use |
| Agar Wedge / Petri Dish | Mycelium growing on a nutrient gel | Isolating genetics; long-term culture storage | Moderate (needs transfer to grain first) | Requires more equipment and technique |
For most home growers reading this, grain spawn is the clear first choice. You receive it already colonized and just break it up and mix it into your bulk substrate. Liquid culture is a close second, especially if you're planning more than one grow or want to keep a strain going. Agar work is genuinely useful but it's a separate skill set that you can learn after your first successful flush. If this is your first grow, start with grain spawn and keep things simple.
Substrate and container setup
Psilocybe cubensis is a dung-loving species in the wild, which means it thrives on nitrogen-rich, nutrient-dense bulk substrates rather than the wood-based mixes that work for oysters or lion's mane. The most widely used beginner substrate is CVG: coco coir, vermiculite, and gypsum. It's low-cost, widely available, resistant to contamination, and easy to prepare.
CVG substrate recipe (for a standard monotub)
- 650g brick of coco coir (expands to roughly 8–10 liters when hydrated)
- 2 liters of vermiculite (medium grain works fine)
- 1 cup of gypsum (optional but helps with texture and pH buffering)
- Boiling water to hydrate (typically 4–5 liters, adjust to field capacity)
Field capacity is the moisture level you're aiming for. Squeeze a handful of your mixed substrate tightly in your fist. A few drops of water should come out, but not a steady stream. If water pours out, it's too wet and you'll get bacterial contamination. If nothing comes out at all, it's too dry and colonization will stall. Get this right and you've solved one of the most common failure points.
Pasteurize your CVG rather than fully sterilizing it. Pour boiling water over the dry coir and vermiculite mix, cover the container with foil or a lid, and let it cool slowly over several hours (or overnight). This heat treatment kills most competing organisms without nuking the beneficial bacteria that actually help suppress contaminants. Full sterilization is overkill for low-nutrient substrates and makes contamination more likely when you're working without a flow hood.
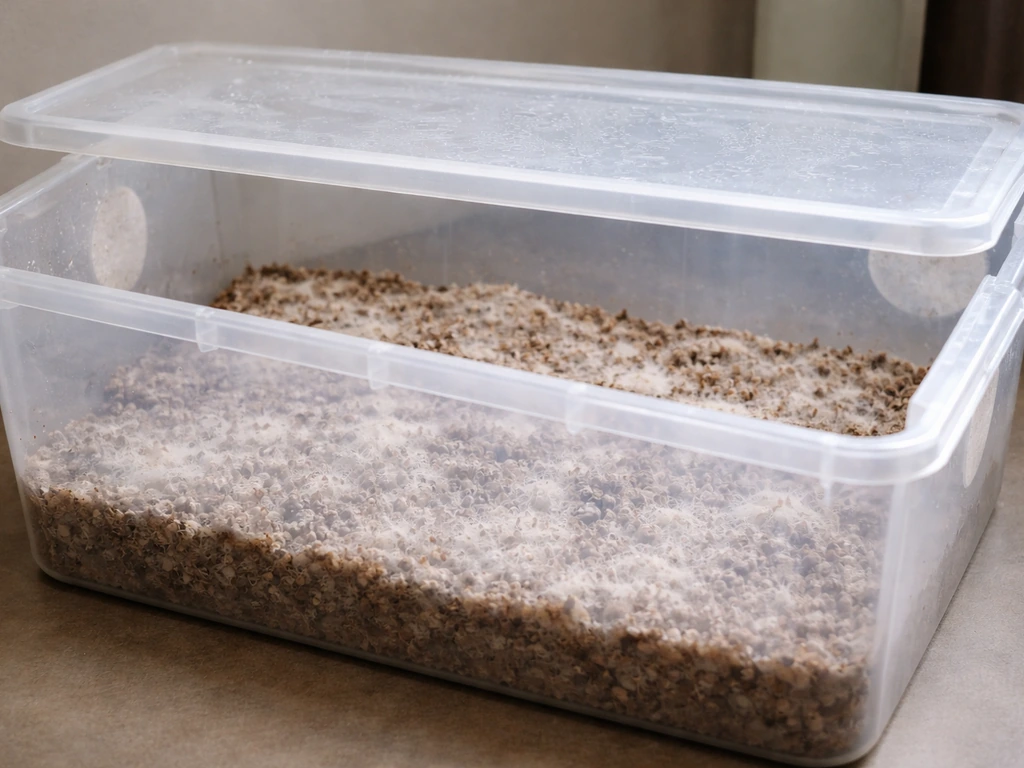
Container options
A monotub is the most practical container for a home grower. Use a 66-quart (roughly 62-liter) clear or translucent storage tub. Drill 4 to 6 holes (about 1/2 inch diameter) along the sides, roughly 4 to 6 inches above where your substrate will sit, and stuff them with polyfill or cover with micropore tape. This gives you passive fresh air exchange without requiring a fan. Shotgun fruiting chambers (smaller tubs with many holes covered in polyfill) also work well and are easy to build, though they require more frequent misting to maintain humidity.
Inoculation using your non-spore starting material
Before you touch anything, clean your workspace. Wipe down all surfaces with isopropyl alcohol (70% is actually more effective than 91% for killing microorganisms). Wear gloves. If you have a still air box (a clear plastic tote flipped upside down to create a low-turbulence workspace), use it. You don't need a laminar flow hood for this step, but you do need to be deliberate about minimizing airborne contamination.
If you're using grain spawn
- Wait until your CVG substrate has cooled fully to room temperature (below 75°F / 24°C). Inoculating into warm substrate will stress the mycelium.
- Break up your grain spawn into individual grains by squeezing and shaking the bag before opening it.
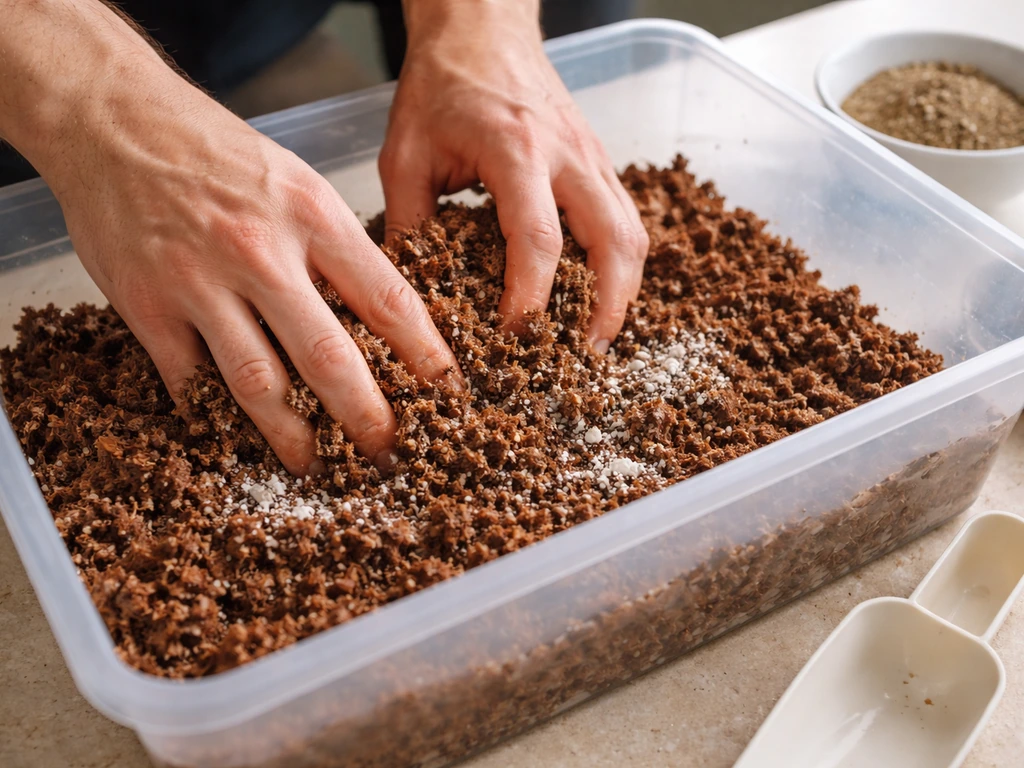
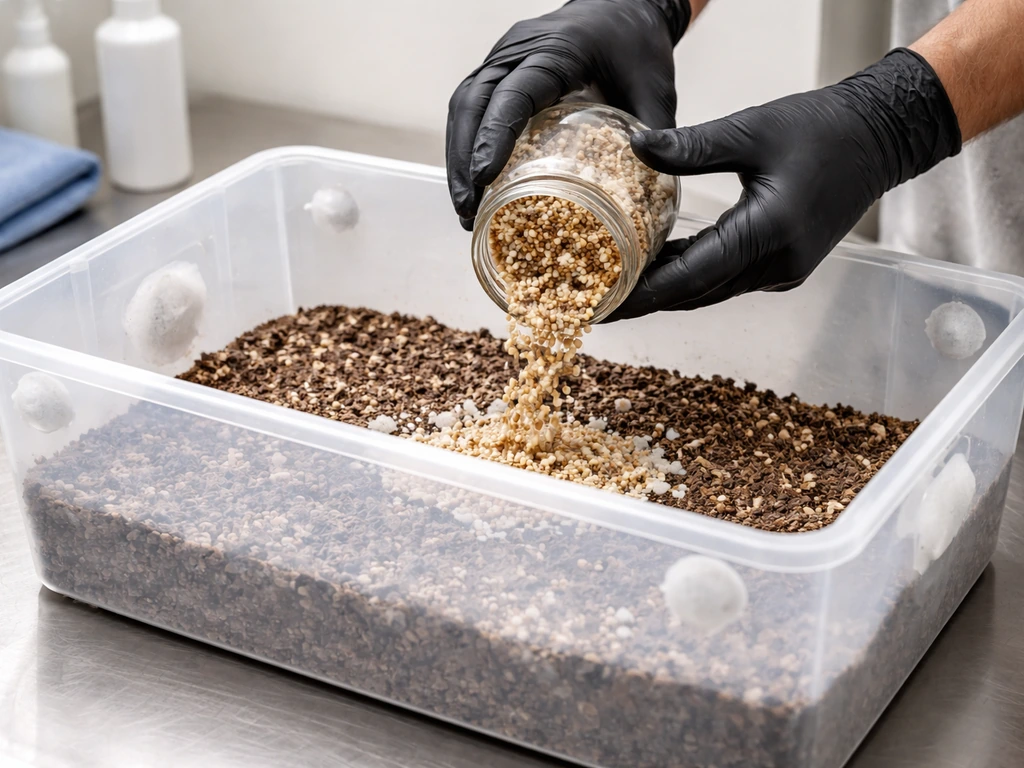
- Layer your tub: add a 2-inch layer of CVG, spread a layer of grain spawn, then another layer of CVG, then more spawn, finishing with a thin CVG casing layer on top. A common ratio is roughly 20–30% grain spawn to 70–80% CVG by volume.
- Alternatively, mix the spawn and substrate together thoroughly in the tub, then level it off and add a thin casing layer. Either method works.
- Seal the tub with its lid and move to your incubation space.
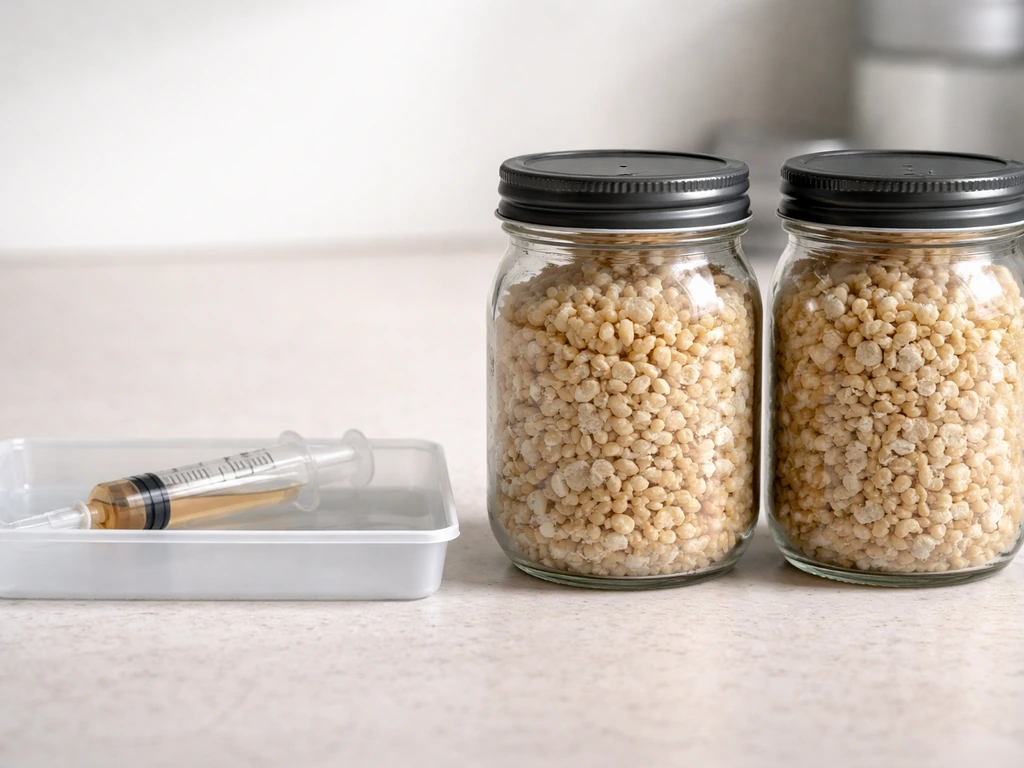
If you're using liquid culture
- Inject 3–5 cc of liquid culture into each quart jar of sterilized grain (rye berries, wheat berries, or popcorn all work) through a self-healing injection port or after flame-sterilizing the needle.
- Shake the jars gently to distribute the culture after injection.
- Allow the grain jars to fully colonize (typically 10–14 days at 75–80°F) before breaking them up and mixing into your bulk substrate using the same layering or mixing method described above.
Incubation: what to watch for and what to avoid
Once inoculated, your tub goes into a warm, dark space to colonize. This is the spawn run phase and your main jobs are maintaining temperature and watching for contamination signs. Do not open the tub unnecessarily. Every time you lift the lid, you're introducing fresh contaminants.
Incubation checklist
- Temperature: target 75–82°F (24–28°C) substrate temperature. Ambient air temperature and substrate temperature differ, so if possible, measure at the substrate surface. Higher temperatures speed colonization but increase contamination risk.
- Light: keep the tub in darkness or very low ambient light during incubation. Full darkness is ideal but not strictly required.
- Fresh air exchange: passive FAE through polyfill holes is sufficient during incubation. You do not need active airflow at this stage.
- Moisture: do not mist during incubation. The CVG substrate holds sufficient moisture and introducing water during colonization invites bacterial contamination.
- Duration: expect full colonization in 10–21 days depending on temperature, spawn ratio, and strain vigor. White, ropy mycelium spreading through the substrate is what you're looking for.
- Contamination signs to watch for: green, blue-green, or black patches (Trichoderma or other molds), yellow or orange discoloration, foul or sour smell, and wet slimy areas (bacterial contamination). Any of these means isolate that tub immediately and do not open it near your clean grows.
A common panic moment for new growers is seeing blue bruising on the mycelium. Blue coloration from physical contact or slight temperature stress is a normal reaction in cubensis and does not mean contamination. Contamination is always a distinct color (green, orange, black, yellow) and usually has a smell. Healthy mycelium is white to off-white.
Fruiting: setting up the right environment
Once your substrate is fully colonized (white mycelium visible throughout with no green or suspicious patches), it's time to trigger fruiting. If you want more practical indoor details, follow a step-by-step cubensis indoor grow plan to dial in your environment from spawn run through fruiting how to grow cubensis indoors. The shift from incubation to fruiting involves lower temperature, higher humidity, more fresh air exchange, and the introduction of light.
Fruiting environment targets
| Variable | Target Range | Notes |
|---|---|---|
| Temperature | 68–72°F (20–22°C) | Drop from incubation temps triggers pinning |
| Relative Humidity | 90–95% for pinning; 85–90% once pins form | Never let it drop below 80% or pins abort |
| Fresh Air Exchange | 2–3 times daily manual fanning, or passive FAE holes | CO2 should stay below 1,000–2,000 ppm; high CO2 causes long, spindly stems |
| Light | Indirect natural light or 12 hrs of low-intensity artificial light | Cubensis needs light cues to pin and orient growth |
| CO2 | Below 1,000–2,000 ppm | Poor FAE is the most common cause of overlay and aborted pins |
To raise and maintain humidity, mist the walls of your fruiting chamber (not directly onto the substrate or mushroom tissue) two to three times per day with a clean spray bottle filled with clean water. Maintaining around 90% RH during pinning and above 80% later helps promote proper growth in a shotgun fruiting chamber. Misting directly onto fruiting bodies causes bacterial blotch, which shows as dark wet lesions on the caps.
Fan briefly after misting to exchange air and prevent stagnant CO2 buildup. For psilocybin-focused home cultivation, keeping humidity at or above 90% and maintaining CO2 below 2000 ppm with constant fresh air exchange are key environmental targets [CO2 buildup](https://www. psilosophy. info/resources/MushroomCultivator-APracticalGuidetoGrowingMushroomsatHome.
pdf). This "mist and fan" routine is the core daily task of the fruiting phase.
Pins typically appear within 5–14 days of initiating fruiting conditions. Once you see the first tiny pinheads forming, reduce disturbance to the tub. The more you poke around and check, the more pins you'll abort. Trust the process and let the environment do the work.
Fruiting triggers
The main environmental triggers for pinning in cubensis are the temperature drop (from ~80°F down to ~70°F), increased fresh air exchange, and light. If colonization is complete but pins aren't forming after two weeks of fruiting conditions, try a cold shock: move the tub to a refrigerator at 50–55°F for 12–24 hours, then return it to fruiting conditions. This mimics seasonal temperature variation and often kicks stubborn substrates into pinning.
Harvesting, second flushes, and troubleshooting
When and how to harvest
Harvest just before or as the veil underneath the cap begins to tear. Once the veil breaks and the cap flattens out, spore drop begins, which reduces potency and makes a mess of your substrate. To harvest, grip each mushroom at the base and twist gently while pulling upward. Don't cut them, because stumps left behind rot and invite contamination. After harvesting a flush, remove any remaining pins (even aborted ones) and any substrate debris.
With proper conditions, expect your first flush within about a month of inoculating your bulk substrate, sometimes faster. If you focus on timing and environment after inoculation, you can steadily work toward how to grow big cubensis yields inoculating your bulk substrate. A healthy tub will typically produce two to four flushes before the substrate is exhausted.
Getting a second and third flush
- After harvesting all mushrooms, remove any dead pins and surface debris.
- Lightly scrape the top 1–2 mm of the substrate surface with a sterilized spoon or gloved hand to expose fresh mycelium.
- Mist the surface lightly, then replace the lid and return to fruiting conditions.
- Some growers do a "dunk and roll" by flipping the colonized substrate block out of the tub, submerging it in cold water for 12–24 hours to rehydrate, then returning it to the tub. This works well if your substrate is losing moisture noticeably between flushes.
Troubleshooting common problems
| Problem | Likely Cause | Fix |
|---|---|---|
| Green mold (Trichoderma) | Contaminated spawn, poor substrate prep, or airborne contamination during inoculation | Remove tub immediately from grow space; do not open near other grows; sterilize workspace before next attempt |
| Wet, slimy patches on substrate or mushrooms | Bacterial contamination from misting directly on tissue or condensation | Improve FAE; mist walls not substrate; harvest mushrooms earlier |
| Overlay (thick white mycelial mat, no pins) | Too much CO2, too little FAE, or insufficient light | Increase fanning frequency; add more light; try cold shock to trigger pinning |
| Aborted pins (small pins that stop growing and die) | CO2 spike, humidity crash, or physical disturbance | Stick to your mist-and-fan routine; minimize tub opening; check humidity |
| Long, skinny stems with small caps | CO2 too high / insufficient FAE | Fan more aggressively 3–4 times daily; drill more FAE holes if needed |
| No pins after 2 weeks of fruiting conditions | Substrate not fully colonized, temp too high, or insufficient trigger | Confirm full colonization; drop temp; try 24-hour cold shock |
Most failed grows trace back to two things: contamination during inoculation (usually from rushing or skipping cleaning steps) and poor FAE during fruiting (usually from not fanning enough or sealing the tub too tightly). If you nail your sterile technique and stay consistent with the mist-and-fan routine, you'll work through both problems quickly.
If you're planning to expand beyond basic cubensis cultivation, the same substrate and fruiting skills transfer well to other species. If you want to know how to grow amanita muscaria indoors, focus on creating the right indoor conditions and using species-appropriate starter material and substrate other species. Growing albino PE (APE), for example, follows a similar substrate and fruiting workflow with some adjustments for slower colonization. And if you want to branch into other psilocybin species, the environmental control principles covered here apply across the board, though each species has its own quirks worth researching separately.
The big takeaway: growing P. cubensis without spores is genuinely straightforward once you have quality starting material and a consistent environment. Grain spawn removes the most technically demanding step (spore germination), CVG substrate is forgiving and cheap, and the monotub fruiting setup needs minimal equipment. Give it clean hands, the right temps, and a regular misting schedule and you'll have your first flush in about four to six weeks from inoculation day.
FAQ
Can I reuse leftover grain spawn or bulk substrate after a flush if I want to keep going without spores?
In general, no. Grain spawn is meant for one inoculation cycle, and reused bulk substrate rapidly becomes mixed with decayed tissue and contaminants, which makes later colonization less predictable. After harvesting, remove all debris (including aborted pins), then start a fresh pasteurized CVG batch and use newly prepared colonized grain spawn or liquid culture for the next run.
What should I do if my liquid culture looks cloudy or has sediment after inoculation?
Some settling can be normal, but if you see distinct color changes, fuzzy colonies, or strong off-odors, treat it as suspect. Before scaling up, test the culture on a small piece of agar (or a small portion of grain) to confirm it produces healthy, white mycelium. Avoid directly expanding any culture that shows contamination symptoms, even if it still seems to grow.
How can I tell the difference between healthy blue bruising and actual contamination early on?
Blue bruising is usually localized and associated with handling or minor temperature fluctuation, while contamination tends to spread into distinct blotches or patches that look green, orange, black, yellow, or otherwise “off” compared to uniform white growth. Also pay attention to smell, healthy tubs typically do not develop a sharp sour or rotten odor. When in doubt, isolate the tub and inspect under consistent lighting rather than opening repeatedly.
Is CVG always the best choice, or can I swap in other substrates without spores?
CVG is forgiving for cubensis, but substitutions change water retention and nutrient balance, which can affect colonization speed and contamination risk. If you try alternatives, keep the overall properties similar, for example coir for fiber, gypsum as a calcium source, and a water-holding amendment. Major changes like using wood-based or low-nitrogen mixes often reduce performance because cubensis is dung-associated and favors nitrogen-rich nutrition.
How do I maintain the right moisture level in CVG without making bacterial contamination more likely?
Use the squeeze test mentioned in the guide, aim for a few drops, not a stream. If you consistently end up too wet, reduce the amount of water used during pasteurization or let the substrate cool and drain longer before mixing. If too dry, mist lightly and mix again, then retest by squeezing, avoid adding water after it is already layered inside the monotub.
What’s the right way to improve fresh air exchange if pins stall but my substrate is fully colonized?
First confirm the tub is not sealed too tightly, and that you are not over-misting the inside of the tub walls. Increase FAE by ensuring the polyfill or micropore patches are not clogged and that the chamber has the intended hole count and height. Then reduce disturbance, if you keep opening the lid to “check,” you often abort small pins or prevent them from stabilizing.
Should I do a cold shock every time pins do not show within 14 days?
Not necessarily. Cold shock is a troubleshooting step, use it only after confirming colonization looks complete and environmental triggers are correct (temperature drop, light exposure, and adequate FAE). If your tub is still too warm or humidity is too low, cold shock may not help and can stress the substrate. Start with the environment first, then apply cold shock for 12 to 24 hours if pins still do not form.
How early can I smell contamination, and what odors are most concerning?
Smell is often one of the earliest warning signs, especially when inoculation introduced unwanted organisms. A clean, earthy or neutral fungal smell is common, while sour, rotten, sharp “vinegar-like,” or strongly unpleasant odors are more concerning. If you notice odor plus visible off-colors, remove the tub from your grow area to avoid cross-contamination.
What should I do if my first flush is small even though colonization succeeded?
Small first flushes often come from uneven moisture, insufficient fresh air exchange during the fruiting phase, or harvesting too early or too late. Review the daily mist-and-fan routine, make sure misting targets chamber walls rather than mushroom tissue, and harvest when the veil is about to tear. Also note that the second and third flushes can be stronger after you dial in conditions, so consistency matters.
When is it unsafe to keep trying with the same tub, and should I restart instead?
Restart when contamination is clearly present (green, black, orange, yellow patches, rapid spread) or when the tub develops a strong foul odor that continues to worsen after you stop disturbing it. If you only see minor blue bruising without other off-colors and the growth remains mostly white, you can usually ride it out. But if the problem is persistent or spreading, isolating and restarting is usually faster than repeatedly “troubleshooting” a failing tub.