Growing Psilocybe azurescens indoors is genuinely difficult, and I want to be upfront about that before you invest time and money into a setup. If you are looking for a more beginner-friendly species, this approach differs from how to grow cubensis indoors, especially for temperature and fresh air needs Growing Psilocybe azurescens indoors. This species evolved to fruit outdoors in cool, coastal Pacific Northwest conditions, and it stubbornly resists conventional indoor fruiting chambers.
How to Grow Azurescens Mushroom Indoors Step by Step

Marcus Holloway
14 May 2026
That said, it is possible to pull it off indoors if you understand exactly what the fungus needs: colonization temperatures around 18-24°C, a fruiting trigger of sustained cool temps between 10-15°C, relative humidity above 90%, strong fresh air exchange, and a wood-chip-heavy substrate. Most indoor failures come from skipping one of these. This guide walks you through every step, from getting spawn to harvesting your first flush, and tells you what to do when things go sideways.
If you're instead looking for how to grow amanita muscaria indoors, the setup and environmental targets are different, so it helps to follow an amanita-specific guide. If you are aiming to grow amanita muscaria outdoors, the environmental and seasonal cues are very different from an indoor setup. One more thing before we start: [psilocybin is a Schedule I controlled substance in the United States at the federal level](https://www. ecfr.
io/Title-21/Section-1308. 11), and cultivation laws vary widely by country, state, and city. Know your local laws before proceeding. Before growing psilocybin-containing fungi, note that the GAO reports [psilocybin is a Schedule I controlled substance in the United States](https://www.
gao. gov/assets/gao-24-106630. pdf) and that it discusses limited accepted safety outside medical supervision, while some states and localities have moved toward legalization for regulated use.
What you'll need before you start

Getting your supplies together before inoculation day matters more than people realize. Scrambling for missing items mid-process is how contamination happens. Here is what you need across three categories: genetics and spawn, substrate materials, and workspace gear.
Spawn vs. spores: what to actually start with
For azurescens specifically, starting from grain spawn or colonized wood-chip spawn is far more practical than working from spores. Spore-to-grain inoculation takes longer, introduces more contamination risk, and azurescens spores are notoriously slow to germinate compared to cubensis. If you can source grain spawn (rye berry or oat grain) already colonized with azurescens mycelium from a trusted supplier, start there. Alternatively, colonized wood-chip blocks work well because they match azurescens's preferred substrate from the start.
Liquid culture syringes are a middle-ground option that speeds up colonization versus raw spores, but still require clean technique. Compared to growing cubensis or APE indoors, where spore-to-grain is a perfectly fine entry point, azurescens rewards you for using the most advanced starting material you can get. If you specifically want how to grow psilocybe cubensis without spores, start with clean, colonized grain spawn rather than relying on spore-based inoculation.
If you already understand APE growing basics, the main differences for azurescens are the cooler fruiting trigger and stricter fresh air requirements Compared to growing cubensis or APE indoors.
Supplies list
- Azurescens grain spawn or colonized wood-chip block (from a reputable supplier)
- Hardwood fuel pellets or alder wood chips (the main substrate component)
- Wheat bran or rice bran for supplementation (10-15% by dry weight, max)
- Sterilization setup: pressure cooker capable of 15 PSI, or large pot for pasteurization
- Polypropylene grow bags with filter patches, or wide-mouth mason jars
- Monotub (66-quart clear storage tote works well) or a modified shotgun fruiting chamber (SGFC)
- Digital thermometer/hygrometer combo unit
- Still-air box or flow hood for inoculation
- 70% isopropyl alcohol, nitrile gloves, face mask
- Spray bottle for misting
- Perlite for passive humidity (if using SGFC)
- A small fan on a timer for fresh air exchange
- Refrigerator with reliable temperature control in the 10-15°C range (crucial for fruiting)
The refrigerator requirement is the one that surprises most people. Unlike cubensis, which fruits happily at room temperature, azurescens needs a genuine cold trigger to pin. A dedicated mini-fridge you can set to 10-15°C and run a humidity setup inside is the most reliable indoor fruiting solution I've found.
Choosing and preparing the right substrate
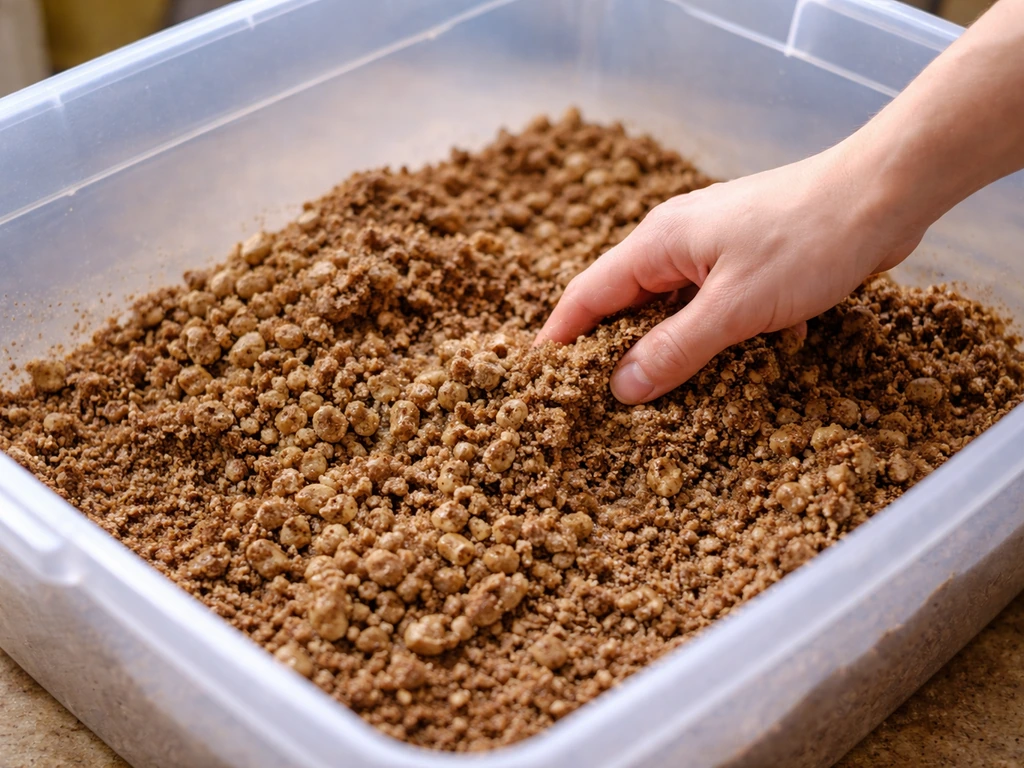
Azurescens is a wood-loving species. In the wild, it colonizes alder wood chips and sandy, coastal soils. Give it a coco coir and vermiculite mix like you might use for cubensis and it will colonize slowly, fruit poorly, and generally sulk. The substrate that works best for azurescens indoors is a hardwood-heavy blend with a modest bran supplement.
The base substrate formula
A reliable mix is roughly 85% pasteurized hardwood fuel pellets (HWFP) rehydrated into sawdust, and 15% wheat bran or rice bran by dry weight. Some growers add a small amount of gypsum (about 1% by weight) to help with moisture retention and structure. If you can source alder specifically, use it. Oak or beech HWFP works well too. Avoid pine or other softwoods, which contain antimicrobial terpenes that slow or kill mycelium.
Sterilization vs. pasteurization: which one to use
Because you're using a supplemented (bran-containing) substrate, you need full sterilization at 15 PSI for 2.5 hours, not just pasteurization. Bran is rich in nutrients and will host competing bacteria and mold if not sterilized. Unsupplemented straight sawdust or wood chips can get away with pasteurization at 80-82°C for 1-2 hours, but the moment you add bran, go to the pressure cooker. Pack your substrate into polypropylene bags or wide-mouth mason jars, sterilize, and let everything cool fully to below 24°C before inoculating. I mean fully. Inoculating warm substrate is one of the most common beginner mistakes and it kills or weakens your spawn immediately.
Target moisture content
Field capacity is the goal: squeeze a handful of substrate and you should see just a few drops of water come out, not a stream. Azurescens tolerates slightly wetter substrate than cubensis, but waterlogged substrate drowns the mycelium and invites bacterial contamination. Aim for around 60-65% moisture content. When you're rehydrating HWFP, add water gradually and mix thoroughly, checking the squeeze test before you commit to your final moisture level.
Inoculation and incubation: keep it clean and colonize successfully
This stage is where most contamination happens, and azurescens is slower to colonize than cubensis, which means contaminants have more time to establish themselves. Clean technique is non-negotiable here.
Inoculation process step by step
- Wipe down your still-air box or flow hood with 70% isopropyl and let it dry for 5 minutes.
- Put on nitrile gloves, spray them with alcohol, and put on your face mask.
- Flame-sterilize your inoculation tool (scalpel or needle) and let it cool for 30 seconds.
- Open your sterilized substrate bag or jar only inside the still-air box.
- Introduce your grain spawn at a rate of about 20-30% spawn to substrate by volume. Higher spawn rates mean faster colonization and less contamination risk for a slow-colonizer like azurescens.
- Mix thoroughly if using bags, or layer spawn on top of jars and let gravity do the work.
- Seal bags with tape or clips; replace lids on jars. Label with species and date.
Incubation conditions and what to expect
Incubate your inoculated substrate in a dark location at 18-24°C. Azurescens mycelium is white and slightly ropy, similar to other wood-loving species. Expect full colonization to take 3-6 weeks, which is significantly longer than the 10-14 days you'd see with cubensis. Do not rush this by raising the temperature. Azurescens is sensitive to heat stress above 25°C and will slow or stall. Check every 3-4 days for early contamination signs (green, black, or orange patches, or sour smells). If you see contamination in the first week, isolate that bag immediately. Healthy mycelium has a clean, faintly earthy smell. Patience is genuinely the skill being tested during incubation.
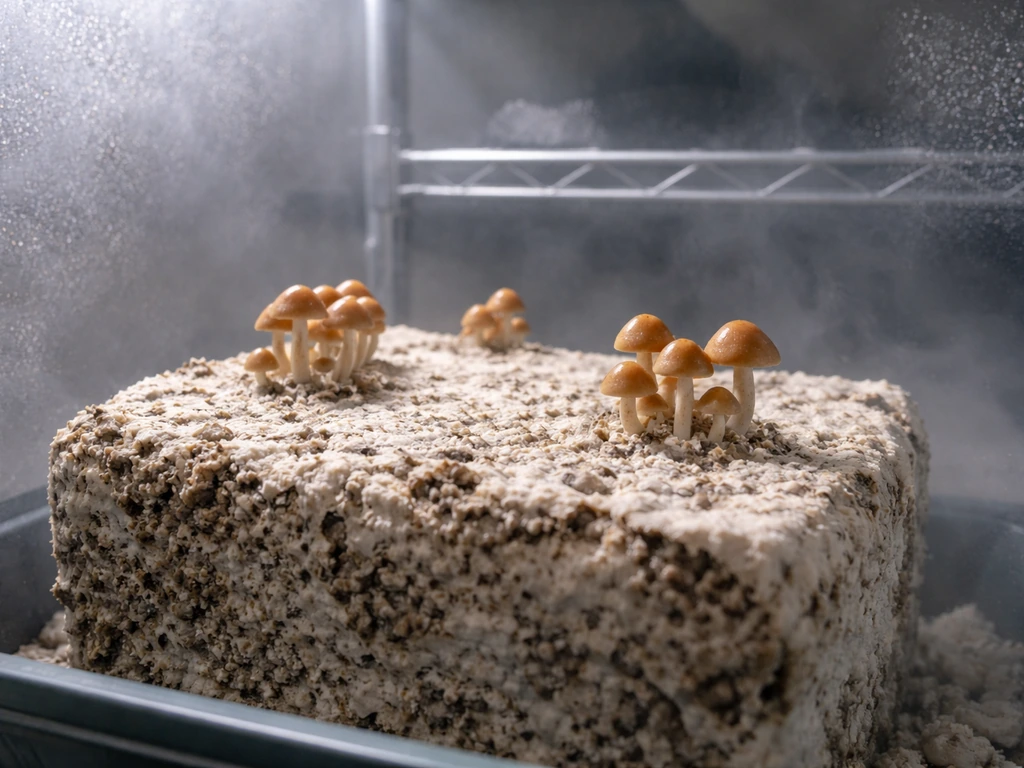
Fruiting setup indoors: the part most people get wrong
Once your substrate is fully colonized, you need to create conditions that trick azurescens into thinking autumn has arrived on the Oregon coast. That means dropping temperature, maintaining very high humidity, delivering fresh air regularly, and providing a gentle light cycle. Every one of these matters. Getting three out of four right still often means no pins.
Temperature: the non-negotiable variable
Fruiting temperature for azurescens is 10-15°C, with the sweet spot around 12-13°C. Room temperature in most homes (18-22°C) is simply too warm for this species to pin reliably. This is why a dedicated mini-fridge set to around 12°C is the most practical indoor solution. You'll run your humidity and FAE (fresh air exchange) setup inside the fridge. A temperature-controlled wine cooler or a garage in autumn also works. If you're growing cubensis at the same time, you already know their fruiting chamber runs at 22-25°C, so you can't share a chamber between the two species.
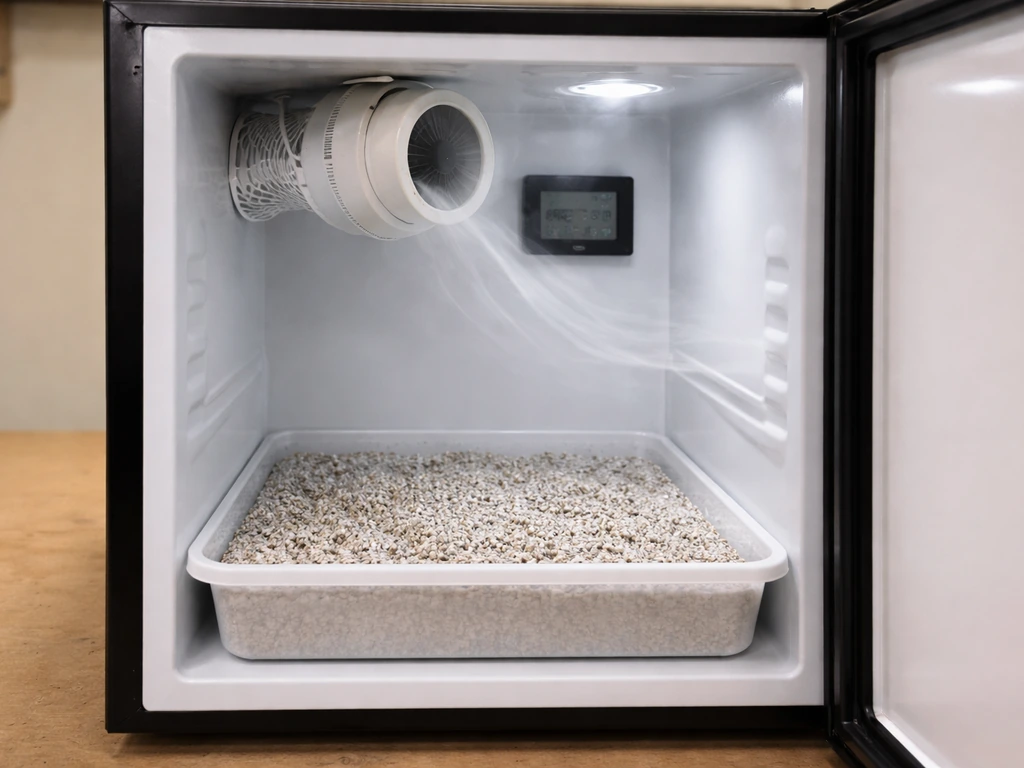
Humidity, fresh air, and light
Relative humidity should be above 90% during fruiting, ideally 92-95%. In a mini-fridge setup, mist the walls and a layer of wet perlite at the base twice daily to maintain this. Run a very small USB fan on a 15-minutes-on, 45-minutes-off timer to deliver fresh air exchange without drying out the chamber. CO2 buildup from poor FAE is a major reason azurescens pins abort or develop long, thin, deformed stems.
If your fruiting chamber smells stale when you open it, FAE is insufficient. For light, a 12/12 cycle (12 hours on, 12 hours off) of indirect, low-intensity light (even a phone flashlight held to the side of the tub for 5 seconds does nothing, but a 6500K LED strip set low works well) helps signal the seasonal day-length change. Azurescens isn't light-hungry, but the cycle matters as a fruiting cue.
Fruiting chamber comparison: monotub vs. SGFC vs. mini-fridge
| Setup | Temperature Control | Humidity Management | FAE | Best For |
|---|---|---|---|---|
| Mini-fridge with perlite tray | Excellent (dial to 12°C) | Good with daily misting | Needs small USB fan mod | Most reliable for azurescens |
| Monotub in cool room | Depends on ambient temp | Very good (sealed lid manages it) | Needs polyfill holes or fan | Works if room is already 10-15°C |
| Shotgun Fruiting Chamber (SGFC) | Poor (ambient only) | Good with perlite base + misting | Excellent passive airflow | Only if you live in a cold climate or cool basement |
For most people in typical home environments, the mini-fridge approach is the most controllable and reliable. It costs around $50-80 for a used mini-fridge and gives you real temperature precision. The monotub in a cold room is a close second if your growing space naturally stays cool, which some basements do in winter months.
What a realistic timeline looks like
Here's the honest timeline from inoculation to first harvest, assuming everything goes smoothly:
| Stage | Duration | Notes |
|---|---|---|
| Substrate prep and sterilization | 1 day | Cool to room temp before inoculating |
| Inoculation | 1 hour | Takes longer if you're new to still-air technique |
| Colonization (incubation) | 3-6 weeks | Longer than most species; do not rush |
| Cold conditioning / fruiting trigger | 1-2 weeks | Move to 10-15°C after full colonization |
| Pinning | 1-3 weeks after trigger | Pins are small and dark, easy to miss |
| First flush harvest | 5-10 days after pinning | Harvest before veils tear fully |
| Second flush prep | 5-7 days rest and rehydration | Dunk or soak block, return to fruiting conditions |
Total time from inoculation to first harvest is realistically 8-14 weeks. This is much longer than cubensis (which runs 4-6 weeks) and is the main reason many growers, especially those used to cubensis timelines, get impatient and disturb or abandon a run that was actually progressing fine.
Harvesting and managing flushes
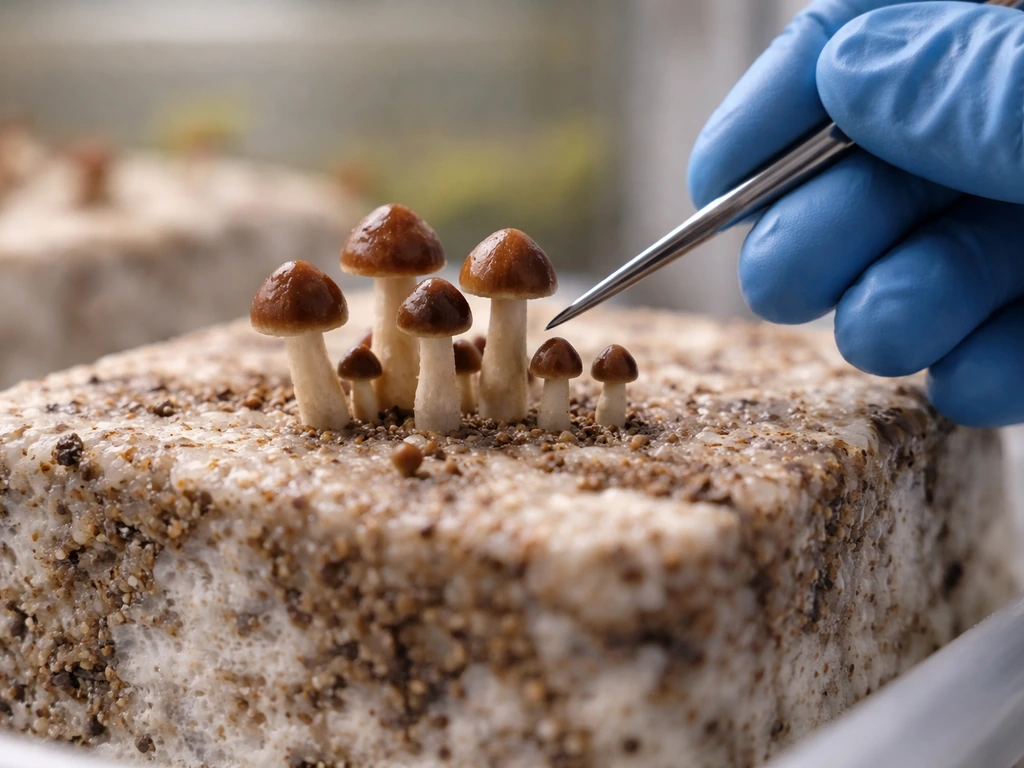
Azurescens pins are dark brown and small at first, emerging from the colonized substrate surface. Harvest them just before or as the veil tears, while the caps are still convex to flat. Once the veil tears and the cap edges curl upward, spore drop begins and potency can decrease. Twist-and-pull is the standard technique: grip the stem close to the base and rotate gently while pulling upward. Don't leave stem stumps in the substrate as they rot and seed contamination.
After the first flush, remove all aborts (small, undeveloped pins that didn't make it) because they rot quickly. To trigger a second flush, do a cold-water soak: submerge the colonized block in cold water (around 10°C) for 12-24 hours, then return it to your fruiting chamber. Azurescens typically produces 2-3 flushes indoors before the block is exhausted, with later flushes diminishing in size. The yields will be modest compared to outdoor beds, but the quality of indoor-grown azurescens can be excellent if the cold fruiting conditions were managed well. Outdoors, you can use the same wood-based substrate ideas, but you'll need to plan around natural temperature swings and seasonal fruiting conditions.
Troubleshooting: no pins, contamination, and other common failures
No pins after 2-3 weeks in fruiting conditions
This is the most common issue with azurescens indoors, and the culprit is almost always temperature. Check your actual fruiting chamber temperature with a separate probe thermometer, not just the dial setting. Mini-fridges often run warmer than their dial indicates, especially when you're opening them regularly. If the temperature is confirmed at 10-15°C and you're still seeing no pins after 3 weeks, try dropping to 10°C for 5-7 days as a more aggressive cold shock, then bring it back to 12-13°C. Also re-evaluate your FAE. A stuffy chamber high in CO2 is the second most common cause of pinning failure.
Contamination during colonization
Green mold (Trichoderma) is the most common contaminant and will appear as bright green or teal patches, usually near the surface or injection points. If it's isolated to one small area in a bag, some growers choose to isolate and monitor, but in most cases the safest move is to remove that bag from your grow space entirely and dispose of it in a sealed bag outdoors. Do not open it inside your grow room.
Black or orange contamination is typically bacterial and smells foul. Those blocks are done. Contamination during colonization almost always points back to either substrate that wasn't sterilized long enough, inoculation technique issues, or spawn that was already contaminated. Run through that checklist before starting the next batch.
Long, thin stems with small or undeveloped caps
This is a CO2 problem. High CO2 levels cause mushrooms to grow tall and leggy while the caps stay small and underdeveloped. Increase your fan frequency or duration, check that your FAE holes aren't blocked, and make sure you're actually exchanging air, not just moving the same stale air around. Two to three proper fresh air exchanges per day is the minimum for azurescens fruiting.
Substrate drying out or cracking
If your substrate surface is cracking or the edges look dry and pale, humidity has dropped or FAE is too aggressive. Increase misting frequency, rehydrate the block surface with a gentle spray of clean water, and check your hygrometer. If RH is consistently below 88%, your chamber seal needs improvement. Add more wet perlite or reduce the fan-on period. On the flip side, if you see standing water pooling at the base of the fruiting chamber or the substrate smells sour, you've gone too wet. Improve drainage (elevate the block on a small rack) and reduce misting until the surface firms up.
Stalled colonization
If mycelium growth stops spreading after an initial start, check incubation temperature first. Above 25°C and azurescens mycelium slows dramatically or stalls. Below 15°C during incubation also slows growth significantly. The target is 18-24°C for colonization. If temperature is fine, check for localized contamination stalling the spread. A healthy block that stalls at 50-70% colonized and shows no other symptoms sometimes just needs more time. Give it another 1-2 weeks before giving up.
After a bad run: what to adjust next time
A failed azurescens run is frustrating, but it's also diagnostic. The most valuable thing you can do after a bad run is write down exactly what happened and when. Did contamination appear in week one or week four? Did you see no pins at all, or pins that aborted?
Each failure pattern points to a specific variable. No pins almost always means temperature or FAE. Early contamination means sterilization or inoculation hygiene. Aborted pins or leggy growth means CO2 or humidity.
Write it down, fix one variable at a time, and try again. Azurescens is a genuinely challenging species to fruit indoors, and even experienced growers occasionally get a bad run. If you've had good success with cubensis indoors and want to step up the difficulty level, azurescens is an excellent next challenge.
If you are looking for a less challenging indoor option, you can also review our guide on how to grow big cubensis and set up your chamber accordingly cubensis indoors. If you're brand new to indoor cultivation, I'd strongly suggest getting a few successful cubensis runs under your belt first before tackling azurescens.
The fundamental techniques transfer directly, and the experience you build identifying healthy mycelium, managing contamination, and dialing in your fruiting chamber will make your first azurescens run dramatically more likely to succeed.
FAQ
Can I grow azurescens indoors without a mini-fridge, using just a normal room or basement?
Yes, but only if your space can reliably hold the fruiting trigger range (10-15°C) without drifting warm during the day. Use a separate probe thermometer placed where the substrate sits, and avoid relying on the room thermostat or fridge dial. If your temperatures regularly exceed about 15-16°C, you may get colonization but very few pins.
What should I do if my substrate fully colonizes, but pins never appear?
First verify two things with measurements, not guesses: fruiting temperature at the substrate surface, and fresh air exchange. Mini-fridges can read cooler on the dial than they really are, and a sealed chamber can build CO2 fast. If temperature is confirmed in range and RH is above about 90%, try a more aggressive cold shock for 5-7 days to about 10°C, then return to 12-13°C while increasing the fan duty cycle.
How often should I open the fruiting chamber or mini-fridge to check it?
Minimize door openings. Each opening dumps cold, humid air and can cause humidity swings that prevent stable pinning. Instead of frequent openings, check temperature with a probe and use a hygrometer window or sensor to confirm RH, then only open to harvest or if you suspect an issue like contamination.
Is it okay to use a humidifier or fogger instead of misting walls and wet perlite?
It can work, but you need to prevent direct wetting of the substrate and avoid creating puddles. Directly spraying the substrate surface too often increases bacterial risk and can cause cracking or sour smell. A safer approach is to humidify the chamber air while keeping the substrate surface slightly damp, not drenched.
Can I recycle or reuse the same substrate after a flush?
Usually no. For azurescens, even if some mycelium remains after the final flush, later flushes often fail, shrink heavily, or shift toward contamination. It is better to treat each block as a planned 2-3 flush project, then start a fresh sterilized batch for consistent results.
How do I tell the difference between healthy mycelium and contamination during incubation?
Healthy azurescens mycelium stays white and ropy with a clean, faint earthy odor. Contamination often shows up as distinct color patches (green, black, orange) or sour, unpleasant smells. If you see early spots, isolate that bag if you have separate space, but do not open it inside the main grow area.
Why did my colonization stall even though there was no visible mold at first?
The most common cause is temperature mismatch during incubation. Growth slows dramatically above about 25°C and can also slow below about 15°C. If temperature is correct, check that the substrate moisture is within field capacity, because overly wet or overly dry blocks can stall spread even without obvious discoloration.
Should I keep the humidity very high even after harvest to encourage a second flush?
Keep it high during the reset, but do not over-saturate the chamber. Use the cold-water soak trigger for 12-24 hours, then return to the normal fruiting setup (10-15°C, RH above 90%, and adequate FAE). If the surface stays wet or smells sour after the soak, reduce misting and improve drainage before expecting the next flush.
What’s the safest way to harvest so I do not contaminate the block?
Harvest just before or as the veil tears, then use a twist-and-pull while removing the entire stem base cleanly. Leaving stem stumps is a major rot pathway that can seed bacteria and cause later flush issues. After harvesting, remove obvious aborts quickly so they do not decay on the substrate surface.
Can I combine azurescens and cubensis in the same grow area or chamber?
Avoid it. The species have different fruiting triggers, temperature targets, and fresh-air requirements. Even if they are placed in the same room, shared airflow and humidity conditions often drift into the range that favors one species and prevents consistent pinning in the other.
What records should I keep to troubleshoot effectively after a failed run?
Write down dates for inoculation, first signs of colonization, when the substrate was moved to fruiting, and when pins aborted or never appeared. Also record actual measured fruiting temperature at the substrate, RH, and how often you ran the fan or opened the door. Patterns like early contamination, no pins, or leggy growth typically point to one variable, making fixes much faster when you have a timeline.