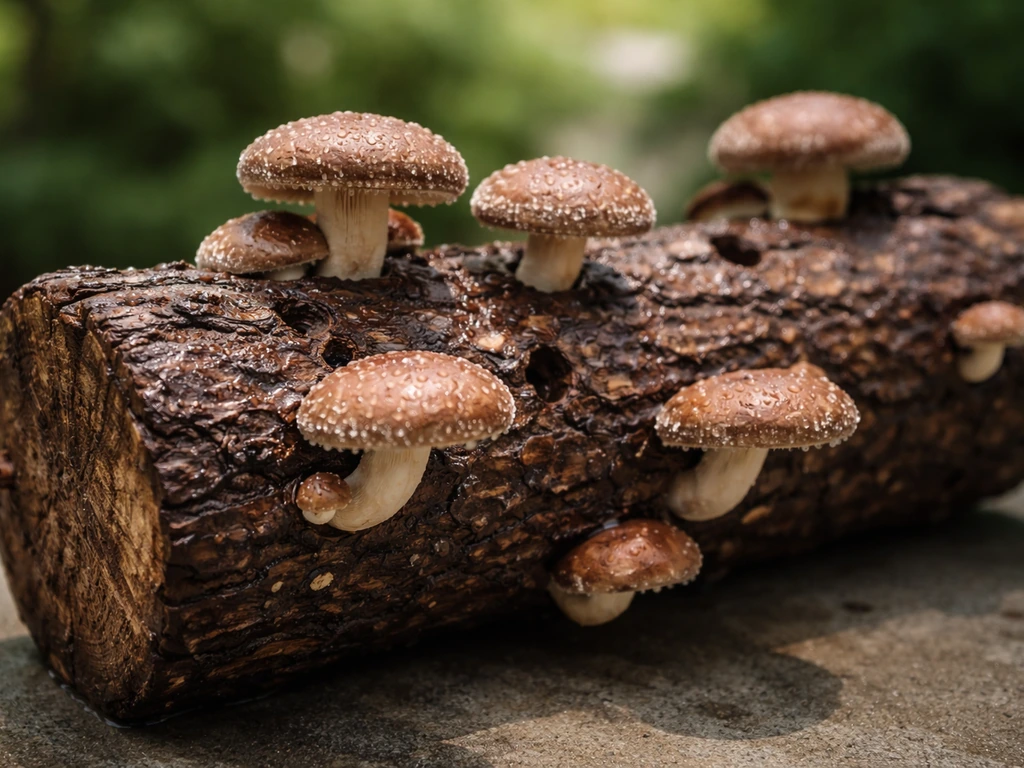
Growing shiitake on logs is one of the most rewarding things you can do as a home mushroom grower, but it does ask for patience.
How to Grow Shiitake on Logs: Step-by-Step Guide

Marcus Holloway
27 Apr 2026
The basic process goes like this: cut fresh oak logs in late fall or winter, drill a pattern of holes across the bark, insert shiitake spawn (either plug dowels or sawdust), seal the holes with wax, let the logs colonize in a shaded, moist spot for 6 to 18 months, then force fruiting by soaking the logs in cold water.
To get consistent results, focus on the details of cutting, drilling, spawn type, and sealing before you wait for colonization cut fresh oak logs in late fall or winter. After that first flush, a single log can produce mushrooms repeatedly for 3 to 6 years. The steps themselves are not complicated. The trick is getting the details right at each stage, so let's walk through all of them.
Choosing the best logs for shiitake

Oak is the gold standard for shiitake. White oak, red oak, and bur oak all work beautifully because they're dense hardwoods that hold moisture and give the mycelium a long-lasting food source. If you can't get oak, other hardwoods like sugar maple, beech, hornbeam, and ironwood are solid alternatives. Avoid softwoods like pine or cedar entirely. They contain resins that are toxic to shiitake mycelium, and you'll get nothing but frustration.
For log dimensions, aim for 3 to 8 inches in diameter and 3 to 4 feet in length. Logs in that range are heavy enough to hold moisture without drying out between waterings, but still manageable to move when it comes time for soaking. Very thin logs (under 3 inches) dry out fast, produce fewer flushes, and burn through their nutrients quickly. Thick logs (over 8 inches) take much longer to colonize and become backbreaking to handle when waterlogged.
Freshness matters more than almost anything else at this stage. You want logs cut from live, healthy trees, ideally within the previous 2 to 6 weeks. The sweet spot for cutting is after the leaves have dropped in autumn and before the buds open in spring. That timing keeps the bark tight on the wood, which protects your spawn from drying out, and the sugar content in the sapwood is high enough to give the mycelium a strong start. Inoculate a few weeks after cutting, not immediately. Freshly cut wood contains natural antifungal compounds that dissipate over those first couple of weeks.
Where to source logs: check with local arborists, tree services, or anyone doing winter pruning or land clearing. Most are happy to let you take sections. Sawmills and firewood suppliers are also worth a call. Just make sure the logs haven't been treated with pesticides or herbicides, and that the bark is intact without signs of heavy rot or existing fungal colonization.
When and how to inoculate your logs
Choosing your spawn type
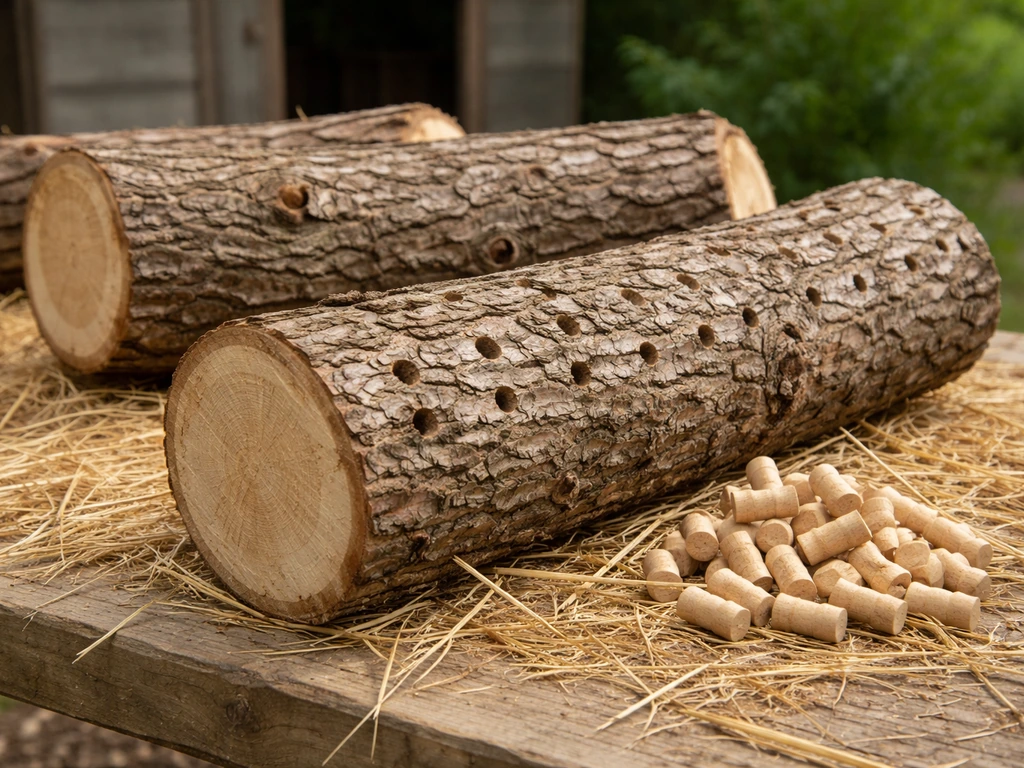
You have two main spawn options for log inoculation: plug spawn (wooden dowels colonized with mycelium) and sawdust spawn (a bag of colonized hardwood sawdust). Both work well. Plug spawn is more beginner-friendly because the dowels are easy to handle and hammer in. Sawdust spawn colonizes slightly faster and is used in commercial operations, but requires a drill bit with a stop collar and an inoculation tool or syringe to pack the holes. For your first set of logs, plug spawn is the easier starting point.
Drilling the holes
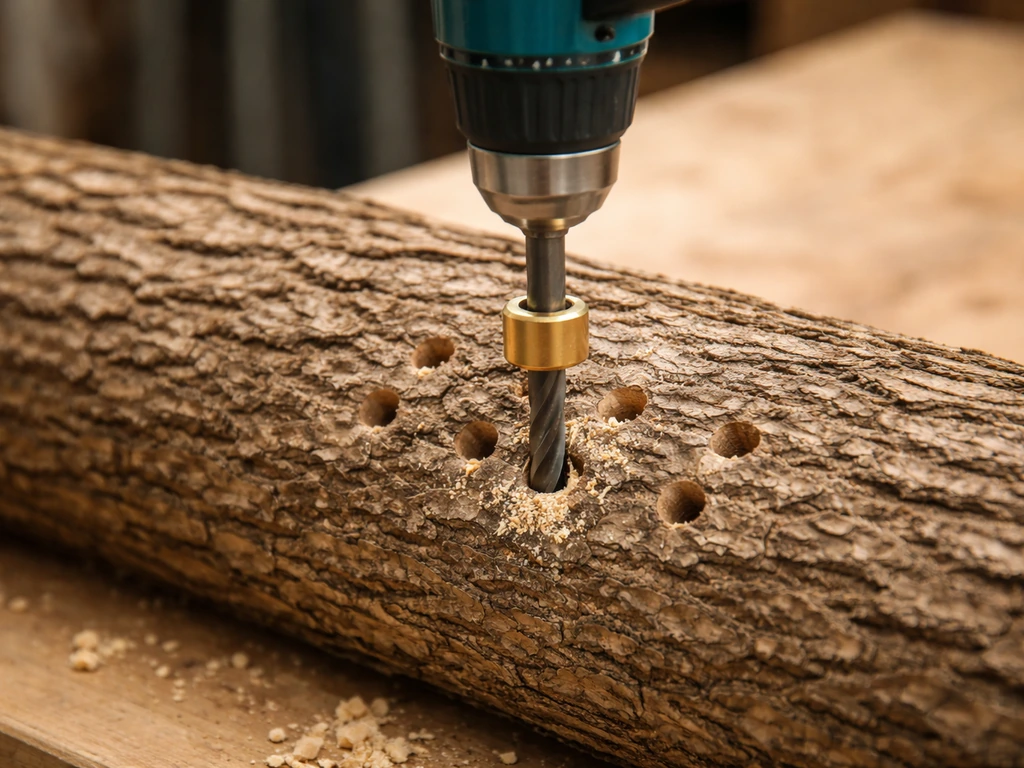
For plug (dowel) spawn, use a 5/16-inch (8.5 mm) drill bit and drill holes to a depth of 1 to 1.5 inches. For sawdust spawn, use a 12 mm bit with a stop collar set to the right depth. Work in a diamond or offset grid pattern along the log: space holes about 6 inches apart down the length of the log, and offset each row by 2 to 3 inches as you rotate around the circumference. A typical 4-foot log in the 4 to 5 inch diameter range will need somewhere around 30 to 50 holes total. Don't be stingy. More inoculation points mean faster colonization and less opportunity for competing fungi to move in first.
Inserting spawn and sealing
For plug spawn, tap each dowel flush with the bark surface using a rubber mallet or a regular hammer with a block of wood. For sawdust spawn, pack each hole firmly using an inoculation tool. Once all the holes are filled, seal every single one with cheese wax or food-grade beeswax. Melt the wax in a small pot or double boiler, dab it over each hole with a natural bristle brush or a dauber, and let it harden.
Also seal the cut ends of the log with a thicker coat of wax. This step is critical. The wax locks moisture in and keeps contaminants and competing spores out while the mycelium establishes itself. Don't skip it or use candle wax, which can crack and flake.
Incubation: letting the mycelium colonize
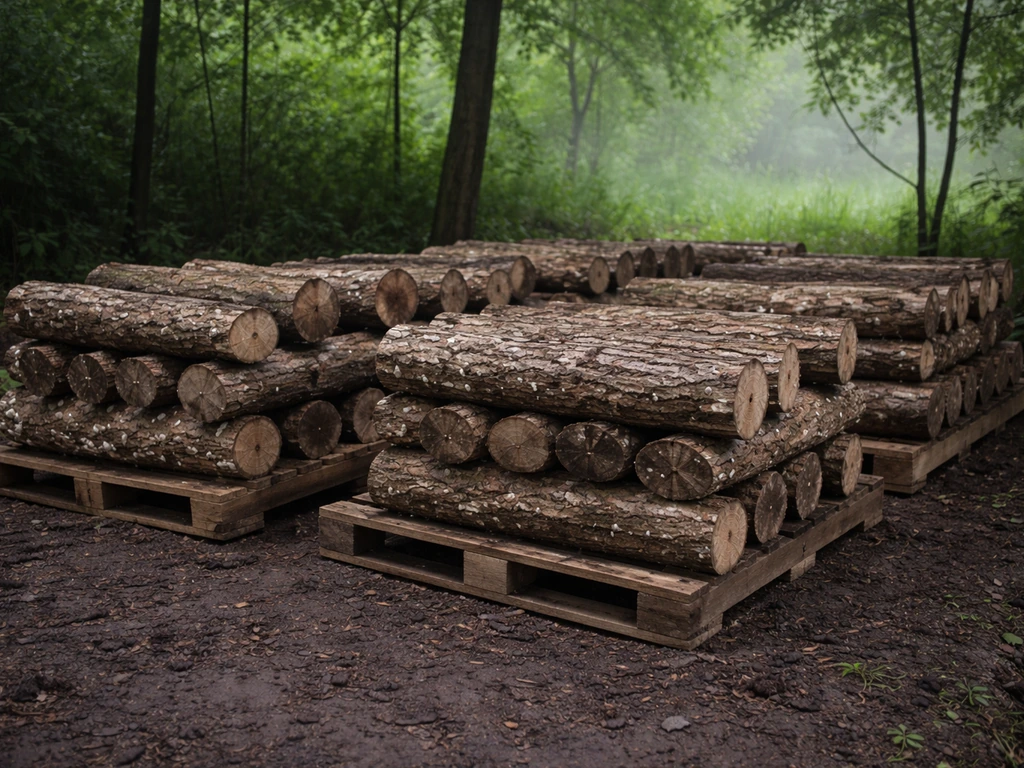
After inoculation, your logs need a shaded, humid outdoor spot to colonize. Shade is non-negotiable. Full sun dries out the bark, cooks the mycelium in summer, and kills your colonization before it gets going. Aim for 60 to 85 percent shade. Under deciduous trees is ideal because you naturally get heavy shade in summer and more light in winter when the logs are dormant. A shade cloth rated for that range works great if natural shade isn't available.
Stack the logs off the ground (use pallets, rails, or a simple wooden frame) in a leaning or crisscross stack to allow air circulation while keeping them from sitting in standing water or on soil that could introduce competing fungi. Keep them in a spot where the temperature stays between roughly 50 and 80 degrees Fahrenheit through most of the colonization period. Extreme heat above 95 degrees Fahrenheit can kill shiitake mycelium, so check on them in peak summer.
Moisture is the other big variable. Shiitake logs need regular hydration during incubation. A good rule of thumb is to water the logs for about 12 hours once or twice a month if you're not getting adequate rainfall. You can lay a soaker hose over the stack or prop a sprinkler nearby. The bark should feel slightly cool and damp to the touch, never bone dry and cracking. A moisture content around 35 to 45 percent in the wood is the target, though you won't be measuring this directly. Just think: damp forest floor conditions.
Colonization takes time. On red oak, most logs show visible white mycelium at the ends and are ready to fruit in 6 to 12 months. On white oak, which is denser, expect 12 to 18 months, and for very fresh white oak logs you may not see a first flush until 1 to 2 years after inoculation. This is not failure. It's just how dense wood works. Check the ends of your logs periodically for white, cottony mycelium growth. That's your indicator that colonization is progressing.
Forcing fruiting and harvesting your shiitake
How to force a flush
Once your logs are fully (or substantially) colonized, you can trigger fruiting by mimicking the conditions that signal fall or spring rains to the fungus. The most reliable method is a cold water soak. Submerge your logs in cold water for 12 to 18 hours. Cornell Cooperative Extension also recommends [cold-water force-fruiting by soaking shiitake logs in cold water for about 24 hours](https://ccecolumbiagreene.
org/resources/shiitake-bolt-management), and never more than 48 hours. Use a stock tank, large trash can, kiddie pool, or even a plastic tote. Weight the logs down with a rock or cinder block so they stay submerged. After soaking, stand or prop the logs in a humid, shaded spot with some airflow.
Mushroom pins should begin appearing within 5 to 10 days.
Temperature matters here too. Shiitake fruits best when daytime temperatures are between 55 and 75 degrees Fahrenheit, making spring and fall the natural windows. Cold water from the tap or from adding ice to the soak speeds up the temperature shock and can improve your results, especially in warmer weather. Some growers call this an ice bath forcing, and it works noticeably better than a lukewarm soak in summer.
Harvesting without damaging your logs
Harvest shiitake just before or as the veil underneath the cap begins to tear. At that stage the caps are usually 2 to 4 inches across and the mushrooms are at peak flavor and firmness. To harvest, twist the mushroom base with a slight pulling motion rather than cutting it, or cut with a clean sharp knife right at the base. Twisting leaves a cleaner wound on the wood. Leaving stem stubs can create entry points for mold and competing organisms.
After a flush, give the log a rest period of 6 to 8 weeks before forcing again. During that rest, keep the logs in their shaded spot and water them normally. This recovery window lets the mycelium rebuild energy reserves before the next round. Most growers run 3 to 4 forced flushes per year per log, though in ideal conditions with good moisture management you might push 5 or 6. Natural (unforced) flushes can also happen spontaneously after heavy rains or a cold snap, which is always a nice surprise.
Care, maintenance, and realistic yields over time
A healthy shiitake log on oak will produce mushrooms for 3 to 6 years, with peak productivity usually in years 2 and 3. Total yields vary a lot by log size, wood species, and how well you manage moisture. A typical 4-foot oak log will yield 1 to 2 pounds of fresh mushrooms per flush, and 20 to 25 percent of the log's weight in total mushrooms over its productive life. Thicker, denser logs tend toward the higher end of that range.
To keep yields strong across multiple seasons, rotate which logs you're forcing. Don't soak every log at once. Instead, stagger them so you have a steady supply coming in rather than one overwhelming glut followed by a long gap. Between forced flushes, logs should rest in their shaded stack and receive regular moisture. In hot, dry summers, increase watering frequency. In winter in cold climates, the mycelium goes dormant naturally, so you don't need to do anything special except make sure the logs don't fully desiccate.
As logs age past year 3 or 4, you'll notice yields declining and the wood becoming noticeably lighter and more punky (soft and crumbling). That's the mycelium finishing the job it was designed to do: breaking down the wood. When a log no longer fruits reliably despite proper forcing and care, it's reached the end of its productive life. At that point it makes fantastic compost or garden mulch.
| Life Stage | Timeline | What to Expect |
|---|---|---|
| Inoculation to first colonization signs | 2 to 4 months | White mycelium visible on log ends |
| First forced flush (red oak) | 6 to 12 months after inoculation | First pins appear 5 to 10 days after soaking |
| First forced flush (white oak) | 12 to 24 months after inoculation | Slower but still reliable |
| Peak production years | Years 2 and 3 | Most flushes per year, largest harvests |
| Log lifespan | 3 to 6 years | Yields taper; wood becomes spongy and soft |
Troubleshooting when things go wrong
No growth or very slow colonization
If you see no mycelium after 4 to 6 months, first check whether the logs dried out during that period. Pick one up and feel its weight. A log that's lost most of its moisture will be noticeably lighter than when you inoculated it, and the bark may be pulling away from the wood. Give logs an extended 18 to 24 hour soak, then resume regular watering. Also check that your spawn was viable when you used it. Old or improperly stored spawn (left in a hot car, exposed to direct sun, or frozen and thawed multiple times) may not colonize effectively. When in doubt, buy fresh spawn from a reputable supplier.
Weak or uneven fruiting
If your logs fruit but the flushes are sparse or only produce on one side, it usually points to uneven moisture in the wood or patchy colonization. For uneven colonization, make sure you did enough inoculation points when you drilled. For moisture issues, try a longer soak next time (18 hours instead of 12) and move the logs to a shadier spot during rest periods. Logs that spent too much time in direct sun are often partially dried out deep in the wood even if the surface feels okay.
Green or black mold on the log surface
Green mold (Trichoderma) is the most common competitor you'll see on shiitake logs. A small amount on the bark surface is not a crisis. Shiitake mycelium, once well established, can outcompete it. The problem comes when colonization is slow and Trichoderma gets a foothold. If you see heavy green mold spreading, wipe the affected area with a cloth lightly dampened with diluted hydrogen peroxide (3 percent solution works fine), then let the log dry in shade before returning it to your stack. The bigger lesson: inoculate more densely next time, use fresh spawn, and keep your drilling tools and wax daubers clean between logs.
Logs drying out
This is the number one problem beginners run into. Logs in full or partial sun in a dry climate can lose critical moisture within weeks. If your logs are cracking on the cut ends or the bark is flaking and lifting, you need to water more aggressively. Move them to a shadier spot and soak them for 24 hours to rehydrate. Going forward, water once or twice a month even when it rains, because the canopy above your stack can redirect a lot of rainfall away from the logs themselves.
Pests and critters
Slugs love shiitake, especially during humid fruiting periods. Pick them off by hand in the evening when they're most active, or set beer traps near your log stack. Squirrels and other rodents will occasionally chew on fruiting mushrooms or even on the logs themselves. A simple wire cage or hardware cloth around your stack during active fruiting periods keeps them out. Fungus gnats can also be a nuisance, mostly around indoor growing operations, but outdoors they're less of a concern since natural predators keep populations in check.
Quick-start checklist before you inoculate
- Fresh hardwood logs (oak preferred), cut within the last 6 weeks, bark intact
- Logs 3 to 8 inches in diameter and 3 to 4 feet long
- Shiitake plug or sawdust spawn ordered from a reputable supplier
- Correct drill bit: 5/16 inch (8.5 mm) for plug spawn, 12 mm for sawdust spawn
- Cheese wax or food-grade beeswax and a dauber or brush for sealing
- Rubber mallet (for plug spawn)
- Shaded outdoor location with 60 to 85 percent shade and airflow
- Soaking container large enough to submerge logs fully
- Watering plan for once or twice a month during incubation
Log cultivation is a bit of a long game compared to faster methods like growing shiitake on sawdust blocks indoors, but the payoff is real: logs produce year after year with minimal ongoing effort, and the mushrooms tend to have exceptional flavor and texture. If you want a different species after your shiitake setup, you can also learn how to grow reishi mushrooms and follow reishi-specific needs.
You can also learn how to grow shiitake on sawdust blocks indoors for a faster, more controlled setup. If you're also exploring other outdoor-grown species, wine cap mushrooms and maitake have their own log and wood chip cultivation approaches worth looking into once you've got your shiitake logs running. Wine cap mushrooms also do well using wood chips instead of logs, so you can follow their specific wood-chip method for best results.
For now, get those logs inoculated, get them in the shade, and give the mycelium time to do its work. The wait is absolutely worth it.
FAQ
Can I grow shiitake on logs if I do not have a lot of shade or storage space outdoors?
Yes, but you must control drying. Use a shade cloth (about 60 to 85 percent shade) and keep stacks off bare soil with good airflow. If you have strong summer sun, consider a temporary move plan (for example, relocating logs under a shaded structure during peak heat) and increase watering so the bark stays slightly cool and damp.
What’s the difference between a successful colonized log and one that is “not ready” to fruit?
A log can be wet but not fully colonized. The readiness cue is white, cottony mycelium on the cut ends (and often a more uniform colonized look when you check). If you force fruiting early, you may get small, sparse flushes and more green mold, so wait until the ends show substantial colonization.
How do I know whether my water soak is cold enough to trigger fruiting?
You can get good results without measuring, but aim for a clear temperature shock. If your climate is warm and logs are in summer conditions, soaking in colder water straight from the tap, or adding ice to bring the water down quickly, usually improves pinning. If you only use lukewarm water, expect weaker or delayed pinsets.
Do I need to soak logs immediately after I see mycelium at the ends?
Not necessarily. End mycelium means colonization is progressing, but it does not guarantee the log is fully ready. If pins have historically been inconsistent for you, wait a bit longer after end colonization appears, then force once you see strong overall end coverage and good firmness in the wood.
Is it okay to inoculate oak logs later than winter?
Inoculating outside the typical window increases risk. Late inoculation can lead to faster drying and more competitor activity before colonization is established. If you must do it later, prioritize freshness, keep logs shaded from day one, and be more aggressive with moisture management so the bark does not crack or lift.
Can I use treated or painted lumber instead of fresh oak logs?
Avoid it. Treated wood can contain chemicals that harm mycelium and wax sealing may not prevent exposure deep in the log. Stick to untreated hardwood from live, healthy trees, and if a log was stored with herbicide or pesticide application nearby, treat it as unsuitable.
What if I accidentally drill through the bark into the heartwood too deep?
It can reduce effectiveness and increase contamination risk if holes are oversized or open. If the hole went deeper than the intended depth, still seal it immediately with proper wax, and consider slightly increasing inoculation density on future logs to compensate for any loss in usable spawn space.
How clean do my drilling tools need to be between logs?
Clean enough that you are not transferring spores, especially green mold spores, from one log to the next. A quick wipe and keep wax and daubers in good condition helps. If you notice heavy competitor growth, pause and clean tools more thoroughly before continuing with additional logs.
Can I seal holes with something other than cheese wax or beeswax?
It’s better to use cheese wax or food-grade beeswax. Other waxes, or materials that crack and flake, let moisture escape and can expose spawn to contaminants. If you are improvising, the key requirement is a flexible, reliable seal that stays intact while the log dries and rehydrates over seasons.
My logs fruit but only on one side, what’s the most likely cause?
Uneven moisture and patchy colonization are the usual drivers. Check whether the sunny side dried out more during incubation or rest. For the next cycle, keep your stack orientation stable in shade, consider a longer soak (for example 18 hours instead of 12), and ensure you used a properly offset grid so inoculation is not concentrated only on one face.
Should I stack the logs in a leaning stack or a crisscross stack?
Either works if air circulation is good and logs do not sit in standing water or directly on wet soil. The crisscross style can improve airflow on all sides. Choose based on your space, but prioritize avoiding hotspots of sun and avoiding water pooling at the base.
What’s the best way to handle pests like slugs without damaging the logs during fruiting?
Hand-picking during evening hours works well for small infestations. For more control, use beer traps near the stack and consider a hardware cloth or wire cage during active fruiting. Avoid broad chemical baits close to logs because runoff and residues can affect the growing environment.
Can I fruit the logs in winter, or do I need spring and fall only?
Winter forcing can work, but yields depend on temperatures and moisture. Shiitake generally fruits best when daytime temperatures are roughly 55 to 75 degrees Fahrenheit. If your winter is too cold, you may see slower pinning or minimal fruiting even after a soak, so protect logs from deep freezing and keep conditions humid and shaded.
How many flushes should I realistically expect per log each year?
Most growers aim for about 3 to 4 forced flushes per year per log, with 6 to 8 week rest between forces. In ideal moisture and shade conditions you might push higher, but if your logs are late to recover, reduce the forcing frequency to protect long-term productivity.
What should I do if the log ends show mycelium early but then growth stalls?
First check moisture. Stalled colonization often means the log dried out partially even if surface bark looks okay. Do an extended soak (18 to 24 hours), then resume regular watering while keeping logs shaded. Also confirm you used viable spawn, since old or improperly stored spawn can show initial activity but fail to sustain colonization.
When is a log “done,” and what should I do with it after it stops fruiting?
If a log no longer fruits reliably after proper forcing and moisture care, it is effectively finished. At that stage, the wood usually feels lighter and more punky. Compost it or use it as garden mulch, but avoid leaving it where it can attract pests or where spore spread might contaminate new incubation logs.