You can absolutely grow wine cap mushrooms indoors, but it takes a bit more deliberate setup than tossing spawn into an outdoor wood chip bed. The core requirements are a pasteurized wood-based substrate, colonization temps around 65–75°F, and then a fruiting environment dialed to 55–70°F with humidity above 85% and steady fresh air exchange. Get those conditions right and you'll have deep red caps pushing up within 30–60 days of inoculation.
How to Grow Wine Cap Mushrooms Indoors: Step by Step

Marcus Holloway
25 Apr 2026

What you're actually growing: wine caps 101
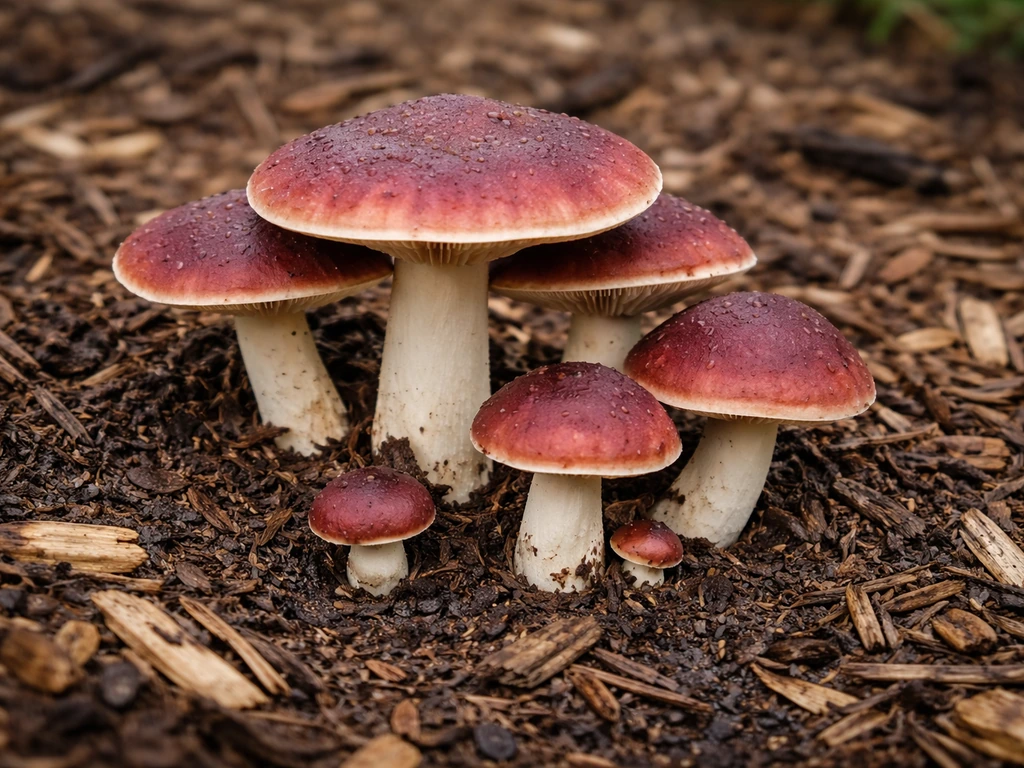
Stropharia rugosoannulata goes by a handful of names: wine cap, garden giant, and king stropharia are all the same mushroom. It's a robust agaric species native to North America with a wine-red to reddish-brown cap, a thick whitish stem, and clay to violet-brown gills. That distinctive ring (the annulus) on the stem is one of its clearest ID features, and the genus name Stropharia literally means 'belt,' a nod to it. As mushrooms age, the cap fades from deep wine-red toward a straw or tan color, so harvesting while caps are still dark and button-shaped gives you the best quality and flavor.
Outdoors, wine caps thrive in wood chip beds and disturbed soil, which is why they're popular in permaculture gardens. Indoors, you're essentially recreating a compressed version of that wood chip environment inside a container. The species is genuinely beginner-friendly in terms of contamination resistance compared to something like oysters, but it does want cooler fruiting temps than most people expect, which is the number one sticking point for indoor growers.
Setting up your indoor grow space
Wine caps don't need much floor space, but they do need specific environmental conditions, especially during fruiting. A spare corner, a shelving unit, or even a grow tent works well. Here's what to dial in before you inoculate anything.
Temperature
This is where most indoor grows go sideways. Wine caps want colonization temps around 65–75°F (18–24°C), which is close to typical room temperature, so that part is easy. The problem is fruiting. They want it cooler: 55–70°F (13–21°C), with research protocols targeting closer to 50–61°F (10–16°C) for primordium formation. If your grow space stays at 72°F year-round, pinning will be slow or may not happen at all. A basement, garage, or unheated spare room in spring or fall is ideal. A mini fridge with the door cracked, or a dedicated grow tent with a cooling pad, can also work if you're committed.
Humidity
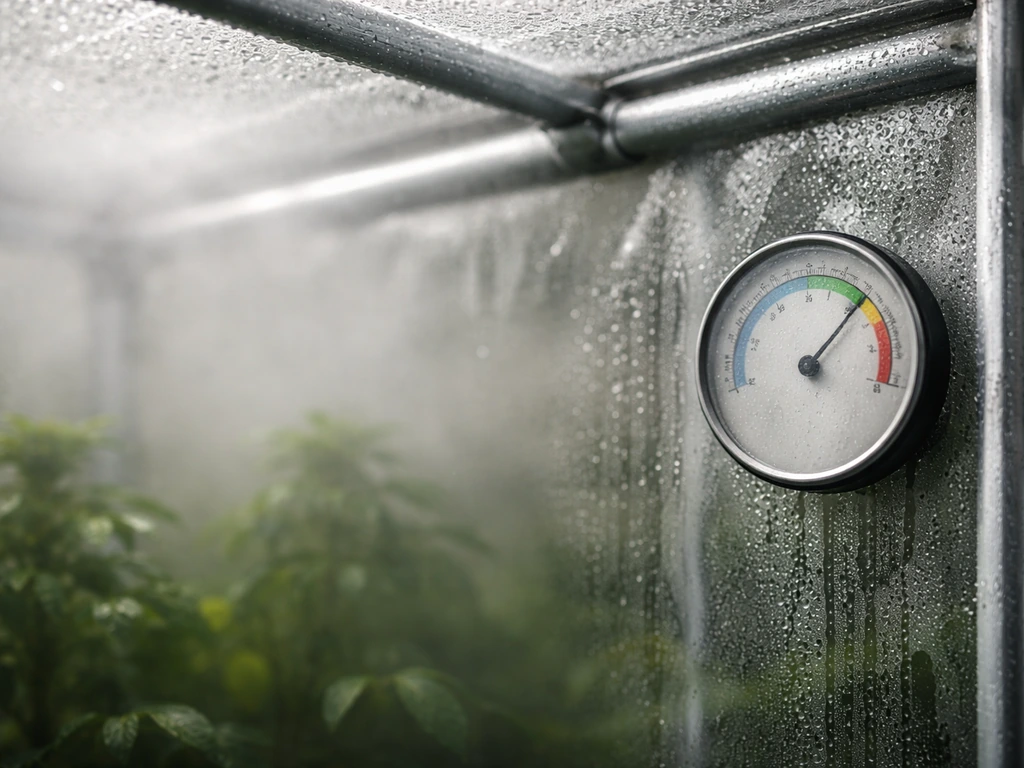
Target 85–95% relative humidity during fruiting. Drop below 85% and growth slows. Drop to 60% or below and you'll see stem cracking, which isn't just cosmetic. It affects the quality of the whole flush. A cool-mist ultrasonic humidifier on a hygrometer-controlled outlet is the cleanest setup. Mist the walls of your grow tent or the surface of the substrate directly a couple of times a day if you're doing it manually.
Fresh air exchange and CO2
Fresh air exchange (FAE) is non-negotiable. CO2 needs to stay below roughly 0.15% (1,500 ppm) during fruiting, and ideally below 1,000 ppm for clean pin development. In a grow tent, a small inline fan running 15–30 minutes every few hours handles this easily. In an open room, natural air movement is often enough. The sign you need more FAE is tall, thin, leggy stems with small or deformed caps.
Light
Wine caps don't need much light at all, but they do benefit from a cue. A standard room light on a 12-hour timer, or any indirect ambient light in the 100–500 lux range, is enough to trigger and orient fruiting bodies. Think of light as a signal, not fuel. Direct sunlight or high-intensity grow lights are unnecessary and will dry out your substrate.
Cleanliness and airflow
Wine caps are relatively contamination-resistant during colonization because wood-based substrates aren't as inviting to competitor molds as grain. That said, keep your grow space clean, wipe surfaces with isopropyl alcohol before inoculation, and don't leave wet substrate exposed to still, warm air for extended periods. Good airflow reduces the risk of bacterial issues, which can show up as dense white patches or slimy spots on the substrate surface.
Choosing and preparing your substrate
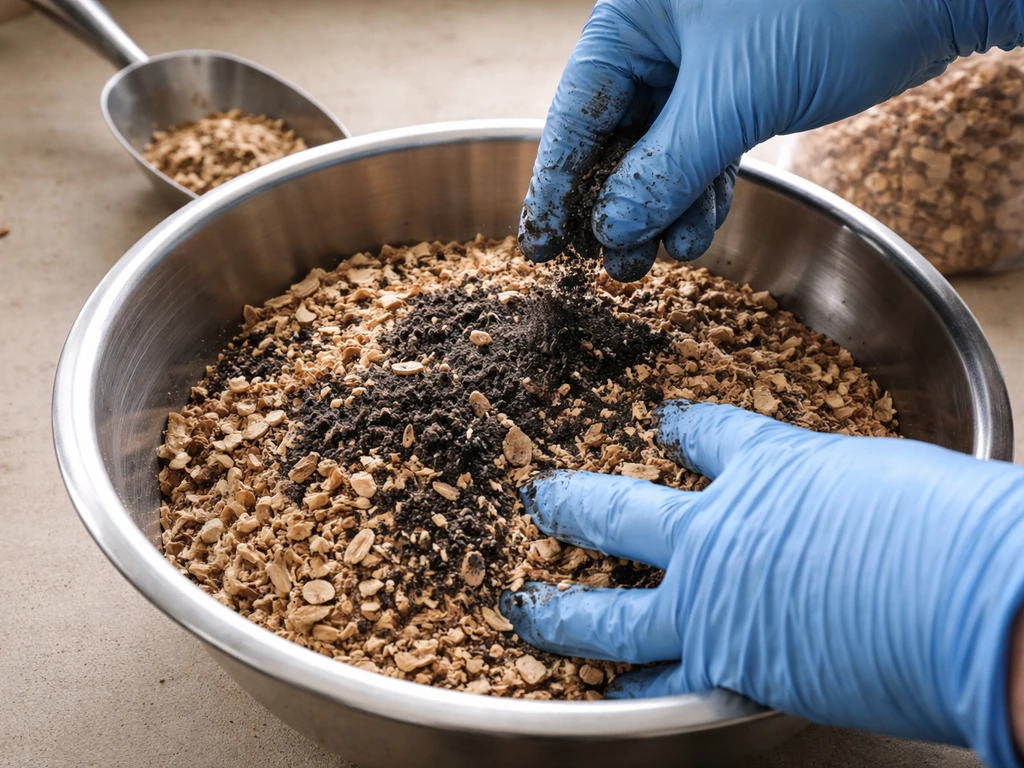
Wine caps are wood decomposers, so your substrate should reflect that. A mix of hardwood sawdust or wood chips with a small percentage of nitrogen-rich supplement works very well. A proven formulation from peer-reviewed research is roughly 87% wood chips, 6% wheat bran, 6% soybean meal, and 1% lime, brought to about 63% moisture content. You don't have to be that precise at home, but the principle holds: mostly wood, a little nitrogen supplement, and a small amount of lime to buffer pH and discourage contamination.
If you're using sawdust, aim for a particle size around 0.8–1.2 mm (coarser than fine dust). Air-dried wood material around 11% moisture content before you add water is a good starting point. Chopped straw is a viable lower-cost alternative and colonizes quickly, though yields tend to be somewhat lower than with hardwood. You can also layer the two: straw in the middle with wood chips on top and bottom, mimicking what wine caps experience in a forest floor bed.
How to pasteurize your substrate
Unlike oyster mushrooms, wine caps don't strictly require full sterilization, but pasteurization is strongly recommended for indoor grows where contamination risks are higher than in an open garden bed. Hot water pasteurization works well for both straw and wood chip mixes. Submerge your substrate in water heated to around 60°C (140°F) and hold it there for 30–60 minutes. For bulk wood chip/sawdust mixes, you can do this in a large pot or a food-grade bucket using boiling water poured over and a lid to retain heat. Let it cool to below 30°C (86°F) before adding spawn. Inoculating into a hot substrate will kill your mycelium.
From inoculation to first harvest: the full process
- Prepare and pasteurize your substrate, then let it cool fully (to room temp or below) in a clean covered container.
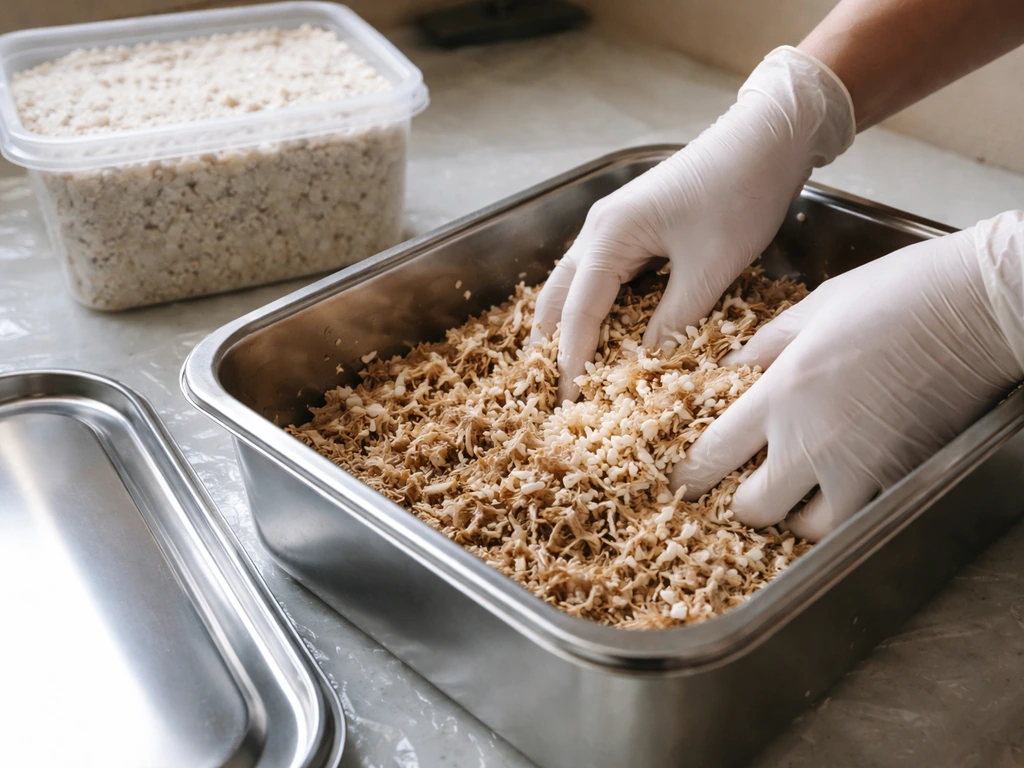
- Mix spawn into the cooled substrate at roughly a 10–20% spawn rate by volume. Higher spawn rates speed colonization and reduce contamination risk. Work in a clean area, ideally wiping down your workspace with 70% isopropyl alcohol first.
- Pack the inoculated substrate into your growing container. Flat storage totes, fabric grow bags, or shallow wooden crates all work. Aim for a layer thickness of at least 5 cm (2 inches), and 10–15 cm for better yields.
- Cover loosely to retain moisture but allow some gas exchange. A loose-fitting lid, a piece of breathable filter paper taped over holes, or a polyfill-stuffed port on a grow bag all work.
- Move the container to your colonization space at 65–75°F. Check weekly. You should see white mycelium threading through the substrate within 1–2 weeks.
- Once the substrate is 50–75% colonized (usually 2–4 weeks), move it to your cooler fruiting environment at 55–70°F and increase humidity to 85–95%. Add the 12-hour light cycle and begin FAE.
- Expect pins to form within 1–3 weeks of initiating fruiting conditions. First full harvest typically arrives 30–60 days after initial inoculation, depending on temperature and strain.
- Harvest caps before or just as the veil under the cap begins to tear. At that stage, the cap is still firm and wine-red, and the mushrooms are at peak flavor and texture.
Harvesting, yields, and keeping the flushes coming
Twist and pull wine caps from the base rather than cutting when possible. Twisting removes the entire stem and reduces the chance of leaving rotting tissue in the substrate, which can invite contamination. If you prefer to cut, cut as close to the substrate surface as you can and remove any leftover stem stub. After harvest, store mushrooms in a paper bag in the fridge, not plastic, since plastic traps moisture and speeds deterioration.
After your first flush, let the substrate rest for about a week. Maintain humidity but back off watering slightly. A light layer of casing soil (a 50/50 mix of coir and vermiculite, or just lightly moistened peat) applied over the surface can help stimulate subsequent flushes by retaining moisture and providing a physical cue for pinning. Subsequent flushes typically take another 2–4 weeks to develop. Yields drop with each flush, but a healthy indoor block can produce 2–3 good flushes before the substrate is spent.
Exact yield depends heavily on your substrate quality and environmental consistency, but a reasonably optimized indoor container of 5–10 liters of substrate can realistically produce 200–500 grams of fresh mushrooms across multiple flushes. Wine caps aren't the highest-yielding species you can grow indoors (oysters and shiitake tend to outperform them per substrate weight), but they're more forgiving and the flavor payoff is excellent.
Troubleshooting common indoor problems
| Problem | Likely Cause | Fix |
|---|---|---|
| Green or black mold on substrate | Contamination from trich or other competing molds; often from insufficient pasteurization or inoculating while substrate was still warm | Remove contaminated sections immediately and isolate the container. Improve pasteurization next time and let substrate cool fully before adding spawn. |
| White patches or slimy wet spots | Bacterial contamination (bacterial blotch); often from overly wet substrate and poor airflow | Improve FAE, reduce surface moisture, and ensure substrate isn't waterlogged. Remove affected areas. |
| Mycelium stops growing after a week | Substrate too wet, too dry, or contaminated. Also possible if colonization temp is too high or too low. | Check moisture (should feel like a wrung-out sponge), verify temp is 65–75°F, and look for signs of competitor molds. |
| No pins forming after colonization | Fruiting temp too high (most common), CO2 too high, or humidity too low | Move to a cooler space (target 55–65°F). Increase FAE and raise humidity to 90%+. |
| Pins forming but caps are small or leggy | High CO2 from inadequate FAE | Increase fresh air exchange. Run fan more frequently or open grow tent daily. |
| Stem cracking on developing mushrooms | Relative humidity dropped to 60% or below during fruiting | Raise RH back to 85–90% and mist more consistently. Cracking itself doesn't make mushrooms inedible but signals stress. |
| Slow colonization (4+ weeks and still sparse) | Spawn rate too low, substrate too dense, or temp too low | Raise colonization temp slightly, break up and re-mix the substrate if contamination-free, or add more spawn next time. |
Realistic expectations and how to scale up
If you're a complete beginner, start with one or two grow bags or totes using a pre-pasteurized wood chip mix and plug spawn or sawdust spawn from a reputable supplier. This keeps your first grow simple and gives you a clear sense of what colonization and pinning look like before you start experimenting with substrate formulations or multiple containers. Expect your first flush around 6–8 weeks from the day you inoculate, possibly sooner in optimal conditions.
The total cost for a beginner indoor wine cap grow is modest. A bag of hardwood sawdust or wood chips, wheat bran, and a bag of spawn will typically run you $20–$40 for a starter setup. A basic ultrasonic humidifier and a thermometer/hygrometer combo add another $30–$50 if you don't have them. A grow tent is optional but helpful for maintaining conditions and runs $40–$80 for a small 2x2 or 2x4 foot model.
For more experienced growers looking to scale, wine caps respond well to bulk substrate cultivation in large totes or wooden crates, stacking multiple grow containers in a tent with a shared humidifier and fan. At that point, managing temperature (especially hitting that cooler fruiting window) becomes the main logistical challenge. If you want to try a more traditional approach, you can also learn how to grow mushrooms in logs by matching the right species and inoculation method to local outdoor conditions cooler fruiting window. A dedicated grow space like a basement with seasonal temperature swings is a genuine asset for wine caps in a way it isn't for tropical species like oysters.
Worth noting: if you're also interested in log-based cultivation or other species that prefer cool fruiting conditions, wine caps share some overlap in their environmental needs with shiitake and other species that fruit well in spring and fall temperature ranges. The substrate prep and inoculation approach differs significantly, but the environmental logic is similar. Maitake is another cool-fruiting species with some comparable cultivation principles, though it's considerably more advanced. If you want the step-by-step details, use this guide on how to grow maitake mushroom as your starting point Maitake is another cool-fruiting species.
The honest summary is this: wine caps indoors aren't the easiest mushroom you can grow (that title probably goes to oysters), but they're not hard either. The main thing that trips people up is expecting them to pin at room temperature. Nail the cooler fruiting environment, keep humidity steady, and give them fresh air, and these mushrooms will reward you with some impressive flushes. Reishi mushrooms have different moisture and temperature targets, so it helps to follow a reishi-specific grow plan once you’re ready to switch species how to grow reishi mushrooms. If you want another option that also thrives with cooler fruiting conditions, see our guide on how to grow shiitake. If you want another option that also thrives with cooler fruiting conditions, see our guide on how to grow shiitake on logs. If you want to move beyond containers, learning how to grow mushrooms in logs is a great way to use outdoor-friendly methods and reduce ongoing environmental control.
FAQ
Can I grow wine cap mushrooms indoors year-round without special cooling?
Yes, but only if you can hit the same cooler fruiting window. If your home never drops below about 70°F, you’ll usually get slow colonization and either delayed or no pinning. A common workaround is to fruit in an unheated area during cooler seasons, or use a grow tent with a cooling pad and keep the chamber stable around 55–65°F.
What should I do if my wine caps colonize but never pin?
It often means the fruiting environment is too warm, fresh air is insufficient, or humidity is too low. Check CO2 by behavior first (tall, thin stems suggest high CO2), then confirm humidity is staying above 85% and the fruiting temperature is below the mid 60s°F. Also verify the substrate is not too dry at the surface, since dry surface layers prevent primordia from forming even when bulk conditions look okay.
When is the best time to harvest wine caps indoors?
Harvest timing affects quality. Pick when caps are still button-shaped to just starting to flatten, and when the cap color is still deep red rather than straw or tan. Waiting too long can also increase bruising and can leave behind tissue that slows the next flush.
Do I need a casing layer to get multiple flushes?
Yes. After the first flush rest, a thin, even casing layer can help, but avoid soaking it. Keep it evenly moist, not dripping, because overly wet casing can encourage surface bacteria and muddy looking stems. If you used a very wet substrate to start, you may need less casing moisture for later flushes.
How do I prevent humidity mistakes, like over-misting or condensation?
Don’t chase humidity by misting blindly. If you see condensation forming and then drying repeatedly on the substrate surface, that can harm primordia and encourage bacterial films. Use a hygrometer and target steady 85–95% RH, and mist walls or the air first if your surface looks already saturated.
How can I tell healthy colonization from contamination?
A good rule is to smell and look, not just color. Sour, ammonia-like, or strong rotten odors suggest bacterial contamination rather than normal wood smell. Slimy patches, dense wet-looking white areas, or melting-looking tissue on the surface are red flags, while healthy colonization usually looks clean and uniform and spreads from inoculation points.
How much fresh air exchange is enough for wine caps?
Most indoor grows do better with multiple small openings or a controlled fan cycle than with one constant high-speed blast. Tall, leggy mushrooms point to excessive CO2 and too little effective exchange, while rapidly drying substrate suggests the air is moving but RH is dropping too fast. Use short fan bursts and recheck temperature and RH after airflow changes.
Why do my mushrooms get cracked stems or poor-looking caps?
If stems crack or caps look small and underdeveloped, it usually means fruiting RH is too low, airflow is too aggressive for the humidity you are providing, or the surface is drying between mistings. Fix by stabilizing RH with a humidifier, reducing direct airflow onto the substrate, and ensuring the fruiting temp stays within the cool range.
Can I use pre-pasteurized wood chip mix, and what precautions still matter?
For beginners, yes, it’s possible to use partially pasteurized, ready-to-use mixes, but avoid mixes that were meant for outdoor beds without proper indoor hygiene. If the supplier says it is already pasteurized, still cool it fully before inoculation and keep everything clean because indoor blocks can build contamination faster than outdoors.
What happens if I inoculate before the substrate fully cools?
Stone-cold hot pasteurized substrate is the main cause. Inoculating into warm substrate can kill or slow the mycelium, leading to delayed colonization or stalled blocks. Let the substrate cool below about 86°F, then inoculate promptly while keeping it clean.
Should I fruit wine caps in plastic bags or open containers?
Plastic can be okay for transport, but many indoor growers see better results with breathable container design during fruiting. If you keep the substrate in a sealed plastic container, CO2 can build up and humidity patterns become erratic. Provide venting or use a grow bag/tote approach that allows controlled fresh air exchange.