Growing mushrooms on logs is one of the most rewarding and low-effort cultivation methods once you understand the rhythm of it. You drill holes in a freshly cut hardwood log, pack in spawn, seal everything up, and let nature do the heavy lifting. Done right, a single log can fruit for several years, producing flush after flush with minimal input. The catch is that the details matter: wrong wood, wrong timing, or poor moisture management and you end up with a very expensive piece of firewood. Here is exactly how to do it right, from picking the log to pulling your first harvest.
How to Grow Mushrooms in Logs: Maitake and More

Marcus Holloway
21 Apr 2026
Choosing the right logs and wood species
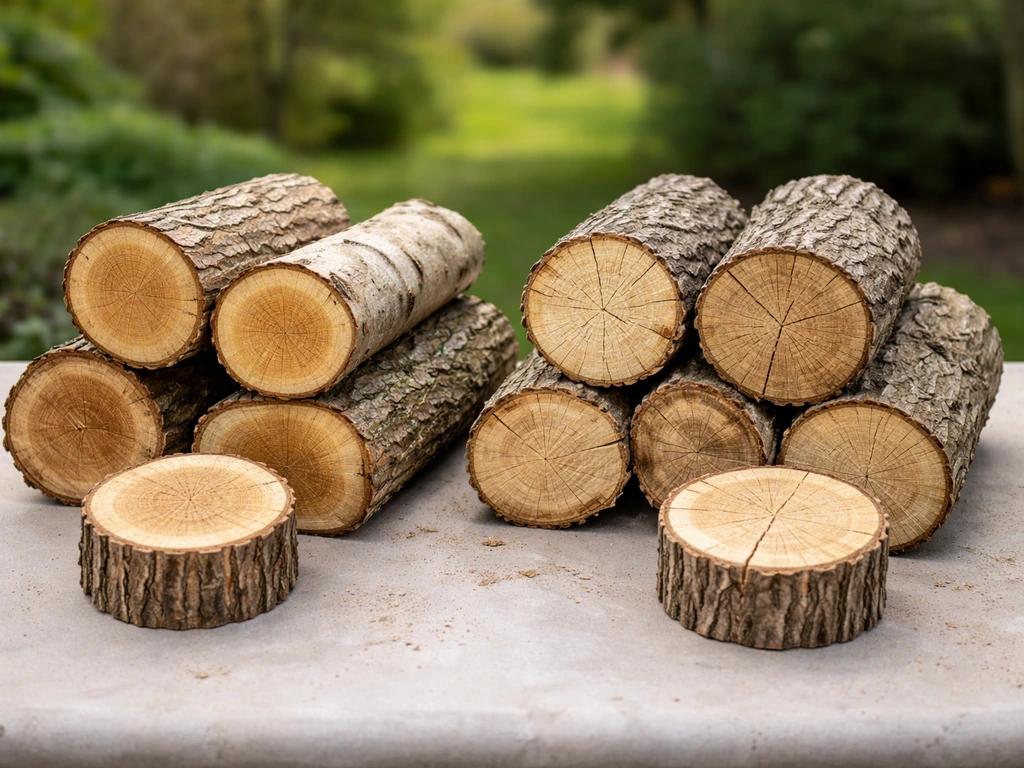
The wood you choose is probably the single biggest factor in whether your log project succeeds. Most culinary mushrooms cultivated on logs are wood-decomposing fungi that evolved on specific types of hardwood, so the species match really does matter. For the widest range of options, you want freshly cut deciduous hardwood logs with the bark still fully intact and firmly attached.
Oak is the classic choice and for good reason. It has dense wood, holds moisture well, and supports a long productive life. For shiitake specifically, MSU Extension lists oak, sweetgum, beech, hophornbeam, hornbeam, and persimmon as top picks. OSU Extension points to the beech family (Fagaceae) as the most recommended overall in the U.S. Cornell Small Farms research adds black cherry and sugar maple as solid performers. If you have oak on your property or can source it locally, start there.
There are woods you should avoid. Locust, poplar, ash, walnut, fruit wood, and all conifers are generally unsuitable for shiitake and most common log-cultivated species. Birch and aspen are also not recommended in most tested contexts despite appearing in some older species tables. Red maple can work with warm-weather strains specifically, but it is not a default choice. The general rule: stick to dense, slow-rotting hardwoods from the oak and beech families when in doubt.
Bark quality matters as much as species. Thin-barked species like beech and red maple are more vulnerable to damage during handling and drying. If you are using them, be extra careful not to scrape or crack the bark during inoculation and stacking, because every breach in the bark is an entry point for competing fungi. The bark is essentially the mycelium's protective shell during colonization.
Timing, log size, and outdoor placement basics
Cut your logs in late winter or very early spring, right after the tree has gone fully dormant and before buds start to break. This timing gives you the highest sugar content in the wood (food for the mycelium) and a bark that is still firmly bonded to the sapwood. If you cut thin-barked species like beech or red maple too late in spring when buds are already opening, the bark will slip right off during handling, which is a disaster for colonization.
Log size is a practical tradeoff. Longer, thicker logs hold moisture better and produce more over their lifetime, but they are heavier and take longer to colonize. A good starting size is 3 to 4 feet long and 4 to 8 inches in diameter. A useful rule of thumb: expect roughly one year of productive life per inch of log diameter. So a 6-inch-diameter log should give you about 6 years of flushes before it breaks down too far to fruit reliably.
Inoculate as soon as possible after cutting, ideally within a few weeks. Freshly cut logs have the right moisture content and have not yet been colonized by competing organisms. The longer you wait, the more you are racing against mold and other fungi that want the same food source.
For outdoor placement after inoculation, choose a shaded spot with good air circulation and protection from direct wind. A spot under deciduous trees works well because you get dappled shade in summer and more light in winter when leaves drop. Avoid full sun, which dries logs out fast, and avoid low spots where water pools, which invites contamination. The goal is a consistently cool, humid microclimate that mimics a forest floor.
Inoculation: selecting spawn and inoculating mushroom logs
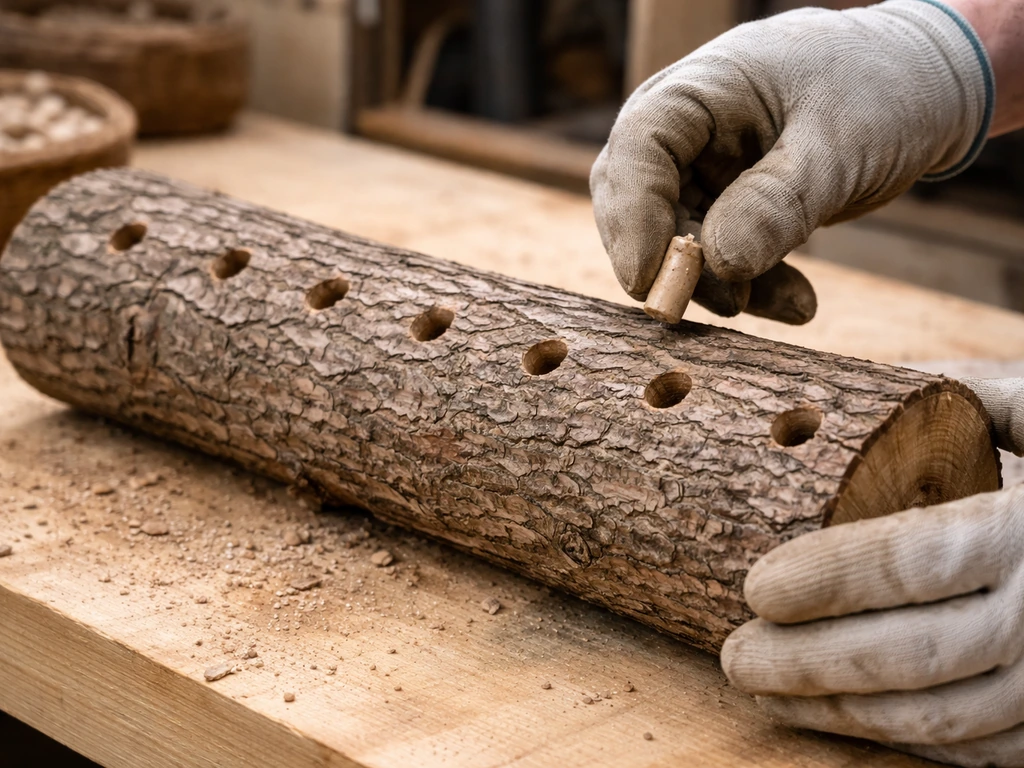
Inoculation is the process of introducing mushroom mycelium into your log through drilled holes. You have two main spawn formats to choose from: plug spawn and sawdust spawn. Both work, but they have real tradeoffs worth understanding before you buy.
| Spawn Type | How It Works | Speed of Colonization | Cost Per Log | Ease of Use |
|---|---|---|---|---|
| Plug spawn | Wooden dowels pre-colonized with mycelium; hammered into drilled holes | Slower; mycelium must migrate from dowel into sapwood | Slightly more expensive | Very beginner-friendly; no special tools needed |
| Sawdust spawn | Colonized sawdust packed into drilled holes | Faster colonization overall | Less expensive at scale | Requires an inoculation tool or modified syringe; slightly messier |
For most beginners, plug spawn is the easier starting point. You drill holes, hammer in the plugs, and seal. Sawdust spawn colonizes faster and is more economical if you are doing many logs, but you need a tool to pack it in. Virginia Tech describes the right amount of sawdust spawn per hole as blank" rel="noopener noreferrer">roughly a thimbleful, pressed firmly in. Whatever format you use, never use grain spawn for log cultivation. Grain spawn is designed for indoor sterile substrate work and will fail in a log environment.
The drilling pattern matters. OSU Extension recommends rows of holes spaced approximately 3 inches apart, with about one row per inch of log diameter going around the log. Holes should be about 1.25 inches deep and between a quarter and a half inch in diameter depending on your spawn format. Offset the rows in a diamond pattern so the holes are staggered rather than lined up in straight columns. This gives the mycelium shorter distances to travel as it colonizes through the wood.
A higher inoculation rate (more holes, more spawn) generally means faster colonization and earlier first fruiting. If you want results sooner and cost is not a major concern, err on the side of more holes. If you are inoculating many logs and want to stretch your spawn budget, the standard spacing still works fine, it just takes a bit longer.
After filling each hole, seal it immediately. After inoculation, Alabama Cooperative Extension System recommends sealing the drilled sites with wax immediately to help protect the holes seal it immediately. Hot cheese wax or beeswax are the traditional choices and work very well. Melt the wax in a small pot or crockpot, dab it over each inoculated hole with a brush or foam applicator, and let it harden. The seal keeps moisture in the hole and keeps competing organisms out. Skipping this step is a common beginner mistake that leads to contamination and failed colonization.
Incubation and moisture management for colonization
After inoculation, your logs enter the incubation (or spawn run) phase. This is the period where mycelium is spreading invisibly through the wood before any fruiting bodies appear. It is the longest and most patience-testing part of the process. Expect colonization to take anywhere from 6 months to 2 years depending on your log size, the amount of spawn you used, the species, and your local climate conditions.
Moisture is the most critical variable during incubation. OSU Extension is specific: keep log moisture content above 30%. Below 25%, mycelium starts to die. You cannot measure internal moisture directly without specialized equipment, so the practical approach is to keep the logs in a consistently humid environment, water them if they start to feel light or the ends look dry, and never let them sit in direct sun for extended periods.
Temperature also matters. The optimum temperature for mycelium growth in the log is 72 to 77 degrees Fahrenheit. Logs will still colonize outside this range, just more slowly. Temperatures above 105 degrees Fahrenheit are lethal to the mycelium, so if you are in a hot climate, shading is non-negotiable during summer.
There are several stacking methods for managing your logs during incubation. OSU Extension lists options including dead piling (logs stacked randomly), A-frame and X-frame racks, crib stacking, lean-to or diagonal stacking, and Japanese hillside stacking. For beginners, a simple lean-to setup against a shaded fence or a crib stack under trees is the easiest to maintain. Some growers also bury logs in shallow beds of wood chips to help retain moisture, which works especially well in drier climates.
Watch for cracking in the log surface. Abrupt drying causes shrinkage and surface checks, and each crack is an entry point for weed fungi like green mold. If you notice logs drying and cracking, water them immediately and move them to a shadier spot. Prevention is far easier than trying to rescue a contaminated log.
Fruiting care: getting and harvesting mushroom flushes
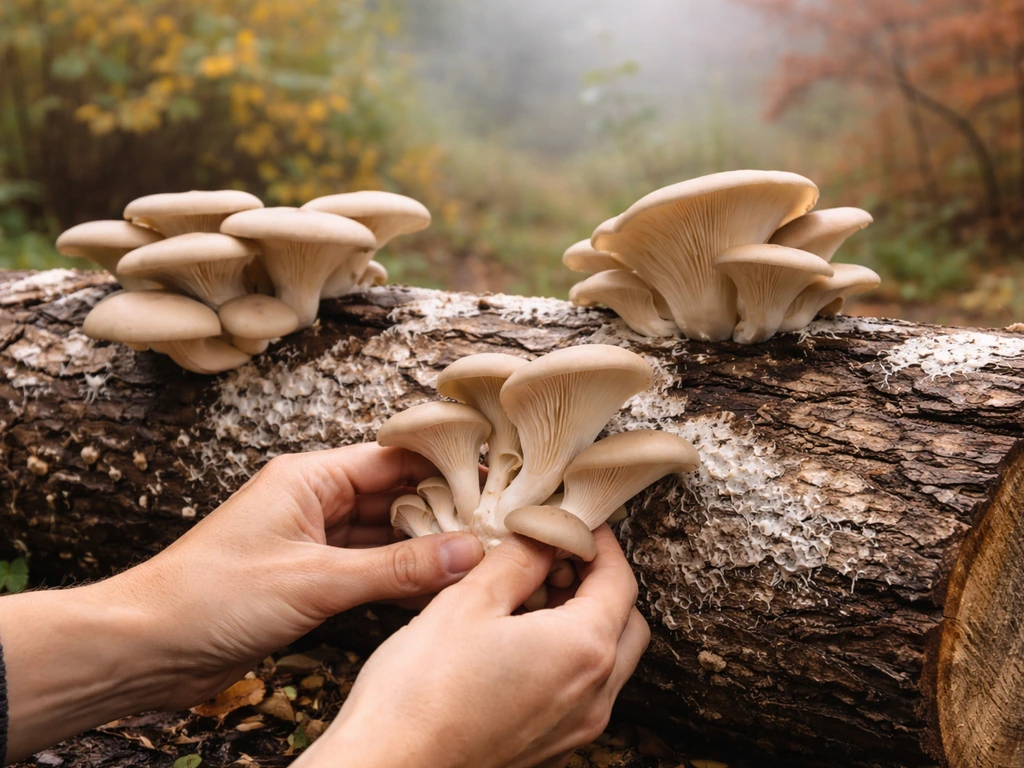
Once your logs have fully colonized, they will often fruit on their own in response to natural seasonal cues, particularly in fall when temperatures drop and rainfall increases. But you do not have to wait and hope. You can force fruiting by shocking the logs with cold water.
Cold-water shocking is straightforward: submerge the log completely in cold water for 12 to 24 hours, then stand it upright in your fruiting area. Wine cap mushrooms can be grown on logs as well, but they prefer slightly different wood and a careful moisture routine during incubation cold-water shocking. The temperature drop and moisture surge mimics a cold autumn rain and triggers the mycelium to produce mushrooms. For most shiitake strains, you will start seeing pins within a week after shocking. Oak logs in particular tend to respond quickly and fruit within a tight window after soaking.
After the first flush, let the log rest for 6 to 8 weeks before shocking again. This rest period lets the mycelium recover and rebuild its energy reserves. You can shock and fruit a log multiple times per year as long as you respect the rest periods. Most logs produce their largest, most impressive flushes in years two and three of their productive life. Year one flushes are often lighter as the mycelium is still establishing its full network through the wood.
During fruiting, keep the logs in a spot with indirect light, good airflow, and moderate humidity. Harvest mushrooms before the caps fully flatten and start to curl up at the edges. For shiitake, pick when the veil under the cap is still partially intact. For most other species, harvest when the caps are plump and firm but before they release heavy spore drops.
A practical note on planning: a 4-inch-diameter log should give you roughly four years of production. A 6-inch log can go six years. Front-load your expectations: the first year is mostly waiting. By year two you are getting into a productive rhythm, and by year three you will likely have more mushrooms than you expected.
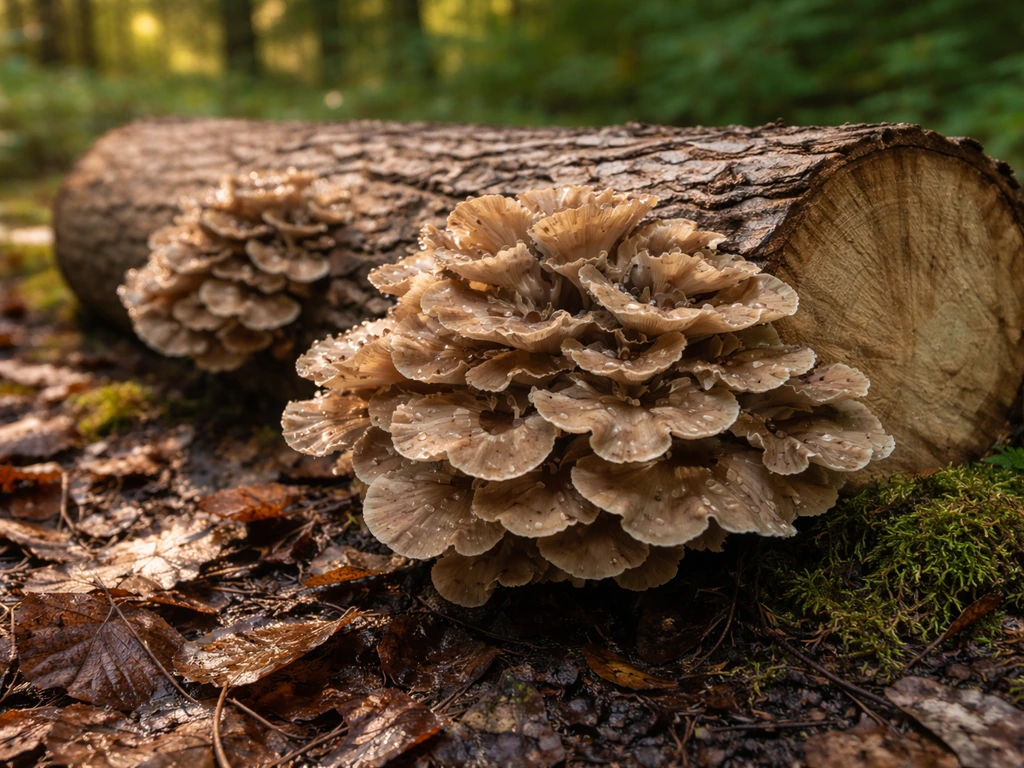
Maitake on logs: what's specific to grow maitake mushrooms
Maitake (Grifola frondosa), also called hen of the woods, is one of the most prized edible and medicinal mushrooms you can grow on logs, and it is genuinely possible at home. But the process differs enough from shiitake that it deserves its own section. For a complete, step-by-step guide on maitake, start with the basics of how to grow maitake mushroom on logs. If you have already been exploring how to grow maitake mushrooms, you will know it has a reputation as one of the more challenging species, and that reputation is partly earned.
For wood species, maitake strongly prefers oaks. It is a natural associate of oak in the wild, particularly old-growth specimens. Use dense oak logs, the same ones you might choose for shiitake, and expect a longer colonization timeline. Maitake is a slower colonizer than shiitake.
The biggest difference in maitake log cultivation is the planting method. Rather than leaving inoculated logs stacked upright or leaning, the recommended approach is to bury the log vertically in a shaded outdoor bed with the top approximately 1 inch below the soil surface. This burial method keeps moisture far more consistent than any surface-stacking approach, which is critical because maitake mycelium is more sensitive to drying than shiitake.
Fruiting happens naturally in fall, typically September through November in most temperate climates, emerging from the base of the buried log. You are not going to get reliable results from cold-water shocking with maitake the way you do with shiitake. It is more of a seasonal fruiter that needs the natural temperature drop of autumn to trigger production. Patience is the main skill required here.
Expect to wait longer before your first flush compared to shiitake. A year or more of colonization before the first fruiting is not unusual. The upside is that a well-established maitake log buried in good soil can produce for many years, and the fruiting bodies can grow very large, sometimes several pounds from a single flush. The difficulty level is higher, but the payoff for a successful maitake grow is hard to beat.
Troubleshooting and next steps if nothing grows
If you have inoculated logs sitting outside and nothing seems to be happening, the first thing to remember is that colonization is invisible. Mycelium grows inside the wood and you cannot see it from the outside. Before declaring failure, ask how long it has been. If it has been less than 12 months, you are probably just waiting. Give it time.
That said, here are the most common failure points and what to do about them:
- Logs dried out during colonization: If the log feels very light, the ends are cracked, and the bark is loose, the mycelium may have died. Prevention is the only real fix. Going forward, keep logs in a shaded, humid area and water them during dry spells. A log that lost bark integrity is often a write-off, but try soaking it fully and monitoring for any signs of life before giving up.
- Green or black mold visible around holes: This usually means the wax seal was incomplete, the spawn was contaminated at purchase, or the log was left too long before inoculation. If the mold is localized, it may not spread. If it is spreading broadly, the log is likely colonized by a competitor and fruiting is unlikely. Source fresh spawn, inoculate promptly, and seal every hole thoroughly.
- Logs fully colonized but not fruiting: This happens when logs are not receiving the environmental cues they need. Try cold-water shocking (12 to 24 hours submerged) and move the logs to a shadier, more humid location. Also check whether you are in the right season; most outdoor log species fruit most reliably in fall.
- Fruiting bodies appearing but stunted or deformed: Low humidity during pinning is the usual culprit. Mist the logs or surrounding area during active fruiting and make sure airflow is not creating a drying wind across the pins.
- Pests eating the mushrooms: Slugs, snails, and insects are common visitors. Harvest promptly as soon as mushrooms reach good size. Diatomaceous earth around the base of logs can help deter slugs without harming the mycelium.
- No fruiting after two full years: Reassess the wood species, spawn quality, and site conditions. If you used unsuitable wood or expired spawn, the log may simply not have taken. Inoculate a fresh log with a new batch of spawn from a reputable supplier and start over with better site selection.
If you are ready to go deeper on specific species, the methods here apply broadly but each mushroom has its own quirks. Shiitake on logs is the most well-documented and beginner-friendly starting point, with the most extension research behind it. If you want the full step-by-step walkthrough for this species, see how to grow shiitake on logs. Reishi and wine cap are other popular outdoor species worth exploring once you have the log method down.
If you want a similar log setup but tailored to a different species, learn how to grow wine cap mushrooms for the best results. If you are aiming specifically at reishi, the same overall log-cultivation mindset applies, but you will need to dial in species-appropriate details to succeed reishi mushrooms. The core skills you build with your first set of logs, choosing good wood, managing moisture, and reading your logs' condition, transfer directly to every other species you try.
Your next practical steps today: source fresh hardwood logs (oak is the safest bet), order plug or sawdust spawn from a reputable supplier, gather a drill, appropriate bits, and a wax sealing kit, and set aside a shaded outdoor spot for your laying yard. Spring and winter inoculations give you the best start, but a well-managed log inoculated in any season can still produce results. Get the logs in the ground and let time and moisture do the work.
FAQ
Can I use red maple or other non-oak hardwoods to grow shiitake on logs?
Yes, but only for species and strains that match the wood and climate. Warm-weather shiitake strains can sometimes work on red maple, yet most “standard” shiitake setups still perform best on oak or beech. If you try a non-default wood, increase your emphasis on bark integrity and moisture stability during incubation, because weaker wood or bark increases contamination risk.
Why doesn’t grain spawn work well for log cultivation, and what should I do instead?
Grain spawn is the common failure mode for log growers. If you only have grain spawn, the practical path is to use it for a different cultivation method (for example, indoor bag or block work) rather than drilling holes and trying to colonize a log. For logs, stick to plug spawn or sawdust spawn because they are formulated for wood colonization.
How can I tell if my log has truly failed to colonize, versus just not fruiting yet?
A “failed” log often looks normal because colonization is inside the wood. If the log has been outdoors less than 12 months, assume it might be colonizing invisibly, especially for slower species. To check without damaging it, you can look for surface signs like fresh, controlled cracking and overall consistent moisture, but the real confirmation usually comes when fruiting starts or when you split a test log after a long delay.
What’s the right approach if I want faster results but I’m watching my spawn budget?
Choose spawn quantity based on desired timeline, not just hope. More holes and more spawn generally speed up colonization and can bring earlier pins, but oversupplying still does not rescue logs with poor moisture management or bad sealing. If cost matters, use the standard drilling pattern, then prioritize keeping log moisture consistently above the 30% target.
Can I shock logs more frequently to get mushrooms sooner, or does it hurt yields?
Cold water shocking can help trigger shiitake, but it can confuse expectations if you use the wrong schedule. After shocking, allow a rest period of about 6 to 8 weeks before shocking again, otherwise the mycelium may not rebuild and flush sizes tend to drop. Also, make sure the log was fully colonized before your first soak.
If I forget to wax-seal a few holes, can I recover the log?
For shiitake, sealing matters most during early colonization, when moisture loss and contamination have the greatest impact. Apply wax promptly after filling each hole, ensure the seal fully covers the cavity, and avoid scraping bark as you stack. If you already inoculated and skipped wax on some holes, prioritize those logs for extra moisture control and expect lower reliability.
What should I do if my log yard gets very hot in summer?
Yes, but plan for slower colonization and potential stress. The mycelium can grow outside the ideal 72 to 77 F range, yet high heat is dangerous, above roughly 105 F it can be lethal. Use deeper shade, keep logs away from reflective surfaces, and consider watering during heat waves so you avoid prolonged hot periods.
When is the best time to harvest, and what happens if I wait too long?
During fruiting, harvesting timing affects both yield and the health of the flush. Pick shiitake when the veil is still partially intact, and harvest most other species before caps release heavy spore drops, because letting them fully sporulate often reduces the quality of future flushes and makes the area harder to manage. If you are unsure, harvest a little earlier rather than waiting for full cap expansion.
What should I do if my logs start cracking while they’re still incubating?
If you see cracking or surface checks, treat it as a moisture warning, not an “end of season” sign. Increase humidity immediately by watering, relocating to deeper shade, and avoiding direct sun and windy spots. Preventing cracks is easier than fixing them later, because cracks can become entry points for contaminant fungi.
Why don’t my maitake logs respond to cold-water shocking like shiitake does?
For maitake, do not rely on cold-water shocking as your primary trigger. Maitake typically fruits from natural seasonal cues, in many temperate regions that means fall conditions, and logs often need a year or more before the first flush. If nothing happens, check timing first, then focus on burial depth and consistent moisture.
Can I use the same stacking method for maitake and shiitake logs?
Maitake and shiitake can share basic log concepts, but maitake prefers a vertical buried setup for stable moisture, while shiitake is commonly stacked above ground. If you want to experiment, keep maitake buried and only compare results after you give the log enough time, since maitake colonization and first fruiting are typically slower.
Is spring the only good time to inoculate, or can I do it in summer or fall?
Inoculation in any season can work if you control moisture and sanitation, yet fresh-cut timing is still important. The highest success generally comes from late winter to early spring, when wood sugars are favorable and bark is firmly attached. If inoculating later in the year, be extra careful with bark slippage and sealing quality, and understand colonization may take longer depending on temperature and humidity.
What location mistakes most often ruin a log grow, and how do I avoid them?
If you’re unsure where to place logs, the safest rule is “shaded, airy, consistently humid, no pooling water.” Avoid low areas where water collects, avoid full-sun corners, and do not block airflow so much that everything stays stagnant and wet. Under deciduous trees is often a strong choice because it moderates summer drying and increases exposure to cooling rains in fall.