Yes, you can absolutely grow reishi mushrooms at home, and plenty of people do it successfully with basic equipment. That said, reishi is not the easiest mushroom to cultivate. It is slow, it is picky about CO2 levels and humidity, and it rewards patience over shortcuts. If you go in with realistic expectations, the right substrate, and decent environmental control, you will get there. This guide walks you through both an indoor and an outdoor approach, covers every major decision from spawn selection to harvest, and gives you the troubleshooting framework to handle the most common failures.
How to Grow Reishi Mushrooms Indoors and Outdoors

Marcus Holloway
21 Apr 2026
Is it realistic to grow reishi at home?
Reishi (Ganoderma lucidum) is fully achievable for home cultivators, but it is worth being honest about what you are signing up for. Unlike oyster mushrooms, which can fruit in two to three weeks and forgive a lot of beginner mistakes, reishi takes 3 months or more from inoculation to harvest. Spawn run alone takes 3 to 5 weeks, and then fruiting can add another 7 to 9 weeks on top of that. You also typically get one main fruiting cycle per substrate block, though kit-based grows can sometimes yield 3 or more flushes if managed carefully between rest periods.
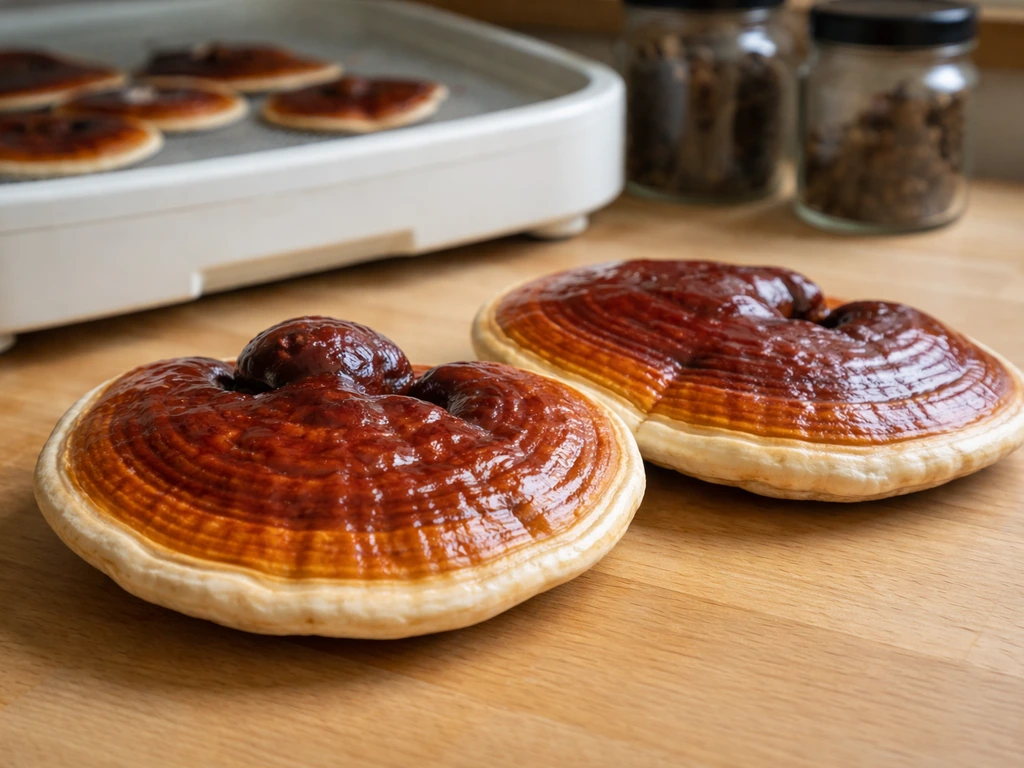
The payoff is a genuinely medicinal mushroom that is expensive to buy and deeply satisfying to grow yourself. Reishi also has a unique "antler" growth phase and a mature conk phase, so it looks spectacular at different stages. If you have grown shiitake or maitake before, you already understand slow-and-steady log or block cultivation, and reishi fits that same mindset. If you want to grow maitake for faster log or block cycles, follow our guide on how to grow maitake mushroom. For first-timers, starting with a pre-made fruiting block or kit is the most beginner-friendly path before moving on to building your own substrate bags.
Indoor reishi growing setup and environmental targets
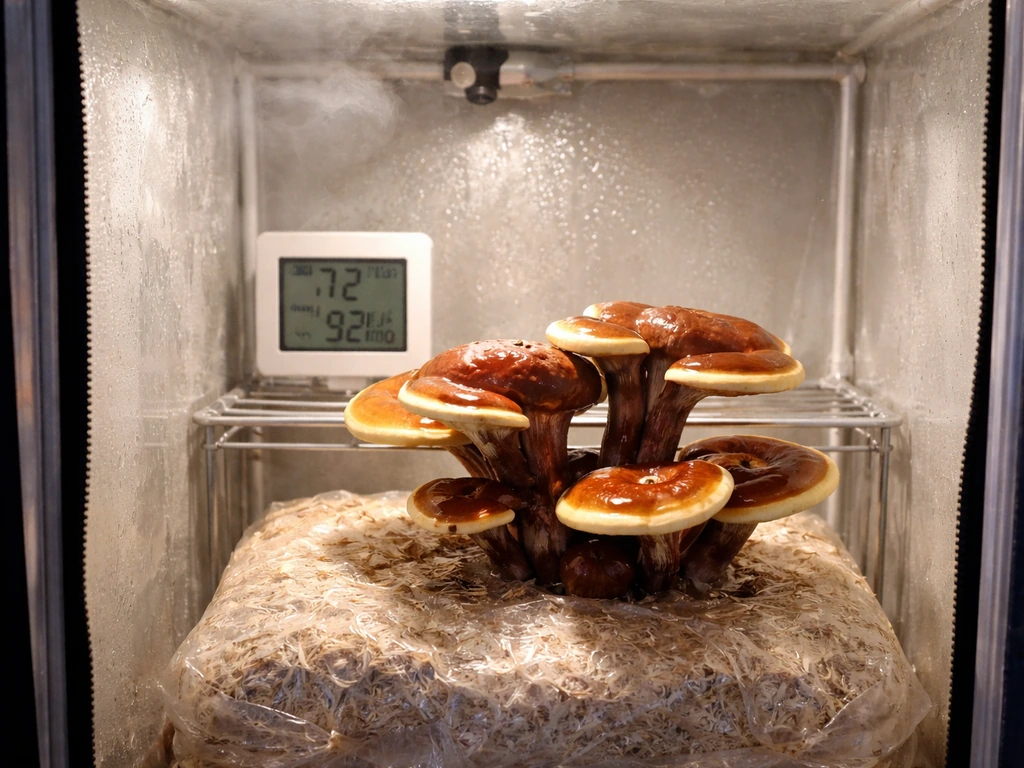
Growing reishi indoors gives you the most control, which matters a lot for this species. You will need a fruiting chamber, a way to maintain humidity, some indirect lighting, and a means of managing CO2. Here are the core environmental targets you are aiming for across the two main growth phases.
| Parameter | Colonization Phase | Fruiting Phase |
|---|---|---|
| Temperature | 26–30°C (79–86°F) | 22–28°C (72–82°F) |
| Relative Humidity | 65–70% substrate moisture | 85–95% ambient RH |
| CO2 Level | Elevated CO2 tolerated | Keep below 2000 ppm; good FAE required |
| Light | Not required | 600–1750 lux; indirect, 12 hrs/day |
| Substrate pH | 4.5–5.5 | 4.5–5.5 |
The fruiting chamber can be as simple as a monotub with a lid drilled for passive air exchange, or a wire shelf tent with an ultrasonic humidifier running on a timer. What you absolutely cannot skip is fresh air exchange (FAE) once fruiting begins. Reishi is sensitive to CO2 buildup, and if levels climb too high, you will get long, antler-like growths instead of the flat conk shape, or no fruiting at all. Keep CO2 below 2000 ppm. Fanning the chamber 2 to 4 times a day manually works fine if you do not have an automated setup.
One thing that trips up a lot of beginners is placement. Keep your fruiting blocks away from heaters, direct sunlight, and air conditioning vents. All three dry out the surface fast and reishi will stall or abort pins the moment the substrate surface dries. A consistent indirect light source helps drive the direction of growth, which is fun to observe and useful for shaping the fruiting bodies.
The outdoor method: growing reishi on logs
Outdoor log cultivation is the most traditional way to grow reishi and it is genuinely satisfying if you have the space and patience for it. Reishi naturally colonizes hardwood stumps and logs, so you are working with its biology rather than against it. The tradeoff is that outdoor grows are slower and you have less control, but the results are robust and the mushrooms tend to be excellent quality. If you want a hands-on walkthrough for the log method, see our guide on how to grow mushrooms in logs for step-by-step inoculation and timing.
Use freshly cut hardwood logs, ideally oak, maple, or other dense deciduous species, cut 3 to 4 feet long and 4 to 8 inches in diameter. Fresh logs (cut within the last 4 to 6 weeks) have the moisture content and residual sugars reishi needs to get a good foothold. Drill inoculation holes in a diamond pattern, every 4 to 6 inches along the log and 1 to 2 inches deep, plug with grain or plug spawn, and seal with cheese wax. Then lean the logs in a shaded, humid spot, ideally against a fence or in a wooded area where they get dappled light and some natural moisture from rain and dew.
Outdoor reishi thrives at 18 to 25°C with 85 to 90% ambient humidity. In dry climates or dry seasons, you will need to soak or mist logs periodically to maintain moisture. Colonization on logs takes significantly longer than on sawdust bags, often 6 to 12 months before you see any fruiting. Most outdoor growers inoculate in spring and do not expect mushrooms until the following summer.
That timeline is frustrating to hear but it is realistic. If you want to compare approaches, the method for growing shiitake on logs follows a very similar inoculation and patience-based process and is a good companion project to run in parallel. If you also want to try a faster wood-log project, this guide on how to grow shiitake on logs walks through the same inoculation and patience-based approach.
Choosing and preparing the right substrate
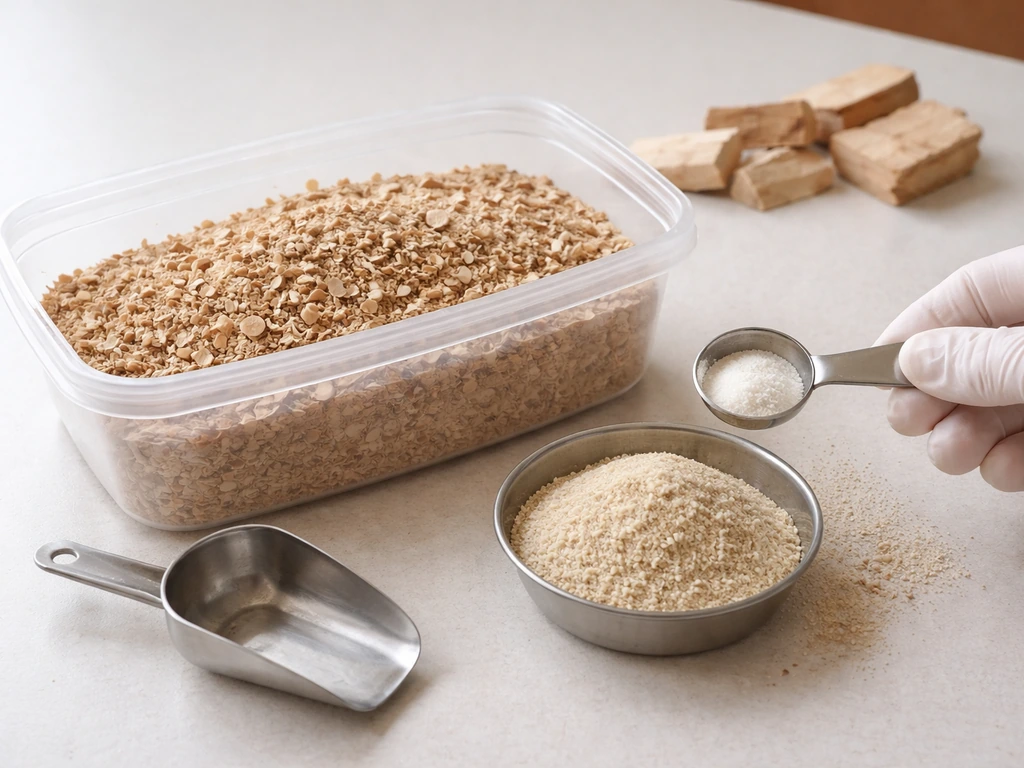
Reishi is a wood-decomposing fungus, so it wants a hardwood-based substrate. The most reliable indoor formula is hardwood sawdust (oak, maple, or alder) supplemented with rice bran or wheat bran at roughly a 10 to 20 percent addition by dry weight. This mix gives the mycelium both the lignin it needs and the extra nitrogen to power through colonization quickly. Substrate moisture should be 60 to 70%, which means the mix should feel like a wrung-out sponge, damp but not dripping.
Sterilization is non-negotiable for reishi. Because colonization is slow compared to faster species like oysters, contaminants have a much longer window to establish themselves if your substrate is not properly sterilized. Use a pressure cooker or autoclave and sterilize your bags at 121°C (15 PSI) for 2.5 to 3 hours depending on bag size. Let bags cool completely to below 30°C before inoculating. The substrate pH should land between 4.5 and 5.5, which is naturally achieved with hardwood sawdust but worth verifying if you are adding bran supplements that can push pH up.
Pre-made fruiting blocks or grow kits skip all of this preparation and are a perfectly valid way to start. They arrive already colonized or ready for fruiting initiation, and the substrate is already dialed in. If you want to learn the full process eventually, starting with a kit and then building your own bags for the second grow is a logical progression.
Spawn and spore options, and how to inoculate
For home growers, grain spawn is the most practical inoculation choice. It colonizes hardwood sawdust bags efficiently and is widely available from reputable suppliers. Plug spawn is the go-to for log cultivation. Liquid culture (LC) syringes are a good option too, especially if you want to inoculate multiple bags from a single culture, and they are what many commercial and semi-commercial growers use to scale up. Spores are the most beginner-accessible entry point in terms of cost, but they have slower and less predictable colonization than vegetative spawn and should be avoided for your first serious indoor grow.
To inoculate a sawdust bag with grain spawn, work in a clean area (still-air box or near a flow hood if you have one), open the cooled bag, add roughly 10 to 20 percent spawn by weight relative to the substrate, mix thoroughly, seal, and label with the date. For liquid culture, inject 3 to 5 mL per bag through a self-healing injection port. For logs, drill your inoculation holes, tap plug spawn firmly into each hole with a hammer, and seal immediately with cheese wax to prevent drying and contamination.
If you are using a kit like Mycocultures or a similar format that arrives fully colonized, the inoculation is done for you. Your job at that stage is to make the incisions correctly: four staggered cross-shaped cuts about 1 inch by 1 inch on the bag surface once it is fully colonized. These cuts are where primordia will form, so placement matters. Follow the kit instructions carefully on this step.
Step-by-step cultivation timeline
Here is what the full indoor grow looks like from start to finished mushroom. Timelines are realistic ranges, not best-case scenarios.
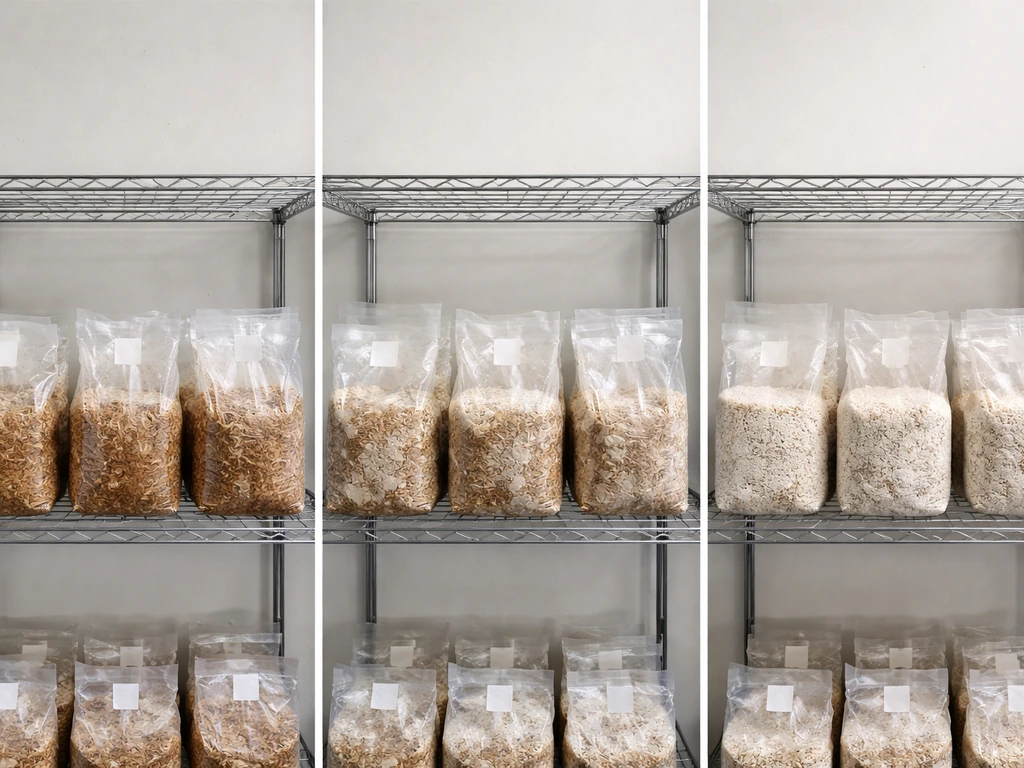
- Week 1: Inoculate sterilized and cooled substrate bags with grain spawn or liquid culture. Seal bags and move to a warm dark location at 26–30°C. Mycelium growth should begin appearing within 5 to 10 days as a white fuzzy network spreading through the sawdust.
- Weeks 1–5: Spawn run (colonization). Maintain colonization temperature (26–30°C) and keep bags in darkness. Full colonization takes 3 to 5 weeks for sawdust bags. The bag should turn uniformly white throughout. Do not rush this stage.
- Weeks 5–6: Transition to fruiting conditions. Drop temperature to 22–28°C, increase ambient humidity to 85–95%, introduce indirect light at 600–1750 lux, and open or cut the bag to trigger primordia. Good fresh air exchange becomes critical here.
- Weeks 6–8: Primordia formation (pin stage). Small nubs appear at the cut sites or bag opening. This is the antler phase if CO2 stays slightly elevated, or wider conk-forming growth if CO2 is kept low. Maintain high humidity and mist lightly if the surface looks dry.
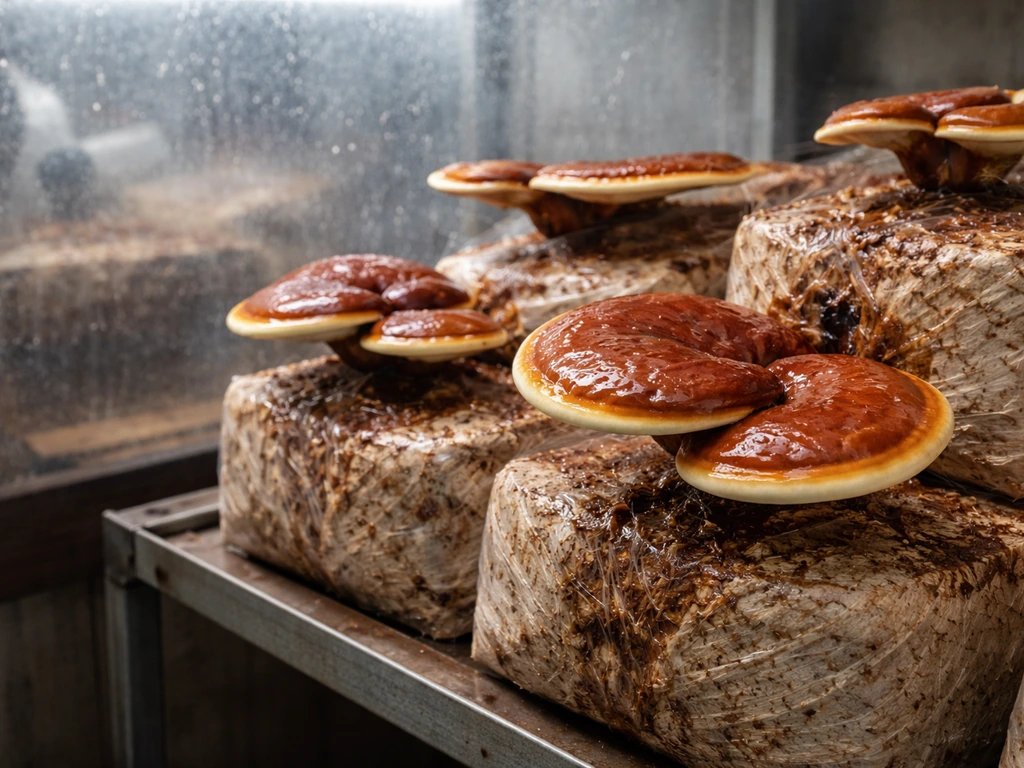
- Weeks 8–13+: Fruiting and conk development. Reishi grows slowly compared to most mushrooms. The fruiting body hardens and develops its characteristic red-lacquered surface. Actual active fruiting runs roughly 7 to 9 weeks from primordia to full maturity.
- Harvest: Harvest when the mushroom has stopped growing and before significant spore drop (a yellow-brown dusting around the base). Total time from inoculation to harvest is typically 3 months or more for indoor grows.
If you are resting a kit between flushes, put it back in darkness and drop it below fruiting temperature for 4 to 7 days, then resaturate by soaking or misting heavily before returning to fruiting conditions. Some kit formats can deliver 3 or more flushes this way. Pre-made commercial blocks, on the other hand, often only support a single fruiting cycle, so check what your block format is designed for.
What goes wrong and how to fix it
Contamination during colonization
Green, black, or pink mold appearing on the substrate is almost always a sterilization or contamination issue. Either the bags were not fully sterilized, they were inoculated before cooling below 30°C, or the inoculation environment was not clean enough. Contaminated bags should be removed from the grow space immediately and sealed in a garbage bag before disposal. There is no saving a heavily contaminated bag. Prevention is the only real fix: sterilize thoroughly, cool completely, and inoculate in the cleanest conditions you can manage.
Stalled colonization
If mycelium stops spreading partway through the bag and progress seems frozen for more than two weeks, the most common causes are temperature too low, substrate too wet (above 70% moisture), or a weak or old spawn batch. Check that your colonization area is consistently hitting 26 to 30°C. If the substrate is visibly wet or has pooled water at the bottom of the bag, your moisture was too high at mixing. Not much you can do at that point except learn for next time.
No pins or fruiting after full colonization
This is the most frustrating failure mode. The mycelium colonized fully but nothing is happening. Usually this comes down to CO2 being too high, humidity too low, or temperature not dropping enough to trigger the fruiting trigger. Reishi needs a meaningful drop from colonization temperature to fruiting temperature.
Make sure you have transitioned to 22 to 28°C, that ambient humidity is at least 85%, that there is some indirect light, and that fresh air exchange is actually happening. SARE’s reishi cultivation handout lists fruiting and primordia targets around 95, 100% relative humidity and temperatures around 70, 80°F (about 14, 28°C) across primordia stages [humidity around 70–80°F (≈14–28°C range shown across primordia stages)](https://projects. sare. org/media/pdf/S/A/R/SAREFieldDayHandoutREVISED.
pdf). Simply Horticulture’s strain guide lists a reishi fruiting target of about 22, 28°C and 85, 95% humidity, with CO2 kept below 800 ppm and a fruiting duration estimate of 30, 60 days. Fan the chamber multiple times a day and check that your humidifier is not just coating the walls without actually raising air humidity.
Long antlers instead of conk formation
Long, finger-like growths that never flatten out into a conk are a sign of elevated CO2. Reishi actually senses CO2 concentration to determine its growth form, which is fascinating but annoying when you want a flat shelf mushroom. Increase your fresh air exchange significantly. Open vents, fan more frequently, or add more air holes to your fruiting tent. Once CO2 drops to an appropriate level, the next growth flush or the tips of current antlers will often begin to broaden into the conk form.
Surface drying and aborted primordia
If tiny pins appear and then shrivel and die, the most likely cause is the substrate surface drying out. This happens easily near heaters, air vents, or in low-humidity rooms. Move the grow further from any heat or airflow sources and mist more frequently. Target 90 to 95% relative humidity consistently. A cheap hygrometer placed inside or near the fruiting chamber is worth every penny for catching this problem early.
Harvesting, drying, and storing your reishi
Harvest reishi when the mushroom has fully developed its characteristic glossy, red-lacquered surface and the white growing edge at the margin has stopped expanding. A key signal that harvest time is approaching is spore drop: a powdery yellow-brown coating that appears on the shelf below the mushroom. Harvest before this gets heavy, as spore dust in your grow space is messy and can be a respiratory irritant with repeated exposure.
To harvest, firmly grasp the base of the fruiting body and twist gently while pulling outward until it releases from the substrate. For log-grown reishi, you can use a clean knife to cut at the base if the attachment is firm. Handle the mushroom carefully because the surface scratches easily and bruising affects appearance though not potency.
Reishi must be dried promptly after harvest. Fresh fruiting bodies deteriorate quickly, so do not leave them sitting at room temperature for more than a day or two. The recommended drying temperature is below 50°C (122°F) to preserve the bioactive compounds. A food dehydrator set to 45°C for 8 to 12 hours works very well. You can also dry in an oven at its lowest setting with the door slightly cracked. Traditional sun drying is possible in dry, hot climates but risks moisture and mold if humidity is high. Freeze drying preserves the most quality if you have access to that equipment, though it is overkill for most home growers.
Once fully dried (the mushroom should be rock hard and snap cleanly), store in an airtight container away from light and heat. A glass jar in a cupboard is ideal. Properly dried reishi stores for 1 to 2 years without significant degradation. You can slice or grind it before storing if you plan to make tea or powder, which also helps it fit into smaller containers. The whole dried conk can also be kept intact and sliced as needed.
A few honest final thoughts
Reishi rewards growers who are organized and patient. The slow timeline feels punishing at first, but once you have a system where colonizing bags are running in the background while a previous batch is fruiting, it becomes a satisfying rhythm. If you are also growing faster species like shiitake or maitake alongside your reishi, those quicker harvests keep the motivation high while you wait for reishi to do its thing.
Start with a single bag or kit, nail your environmental targets, and you will have everything you need to scale up from there. If you are also interested in how to grow wine cap mushrooms, the setup and timeline are different, but the same basic planning for spawn, substrate, and moisture still applies.
FAQ
Can I grow reishi from grocery mushrooms or random “wild” conks I find?
It usually will not work reliably. Store-bought and wild conks often carry contaminants or are not viable for clean propagation, and reishi is slow enough that hidden contamination will win. For a first serious attempt, start with grain spawn, plug spawn, or a reputable liquid culture from a known supplier.
What is the best starting setup if I want the highest chance of success?
A pre-made fully colonized fruiting block or a reputable grow kit is the easiest way to reduce variables like sterilization and spawn rate. You still need to dial in fruiting conditions (fresh air exchange, humidity, and temperature drop), but you avoid the most failure-prone prep steps.
How do I tell if my reishi is growing as it should versus being “stretched” from CO2?
Look for shape progression. Healthy growth broadens toward a flat conk over time, while elevated CO2 tends to produce persistent finger-like growths that never properly flatten. If you see stretching, increase fresh air exchange immediately, then reassess after a few days.
What humidity should I target indoors, and how can I measure it correctly?
Aim for roughly 85 to 90% relative humidity during fruiting, and up to about 90 to 95% if pins keep shriveling. Use a hygrometer placed inside the chamber near the block, not only on the walls, so you measure the air the mushroom surfaces are actually exposed to.
Do I need to keep fresh air exchange going during colonization or only during fruiting?
During colonization, you typically do not want the same intense fresh air flow you use for fruiting, since colonization needs a stable environment and contamination control. Turn your attention to active FAE when you transition to fruiting, especially because reishi is CO2-sensitive once primordia form.
How much of a temperature drop should I aim for when switching from colonization to fruiting?
Use the trigger concept, not just the absolute numbers. Reishi needs a meaningful drop from colonization conditions to fruiting conditions, commonly transitioning into about the low to upper 20s Celsius for fruiting. If nothing starts after the switch, confirm the chamber truly reached fruiting temperature for at least several hours per day, not just briefly.
My mycelium colonizes but stalls for weeks, what are the most common causes?
The most common reasons are temperature too low, substrate that is too wet, or spawn that is weak or past its prime. If you notice pooled water or a very glossy substrate surface inside the bag, that strongly suggests excess moisture at mixing.
How can I reduce contamination risk during inoculation?
Do inoculations in the cleanest setup you can manage (still-air box or near a flow hood) and make sure the substrate is fully cooled before inoculating. Also avoid repeatedly opening bags once sealed, label everything, and work efficiently so the exposed surfaces are never sitting in open air.
Why do I sometimes see mold colors like green or black, and can I save the bag?
Those colors usually indicate contamination rather than normal mycelium. If a bag shows heavy contamination, remove it immediately and discard it sealed, because the spores and hyphae can contaminate nearby blocks. Prevention is the real fix: correct sterilization, correct cooling, and cleaner inoculation practices.
How often should I fan or exchange air during fruiting?
Many home setups rely on manual fanning several times per day. If you cannot maintain consistent fresh air exchange, CO2 can creep up and you may get misshapen or stalled growth. When in doubt, add more air exchange and verify it actually raises air quality inside the chamber rather than just moving wet walls around.
On logs, how do I know if I’m hydrating correctly without overdoing it?
You want the log to stay moist, not drenched and sitting in standing water. In dry conditions, periodic soaking or misting helps, and the shaded placement supports natural moisture. If logs stay waterlogged for long periods, you can encourage unwanted microbial activity and slow down a healthy colonization pattern.
Is it normal to wait many months for outdoor fruiting?
Yes. Indoor grows are faster, but outdoor log cultivation often takes many months before you see any fruiting. Many growers inoculate in spring and wait until the following summer, so plan your expectations around that slower seasonal timing.
When should I harvest reishi, and what does “spore drop” really mean for timing?
Harvest when the conk has its characteristic glossy red surface and the white growth edge stops expanding. If you see a powdery yellow-brown dust coating below the mushroom, spore release is starting, so harvest before it becomes heavy to keep the grow space cleaner and reduce inhalation exposure.
How do I dry reishi without losing quality?
Dry promptly after harvest and keep drying temperatures below about 50°C. A food dehydrator around 45°C for roughly 8 to 12 hours is a practical target for many home growers. Let it dry until it is rock hard and snaps cleanly before storing.
How long does dried reishi last, and what is the best way to store it?
When fully dried and sealed in an airtight container away from light and heat, it commonly stays usable for 1 to 2 years with limited degradation. If you plan to make tea or powder, you can slice or grind for easier portioning, but keep it in sealed containers to minimize moisture reabsorption.