Crimini mushrooms (also spelled cremini) are totally growable at home, but they need a bit more attention than oysters or shiitake. If you also want to try shimeji, the growing setup is different in a few key ways, so it helps to follow a shimeji-specific guide shimeji mushrooms. If you want a different approach, learn how to grow shiitake mushrooms from plugs. You'll be working with Agaricus bisporus, the same species sold as white button mushrooms and portobellos. The crimini is simply the brown color morph of that species, harvested before the cap fully opens. To grow them indoors, you need composted substrate, A. bisporus spawn, a tray or bin setup, and tight control over temperature (around 65-75°F for colonization, 55-65°F for fruiting) and humidity (85-95%). Get those conditions right and you can realistically pull your first harvest in 5 to 8 weeks from setup.
How to Grow Crimini Mushrooms at Home: Step by Step

What crimini mushrooms are and what you'll need
If you've ever been confused by the names, here's the simple truth: white button, crimini/cremini, baby bella, and portobello are all Agaricus bisporus. The crimini is the brown color strain, and the difference between a crimini and a portobello is literally just how long you let it grow before picking. Crimini is harvested young and tight. Let it mature and open up, and it's a portobello. There's no botanical difference, just a harvesting decision. This matters for growing because you're working with one species no matter what the grocery store label says.
Agaricus bisporus is more demanding than trendy species like oysters because it needs a composted, nitrogen-rich substrate and cooler fruiting temperatures. It won't colonize simple straw or hardwood sawdust the way oysters do. That said, it's the most commercially grown mushroom in the world, and home growers have been doing it successfully for decades. Here's what you need to gather before you start.
- A. bisporus crimini/brown strain spawn (grain spawn or brick spawn from a reputable supplier)
- Composted substrate: a blend of horse manure compost or a coco coir/composted manure mix works well for home grows
- A shallow growing tray or plastic storage bin (4 to 6 inches deep, at least 12x18 inches)
- Casing layer material: peat moss mixed with hydrated lime, or a coco coir/vermiculite blend
- Spray bottle or handheld pressure sprayer for misting
- A thermometer and a hygrometer
- Loose plastic sheeting or a humidity tent to cover the tray during colonization
- Optional but helpful: a seedling heat mat for temperature control during colonization
You can buy ready-to-use A. bisporus grain spawn online from mushroom supply companies. Some suppliers also sell pre-made composted substrate specifically for Agaricus, which cuts out a lot of the prep work if you're a first-timer. I'd recommend going that route for your first grow so you can focus on the environmental side without wrestling with compost.
Step-by-step indoor setup
Unlike species that fruit in bags or jars, crimini grows best in a tray or flat bin setup, which is how commercial operations have done it for over a century. The general flow is: prepare and pasteurize your substrate, inoculate it with spawn, let it colonize in a warm dark space, apply a casing layer, then move it to cooler fruiting conditions. Here's the full process.
- Pasteurize your substrate: if you're using a home-mixed compost blend, pasteurize it by bringing it to 160-180°F for 1-2 hours (a large pot with a thermometer works), then let it cool completely to room temperature before adding spawn. Pre-made Agaricus substrate is usually already pasteurized.
- Mix in your spawn: at around 65-70°F, mix crimini grain spawn into your cooled substrate at a rate of roughly 10-20% spawn by weight (so about 100-200g spawn per 1kg substrate). Spread the inoculated mix into your tray to a depth of 4-5 inches and firm it down gently.
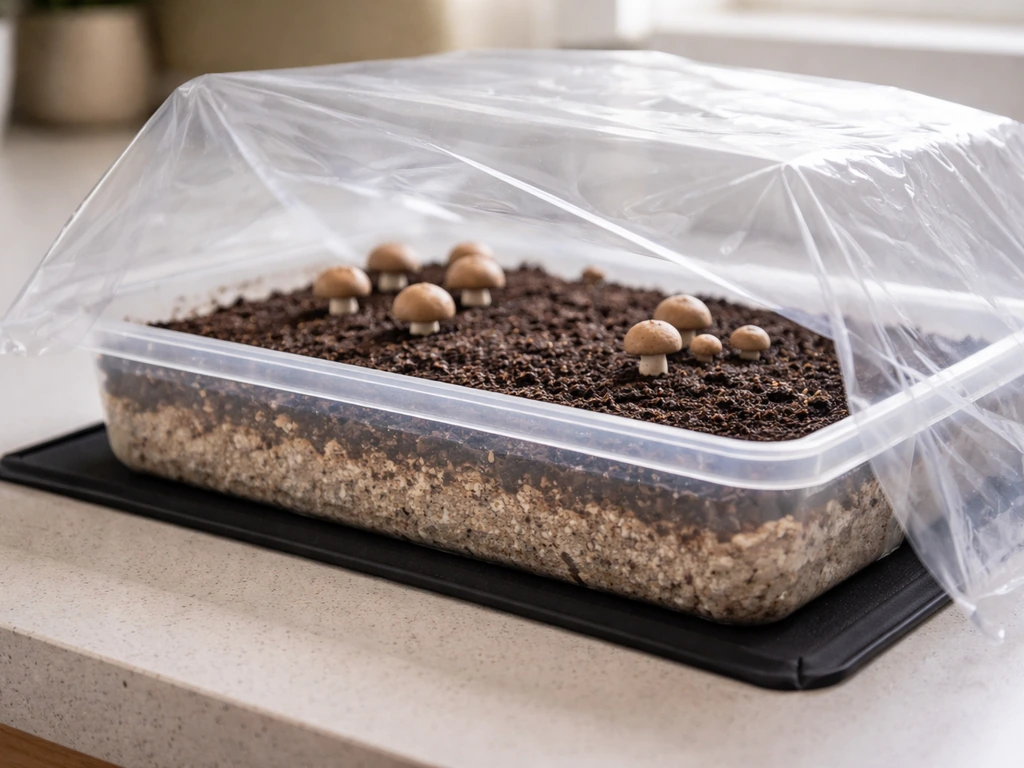
- Cover and colonize: tent the tray loosely with plastic sheeting to hold moisture and keep out contaminants. Place it somewhere warm (65-75°F). Leave it alone for 10-14 days while the mycelium spreads. You'll see white, fluffy growth threading through the substrate.
- Apply the casing layer: once the substrate surface is 70-80% covered in white mycelium, apply a casing layer about 1 inch thick. A classic mix is 3 parts peat moss to 1 part hydrated lime (adjust pH to around 7.5), moistened but not dripping wet. This layer triggers pinning by changing the CO2 and moisture environment at the surface.
- Wait for pinning: after casing, keep the tray at 65-70°F for another 5-10 days. Tiny white pins will appear at the casing surface. Once you see pins, drop the temperature to your fruiting range and increase fresh air exchange.
- Fruit the mushrooms: move the tray to your fruiting environment (55-65°F, 85-95% humidity, gentle fresh air) and mist lightly once or twice daily. First harvest typically arrives 7-14 days after pinning begins.
Substrate options and preparation
Agaricus bisporus is a secondary decomposer, which means it thrives on well-composted, nitrogen-rich material rather than fresh woody biomass. Getting the substrate right is honestly the step where most home growers stumble with this species. Here are your realistic options.
| Substrate Option | Pros | Cons | Best For |
|---|---|---|---|
| Pre-made Agaricus compost (bought online) | Ready to use, consistent, pasteurized | Costs more, limited shelf life | Beginners, first grows |
| Horse manure compost + straw blend (aged 4+ weeks) | Cheap, effective, traditional | Needs pasteurization, more prep work | Growers with outdoor compost access |
| Coco coir + composted manure mix (50/50) | Easier to source, good results | Needs pasteurization, variable manure quality | Intermediate growers |
| Commercial mushroom compost (garden center) | Widely available, inexpensive | Quality varies, may need pasteurization | Budget growers willing to experiment |
Whatever substrate you use, moisture content is critical. Aim for the squeeze test: grab a handful and squeeze hard. You want a few drops of water to come out, not a stream. Too wet and anaerobic bacteria will rot your substrate before mycelium can take hold. Too dry and colonization stalls. After mixing in spawn, the substrate should feel like a damp sponge, moist but not soggy.
blank" rel="noopener noreferrer">The casing layer is not optional with Agaricus. Without it, you'll often get colonization but no pins. The peat-lime mix is the classic choice because the pH (target 7. Shroomery also emphasizes casing pH as important, and it notes a commonly cited casing mixture pH range of 6.5 to 8 blank" rel="noopener noreferrer">The peat-lime mix is the classic choice because the pH (target 7.. 5-8.0) and water-holding capacity of peat create the right microenvironment at the surface. Coco coir works too, though it tends to hold moisture a bit more aggressively, so watch for pooling. Hydrate your casing mix before applying it so it's evenly moist throughout.
Environmental controls: temperature, humidity, air, and light
This is where crimini growing diverges most sharply from oysters or shiitake. Crimini needs distinctly different conditions for colonization versus fruiting, and both windows are cooler than what most tropical species want. A lot of home growers run into trouble because they try to fruit at room temperature and get leggy, poor-quality mushrooms or nothing at all.
Temperature
During spawn run and colonization, keep the substrate between 65-75°F. A seedling heat mat under the tray can help if your space is cooler. Once you see solid colonization and apply the casing layer, drop temperatures to 55-65°F for fruiting. This is the most important environmental shift in the whole grow. A basement, a cool garage in spring or fall, or a dedicated mini-fridge setup with a temperature controller all work well. Fruiting above 70°F regularly produces aborts and thin, poor-quality mushrooms.
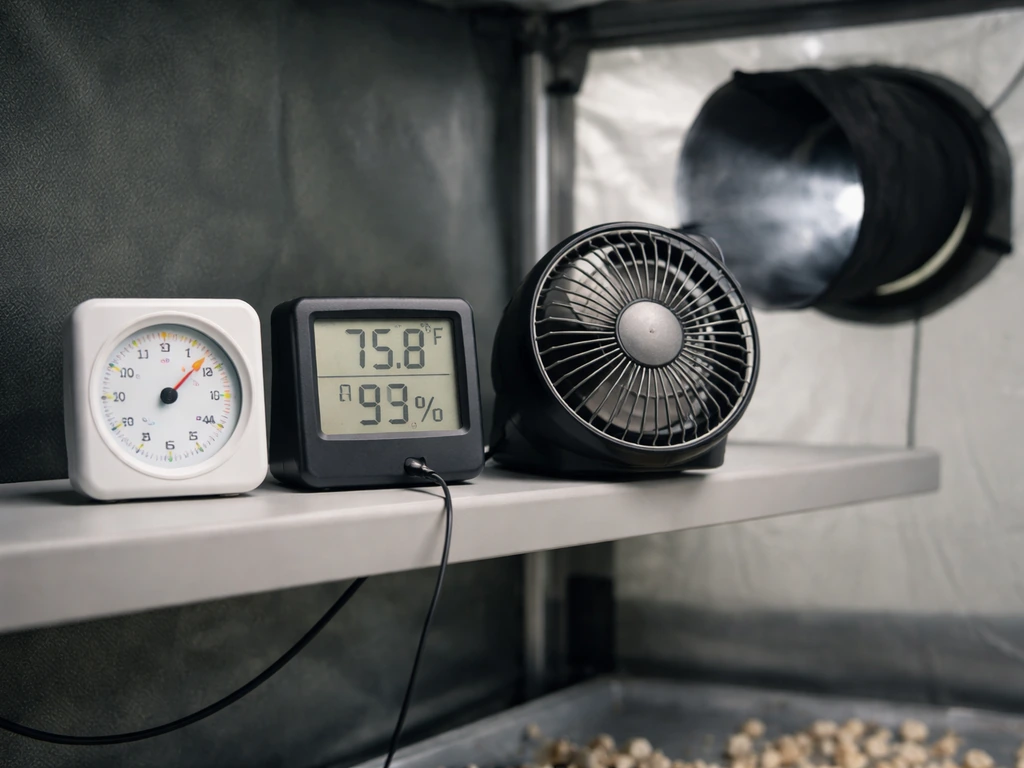
Humidity
Target 85-95% relative humidity throughout colonization and fruiting. A humidity tent over the tray is usually enough to hold this during colonization. During fruiting, mist the casing layer and the inside of the tent lightly once or twice a day. Never mist directly and heavily onto developing pins or young mushrooms, as it can cause blotching and encourages bacterial blotch. If your space is very dry (common in winter with heating running), you may need a small humidifier nearby.
Fresh air and CO2
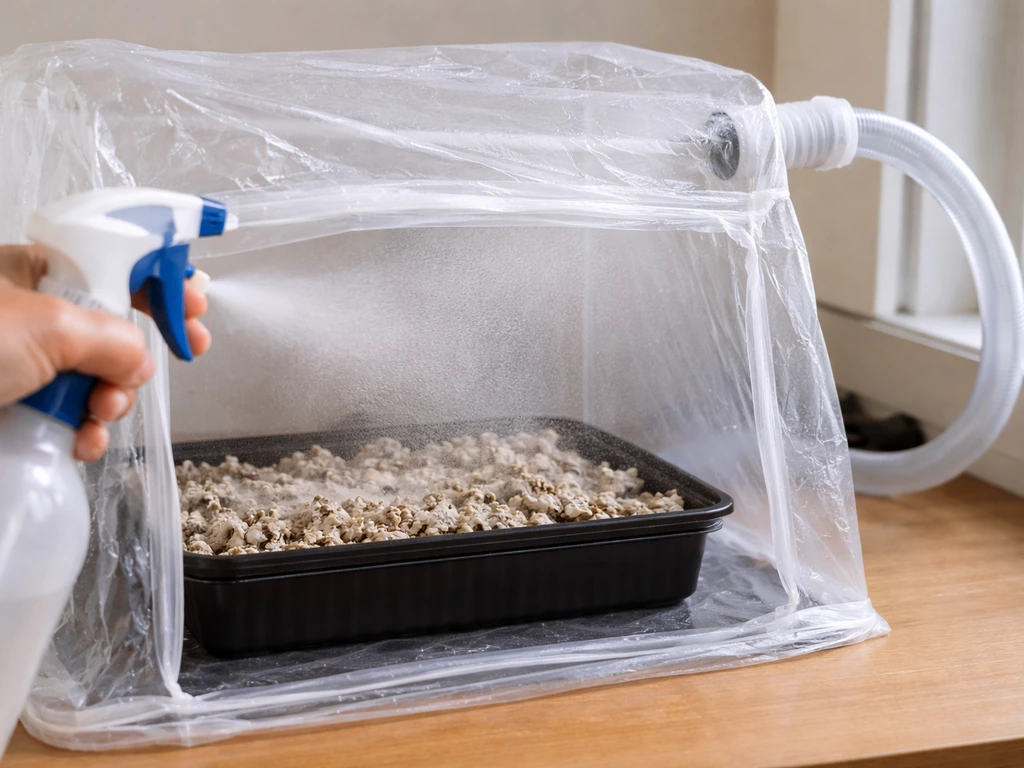
During colonization you can keep the tent fairly sealed to hold humidity and CO2, which actually helps the mycelium spread. But once pins appear, Agaricus needs fresh air exchange to develop properly shaped mushrooms. High CO2 causes elongated stems and small, deformed caps. Open or fan the tent for 30-60 minutes a couple of times a day, or leave a small gap in the plastic sheeting. You don't need a lot of air movement, just enough to refresh the CO2. A small fan on the lowest setting pointed away from the tray (to circulate room air indirectly) works well.
Light
Agaricus bisporus doesn't require light and happily fruits in complete darkness. However, indirect ambient room light won't harm it, and some growers find it helps them spot pinning and monitor the tray more easily. Don't put it in direct sunlight, which will dry out the surface and raise temperatures. For all practical purposes, a dark basement shelf or a closet is perfect.
Realistic timeline from setup to harvest
| Stage | Duration | What to Watch For |
|---|---|---|
| Substrate prep and inoculation | Day 1 | Even spawn distribution, correct moisture |
| Spawn run (colonization) | 10-14 days | White mycelium spreading through substrate |
| Casing layer application | Day 12-16 | 70-80% surface mycelium coverage |
| Pin formation after casing | 5-10 days | Tiny white pins at casing surface |
| First flush development | 7-14 days after pinning | Tight caps, veil still closed or just beginning to open |
| Second flush (after rest) | 7-14 days rest + another 7-14 days | Repeat pinning cycle after watering casing layer |
Total time from setup to first harvest: roughly 5 to 8 weeks. Most home setups can pull 2 to 3 flushes from a tray before yields drop off significantly. Second and third flushes are often just as good as the first if you maintain the casing layer's moisture after picking.
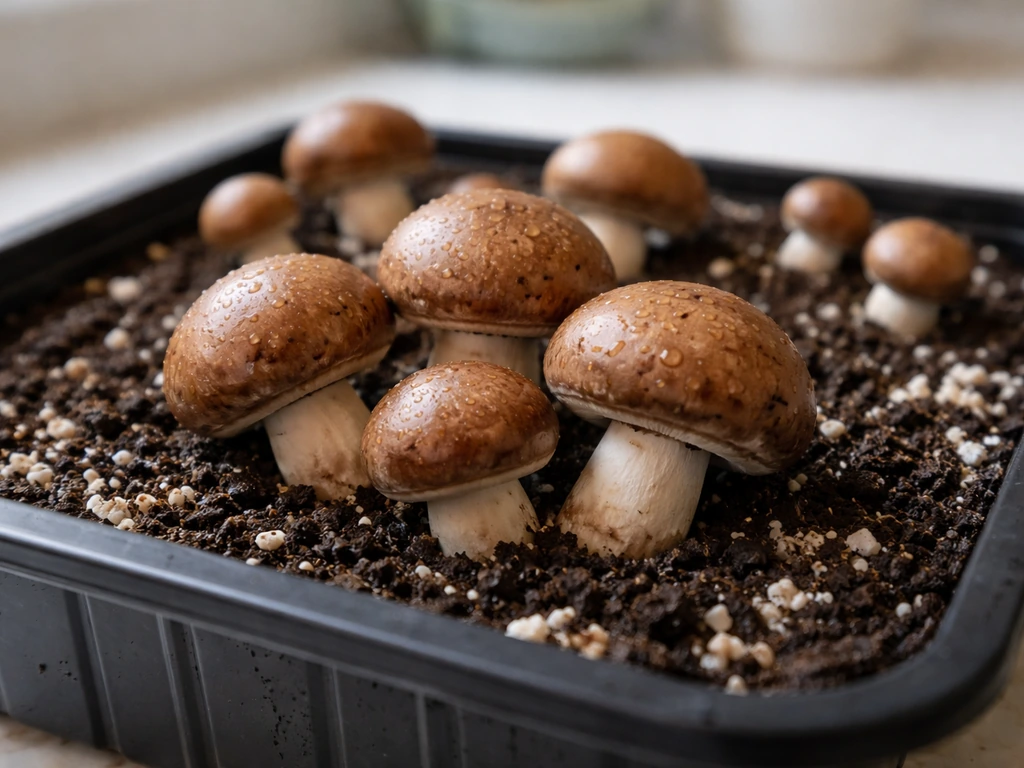
Harvest timing, picking, and storing your crimini
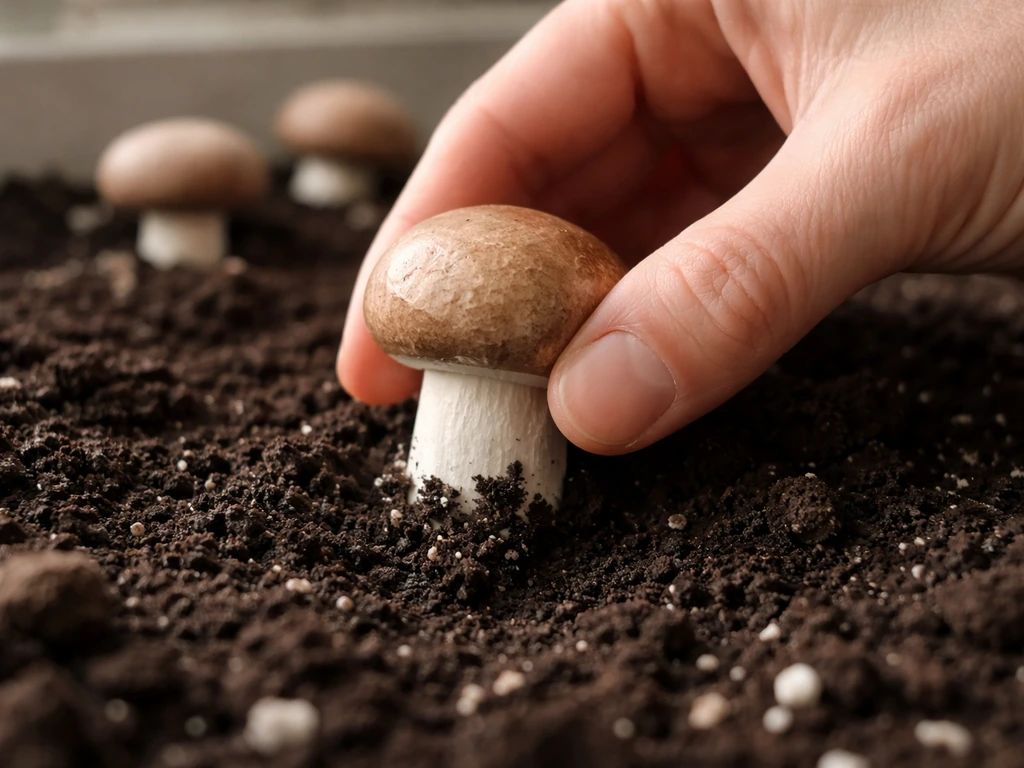
Harvest crimini while the cap is still firm, rounded, and the veil (the thin membrane connecting the cap edge to the stem) is still intact or just barely starting to tear. Once the veil breaks and the cap flattens out, you've got portobello, which is still perfectly edible, but if you want the classic crimini look and shelf life, pick before that happens. The caps should be a light tan to rich brown depending on your strain.
To harvest, grip the mushroom near the base and twist gently while pulling upward. Don't cut them with scissors or a knife, as the stub left behind can rot and become a contamination point in the casing layer. Remove the entire mushroom including the base. After each flush, clear away any leftover stems or aborted pins from the casing surface, then water the casing layer gently and wait for the next pin set.
For storage, crimini keep well in a paper bag or a container lined with a paper towel in the refrigerator for up to 7-10 days. Avoid sealed plastic bags, which trap moisture and cause sliminess. If you've harvested more than you can use, slice and dry them at 95-115°F in a food dehydrator for long-term storage. Dried Agaricus has excellent flavor and reconstitutes well in soups and sauces.
Troubleshooting when things go wrong
Crimini grows can stall or fail at several predictable points. Here's what's actually happening in the most common scenarios and what to do about it.
Mycelium isn't spreading after 2 weeks
The most common cause is substrate that's too wet, too dry, or too hot after inoculation. Check your moisture content and temperature first. If the substrate feels waterlogged or smells sour, you've got anaerobic bacteria competing with the mycelium. There's not much to save at that point; note the mistake and restart with better moisture balance. If it's just a bit slow, make sure you're holding 65-75°F and give it another week before assuming failure.
No pins after applying the casing layer
This is one of the most frustrating outcomes, and it's usually one of three things: the casing pH is off, the temperature is too high, or the casing layer dried out. Rehydrate the casing layer by misting it gently, check that your pH is around 7.5-8.0 (add a little hydrated lime if it's too acidic), and make sure you've dropped to the 55-65°F fruiting range. If the casing layer has been on for more than 3 weeks with no pins and you've corrected these factors, give the tray a single heavier watering and wait another 7-10 days. Sometimes that triggers a pinning response.
Pins appear but abort before developing
Aborts happen most often from humidity swings, temperature spikes, or CO2 buildup. If you're seeing tiny pins stalling and turning brown or yellow, check that your humidity is consistently above 85% and that you're getting adequate fresh air exchange. A single day of drying out can abort an entire pin set. Tighten up your misting routine and look for drafts or heat sources near the tray.
Green, black, or pink patches in the substrate or casing
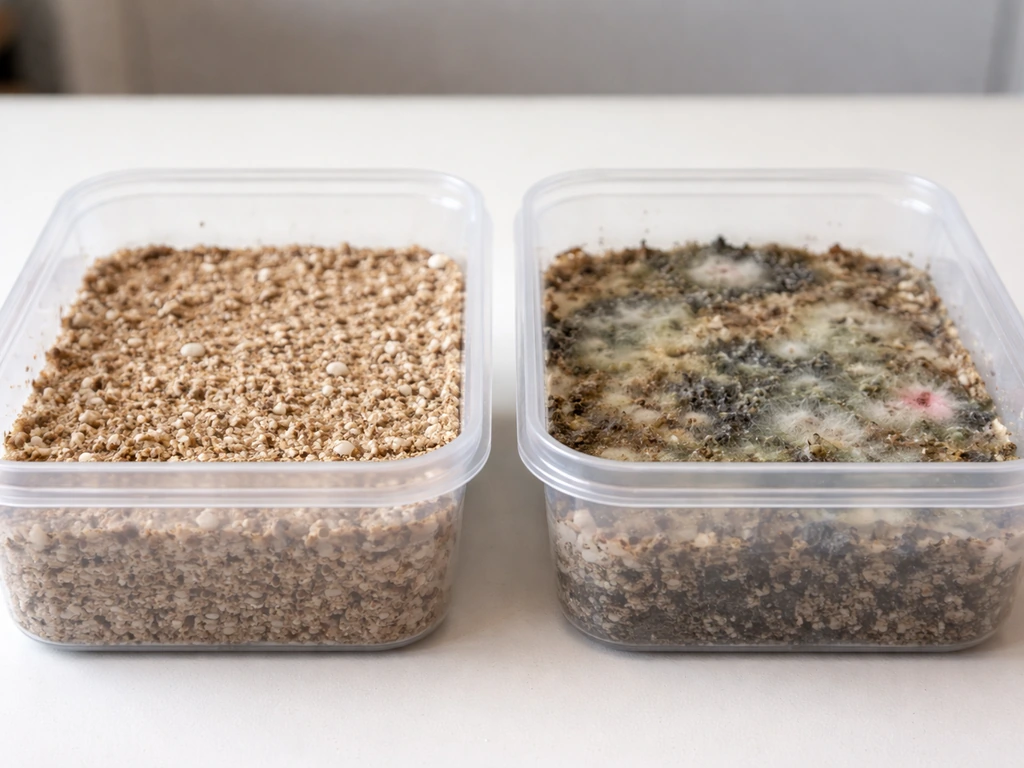
Colored patches are mold or bacterial contamination. Green is typically Trichoderma, a fast-moving competitor mold. If it's isolated to a small area, you can try removing the contaminated section carefully and applying a small amount of hydrated lime directly to the spot to raise pH locally. If it's spreading across more than 20-30% of the tray, the grow is likely compromised and you're better off starting fresh. Contamination this severe usually traces back to a substrate that wasn't pasteurized thoroughly enough, or spawn that was introduced before the substrate had fully cooled.
Mushrooms developing long stems and small caps
This is a classic CO2 problem. Open up your fruiting space more aggressively and increase fresh air exchange frequency. If you've been keeping the tent nearly sealed to hold humidity, loosen that approach and find a balance between fresh air and moisture retention. Misting more frequently with shorter tent closures helps.
Second flush doesn't come
After picking the first flush, many growers miss the rehydration step. The casing layer loses moisture during fruiting and needs to be replenished. After clearing all harvested mushrooms and old stubs, mist the casing layer generously (more than your usual daily misting) and cover loosely for a couple of days to let it rehydrate evenly. Then resume normal fruiting conditions and wait 7-14 days. If yields from the second flush are very low, the substrate may simply be depleted.
Crimini takes more patience and setup than beginner-friendly species like oysters, but the rewards are real. If you also want to try nameko mushrooms, the key is learning their different temperature and substrate preferences before you scale up. Once you understand that this is really a temperature and moisture management game from start to finish, the whole process starts to make more sense. If you've had success with crimini and want to explore other species that reward careful environmental control, wood-loving varieties like shiitake grown from plugs or log-cultivated reishi follow a similarly methodical approach that will feel familiar. If you want, you can apply the same core indoor steps to matsutake by focusing on the right host and longer timelines matsutake mushrooms.
FAQ
What should I do if I realize I fruited my crimini at room temperature for a few days?
If you accidentally fruit at the wrong temperature, first look for leggy growth and aborts rather than trying to “fix” it with extra misting. Drop to the recommended fruiting range (55-65°F), keep humidity high, and increase fresh-air exchange. Then wait about 7-10 days, because mushrooms often show delayed effects from the temperature shift during that pinning cycle.
Can I grow crimini without a casing layer?
No. For Agaricus, you generally need a casing layer to get reliable pinning. If you skip casing and you only get fluffy surface mycelium, pins usually never form or they fail quickly. The practical fix is to remove the surface growth as best you can, apply correctly hydrated casing, and re-enter the fruiting temperature window.
How do I know whether my problem is high CO2 or humidity swings?
Use CO2 management as the guide. If stems are elongated and caps are small or deformed, you likely have too much CO2, usually from a near-sealed tent. Increase fresh air exchange in short bursts (for example, open for 30-60 minutes a couple times per day) while keeping humidity high, so you do not trigger drying.
Can I mist more often to boost humidity if pins are small?
Too much free water is a common reason for bacterial blotch and soft breakdown. Misting should target the air and the casing surface, not soaking pins. If you see blotchy, wet-looking spots, stop heavy misting immediately, let the surface dry slightly, improve airflow for short periods, and resume gentle misting only after the casing surface is evenly moist again.
How do I harvest at exactly the right stage for crimini versus portobello?
Choose the harvesting moment based on your goal. Pick crimini when the cap is still firm and rounded, and the veil is intact or just starting to tear. If you wait until the veil fully breaks and the cap flattens, it will still be edible, but it will behave more like portobello (often softer and with shorter shelf life).
What’s the best way to handle temperature control if my home is either too warm or too cold?
Yes, you can, but you need to be consistent and avoid overshooting. If your space is cold, the simplest approach is to keep colonization near 65-75°F with a heat mat under the tray and a temperature controller if possible. If your fruiting area is warm, use a dedicated cooler space (garage, basement) or a temperature-controlled setup, because fruiting above 70°F regularly causes aborts and thin mushrooms.
My trays keep contaminating. Should I blame the spawn or the substrate preparation?
Pasturized substrate is critical for Agaricus because it is slower to compete than oyster. If you use compost, let it cool fully before inoculation, and ensure pasteurization was thorough. If contamination keeps appearing, especially early, the most likely cause is that the substrate was not pasteurized enough or was inoculated before it cooled.
Why does my second flush drop off, even though the first flush looked great?
After you harvest, the casing dries out fastest on the surface. Mist more generously than your daily routine, cover loosely for a couple of days to let moisture re-distribute, then return to normal fruiting conditions. If second-flush yields are low, it can mean the substrate is depleted, but first confirm casing moisture was restored before changing anything else.
What’s the safest storage method to maximize freshness and avoid sliminess?
Paper-only storage is the goal. If you store in sealed plastic, you create a humid microclimate that encourages sliminess. If you need longer storage, slice and dry at a low, controlled dehydrator temperature (or cool-dry promptly) and store dried mushrooms airtight away from light and moisture.
If I don’t see pins after a few weeks, what order should I check conditions in?
First troubleshoot with a timeline. If you applied casing and still see no pins after roughly 3 weeks, check the casing pH (around 7.5-8.0), confirm fruiting temperatures are in the 55-65°F range, and verify casing moisture is correct (damp sponge, not wet). Once those are corrected, a single heavier rehydration and then waiting about 7-10 days can sometimes trigger pinning.