You can grow maidenhair fern (Adiantum spp.) from spores at home, but it takes patience: expect a translucent green film on your medium within 4–14 days, prothalli (the heart-shaped gametophyte stage) by 4–6 weeks, and tiny recognizable fern fronds somewhere between 8 and 12 weeks from sowing. Full-sized plants take closer to 12 months. The keys to success are a sterile start, consistent moisture without waterlogging, warmth in the 68–86°F range, and keeping everything sealed until the plants are big enough to handle open air.
How to Grow Maidenhair Fern From Spores: Step by Step

Marcus Holloway
18 May 2026
Spores vs spores: sourcing, viability, and what you can actually expect
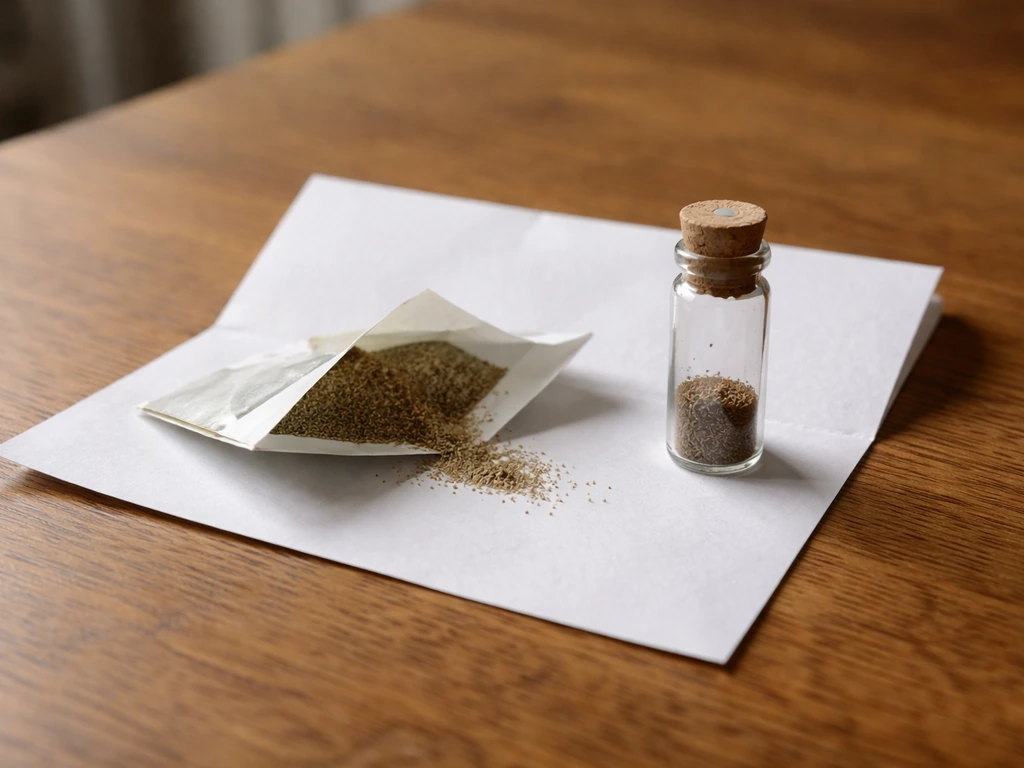
There are two ways to get maidenhair fern spores: collect them from a plant you already own, or buy a spore packet. Both work, but they come with different expectations. If you're collecting fresh spores from a frond, check the sori (the little clusters on the underside of the fronds). They should be dark brown to black when ripe.
Pale green or yellowish sori mean the spores aren't ready yet. Once ripe, snip the frond, slide it into a thin paper envelope, and leave it somewhere dry and warm for a day or two.
The American Fern Society recommends putting ripe sori-bearing fertile fronds into a thin white paper envelope and letting them dry at room temperature for a few days before extracting or spreading the spores snip the frond, slide it into a thin paper envelope, and leave it somewhere dry and warm for a day or two. You'll find a fine dust of spores at the bottom of the envelope.
Bought spore packets are convenient and usually reliable if you're sourcing from a reputable supplier. The good news is that fern spores, when stored properly in a cool, dry place, can remain viable for several years. Still, freshness matters. If you're buying spores, check that the packet includes a harvest date, and look for sources that store at cool temperatures. Viability drops noticeably with heat and humidity, so avoid packets that have been sitting in a warm warehouse. Either way, don't expect 100% germination. Even healthy spores might give you 40–70% germination under good conditions at home, not a lab. That's fine because you're sowing a lot of them.
This process is fundamentally different from growing mushrooms from spores, where you're working with fungal cultures on agar or grain substrates. If you meant mushroom propagation specifically, the process differs from ferns and you’ll want a guide on how to grow mushroom spores from syringe. Fern spores behave more like fine dust, and the early stages involve a completely different organism (the prothallus) before you ever see anything that looks like a fern. If you've done work with spore syringes or spore prints for mushrooms, some of the sterile-technique habits will transfer, but the biology here is its own thing.
Supplies and setup: what you need before you sow a single spore
Maidenhair fern spores are incredibly small and light, which means airborne contaminants (mold spores, moss spores, bacteria) will colonize your medium just as easily. Getting your setup right before you open any spore packet will save you weeks of frustration. Here's what you'll need:
- A clear, sealable container: a glass terrarium, a clean glass casserole dish with a lid, or even a large clear plastic storage container with a tight-fitting cover. The key is transparency (you need to monitor progress) and a seal that holds humidity.
- Growing medium: a peat-based mix or a coir/sphagnum blend works well. Some growers use straight peat moss. A peat:vermiculite:perlite mix adjusted to around pH 6.5 is excellent. Avoid potting soil with added fertilizers for the germination stage — it encourages algae and mold.
- Distilled water: tap water introduces minerals and sometimes chlorine that can inhibit germination. Use distilled water throughout.
- A dilute bleach solution: roughly 2–5% sodium hypochlorite in water, plus one small drop of dish soap as a wetting agent. This is for sterilizing both the medium and optionally the spores themselves.
- Clean tools: a clean spoon or scoop, a small sterile mist bottle, clean gloves, and a workspace wiped down with dilute bleach solution.
- A paper envelope or small clean dish for handling spores.
- Clear plastic wrap or a glass/plastic lid for sealing the container.
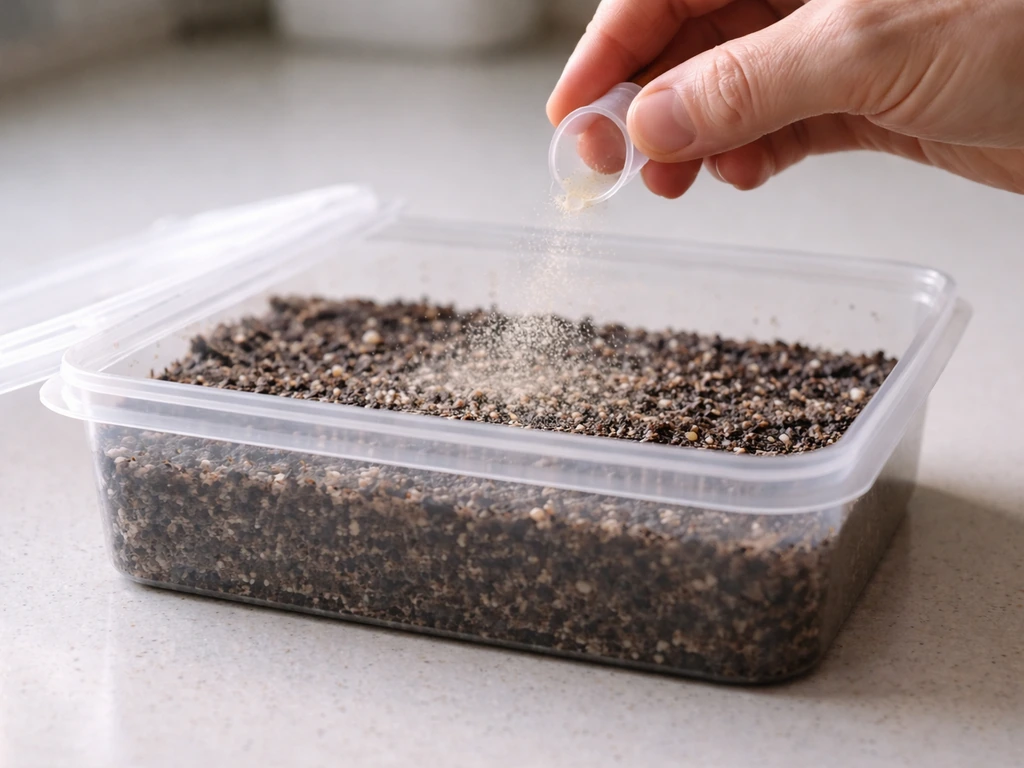
Before you fill your container, sterilize the growing medium. The easiest home method: moisten your peat or coir mix until it holds together but isn't dripping, then microwave it for about 2 minutes. Alternatively, pour boiling water over it and let it cool completely before use. This kills any stray fungal, moss, or fern spores that are already in the mix. Don't skip this step. I've tried it both ways, and every time I skipped sterilizing the medium, green algae or moss took over before the fern spores even got started. Once the medium is cool, pack it lightly into your container to a depth of about 1–2 inches. The surface should be level and just slightly moist.
Sowing the spores: technique, moisture, and keeping things sealed
Sow in as clean an environment as you can manage. A cleared kitchen counter wiped down with dilute bleach is fine for most home growers. If you want to go further, work next to a gas stove flame or inside a clean plastic bag to reduce airflow carrying contaminants. Avoid fans or drafts in the room while sowing.
For an optional but worthwhile spore sterilization step: add your spores to a small clean container with a 2–5% bleach solution and a drop of wetting agent. Soak for no more than 30 seconds to 1 minute, then carefully remove the bleach solution using a clean pipette or by draining with a clean piece of cloth, leaving the spores behind. Rinse once with sterile distilled water. This step reduces contamination significantly, especially if you're working with spores collected from an outdoor plant. It's the same logic applied to surface-sterilizing fertile fronds: the Brooklyn Botanic Garden method of briefly washing the frond in a 5–10% bleach solution before tapping out spores is another way to go about it.
Once your spores are ready, tap or sprinkle them as evenly as you can across the surface of your prepared medium. You don't need to cover them with more medium. Fern spores germinate on the surface, exposed to light. A light dusting is enough. After sowing, mist the surface very gently with distilled water using your sterile mist bottle, then immediately seal the container with your lid, plastic wrap, or glass cover secured with rubber bands. That sealed environment is your best contamination control and moisture management tool in one.
What happens after you sow: the germination timeline and life stages
Here's where maidenhair fern cultivation gets genuinely fascinating, and a little confusing if you're not prepared for it. The fern life cycle has two distinct stages before you get the plant you recognize, and each stage looks completely different from the one before it.
| Stage | What it looks like | Approximate timing |
|---|---|---|
| Spore germination begins | Nothing visible yet, but cells are activating | 3–20 days from sowing |
| Prothallus (gametophyte) film | Translucent green film or dusty green haze on the medium surface | 4–14 days (early film); 4–6 weeks (distinct prothalli) |
| Heart-shaped prothalli | Small, flat, heart-shaped green structures, like tiny liverwort; this is the gametophyte stage | 4–8 weeks from sowing |
| Fertilization and sporophyte development | Tiny fern-like fronds emerging from the prothalli; this is the true fern plant starting | 8–12 weeks from sowing (faster in spring/summer, slower in fall/winter) |
| Transplantable seedlings | Recognizable small ferns with 2–3 fronds | 3–6 months from sowing |
| Full-grown plant | Mature maidenhair fern | Around 12 months from sowing |
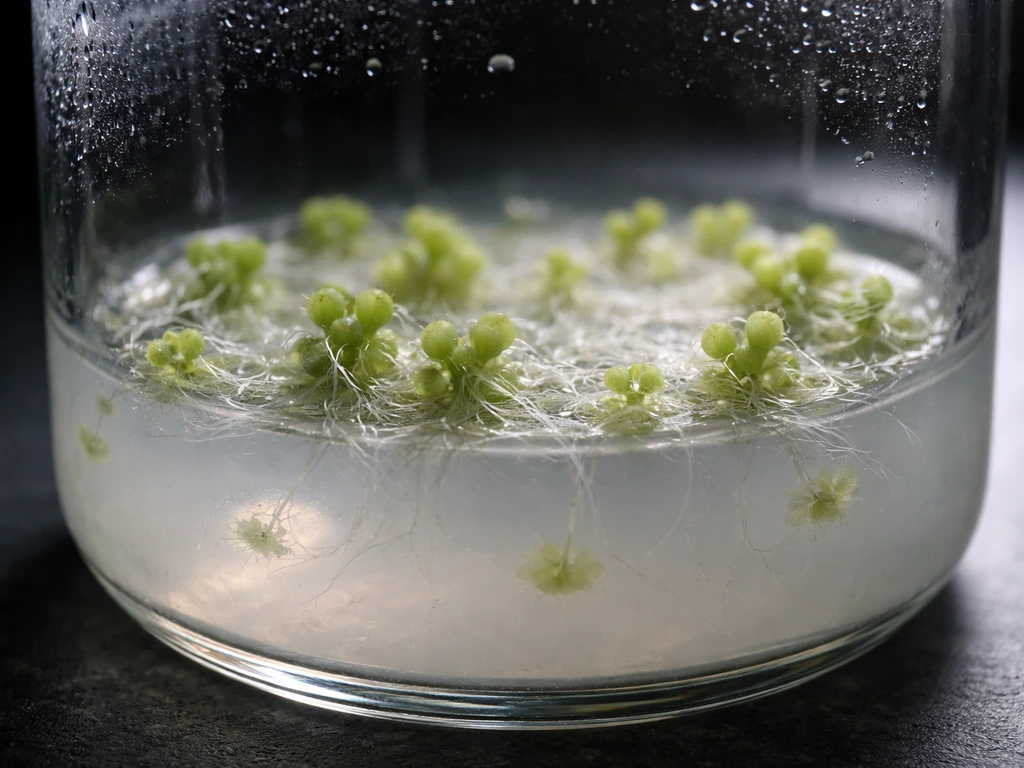
The prothallus stage is the one that trips people up most. Those flat green patches do not look like ferns. They look like algae or moss, and a lot of first-time growers panic and think something went wrong. It hasn't. Those heart-shaped prothalli are the gametophyte generation, and fertilization happens at this stage (requiring a thin film of water so male cells can swim to the egg cells). This is exactly why the surface must never dry out during the prothallus stage. A dry surface at this point means no fertilization, and no fertilization means no fern plants.
The first true fern fronds emerging from the prothalli are tiny, usually just a few millimeters tall, and they'll look unmistakably like maidenhair fern even at that size. That's your signal that things are going exactly right.
The conditions that actually matter: humidity, light, temperature, and airflow
Maidenhair fern spores are more demanding about their environment than most fern species. Get these four factors right, and the process is surprisingly manageable.
Humidity
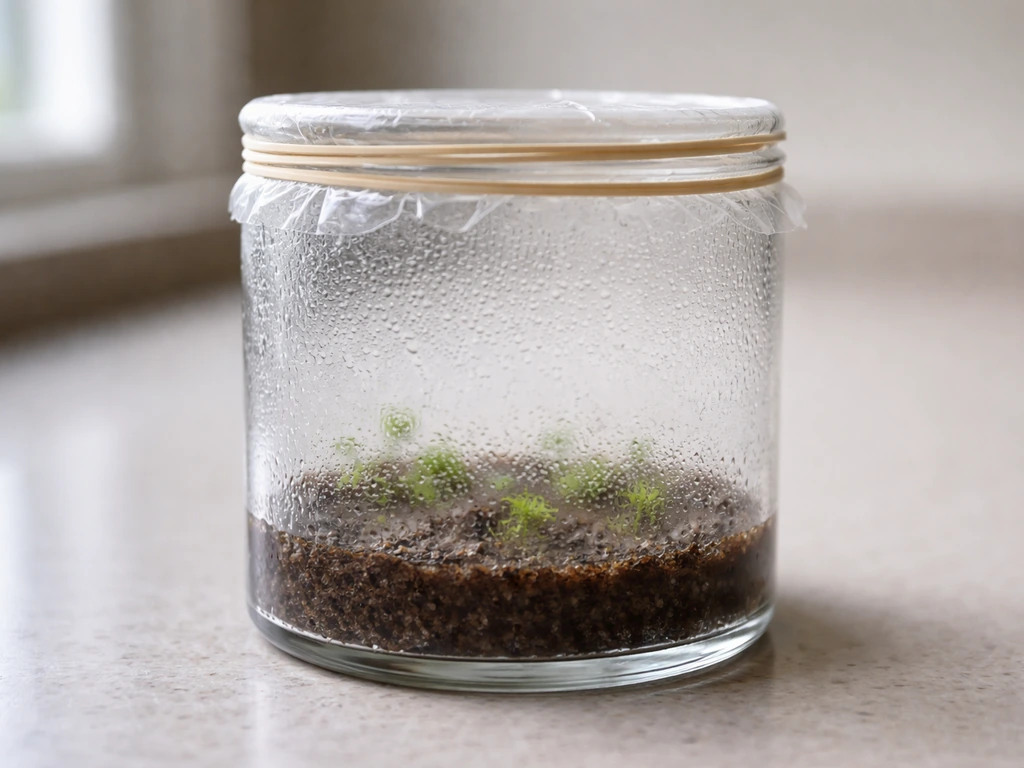
Keep the container sealed until you have visible prothalli. That sealed cover is not optional. It maintains near-100% humidity around the developing spores and keeps out airborne contaminants. The surface of your medium needs to always have a thin, glistening moisture layer. Check every few days, and if it looks dry, mist lightly with distilled water using a clean mist bottle. Don't flood the surface. You want moist, not waterlogged.
Temperature
Aim for 68–86°F (20–30°C) for germination. The sweet spot for maidenhair ferns is around 65–70°F at night and similar during the day. This is easily achievable on a warm windowsill or under grow lights in a typical indoor environment. Don't let the container get cold. Temperatures below 60°F will slow germination dramatically and can cause stalling at the prothallus stage.
Light
Bright, indirect light is what you want. A windowsill that gets diffused daylight but no direct harsh sun works well. Direct sun through glass will overheat the sealed container and cook your spores. Fluorescent or LED grow lights at about 12–14 hours per day are a great option if your indoor light is limited. Maidenhair ferns like shade in their mature life, and that preference starts early.
Airflow
Here's where the timing matters. Keep the container fully sealed until the prothallus stage is established and you see the first sporophyte fronds forming. Then, very gradually introduce air. One old-school method that works beautifully is to prop your glass or lid about 8 inches above the pots so a gentle current of air passes over the surface, while still keeping most of the humidity in. Do this incrementally over a week or two. Sudden exposure to dry room air at the prothallus stage will kill everything.
Thinning, transplanting, and potting your fragile young ferns
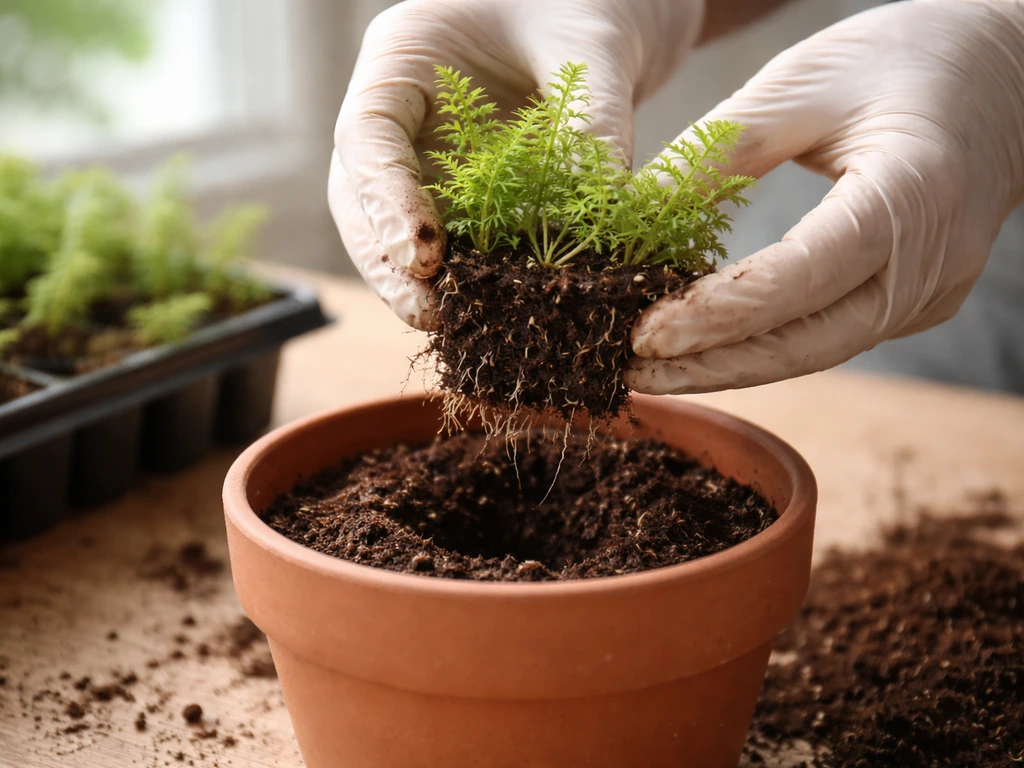
Once you have recognizable small fern fronds (usually around 8–12 weeks from sowing, sometimes up to 6 months depending on conditions), it's time to think about transplanting. To grow an ostrich fern from spores, follow a similar approach with sterile medium, consistent moisture, and sealed conditions until the gametophyte stage is established. Don't rush this. Wait until you have at least two or three clear fronds per cluster before moving anything.
The recommended approach is to transplant in small clumps rather than individual seedlings. Aim for groups of 3–5 seedlings per clump, spaced roughly 1 inch apart in small pots or cell trays. This gives the fragile plants some protection during the transition and they establish better than single isolated plants. Use a slightly larger container than feels necessary. Maidenhair fern roots are delicate and don't like being cramped immediately.
For potting mix, a peat and vermiculite blend with a small amount of perlite works well, adjusted to around pH 6.5. You can add a small amount of agricultural lime (roughly 100g per 10 gallons of mix) to get the pH right if your peat is very acidic. Avoid mixes with heavy bark or large composted material particles. Maidenhair fern roots are fine and need a mix that holds moisture but still drains.
After transplanting, cover the new pots with a clear humidity dome or plastic bag for at least 3 days. This gives the root system a chance to establish before being exposed to lower humidity. Then, over 7–10 days, gradually lift or open the cover for longer periods each day. Watch the fronds: if they start to curl or look crispy at the edges, slow down the acclimation. Maidenhair ferns are famously dramatic about humidity drops.
Once established and growing in open conditions, keep the soil consistently moist but never soggy. Water with room-temperature water (distilled or filtered is better). Only start fertilizing when the plant is actively putting out new growth, and use a very dilute balanced liquid fertilizer at about half the recommended strength. Heavy feeding of young maidenhair ferns causes more harm than good.
Troubleshooting: the most common problems and how to fix them
No germination after 3–4 weeks
First, check your temperature. Cold is the number one silent killer at this stage. If your container is sitting somewhere below 65°F at night, move it somewhere warmer. Second, check spore viability. Old, improperly stored spores may simply fail. If you collected your own spores from pale green (unripe) sori, that's the problem. Third, make sure the medium surface is genuinely moist, not just damp-looking. If it dried out in the first week, germination will have stalled.
Mold or algae taking over
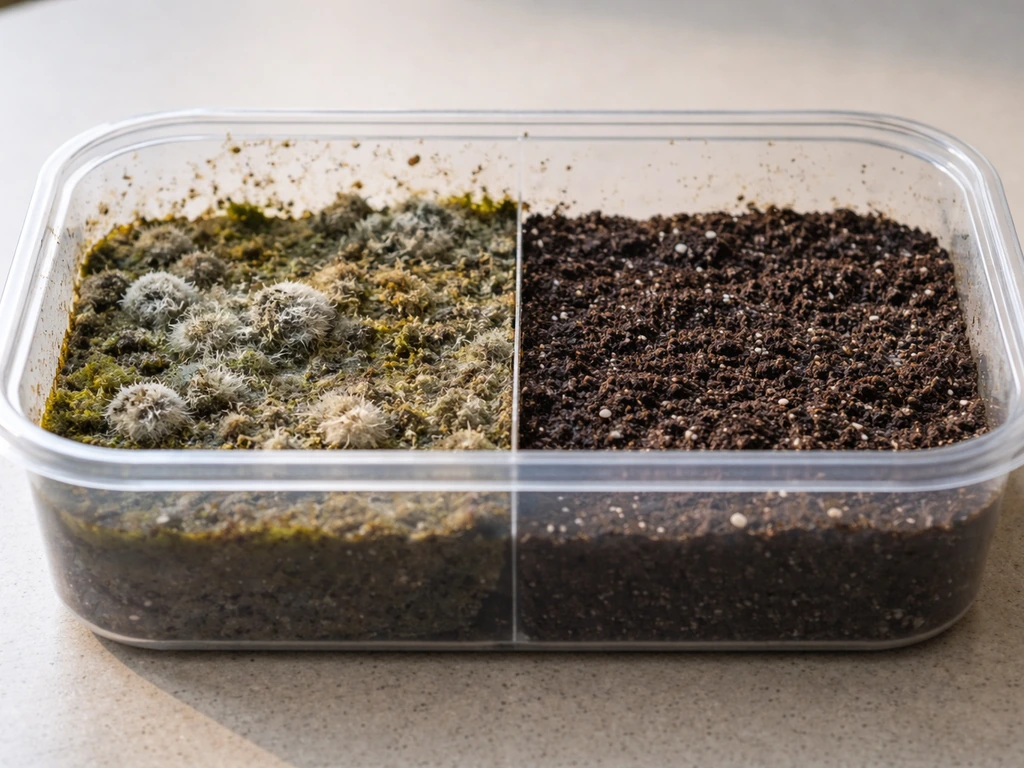
This is the most common frustration and it usually comes down to two things: the medium wasn't sterilized before sowing, or the container was opened too often. Green algae spreading across the surface looks deceptively like prothalli in the early stages, so look closely. True prothalli have a defined heart shape. Algae forms a shapeless green crust. To slow algae and mold growth, slightly increase temperature, reduce humidity marginally by cracking the lid, and improve air circulation around (not inside) the container. Avoid cool, stagnant conditions. If mold is white and fuzzy and spreading fast, the batch is likely contaminated and you may need to start over with a better-sterilized setup.
The surface keeps drying out
If you're losing moisture even with the container sealed, check your lid seal. Plastic wrap secured with rubber bands is often more airtight than a loose-fitting plastic lid. Mist with distilled water before resealing, but do it gently. If the container is in direct sun, it may be losing moisture through heat. Move it to bright indirect light.
Prothalli formed but no fern fronds appearing
This is almost always a fertilization issue at the prothallus stage. Remember: fertilization requires water on the surface for the sperm cells to swim. If your prothalli look healthy but dry, mist very lightly with distilled water to restore that thin moisture film. Also make sure your prothalli aren't overcrowded. Dense mats of prothalli can inhibit fertilization. If they've grown into a solid sheet, carefully thin them slightly with a clean implement.
Young ferns dying after transplant
Transplant shock in maidenhair ferns almost always comes from humidity drop. If you moved them straight from the sealed container to open room conditions, the shock is too abrupt. Always use a humidity dome for the first 3 days minimum, and then acclimate slowly over at least a week. Also check that your potting mix isn't staying waterlogged, which causes root rot in young plants.
Your next steps and long-term care checklist
Once you've made it through germination and the first transplant, the hardest part is behind you. Here's how to keep your maidenhair ferns thriving from seedling to mature plant:
- Keep new transplants in bright, indirect light. No direct sun. A north or east-facing windowsill, or filtered light under a grow light, is ideal.
- Water consistently with room-temperature distilled or filtered water. The soil should stay evenly moist. Maidenhair ferns collapse quickly if the root zone dries out, but they also hate sitting in standing water.
- Maintain ambient humidity above 50% around established plants. A pebble tray with water under the pot, or grouping plants together, helps without re-sealing them.
- Fertilize only during active growing periods (spring and summer) using a balanced liquid fertilizer at half the recommended dose. Skip fertilizing in fall and winter.
- Watch for pests once plants are out in open conditions. Scale and mealybugs occasionally target maidenhair ferns. Check the undersides of fronds regularly.
- Repot when you see roots circling the bottom of the pot, but don't rush it. Maidenhair ferns prefer a slightly snug root environment.
- Accept that frond loss happens. Maidenhair ferns are sensitive to drafts, temperature swings, and dry air. Cut dead fronds at the base and the plant will usually push new growth.
Growing maidenhair fern from spores is a slow process compared to buying a plant at the nursery, but it's also one of the most rewarding propagation projects you can do indoors. The life cycle you get to watch unfold, from dust-like spores to heart-shaped prothalli to tiny recognizable ferns, is genuinely remarkable.
The same attention to sterile technique and controlled moisture that makes spore-to-plant projects work for mushrooms applies here, just with a much longer timeline and a very different end result. If you’re also interested in fungi, see our guide on how to grow mushrooms from spore prints for the right sterilization and incubation steps spore-to-plant projects work for mushrooms.
If you want to try something similar, learn how to grow mushrooms from spores and compare the sterile technique and humidity control steps. Give it the right conditions and a lot of patience, and maidenhair fern from spores is absolutely achievable at home. If you want a more general guide specifically for how to grow staghorns from spores, follow the steps and environmental targets for this species maidenhair fern from spores. Staghorn ferns follow a similar spore-start approach, but their environmental targets and early growth needs can differ by species how to grow staghorns from spores.
FAQ
Can I grow maidenhair fern from spores without sterilizing the medium or tools?
You can try, but it greatly increases the odds that algae, moss, or bacteria take over before the prothallus forms. If you skip sterilizing, at least switch to a smaller, very well sealed container and keep temperatures at the warm end (around 75°F) to reduce slow-moving contaminants, then be prepared to start over if you see fast spreading green crusts.
What should maidenhair fern spores look like after sowing, and how do I tell prothalli from algae?
Prothalli tend to look like a heart-shaped, slightly structured patch rather than a uniform film. Algae usually forms a more shapeless, even green crust. If growth expands rapidly in all directions as a thick sheet, it is more likely algae. When in doubt, wait a few extra days before making changes, since early stages can be visually similar.
Why are my prothalli turning brown, melting, or looking unhealthy?
This often happens when the surface dries out even briefly during the prothallus stage, or when the container was opened too often. Another common cause is cold exposure (especially at night). Check that the medium has a constant thin glistening layer, mist with distilled water only when needed, and keep the container above 65°F consistently.
My setup is sealed but it still dries out. What’s the best fix?
First check the seal quality. A loose lid leaks far faster than plastic wrap tightly secured with rubber bands. If you suspect heat is driving off moisture, move the container to bright indirect light rather than near a warm window or direct sun. Then mist lightly and reseal immediately, avoid soaking the medium.
Do I need light for germination, and can I use a dark closet?
Light matters because spores germinate on the surface and the process depends on conditions that support prothallus development. Use bright indirect light or a low-intensity grow light on a timer (about 12 to 14 hours). A dark closet often slows or stalls development even if humidity and temperature are correct.
How do I know when it’s safe to open the container and increase airflow?
Wait until you see the shift from flat prothalli to emerging tiny fern fronds (sporophyte stage). Then acclimate gradually over one to two weeks. If you notice edges curling, crisping, or the plants shrinking after venting, reduce airflow duration and return to higher humidity temporarily.
When I transplant, should I pot individual seedlings or clumps?
Clumps are usually safer. Transplant 3 to 5 seedlings together in small groups so roots and humidity stay more stable during the transition. Single seedlings often dry out faster and are more prone to stalling. Also make sure the new mix is moist but not constantly saturated.
What soil mix is best for maidenhair fern seedlings after transplanting?
A peat-vermiculite style mix around pH 6.5 works well, with extra drainage from small amounts of perlite. Avoid chunky bark-heavy mixes, since the fine roots need consistent moisture contact. If your mix stays waterlogged for long periods, use more perlite or reduce how much you compress it in the pot.
What temperature range should I use after transplant, not just during germination?
After transplant, treat temperature stability as the main priority. Keep nights above about 65°F, since cooler nights are a common reason young maidenhair fern fronds stall or die back. If your home swings cold at night near windows, move seedlings away from the glass.
Should I fertilize maidenhair fern seedlings right away?
Usually no. Wait until you see active new growth, then use a very dilute balanced liquid fertilizer at about half strength. Too much fertilizer can burn fragile roots or cause weak, stressed fronds, especially while humidity is still being dialed in.
My batch looks contaminated with mold or algae. Do I need to restart everything?
If mold is spreading quickly or covering most of the surface, restarting is often the safest route. For minor localized green spots, you can sometimes improve airflow marginally and warm the setup slightly, then keep the surface correctly moist. If the medium becomes fuzzy or rapidly expands, do not keep ventilating aggressively, since that can also damage the prothalli.