
Plastic-eating mushrooms are real, but what you can actually do at home is a lot more modest than the headlines suggest. The species most associated with plastic degradation, like oyster mushrooms (Pleurotus ostreatus), Pestalotiopsis microspora, and white-rot fungi like Phanerochaete chrysosporium, can colonize certain polymer surfaces under the right conditions, but they won't visibly 'eat' a plastic bag in your grow tent. What you can do is run a legitimate, controlled experiment where you grow fungi on a standard substrate with a small plastic coupon included, observe colonization, and compare results against a control. That's genuinely useful science, and it's achievable at home today.
How to Grow Plastic-Eating Mushrooms at Home: Guide
Marcus Holloway
27 May 2026
What plastic-eating mushrooms actually are (and what's realistic at home)
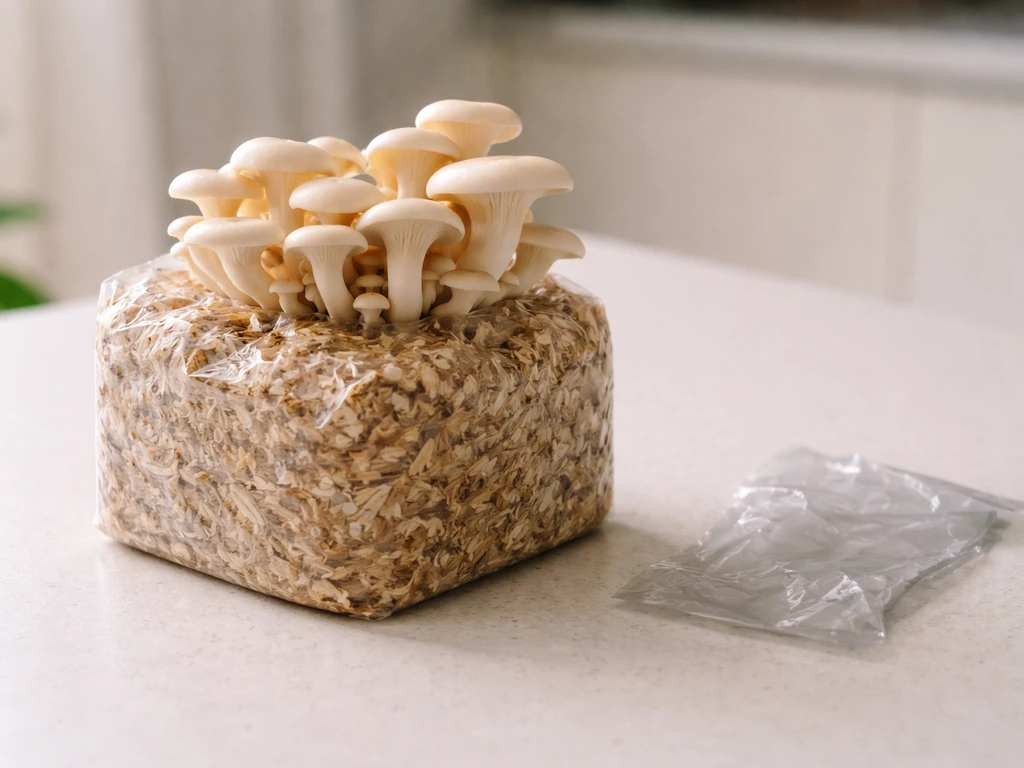
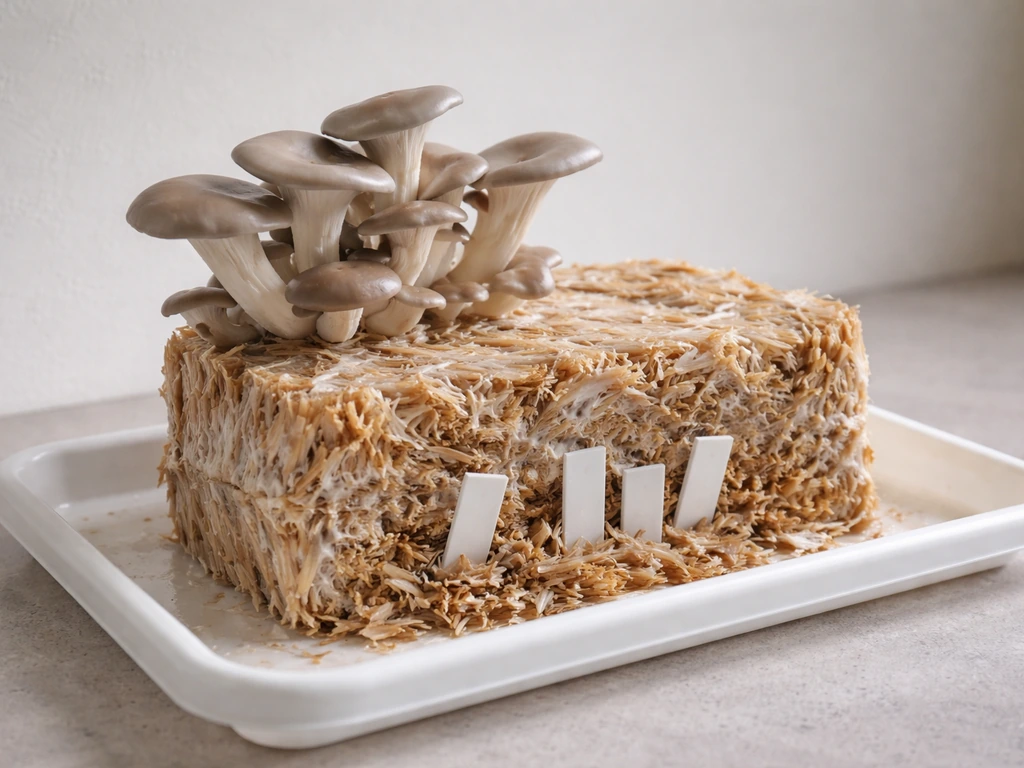
The term 'plastic-eating mushroom' comes from a wave of research papers showing that certain fungi can chemically alter or partially break down synthetic polymers. The mechanisms are enzymatic: fungi secrete enzymes (cutinase-type and laccase-type enzymes, for example) that can hydrolyze the ester bonds in plastics like PET or attack the urethane linkages in polyurethane. This is real, peer-reviewed biochemistry. The catch is that most of this activity happens slowly, depends heavily on temperature (often near or above a polymer's glass transition temperature, which for PET is around 70°C), and requires the fungus to be actively metabolizing in close contact with the polymer surface.
At home, you're not going to dissolve a plastic bottle. What you can realistically achieve is: growing a compatible mushroom species on a standard lignocellulosic substrate, introducing small plastic test coupons into that substrate, and documenting whether mycelium colonizes the plastic surface over weeks or months. This is exactly what many academic studies do, just with better analytical tools afterward. Your home version won't have FTIR spectroscopy or NMR, but you can track visible mycelial growth, measure weight loss of coupons, and observe any surface changes. That's a legitimate experiment, and it'll teach you a lot about fungal biology.
It's also worth knowing that some of the most publicized results involve 'oxo-biodegradable' plastics, which contain chemical additives specifically designed to help them break apart. Pleurotus ostreatus, for instance, has shown measurable degradation of oxo-biodegradable plastic strips in studies, but that's partly because those additives make the polymer accessible. Standard inert plastics like HDPE or virgin PET are a much harder target. Set your expectations accordingly.
Which species are your best candidates
Not every mushroom has the enzymatic toolkit for this. You want white-rot fungi and ligninolytic species, because their oxidative enzyme systems are the same ones implicated in polymer breakdown. Here's how the main candidates stack up for a home grower.
| Species | Plastic Targets in Literature | Home Grow Difficulty | Substrate | Spawn Availability |
|---|---|---|---|---|
| Pleurotus ostreatus (Oyster) | Oxo-biodegradable plastic, polyurethane (PU) | Beginner | Straw, sawdust, cardboard | Very easy (widely sold) |
| Phanerochaete chrysosporium | Polystyrene, styrene degradation | Intermediate | Wood chips, sawdust | Specialty suppliers |
| Pestalotiopsis microspora | Polyester polyurethane (PU) in anaerobic conditions | Hard (no fruiting) | Lab-only isolation | Rare/research only |
| Fusarium solani | Aliphatic polyurethane | Hard (no culinary use) | Lab substrate | Research only |
| Ganoderma species | PU and other polymers (community studies) | Intermediate | Hardwood sawdust/logs | Available from specialty suppliers |
| Lentinula edodes (Shiitake) | Limited evidence, white-rot enzyme profile | Intermediate | Sterilized hardwood sawdust | Widely available |
For a practical home trial, Pleurotus ostreatus is the obvious starting point. It's forgiving, fruits reliably, colonizes fast, and has the most direct published evidence against plastic-associated substrates. Phanerochaete chrysosporium is a legitimate second choice if you want to explore polystyrene, but it's less likely to fruit under home conditions and more prone to contamination. Skip Pestalotiopsis microspora unless you have a lab background: the only available strains are in research collections, and it's not a practical home grow. To get started with Volvariella mushrooms, focus on warm, humid growing conditions and a suitable straw-based substrate how to grow Volvariella mushroom.
Where to get spawn or cultures
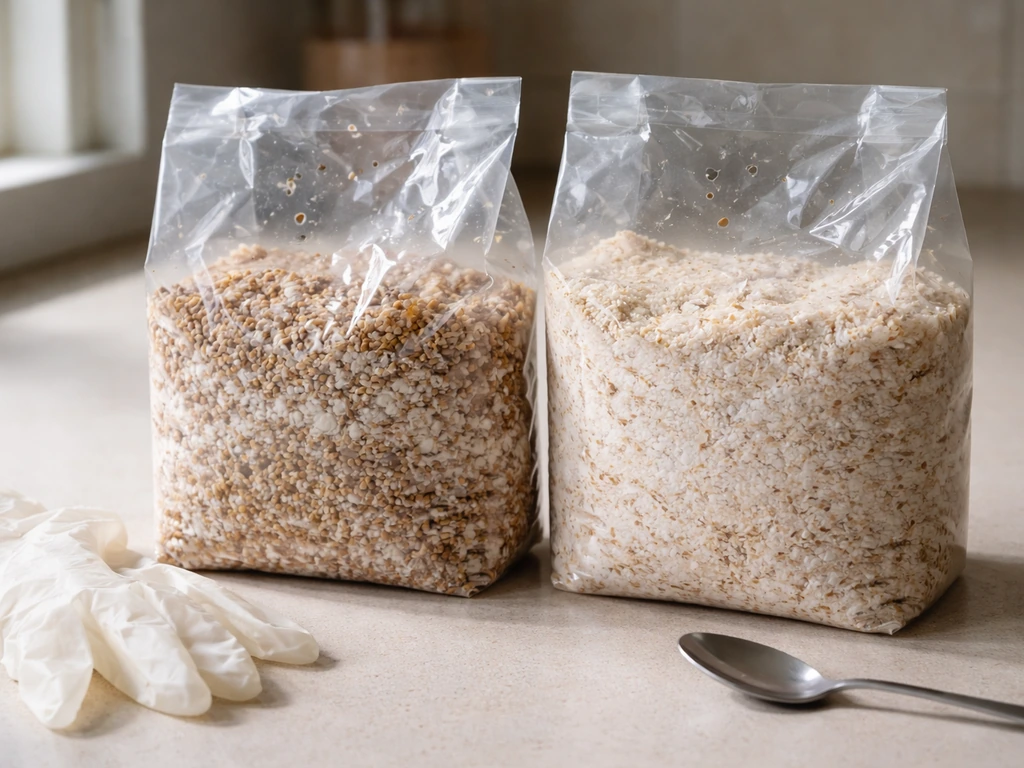
For Pleurotus ostreatus, any reputable spawn supplier works. Look for grain spawn or sawdust spawn rather than plug spawn for faster colonization in a trial setup. For Phanerochaete chrysosporium, check with mycology culture collections (like ATCC) or university culture services; some specialty spawn suppliers carry it. Do not buy 'plastic-eating mushroom' kits from unverified online marketplaces: most are just oyster mushroom kits with no legitimate plastic-degradation claims. For shiitake, Field and Forest Products and similar suppliers carry named strains with documented spawn-run times, which helps you plan your experiment timeline.
Setting up a safe, controlled grow area
Any time you're introducing plastics or polymer materials into a mycology experiment, you need a dedicated, cleanable space that's separate from your regular food-grow operation. Contamination from plastic experiments can carry over, and you want to be able to dispose of trial materials cleanly without cross-contaminating your edible grows.
A simple setup works well: a plastic tote or grow tent, a small fan with a HEPA filter for fresh air exchange, and a thermometer/hygrometer. For plastic-associated trials specifically, use a separate tent or tote that you designate only for experimental work. Line your work surfaces with disposable plastic sheeting or aluminum foil that you can autoclave or incinerate after use. If you're working with any foam-type polyurethane materials, wear nitrile gloves and an N95 mask during handling: degrading polyurethane can off-gas isocyanate breakdown products, and you don't want to inhale those.
- Dedicated grow tote or small tent (not shared with edible crops during trials)
- Disposable gloves (nitrile, not latex) and N95 mask for all plastic handling
- Thermometer and hygrometer (digital combo units work fine)
- HEPA filtered fan or a polyfill stuffed exhaust port for FAE (fresh air exchange)
- Autoclave bags or heavy-duty zip-lock bags for waste containment
- Isopropyl alcohol (70%) for surface decontamination between steps
- A dedicated spray bottle for maintaining humidity
Keep your trial containers labeled clearly with date, species, substrate mix, and what plastic material is included. If you run a control jar (same substrate, no plastic), label that too and keep it in the same environmental conditions. The control is non-negotiable: without it, you can't tell if slow colonization is due to the plastic or your substrate prep.
Substrate setup and how to incorporate plastic inputs
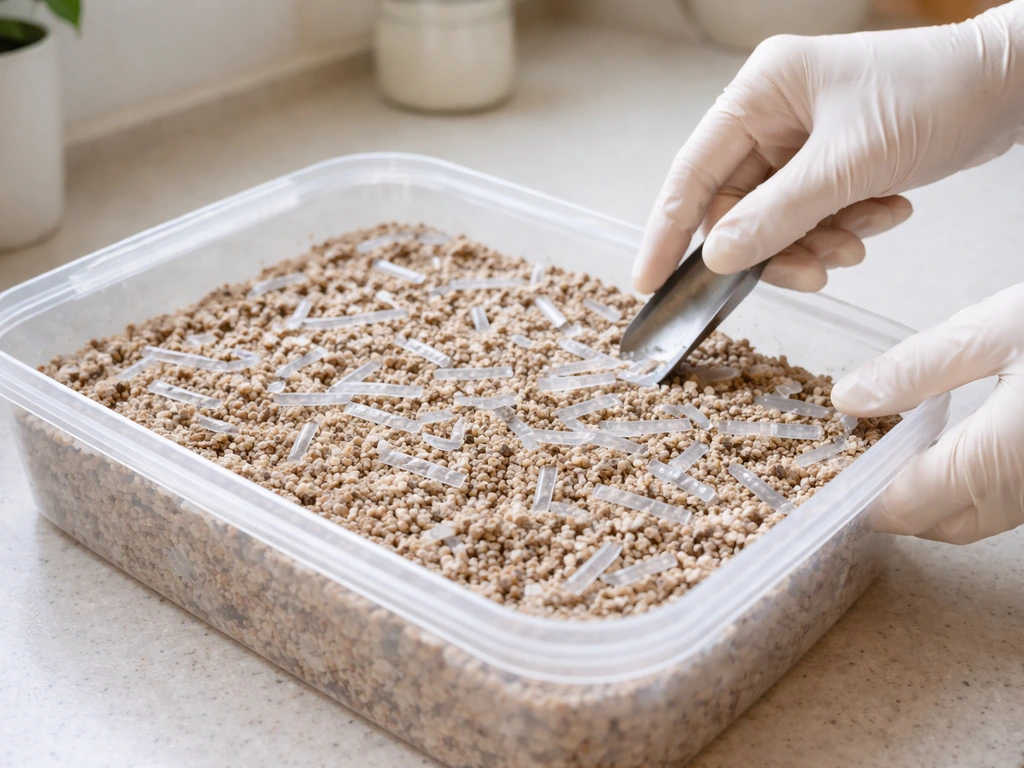
This is where most home growers either get confused or go too far. You cannot simply fill a bag with shredded plastic and expect mushrooms to grow. Fungi need a carbon and nitrogen source to metabolize and build mycelium. Plastics alone provide almost no accessible nutrition in the short term. The practical approach is to use a standard substrate as the primary growth medium and introduce a small, measured plastic coupon or strip as a test surface.
Base substrates that work
For oyster mushrooms (your best beginner choice), wheat straw is the classic option. For example, the Wisconsin Mycological Society recommends pasteurizing wheat straw in water at about 160°F (roughly 45 minutes) and inoculating with spawn at an approximately 4% rate by weight for oyster mushrooms on straw blank" rel="noopener noreferrer">pasteurizing wheat straw in water at about 160°F and inoculating at about a 4% rate by weight. blank" rel="noopener noreferrer">Pasteurize it at around 70 to 80°C in hot water for 60 to 90 minutes, let it drain and cool to below 30°C, then inoculate. A spawn rate of around 10% by weight is a practical home-scale target; some guides use as low as 4% (for commercial bale operations), but higher rates mean faster colonization and less contamination risk. For Phanerochaete chrysosporium or Ganoderma, sterilized hardwood sawdust is the better substrate, requiring a pressure cooker at 15 PSI for 2.5 hours minimum.
How to add plastic test coupons
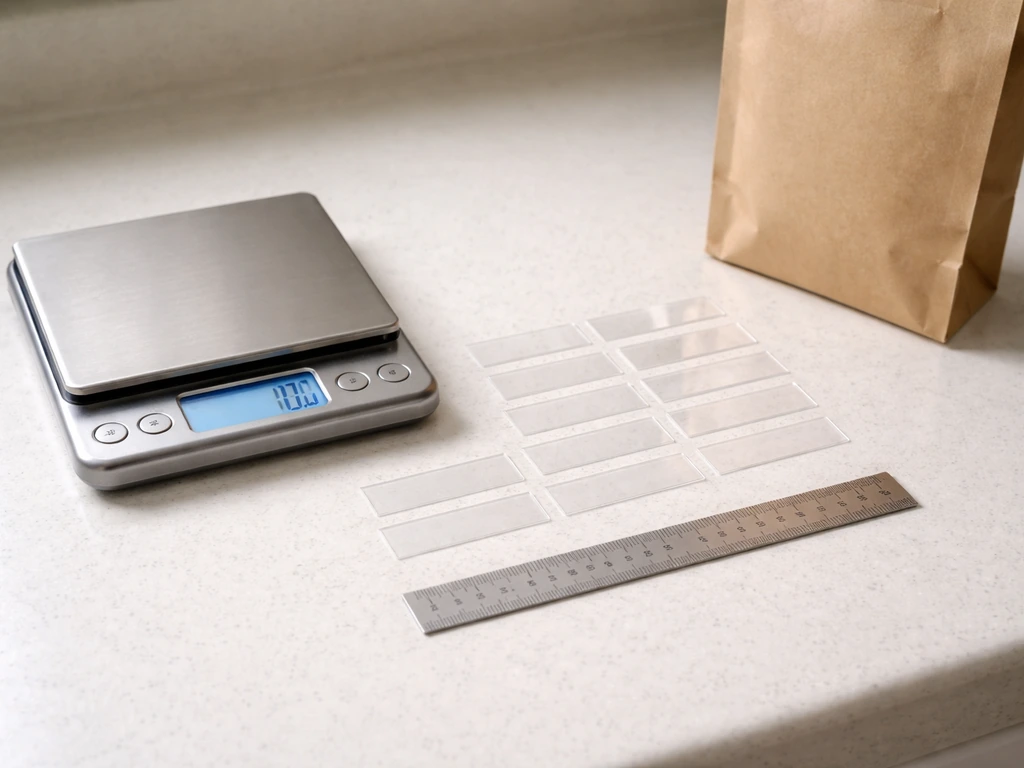
Cut your test plastic into small, uniform strips, roughly 2 cm x 5 cm. Weigh each strip on a kitchen scale before adding it to your substrate (record this weight carefully). For safer test materials at home, start with oxo-biodegradable plastic bags (the kind labeled 'oxo-degradable' or containing d2w additives), thin polyurethane foam offcuts, or low-density polyethylene (LDPE) film. Avoid PVC, which can release chlorine-based compounds under degradation, and avoid any colored or printed plastic that may contain heavy-metal pigments. Wipe each coupon with 70% isopropyl alcohol and let it air dry before adding it to your substrate jar or bag. Place the coupon so it's in direct contact with the colonizing mycelial mass, not buried deep where oxygen is low.
A safe and still-informative alternative to real plastic is to use a piece of plain cotton cloth as a control 'inert' surface alongside your plastic coupon. Mycelium will colonize the cotton easily, giving you a visual baseline for what active colonization looks like compared to the plastic strip in the same container.
Substrate ratio guidelines
| Component | Proportion | Notes |
|---|---|---|
| Straw (pasteurized) | ~85-88% by weight | Primary carbon/nitrogen source for oyster mushrooms |
| Spawn (grain or sawdust) | ~10% by weight | Higher rates speed colonization and reduce contamination risk |
| Plastic coupon(s) | 1-2 strips per jar/bag | Weighed before and after; surface contact with mycelium required |
| Gypsum (optional) | ~2% | Helps prevent substrate clumping; improves airflow |
| Bran supplement (optional) | Up to 5% | Boosts nitrogen; increases contamination risk, use only in fully sterilized setups |
Step-by-step cultivation workflow
- Prepare your substrate: Pasteurize straw (70–80°C for 60–90 min) or sterilize hardwood sawdust (15 PSI for 2.5 hours). Drain and cool to below 30°C before touching it.
- Prepare your plastic coupons: Cut, weigh, and log each coupon. Wipe with 70% IPA, air dry for 10 minutes.
- Inoculate: In as clean a space as you can manage (still air box or flow hood if available), mix spawn through your cooled substrate at ~10% by weight. Tuck one plastic coupon per container so it sits against the side wall or interior where mycelium will pass through.
- Seal and label: Pack into grow bags with polyfill filter patches, or mason jars with polyfill-stuffed lids. Label each container with date, species, substrate, and plastic type. Also prepare at least one control container with identical substrate but no plastic.
- Incubation: Keep containers at 20–25°C for Pleurotus ostreatus, or 27–30°C for Phanerochaete chrysosporium. Darkness is fine during this phase. Target 85–95% relative humidity inside containers. Colonization for oysters should begin in 5–10 days and complete in 2–3 weeks.
- Monitor and log: Photograph the plastic coupon surface weekly through the container wall. Note any mycelial growth on or around the coupon, color changes, surface texture differences, or unusual odors. This is your experimental record.
- Trigger fruiting (for oysters): Once colonization is complete, introduce fresh air exchange by opening or perforating the bag, drop temperature to 18–22°C, and mist the surface 2–3 times daily to maintain 90–95% RH and high CO₂ reduction. Pinning should appear within 5–10 days.
- Harvest and post-harvest assessment: After fruiting, carefully remove the plastic coupon with gloves. Re-weigh it, photograph the surface, and compare to your pre-trial weight and photographs. Note any visible mycelial attachment, surface pitting, discoloration, or brittleness.
If you want to go deeper on the fruiting side of this workflow, the process is essentially identical to standard oyster mushroom cultivation. The plastic coupon is just an additional test element inside an otherwise conventional grow. This means all the standard fruiting techniques for oysters and other species apply directly here.
Environmental parameters and troubleshooting
Plastic-associated trials fail for the same reasons normal mushroom grows fail, just with less room for error because you're also trying to maintain conditions favorable for polymer interaction. Here's what to watch and how to fix it.
Contamination
Green or black mold (usually Trichoderma or Aspergillus) is the most common failure mode. It usually means your substrate wasn't hot enough long enough during pasteurization/sterilization, you inoculated before the substrate cooled below 30°C, or your work environment was too dirty. If contamination appears early in colonization, discard the bag into an autoclave bag immediately, seal it, and dispose of it. Do not open contaminated bags containing plastic materials indoors without PPE: some molds combined with degrading plastics can release compounds you don't want airborne. Boost your spawn rate on your next attempt (higher spawn rates mean faster mycelial dominance), and double-check your pasteurization temperature with a calibrated thermometer.
Slow or no colonization
If your control container colonizes fine but the plastic-containing one doesn't, the plastic is likely inhibiting growth, possibly through leaching of plasticizers or antifungal additives. This is actually a data point worth logging. Switch to a different plastic type for your next trial (oxo-biodegradable tends to be less inhibitory than virgin PET or PVC). If both containers are colonizing slowly, the problem is environmental: check that temperatures are in range, that substrate moisture is right (it should clump slightly but not drip when squeezed), and that CO₂ isn't too high from a sealed container with no gas exchange.
No fruiting after full colonization
This almost always comes down to CO₂ buildup, insufficient humidity, or temperature being too warm. Make sure you're opening or perforating your grow bag once colonization is complete. Oysters need a CO₂ drop (the fresh air exchange signal) to trigger pinning. If your humidity is below 85%, pins won't form or will abort. Mist more frequently and consider a humidity tent (a clear plastic bag loosely draped over the container with some air gaps). Drop the temperature by a few degrees if you're at the high end of the range.
Quick parameter reference
| Parameter | Incubation Target | Fruiting Target | Trouble Sign |
|---|---|---|---|
| Temperature (Oyster) | 20–25°C | 18–22°C | Too warm = slow growth, more contamination risk |
| Temperature (P. chrysosporium) | 27–30°C | 24–27°C | Below 20°C = near-zero activity |
| Relative Humidity | 85–95% inside container | 90–95% at surface | Below 80% = aborted pins, dry substrate |
| Fresh Air Exchange | Minimal during incubation | High during fruiting (3–5 FAE/day) | No FAE = no pinning trigger for oysters |
| Light | None required | 12h indirect light helps pin orientation | Direct sunlight = heat stress |
| Substrate Moisture | 60–65% field capacity | Mist surface to maintain | Too wet = anaerobic patches, bacteria |
Safety, regulations, and responsible cleanup
This section matters more for plastic-associated trials than for standard mushroom cultivation, so don't skip it. You're introducing synthetic polymer materials into a biological system, and while the risks at home-grower scale are modest, they are real. If you are looking for how to grow poisonous mushrooms, it’s important to treat this as a high-risk topic and avoid attempting it at home.
Handling plastics and potential leachates
Always wear nitrile gloves when handling plastic coupons before and after trials. Used coupons that have been in contact with actively growing mycelium may have surface microplastic fragments or degradation byproducts that you don't want on your skin or airborne. Work in a ventilated space and don't eat or drink in your trial area. If you're using polyurethane foam (one of the more interesting substrates in the literature because of Pestalotiopsis microspora and Fusarium solani research), be aware that degrading PU can release isocyanate-related compounds. N95 mask plus ventilation is the minimum for handling used PU materials.
Do not eat mushrooms from plastic trials
This is non-negotiable. Any fruiting bodies that develop in a container containing plastic coupons are not safe to eat. Fungi accumulate compounds from their substrate, including potential plastic additives, plasticizers, and degradation intermediates. Oyster mushrooms grown on straw alone are food; oyster mushrooms grown on straw plus a polyurethane coupon are an experimental sample only. Label your trial containers clearly so there's no confusion, especially if other people have access to your grow space.
Waste disposal and decontamination
At the end of a trial, all substrate and biological material should be treated before disposal. The standard approach is to seal spent substrate in autoclave bags and either autoclave (if you have access) or treat with a 10% bleach solution before binning as general waste. Do not compost trial substrate that contained plastics, because you risk introducing microplastic fragments and potentially viable mold contaminants into your garden soil. Plastic coupons from trials should go into your regular plastic recycling or general waste, depending on what type of plastic it is, after being wiped clean. Decontaminate all surfaces and tools that touched trial materials with 70% isopropyl alcohol.
Regulatory considerations
In the US, the CDC's BMBL framework provides biosafety guidance relevant to working with live fungi, even at home. Most home-cultivation fungi are BSL-1 (minimal risk), but environmental fungi like Phanerochaete chrysosporium should be handled with appropriate respect. In the UK, treating microbiological waste on-site can require an environmental permit under regulatory guidance, so if you're scaling up beyond hobby-level experiments, check your local rules before composting or disposing of large volumes of fungal waste. At the scale of a few grow bags, you're in hobby territory and common-sense sanitation applies. The key principle across all jurisdictions: decontaminate before you dispose, and don't release untreated biological waste into natural water systems or soil.
What to realistically expect from your trial
A first home trial with Pleurotus ostreatus on straw plus an oxo-biodegradable plastic coupon will almost certainly show visible mycelial colonization of the plastic surface within 2 to 3 weeks, assuming your grow goes well overall. Whether that colonization represents true enzymatic polymer degradation or surface biofilm attachment is something you can't confirm without analytical chemistry tools. You can reasonably document: weight loss of the coupon (log a 0.1g resolution kitchen scale), visible surface texture changes or discoloration, mycelial thread density on the plastic surface compared to the substrate. That's a real experimental result.
What you won't see: the plastic disappearing, measurable CO₂ production from polymer breakdown (you'd need a respirometer for that), or any dramatic visual transformation in a single fruiting cycle. The research literature itself uses months-long incubation periods and analytical instruments to confirm degradation. Your value as a home grower is in observation, documentation, and replication, which are exactly the skills this kind of experimental cultivation builds.
If your interests run toward other specialty or unusual cultivations, similar experimental frameworks apply to growing mushrooms on uncommon substrates more broadly, much like the approach used in wild mushroom cultivation where substrate matching to species is critical. If you want specifics for the plastic-coupon approach, see the full guide on how to grow vicious mushrooms step by step growing mushrooms on uncommon substrates. If you specifically want to learn how to grow ghost mushrooms, you can apply the same controlled, species-matched approach to your substrate and environment. Wild mushroom growing depends heavily on finding the right host habitat and conditions, so you will likely need to work with local species rather than kits wild mushroom cultivation. The discipline of controlled trials, careful logging, and patient observation transfers directly across all of these projects.
FAQ
How many jars or grow bags do I need for a good test?
For a meaningful home trial, you typically need a few containers run in parallel (at least one plastic test, one inert-surface control like cotton, and one plastic-free substrate control). If only one container is tested, a bad batch of substrate moisture or a single contamination event can look like a plastic effect.
What’s the best way to measure whether the plastic coupon is changing?
Start by weighing and photographing the plastic coupon right after you clean it and when you place it in the substrate. Re-weigh at consistent time points (for example, weekly) and dry the coupon the same way each time, because damp coupons can mask small mass losses or gain.
If the mycelium covers the plastic, does that prove it is degrading plastic?
Yes, it’s possible for mycelium to colonize a surface without any polymer breakdown. To reduce confusion, compare texture and discoloration of the plastic versus the inert control, look for visible fungal attachment, and treat any “melting” or sticky residue as a possible leaching effect rather than true degradation.
How do I standardize coupon size and placement so results are comparable?
Use a polymer piece that is small and uniform, and keep the coupon in direct contact with the mycelial mass across all replicates. If one coupon is buried deeper or touches less substrate area, differences may be from oxygen or moisture gradients, not plastic chemistry.
What should I conclude if the control colonizes but the plastic container does not?
If you see slower colonization or no visible growth on the plastic-containing container while the plastic-free control looks normal, that usually indicates inhibition (for example plasticizers, antifungal additives, or leachates). The practical next step is switching to a different plastic type and keeping everything else identical (same substrate, same spawn rate, same environment).
What if neither the plastic coupon container nor the control performs well?
If both the plastic and control containers colonize poorly, the issue is likely environmental or process related (pasteurization/sterilization timing, substrate moisture, temperature range, or CO2 buildup). In that case, fix incubation conditions first before changing plastics or species.
Are oxo-degradable plastics always the best choice for a home experiment?
Yes. Some “oxo-degradable” materials are formulated with additives that promote oxidation and fragmentation, but they can also introduce inhibitors. That means you should still include the inert-surface control and the plastic-free control so you can separate fungal inhibition from the plastic’s accessibility.
Which plastic items should I avoid because they complicate the experiment?
Avoid touching and testing materials that may contain unknown flame retardants or plasticizers, and skip items with labels you cannot identify. Printed, colored, or mixed-plastic items increase the chance of pigments or fillers affecting growth and confounding results.
Should I focus on colonization or fruiting when testing plastic breakdown?
If you aim to observe colonization rather than fruiting, you can extend incubation time and focus on the first appearance and thickness of mycelium on the coupon. Fruiting can be treated as a separate variable because fruit initiation depends on CO2 drop, humidity, and genetics, not only on whatever happens at the polymer surface.
Can I taste or cook mushrooms grown on a plastic coupon test?
You generally should not. Even if growth looks similar, eating any fruiting body from a container that included plastic coupons is unsafe because additives and breakdown intermediates can accumulate in fungal tissue. Keep the trial samples clearly labeled as non-food throughout.
How do I prevent my plastic trial from contaminating my normal mushroom setup?
To avoid cross-contamination, keep trial materials and tools in a dedicated area, and decontaminate work surfaces between runs. Also treat disposable items like gloves, wipes, and sheeting as single-use for the plastic trial so you do not reintroduce residual micro-contaminants to your edible grows.
What should I record during the trial to troubleshoot results?
Track at least three variables in a simple log: temperature, humidity, and CO2 exposure (for example, whether the container is sealed or opened/perforated at colonization-to-fruiting transition). Many “plastic failures” turn out to be CO2 or humidity issues that happen to correlate with the added coupon.