
Ghost mushrooms almost always refers to Omphalotus nidiformis, the Australian ghost fungus, a bioluminescent wood-decay mushroom that glows a soft green in the dark. It is not the easiest species to cultivate at home, but it is absolutely doable if you treat it like the wood-lover it is, keep your work sterile, and have patience with a slower colonization pace than oysters or shiitake. This guide walks you through every stage, from getting spawn to your first flush.
How to Grow Ghost Mushrooms: Step-by-Step Guide
Marcus Holloway
27 May 2026
Which species people actually mean by 'ghost mushroom'
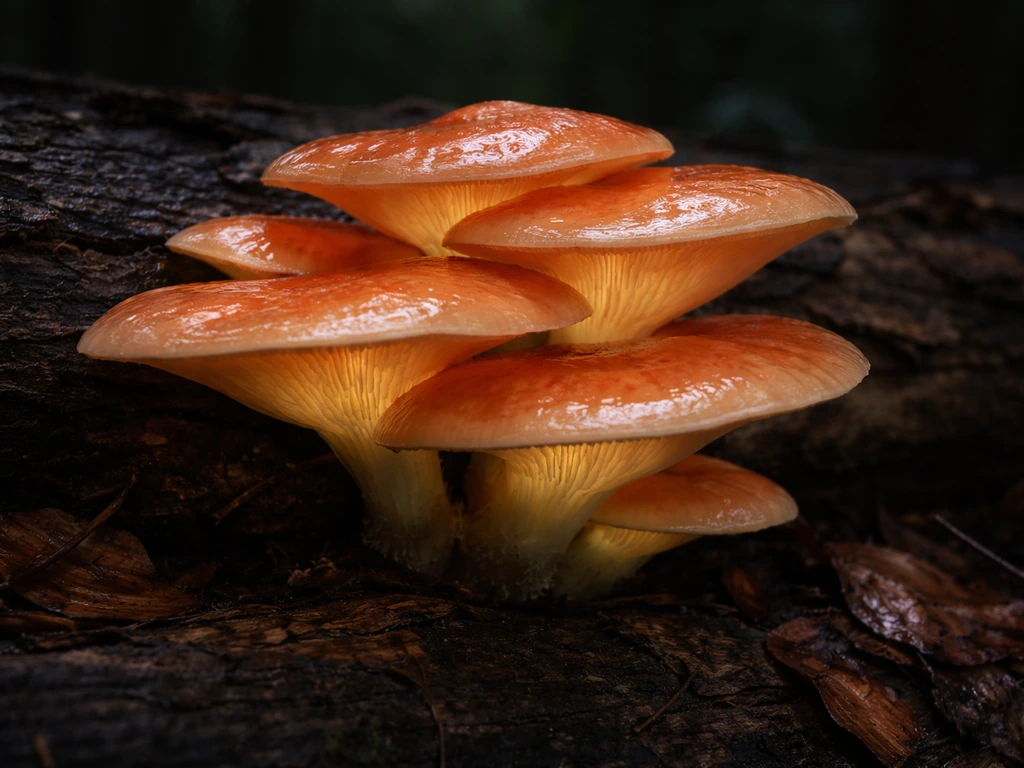
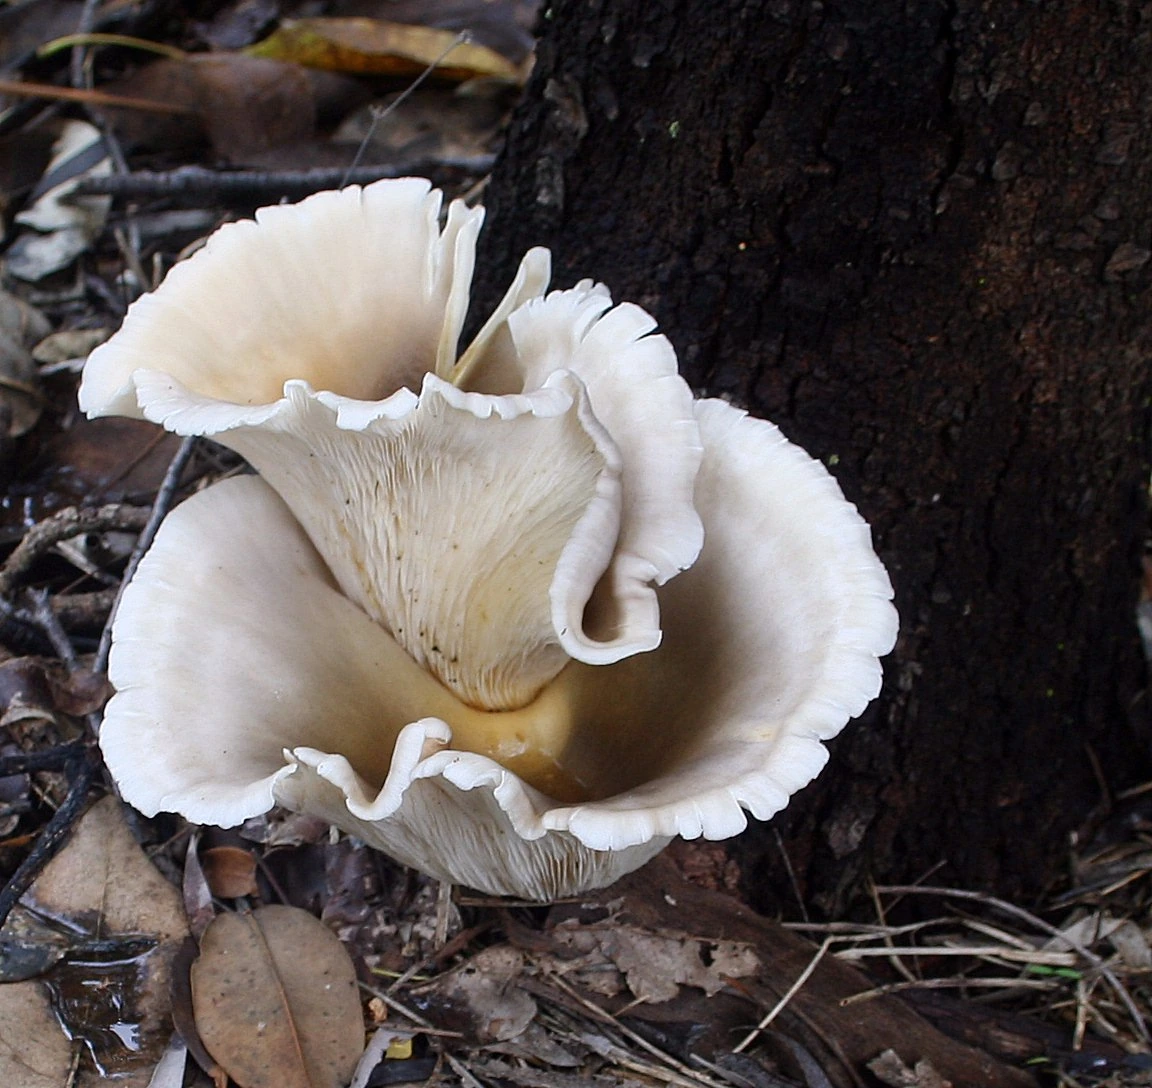
The name 'ghost mushroom' or 'ghost fungus' most consistently points to Omphalotus nidiformis, native to Australia and parts of Southeast Asia. It belongs to the genus Omphalotus, which also includes the North American jack-o'-lantern mushrooms (Omphalotus illudens and Omphalotus olearius). All of these are bioluminescent saprotrophic fungi that break down dead wood, and they share the same orange-to-cream coloring, deeply decurrent gills that run down the stalk, and a white spore print. None of them are edible. They contain illudin toxins that cause severe gastrointestinal distress, and they have been mistaken for oyster mushrooms (Pleurotus) with unpleasant consequences.
The bioluminescence is real and genuinely striking. O. nidiformis fruit bodies glow from the gills and flesh, and you can see it clearly after a few minutes of dark adaptation in a completely dark room. That glow is part of why cultivators are drawn to this species. If you are in North America and searching for grow info, most of the community cultivation discussion centers on Omphalotus nidiformis because it has attracted the most hobbyist interest, though the same broad cultivation principles apply to related Omphalotus species. It is worth noting that O. nidiformis is a very different animal from oyster mushrooms, shiitake, or other gourmet species, so if you arrived here by accident looking for a more common edible, the methods below will not apply to those.
Indoors vs outdoors: which route actually works
Omphalotus nidiformis grows outdoors in the wild on dead or dying hardwood stumps and buried roots, which naturally suggests an outdoor log or stump method. And that approach does work, but it is slow (we are talking months to over a year before you see fruit), and you have zero control over temperature, competing organisms, or humidity. Indoors in a fruiting chamber gives you much faster feedback, the ability to correct problems quickly, and more reliable conditions. For a first-time grow, I always recommend starting indoors.
That said, outdoor cultivation on hardwood stumps or buried logs is a genuinely satisfying long-game project, and it more closely mimics the conditions this species evolved in. If you have a suitable hardwood stump in a shaded, moist part of your yard and you want a low-effort setup that just needs occasional watering, outdoor colonization is worth attempting alongside your indoor grow. The two approaches complement each other well.
| Factor | Indoor (Fruiting Chamber) | Outdoor (Stump/Log) |
|---|---|---|
| Timeline to first fruit | 4–8 months from inoculation | 12–24+ months |
| Control over conditions | High | Low |
| Contamination risk | Moderate (manageable with sterile technique) | High early on, lower once colonized |
| Setup cost | Low to moderate | Low |
| Ongoing effort | Daily misting and monitoring | Occasional watering |
| Best for | First grows, learning, controlled experiments | Long-term garden feature, low maintenance |
What you need before you start
Spawn and culture sources
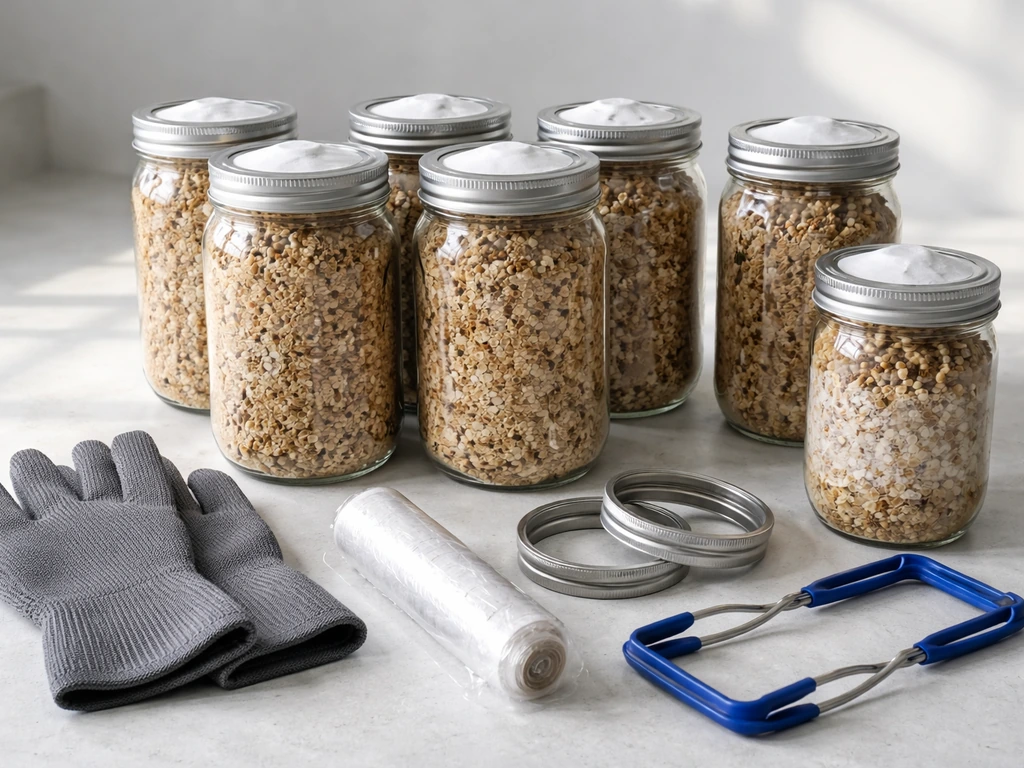
This is where Omphalotus cultivation gets genuinely tricky. Unlike oyster mushrooms or lion's mane, you will not find O. nidiformis grain spawn sitting on a shelf at a typical mushroom supply shop. Your realistic options are: obtaining a tissue culture or agar plate from a specialty mycology supplier or an active cultivator in online communities, or working up your own culture from a fresh wild specimen (spore print plus agar work, or direct tissue onto PDA). Research has confirmed that spore-derived isolates from O. olivascens and related species do produce viable cultures, so the biology is there. You just need a clean starting point. Starting from spores requires agar work and adds a few months to your timeline, while starting from a live culture on agar or colonized grain spawn is faster and more beginner-friendly.
Containers and tools
- Quart or half-pint mason jars with modified lids (polyfill or Tyvek filter patches) for grain spawn preparation
- Monotub or modified shotgun fruiting chamber (SGFC) for the fruiting stage
- Pressure cooker (15 PSI capable) for sterilizing grain
- Large pot or turkey fryer for pasteurizing bulk substrate
- Spray bottle for misting
- Still-air box or flow hood for inoculation
- Isopropyl alcohol (70%) and gloves for surface sanitization
- Thermometer and hygrometer to monitor your fruiting chamber
- Agar plates (PDA or MEA) if you are starting from culture work
Substrate prep: what ghost fungus actually wants to eat
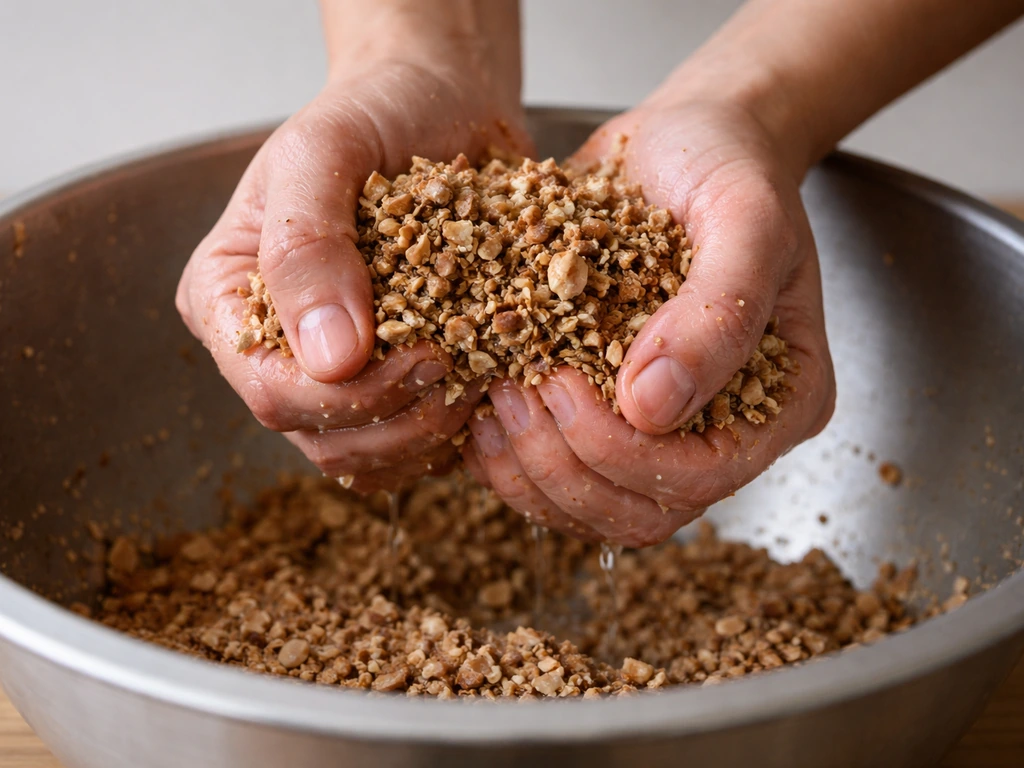
Omphalotus nidiformis is a wood-decaying fungus. It does not want straw or compost. Your substrate should be hardwood-based. The most accessible option for home growers is a mix of hardwood fuel pellets (HWFP) rehydrated with water, often combined with wheat bran or rice bran at around 10–15% by dry weight to add nutrition. A straight hardwood sawdust and bran mix works just as well if you have access to sawdust. Avoid softwoods (pine, cedar) as the terpenes are inhibitory. Oak, beech, alder, and fruit woods all work well.
Field capacity moisture is the target: when you squeeze a handful of substrate, only a few drops should come out. Too wet and you invite bacteria; too dry and colonization stalls. A starting ratio that works reliably is 500g dry hardwood pellets to roughly 500–550ml of water, allowed to fully absorb before mixing in bran. Once you add bran, the mixture will look slightly crumbly. That is fine.
Sterilization vs pasteurization
Because your substrate contains bran (a nutrient-rich amendment), you need full sterilization, not just pasteurization. Load your substrate into mason jars or autoclave-safe bags, filling them no more than two-thirds full, and pressure cook at 15 PSI for 2.5 hours. Let the jars cool completely, at least 8–12 hours, before inoculating. Inoculating warm jars kills your spawn and causes condensation that promotes contamination. If you are doing a pure hardwood pellet substrate with no bran, pasteurization at 80°C for 1–2 hours is acceptable, but sterilization is always the safer call with a slow-colonizing, contamination-prone species like O. nidiformis.
Inoculation and incubation
Work in the cleanest environment you can manage. A still-air box (a clear tote with arm holes) is the minimum bar. A flow hood is better. Wipe down all surfaces with 70% isopropyl, wear gloves, and do not breathe directly over open jars. If you are transferring from agar plates to grain, flame-sterilize your scalpel between transfers and let it cool before cutting. If you are using colonized grain spawn, crack the jar or bag under clean conditions and mix spawn at roughly a 15–20% rate into your bulk substrate.
Once inoculated, seal your jars or bags and move them to your incubation space. Omphalotus colonizes at a leisurely pace compared to oysters. Expect to see visible white mycelial growth starting within 2–3 weeks, with full colonization of a quart jar taking 6–10 weeks at around 21–24°C (70–75°F). This is slow. Do not panic and do not poke around in the jars. Every intrusion is a contamination risk. Keep your incubation space dark or dimly lit, well-ventilated but free of drafts, and at a stable temperature. Condensation inside the jar is normal in small amounts; heavy pooling of water is a sign of too much moisture.
Watch the colonizing mycelium carefully. O. nidiformis mycelium is white and dense, sometimes with a slightly rope-like or rhizomorphic appearance. Green, black, or pink patches mean contamination. Pink or red fuzzy growth typically indicates a Neurospora mold. Any jar showing contamination should be removed from your grow space immediately, sealed in a bag, and disposed of outside.
Setting up the fruiting environment
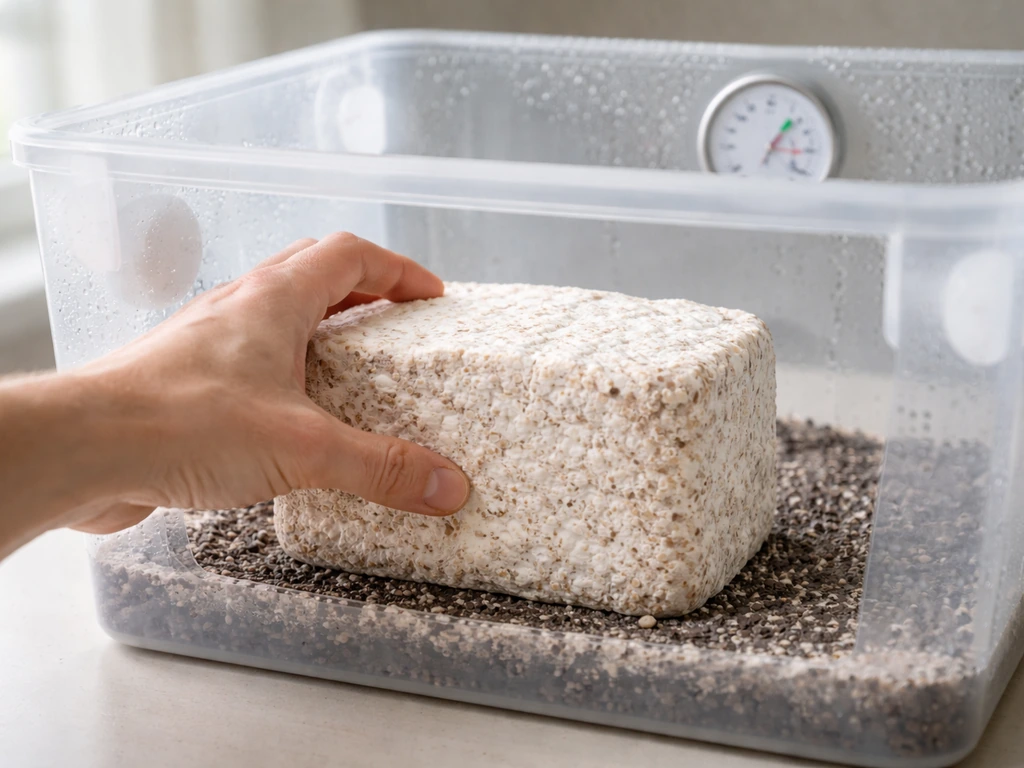
Once a bulk substrate block is fully colonized (white all the way through, with no green or discolored patches), it is time to initiate fruiting. Move it to your fruiting chamber and introduce a cold shock if possible: dropping temperatures to 16–18°C (60–64°F) for 24–48 hours can help trigger pinning. After the cold shock, settle into fruiting conditions.
| Parameter | Target Range | Notes |
|---|---|---|
| Temperature | 18–22°C (64–72°F) | Slightly cooler than colonization temps; consistent is better than fluctuating |
| Relative humidity | 90–95% RH | Critical for pin formation and cap development; drop below 85% and pins abort |
| Fresh air exchange (FAE) | 4–6 fan cycles per day minimum | CO2 should stay below 1,000 ppm; high CO2 causes long stems and small caps |
| Lighting | 12 hours on / 12 hours off | Low-intensity indirect light; helps orient fruiting; not required for growth but useful |
| Misting frequency | 2–4 times daily | Mist the walls of the chamber, not directly onto the block; avoid waterlogging |
The easiest fruiting chamber setup for a first grow is a modified shotgun fruiting chamber: a clear tote with 6mm holes drilled every 5cm on all sides (including the lid and bottom), filled 5–7cm deep with perlite moistened with water. The perlite acts as a passive humidity buffer. Fan and mist manually 3–4 times a day, or automate with a timer-controlled ultrasonic humidifier. Keep the whole setup in a room that stays within your target temperature range and out of direct sunlight.
Bioluminescence is most visible once the gills are developed and fruit bodies are mature. If you want to see the glow, bring a fully developed specimen into a completely dark room and give your eyes 5–10 minutes to adjust. The effect is subtle but unmistakable: a faint blue-green glow from the gill surface. It is one of the genuinely magical moments in mushroom cultivation.
Harvesting, yield expectations, and fixing common problems
When and how to harvest
Harvest before the caps fully flatten and the edges start to wave or crack. For a practical overview of the full process, you can also follow the step-by-step guidance on how to grow wild mushrooms Harvest before the caps fully flatten and the edges start to wave or crack.. For O. nidiformis, the cap edges will begin to turn upward as the mushroom matures, and at that point spore drop is imminent. A heavy spore drop will coat your chamber and can irritate your respiratory tract, so harvest slightly before peak maturity. Twist and pull gently at the base, or cut with a clean knife. Remove the entire cluster at once. After harvest, clean the surface of your substrate block by scraping away any spent material or discolored patches, then return it to fruiting conditions. A second flush is possible but yields are typically lower.
What to realistically expect
Be honest with yourself: O. nidiformis is not a high-yield production mushroom. A colonized quart jar worth of substrate might produce 30–80 grams of fresh mushrooms across one or two flushes. The appeal here is the bioluminescence and the cultivation challenge, not the harvest weight. The overall grow cycle from inoculation to first harvest runs roughly 4–8 months if everything goes well, which is substantially longer than oysters (6–8 weeks) or lion's mane (8–10 weeks). Budget your time and expectations accordingly.
Troubleshooting the most common failures
Contamination is the single most common failure with O. nidiformis, and it is almost always caused by inadequate sterilization or poor inoculation hygiene. If you are seeing green mold (Trichoderma), your sterilization was incomplete or you introduced spores during inoculation. Prevention: extend your pressure cook time, let jars cool fully before opening, and upgrade your still-air box technique or invest in a flow hood. Once Trichoderma is established in a jar, there is no saving it.
Stalled colonization, where mycelium seems to stop spreading after an inch or two, usually means one of three things: the substrate is too wet, your temperature dropped too low (below 18°C can slow things dramatically), or the spawn was weak. Check your moisture level by weighing the jar against your target, nudge temperatures up a degree or two, and give it another 2–3 weeks before giving up. If there is no new growth after 3 more weeks and no visible contamination, the spawn was likely dead on arrival.
Poor pinning or no pins after full colonization is usually a CO2 or humidity problem. Poor pinning or no pins after full colonization is usually a CO2 or humidity problem CO2 builds up and suppresses pinning. If you have been lazy about fresh air exchange, CO2 builds up and suppresses pinning. Open the chamber more aggressively, fan it out 5–6 times a day, and make sure your humidity stays above 90%. A cold shock (dropping temperature by 4–5°C for 24–48 hours) is often the nudge a fully colonized block needs. If you have done all of that and still see no pins after 3–4 weeks in fruiting conditions, try scraping and dunking the block (submerging it in cold water for 12 hours) before returning it to the chamber.
Malformed or leggy fruit bodies, where stems are long and thin with tiny underdeveloped caps, almost always mean CO2 is too high. This is the mushroom stretching toward fresh air. Increase your fresh air exchange immediately. Conversely, if caps are drying out and cracking at the edges, your humidity is too low: mist more frequently or add more perlite to your reservoir layer.
A note on safety and legal considerations
Omphalotus nidiformis is toxic. It is cultivated strictly as a novelty and scientific curiosity, not for eating. Keep your grows clearly labeled, especially if other people have access to your space. The fruit bodies can look similar to oyster mushrooms (Pleurotus species) to an untrained eye, so labeling matters. Children and pets should not have access to fruiting chambers containing this species. Handle spent substrate carefully, as large spore loads can cause respiratory irritation in sensitive individuals.
Where to go from here
If you are interested in ghost fungus primarily because you want a challenging, unusual cultivar with a visual payoff, this project is worth every hour. If you are newer to mushroom cultivation overall and want to build skills first, it is genuinely worth practicing the full sterile workflow on a forgiving species like oysters before taking on the slow colonization and narrow fruiting window of O. If you want a different, more beginner-friendly project after this, you can also learn how to grow volvariella mushroom using a similar sterile workflow and a suitable substrate. nidiformis. The same sterile technique, substrate prep logic, and fruiting chamber principles you learn on a fast species will transfer directly. For those curious about other unusual cultivation projects in this space, species grown for non-culinary purposes (like novelty, science, or ecological interest) make for some of the most engaging grow journals you will find in home cultivation communities.
FAQ
Is “ghost mushroom” the same thing as oyster mushrooms?
It is not the same as oyster mushrooms, and you should not expect a “mix the kit and mist” workflow to work. Omphalotus needs a wood-based hardwood substrate, full sterilization (especially if you add bran), and it colonizes and fruits much more slowly than Pleurotus, so schedule your checks in weeks, not days.
Can I taste the mushrooms after my first flush?
No edible species rule applies here. Omphalotus nidiformis is toxic, and even though it can be cultivated and observed, you should treat all fruit bodies and spore residues as hazardous, keep the grow area restricted, and avoid any tasting or “just a little” handling.
If one jar shows contamination, can I save it or transfer the clean parts?
If you contaminated the jar early, removing it immediately is the right move. Once you see green, black, or pink patches, do not try to salvage with extra sterilization or re-inoculation, because the culture is already compromised and the contamination will likely spread to your incubation area.
Why is the bioluminescence dim or hard to see in my grow?
Time your “dark adaptation” carefully. For best visibility, move the fully developed specimen into a completely dark room, wait 5 to 10 minutes for your eyes to adjust, and keep it out of any bright LED light during the wait because even brief exposure reduces what you can see.
Can I grow ghost mushrooms outdoors for faster results?
Yes, but plan for it. If you choose an outdoor stump approach, you generally cannot control temperature swings and humidity, so colonization and fruiting can take many months to over a year. For an early experimental outcome, start indoors to learn the workflow, then use outdoor as a long-game backup.
My jars are slow to colonize, how do I know if it is temperature or weak spawn?
A first-time mistake is keeping the incubation space too cold or too drafty. Stay near the recommended warm incubation range, keep airflow gentle, and avoid frequent jar movement. If you suspect the temperature dropped, give the jars an extra 2 to 3 weeks before concluding the spawn failed.
How can I reduce spore irritation when harvesting?
Yes, especially with high-spore-load setups. Spore drop can irritate sensitive lungs, so harvest slightly before peak maturity and keep fruiting chambers away from living spaces. If you are prone to respiratory issues, consider masking during harvest and keep the chamber covered while you remove clusters.
What should I adjust first when I get no pins after the block is fully colonized?
If caps are growing but never really pinning, think CO2 and fresh air exchange. Raise fresh air exchange immediately, maintain high humidity, and use the cold shock at the right time after full colonization. Many “no pins” cases are solved by fixing gas exchange rather than changing humidity alone.
How do I tell if my hardwood pellet substrate is too wet or too dry?
Use a moisture check method that matches your materials. Field capacity is the goal, if squeezing your substrate releases lots of water you likely went too wet, if it does not release any and the mix looks dusty you likely went too dry. Adjust water before inoculation, because it is much harder to correct wet substrate during incubation.
Do I need to do anything special after harvest besides cleaning the block?
Large spore loads after harvest can create ongoing respiratory exposure in a room. After you remove the cluster, clean discolored or spent material from the surface, dispose of spent substrate outside the home (sealed if possible), and keep the chamber closed until it is fully cleaned.