
Tidal Wave is a Psilocybe cubensis hybrid (commonly described as a B+ x Penis Envy cross) grown on grain spawn and a bulk substrate like CVG (coco coir, vermiculite, and gypsum). Colonization on grain takes roughly 12 to 18 days, pinning follows a 12 to 24 hour cold shock, fruiting humidity sits around 90 to 95%, and you can expect 3 to 4 flushes from a single tub. The full cycle from inoculation to first harvest typically runs 4 to 6 weeks for a beginner doing everything reasonably right.
How to Grow Tidal Wave Mushrooms at Home: Full Guide
Marcus Holloway
29 May 2026
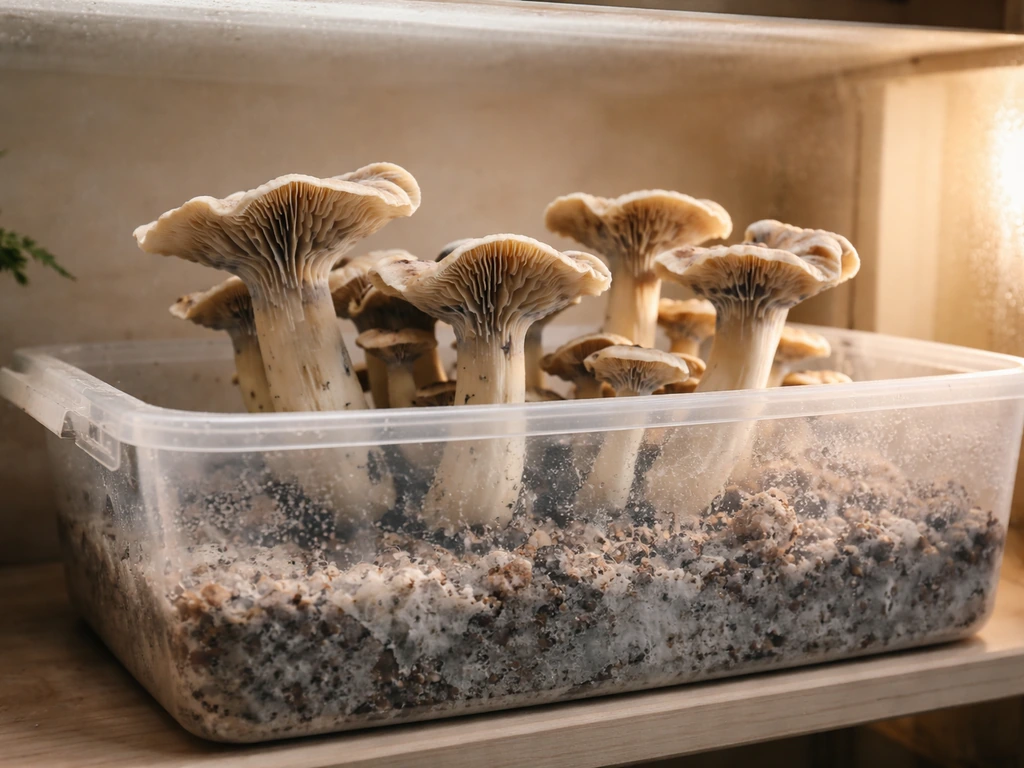
Make sure you actually have the right Tidal Wave
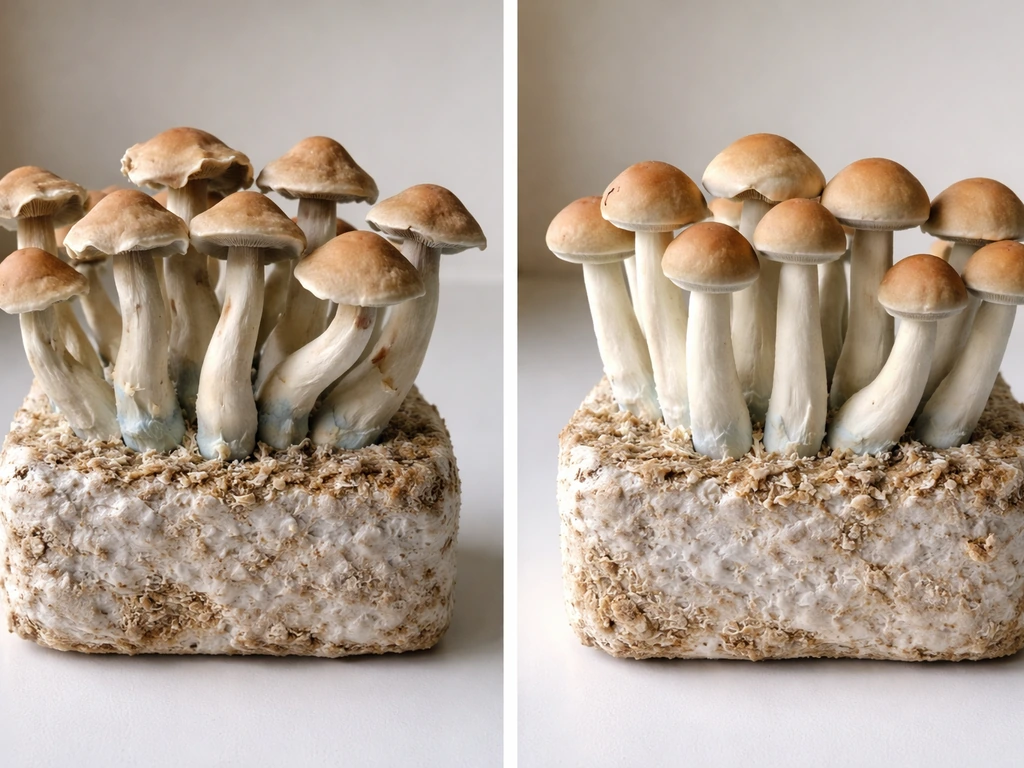
This is worth spending a few minutes on because 'Tidal Wave' gets mislabeled more than most strains. The name gets attached to completely different mushroom types depending on the seller. The Tidal Wave you want for a standard home cube grow is a Psilocybe cubensis hybrid, widely described as blank" rel="noopener noreferrer">a cross between B+ and Penis Envy genetics. It is not a wavy cap mushroom (Psilocybe cyanescens), which is a totally different species that grows outdoors on wood chips and has different substrate requirements, different ecological preferences, and a different cultivation workflow entirely. If your source is describing Tidal Wave as a wood-loving outdoor species, you're looking at the wrong product.
The visual tell for genuine Tidal Wave cubensis is a slight waviness or undulation along the bottom edge of the mature cap. That said, this strain is genetically unstable and known to throw mutations across flushes, so you may see albino-looking balls, irregular forms, or significant variation between fruits even within the same tub.
Tidal Wave is described as a recent hybrid that can be genetically unstable, which helps explain mutation differences across flushes genetically unstable and prone to mutations across flushes. That's normal for this strain specifically. If your mushrooms look unusually weird but the mycelium colonized correctly on grain, don't panic.
If you're comparing notes with other growers online and your source's 'Tidal Wave' behaves very differently from theirs, sourcing variation is a likely explanation. Always buy from a vendor with a clear strain description and established reputation.
What you need before you start
You don't need a lab to grow Tidal Wave, but you do need to take cleanliness seriously from day one. Here's a practical checklist of what to have on hand before you inoculate anything.
- Grain spawn (rye, wheat berries, or wild bird seed jars) or pre-made grain spawn bags, already sterilized
- Spore syringe or liquid culture syringe from a reputable vendor (liquid culture is faster and lower risk for beginners)
- Pressure cooker (15 PSI capable) if you're sterilizing your own grain, or an Instant Pot equivalent
- Coco coir, coarse vermiculite, and gypsum for CVG bulk substrate
- Large mixing bowl, strainer, and boiling water for substrate pasteurization
- 6-quart or larger clear storage tubs with lids (one for inoculation, one for fruiting, or a martha tent setup)
- Isopropyl alcohol (70%), latex or nitrile gloves, and a face mask
- Still air box (a large clear tote with two arm holes cut in it works fine) or a flow hood if you have one
- Micropore tape or polyfill for jar lids and injection ports
- Thermometer and hygrometer to monitor temperature and relative humidity
- A spray bottle for misting
- Small fan for fresh air exchange during fruiting
If you're just starting out, pre-made grain spawn bags are genuinely worth the few extra dollars. Sterilizing your own grain is a skill unto itself, and contamination during that step is where a lot of beginners lose their first run before it even gets started. Buy sterile grain bags for your first couple of grows, get comfortable with everything else, then learn to sterilize your own grain later.
Substrate prep: CVG is your friend
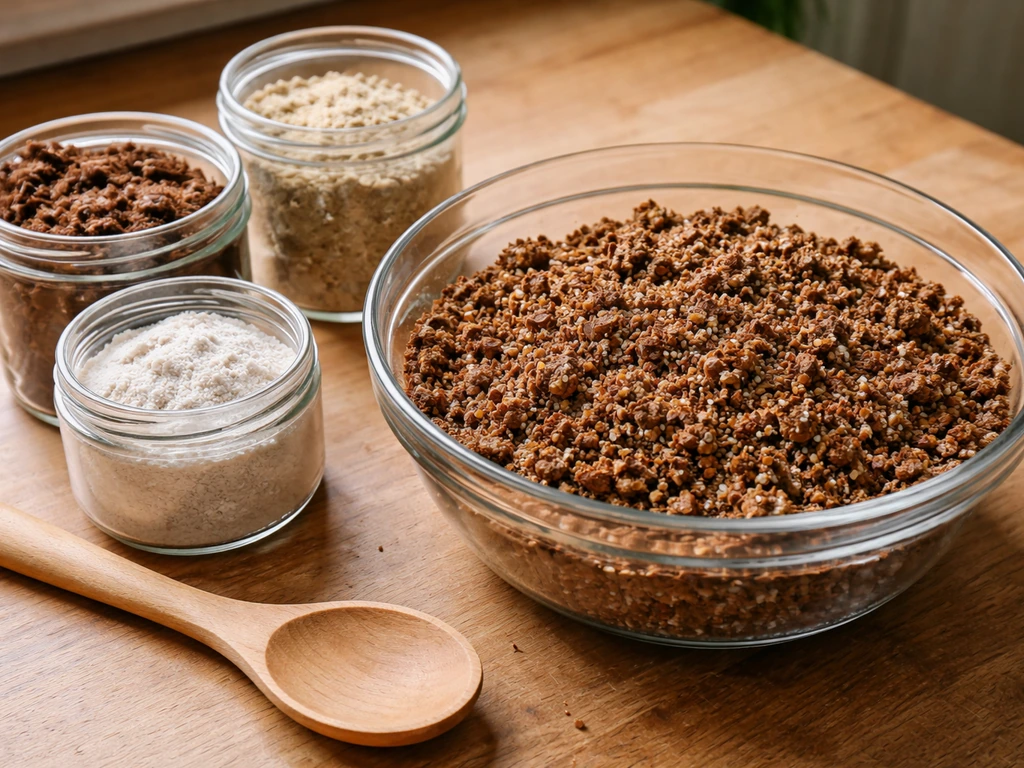
Tidal Wave does well on CVG, which is the standard bulk substrate for cubensis grows. The recommended formula is roughly 50% coco coir, 30% coarse vermiculite, 5% gypsum, and 15% water by volume. The gypsum improves texture and helps prevent substrate from clumping too tightly, which matters for colonization speed.
Unlike grain, CVG does not need to be pressure cooked. You pasteurize it, which is a lower-heat process that knocks out competing organisms without creating a sterile dead zone that's actually harder for mycelium to colonize. Here's how to do it: boil enough water to hydrate your coco coir and pour it over the dry mix in a large bowl or bucket.
Stir thoroughly, cover with foil or a clean lid, and let it sit at around 160 to 180 degrees Fahrenheit for 1 to 2 hours. Field capacity is what you're targeting for moisture: squeeze a handful and you should see just a few drops of water, not a stream. Let it cool to room temperature before you introduce any spawn. Putting warm substrate on colonized grain is a contamination invitation.
A casing layer (a thin top layer of unfertilized material like peat moss and lime, or more CVG) is optional with Tidal Wave but can help retain surface moisture and improve pin development. It's not required on your first run, but worth trying once you have the basics down.
Inoculating your grain: spores vs liquid culture, ratios, and staying clean
Spores vs liquid culture
Both spore syringes and liquid culture syringes will work for Tidal Wave, but they're not equal for beginners. Spore syringes contain ungermed spores and take longer to fully colonize grain (spores need to germinate first, which adds time and contamination exposure). Liquid culture contains already-active mycelium and colonizes grain noticeably faster, which means the mycelium outcompetes contaminants more effectively. If you have a choice, go with liquid culture for your first run.
Inoculation ratios and technique
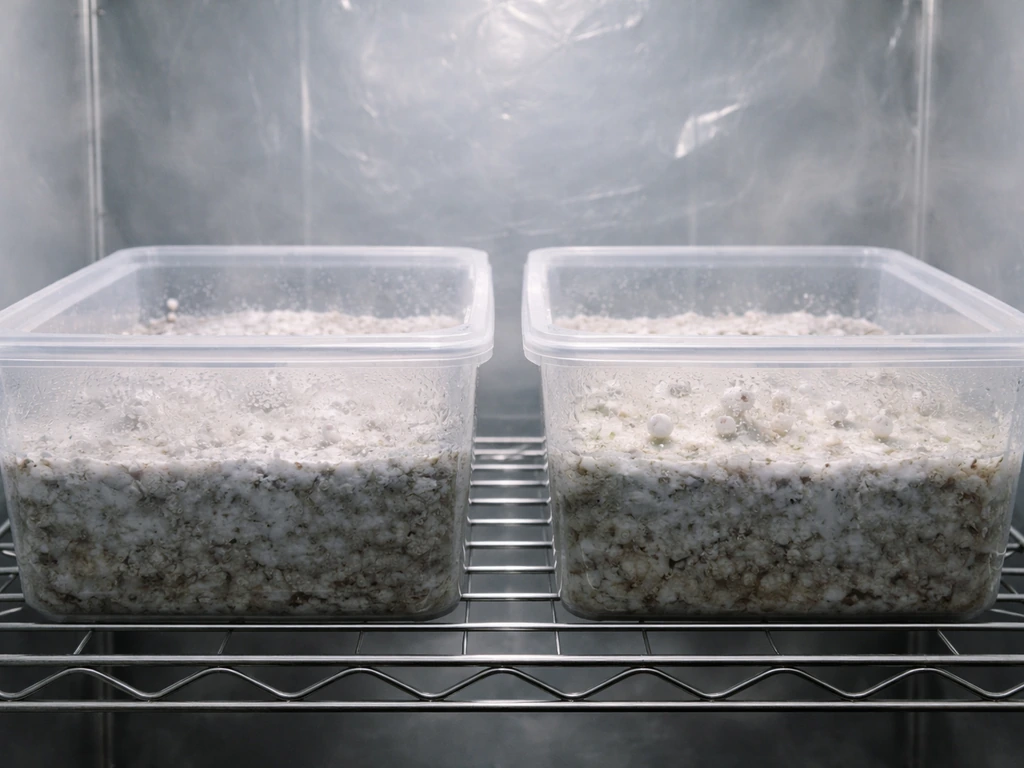
For Tidal Wave, the recommended spawn-to-bulk-substrate ratio is 1:1 to 1:2. If you want a quick start on how to grow shiaqga mushroom, focus on clean inoculation, the right bulk substrate, and dialing in humidity and fresh air for fruiting. That means for every one part colonized grain spawn, you use one to two parts pasteurized CVG. A more aggressive ratio (closer to 1:1) colonizes the bulk faster and reduces the contamination window, which is worth prioritizing on early runs. A 1:2 ratio gives you more substrate volume and potentially more yield, but takes longer and gives competing organisms more time to get established.
Hygiene during inoculation is non-negotiable. Work inside your still air box. Wipe all surfaces with 70% isopropyl alcohol. Wear gloves and a mask. Flame-sterilize your needle between each jar if you're using syringes. When mixing spawn into bulk substrate, do it quickly and confidently in your still air box, then seal the tub. The fewer times you open things up, the better.
Incubation vs fruiting: the environment breakdown
These two phases need completely different conditions, and mixing them up is one of the most common beginner errors. Here's what Tidal Wave needs at each stage.
| Parameter | Colonization (Incubation) | Pinning Trigger | Fruiting |
|---|---|---|---|
| Temperature | 75–80°F (24–27°C) | Drop to 65–70°F (cold shock) | 72–75°F (22–24°C) |
| Humidity | Substrate moisture only (lid sealed) | High ambient humidity begins | 90–95% relative humidity |
| CO2 / Airflow | High CO2 fine (lid closed) | Introduce fresh air exchange | Fresh air exchange 2–4x daily minimum |
| Light | Darkness or ambient low light | Indirect light helps trigger pins | 12 hours indirect light per day |
| Duration | 12–18 days on grain | 12–24 hours cold shock | Days to first pins, then 5–7 days to maturity |
During colonization, keep the tub sealed. The mycelium doesn't need fresh air yet and elevated CO2 actually helps it run. Once you see full colonization (all white, no green, black, or pink patches), initiate the cold shock by moving the tub to a cooler space around 65 to 70°F for 12 to 24 hours. After that, move to fruiting conditions. This means introducing fresh air exchange (FAE), bumping humidity up to 90 to 95%, dropping the temperature slightly to the 72 to 75°F range, and providing indirect light. Mist the walls of your fruiting chamber (not directly on the substrate surface) to maintain humidity without waterlogging.
Fresh air exchange is something beginners consistently underdo. Mushrooms produce CO2 as they grow, and high CO2 concentrations during fruiting lead to long, leggy stems and poorly formed caps. Open your fruiting chamber and fan it gently at least twice a day, or set up a passive polyfill filter in the lid to allow passive air exchange. A small fan on a timer set to run a few minutes every few hours works well if you have a martha tent setup.
Harvesting, managing multiple flushes, and storing your yield
When and how to harvest
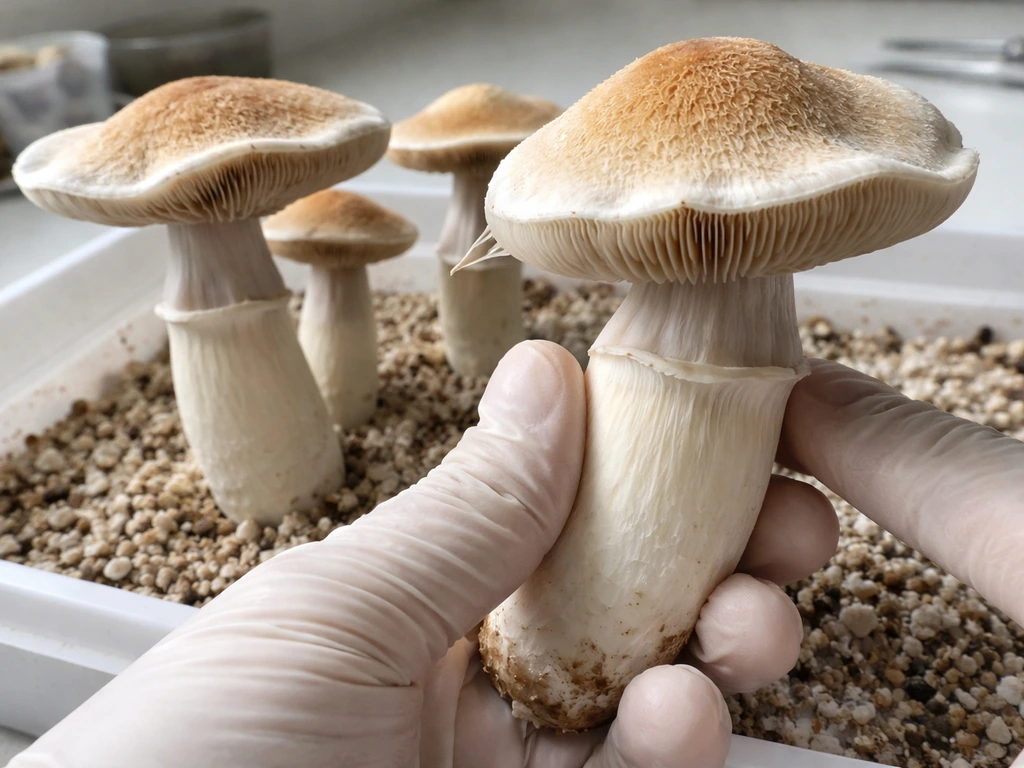
Harvest Tidal Wave just before or as the veil underneath the cap begins to tear away from the stem. Once the veil breaks and the cap opens fully, the mushroom is dropping spores and has passed peak potency and freshness. Twist and pull with a gentle rotation rather than cutting, which helps avoid leaving a stump that can rot and invite contamination. Clean out any remaining stem bases or pins from the substrate surface after each harvest using clean tweezers.
Getting repeat flushes
Tidal Wave typically gives 3 to 4 flushes from a single tub if you manage it correctly. After harvesting a flush, scrape any dead pins or debris off the substrate, lightly mist the surface, and rest the tub for a few days. Then return to fruiting conditions (humidity, FAE, light). Each successive flush takes a little longer to appear and generally produces slightly less volume than the one before it. Don't abandon the tub after the first flush. The second and sometimes third flush can be nearly as productive.
Simple storage
Fresh mushrooms keep for about 5 to 7 days in the refrigerator in a paper bag (not plastic, which traps moisture and accelerates rot). For longer storage, dehydrate them. A food dehydrator set to 95 to 115°F works well. Dry until cracker-dry, meaning they snap cleanly rather than bend. Store in an airtight glass jar with a food-grade desiccant packet in a cool, dark location. Properly dried and stored mushrooms will last a year or more without significant degradation.
Troubleshooting: contamination, stalls, and weird growth
Green, black, or pink patches
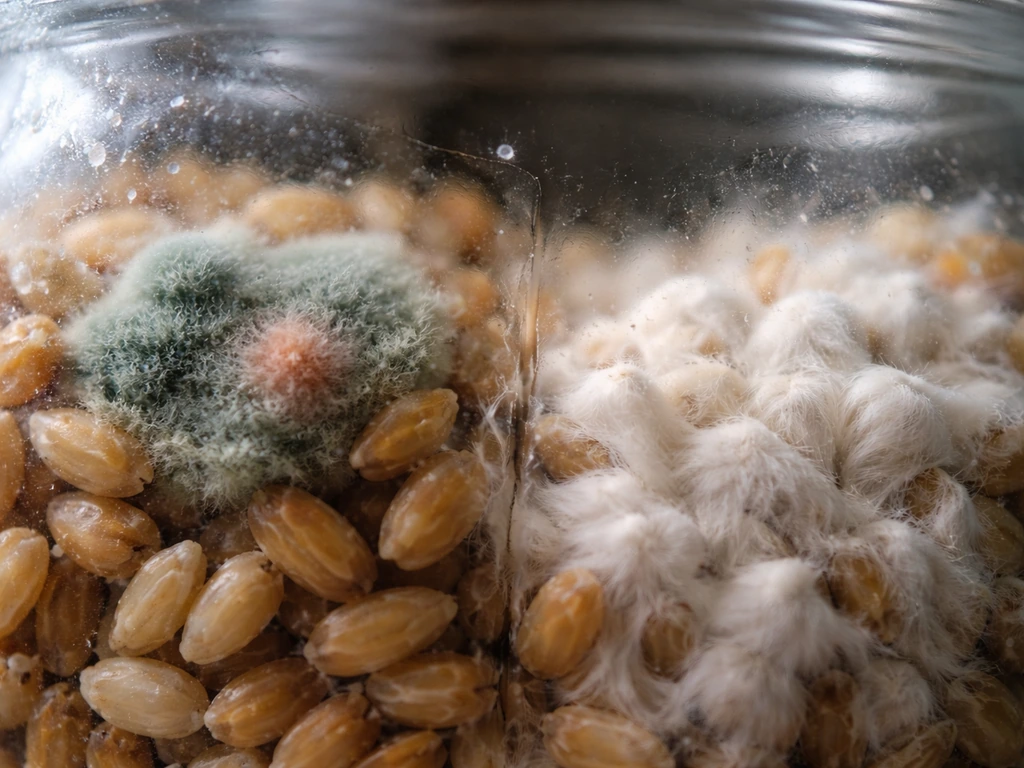
Green mold (Trichoderma) is the most common contamination you'll see. If it appears on colonizing grain before you've transferred to bulk substrate, that jar is a loss. Remove it from your grow space immediately and don't open it indoors. If contamination appears on the bulk substrate after colonization, small isolated patches can sometimes be scooped out and the tub salvaged, but if it's spreading, cut your losses. Green on fully colonized bulk is less catastrophic than green on grain, but still needs fast action.
Mycelium that won't colonize or stalls out
If colonization stalls before grain is fully white, check your temperature first. Tidal Wave colonizes grain well in the 75 to 80°F range. Below 70°F, growth slows significantly. Also check your substrate moisture: substrate that's too wet creates anaerobic pockets where mycelium won't thrive. If you're working with spores rather than liquid culture, germination can be slow and inconsistent with this strain, so switching to liquid culture on your next run is a reasonable fix.
No pins forming after cold shock
If you've done the cold shock and returned to fruiting conditions but pins aren't appearing after 7 to 10 days, run through this checklist: Is humidity consistently at 90% or above? Is there adequate fresh air exchange? Is there at least some indirect light? Is the substrate surface starting to dry out (light misting may help)? Tidal Wave can be slow to pin compared to more stable strains like Golden Teacher. Give it a second cold shock attempt if the first one didn't trigger anything after 10 days.
Mutations and weird-looking fruits
Tidal Wave is genuinely one of the more genetically unstable cubensis strains out there. You may see white ball-shaped blobs, fruits that never properly cap, albino-looking specimens, or dramatic variation between flushes. This is a documented characteristic of this strain, not necessarily a sign you're doing something wrong. If the mycelium looks healthy and there's no contamination, let the grow run. Mutation-heavy flushes are frustrating but normal with Tidal Wave. If you want more predictable morphology on your first grow, a more stable strain like B+ or Golden Teacher is honestly a better starting point.
Low yields
Low yield on early flushes usually comes down to one of three things: insufficient humidity, too much CO2 during fruiting (not enough FAE), or substrate that's too dry by the second or third flush. Address each systematically. A hygrometer in your fruiting chamber is non-negotiable if you're chasing yield. Guessing your humidity rarely works.
What a successful grow actually looks like, week by week
Here's a realistic timeline for a beginner running Tidal Wave with pre-made grain spawn, liquid culture inoculation, and CVG bulk substrate. If you’re looking for a different species with a simpler outdoor season, see our guide on how to grow liberty cap mushrooms. Actual timing will vary based on your conditions, but this gives you clear benchmarks to measure against.
| Timeframe | What Should Be Happening | Red Flag to Watch For |
|---|---|---|
| Days 1–3 | Inoculation complete, tubs sealed and in warm dark spot | Any visible color besides white in 48 hours could be contamination |
| Days 4–10 | White mycelium visibly spreading through grain or bulk substrate | No visible growth by day 7 means temperature may be too low |
| Days 12–18 | Full colonization of grain (all white, healthy-looking) | Green, black, or pink = contamination, remove immediately |
| Day 18–20 | Transfer colonized spawn to bulk substrate (CVG), re-seal | Wet or pooling substrate means too much moisture |
| Days 20–28 | Bulk colonization completing | Stalled growth after day 25 warrants a temperature and moisture check |
| Day 28–30 | Cold shock (12–24 hours at 65–70°F) | Skipping this step often means delayed or absent pinning |
| Days 30–37 | Pins appearing (tiny white dots developing on surface) | No pins by day 37 means revisit FAE, humidity, and light |
| Days 37–44 | First flush reaching harvest size | Veils tearing = harvest now, don't wait |
| Flush 2 and 3 | Repeat cycle after rest period, 7–14 days between flushes | Contamination risk increases with each flush |
By the end of your first run, a reasonable success benchmark is completing 2 to 3 flushes with visible pins forming within 10 days of your cold shock and no contamination spreading past the first flush. Don't judge the entire strain by a mutation-heavy flush. Tidal Wave's instability means your second or third flush may look completely different from your first, and that's just the nature of this particular genetic line.
If you're comparing your experience with other cubensis strains you've grown or are researching (like Mazatapec or other beginner-friendly varieties), keep in mind that Tidal Wave is not the easiest first strain. If you're specifically wondering how to grow Mazatapec mushrooms, focus on dialing in clean inoculation, stable humidity, and consistent fresh air during fruiting. It rewards growers who already have a clean workflow dialed in.
If this is your very first cubensis grow and you're running into consistent contamination or stalls, consider doing one run with a more forgiving strain first, then coming back to Tidal Wave once you trust your inoculation hygiene and environmental controls. The payoff with Tidal Wave (particularly its yield potential and the visual interest of its mutations) is genuinely worth the extra learning curve.
FAQ
How can I tell if a stall is caused by temperature versus contamination during grain colonization?
If growth is uniformly slow but still looks creamy white, temperature or moisture is more likely. If you see distinct colored patches (green, black, pink) or wet, sour-smelling areas that spread, contamination is the likely cause. Also avoid repeatedly opening grain during the stall window, as that increases airborne contamination.
What moisture level should CVG have if I’m getting slow colonization or uneven coverage?
Aim for field capacity, a squeeze test that produces only a few drops. If your CVG drips or squishes into liquid, it can create anaerobic pockets and slow or stress the mycelium. If it stays crumbly with no drops, it dries out faster during early colonization and can stall edges.
Do I need to pasteurize my substrate again if it cools down for a long time before I inoculate?
Yes, but do it correctly once, not repeatedly. Let pasteurized substrate cool fully to room temperature, then keep it covered and relatively clean until inoculation. If it sits exposed for hours in a dusty area, treat it as higher risk even if temperature is fine, because competing microbes can rebound.
Can I use a casing layer every time, or is it better to skip it for better results?
You can use casing for pin support, but for Tidal Wave it’s more helpful once your basics are dialed in. If you consistently have humidity and misting correct, skipping casing on the first run can reduce variables. If pins are slow and the surface is drying between flushes, a thin casing can stabilize surface moisture.
What fresh air exchange setup should I choose if I do not have a martha tent?
A simple approach is fanning at a consistent schedule (at least twice daily) while keeping humidity in range with gentle wall misting. If you prefer passive exchange, use a lid designed to allow airflow while still limiting direct drying of the substrate. The key is avoiding long periods where CO2 builds up, which causes leggy fruits.
Why do my fruits sometimes grow tall and misshapen even when humidity seems correct?
Humidity can be right while CO2 is still too high. If you see elongated stems, tight caps, or poor cap development, increase fresh air exchange rather than just misting more. Add airflow in small, regular intervals so the surface stays humid but the chamber does not become stagnant.
If my tub is fully colonized, can I start fruiting immediately or should I wait?
It’s best to move to the cold shock promptly after full colonization. Delaying fruiting often leads to shifts in moisture balance and CO2 buildup patterns from the sealed colonization environment. If you must wait, keep the tub sealed and stable, then initiate the cold shock when you’re ready to transition.
How do I adjust the spawn-to-bulk ratio if I’m getting contamination or slow colonization?
For beginners aiming to reduce risk, a closer-to-1:1 ratio can shorten the time bulk sits vulnerable before full colonization. If you have strong hygiene and want more substrate per tub, 1:2 can work, but it increases the time competing organisms have to establish.
Is it ever okay to scoop out small contamination patches after they show up on bulk?
Only for very small, isolated spots early, and even then act fast. Remove the affected area cleanly, avoid spreading debris, and ensure good airflow to prevent further spread. If contamination is expanding, keep it sealed away from your grow area and discard rather than trying to “save” a worsening tub.
How should I handle harvest timing if my mushrooms open quickly after the veil tears?
Harvest right at veil break or as it begins to tear away, because once the caps fully open, spores are being shed and the fruits can decline in freshness. If you can’t check often, set a reminder based on your typical development pace and harvest in small batches to keep the tub from continuing to mature unchecked.
After a flush, should I rehydrate the entire surface or only lightly mist the area that dried out?
Light, targeted misting is safer than soaking the whole surface. Over-wetting after harvesting can lead to water pooling, delayed pinning, or increased contamination risk. If the surface looks dry, mist until it glistens lightly, not until it forms puddles.
What’s the best way to store mushrooms without losing too much texture or potency?
Use a paper bag in the refrigerator, keep them loosely packed, and avoid washing before storage unless you will dry or consume immediately. If they become slimy or smell off, discard rather than trying to salvage them. For longer storage, dehydrating at the lower end of the target range helps maintain better consistency.
My tub mutated a lot between flushes, but the earlier flush looked normal. Is that still expected for Tidal Wave?
Yes. This strain is known for variability across flushes, so a later flush can look dramatically different even if earlier growth was more typical. As long as the mycelium was healthy and contamination is not present, treat the changes as strain behavior rather than a sign to restart from scratch.