Growing mushrooms at home comes down to four things: getting the right fungal genetics (as spores or spawn), preparing a food source (substrate) that mushrooms can colonize, keeping conditions clean and stable during colonization, then nudging the environment to trigger fruiting. Most beginners can harvest their first flush in 4 to 8 weeks using a simple kit or a few cheap materials from a hardware store.
How to Grow Fungi: Mushrooms at Home Step by Step

Marcus Holloway
26 Apr 2026
This guide walks you through every stage, from picking a beginner-friendly species to troubleshooting a block that refuses to pin. If you are wondering how do toadstools grow, the core idea is the same: start with the right fungal material, prepare a suitable substrate, and then trigger fruiting with the right conditions. For a quick species-specific comparison, see how to grow toadstools for its related approach and cues.
How fungi actually grow (and why it matters for cultivation)
Fungi don't grow the way plants do. There are no roots, no seeds, and no photosynthesis. Instead, a mushroom is just the reproductive body of a much larger organism: the mycelium. Mycelium is a web of thread-like cells called hyphae that push through a food source, secreting enzymes to break it down and absorb nutrients. When you grow mushrooms, you're really farming mycelium and then coaxing it into producing fruiting bodies.
The lifecycle in cultivation follows three stages. First, spores germinate or spawn is introduced and mycelium begins spreading through the substrate. This is colonization, and it can take anywhere from a few days to several weeks depending on species and temperature. Second, the mycelium reaches full colonization and you shift the environment to signal that conditions are right for reproduction. This is primordia initiation, sometimes called pinning. Third, the pins develop into mature mushrooms ready to harvest. Understanding this progression makes every step in cultivation make sense, because you're essentially mimicking nature at each phase.
Pick your species and method before buying anything
The biggest mistake beginners make is buying supplies before deciding what they're actually growing. Species choice determines everything: substrate, incubation temperature, fruiting triggers, and how forgiving the grow will be when something goes wrong.
Best beginner species
| Species | Difficulty | Substrate | Method | Time to First Harvest |
|---|---|---|---|---|
| Oyster mushrooms (Pleurotus spp.) | Very easy | Straw, cardboard, coffee grounds | Indoor bag or bucket | 3–5 weeks |
| Shiitake (Lentinula edodes) | Moderate | Hardwood sawdust blocks or logs | Indoor block or outdoor log | 6–12 weeks (blocks); 6–12 months (logs) |
| Lion's mane (Hericium erinaceus) | Moderate | Hardwood sawdust blocks | Indoor block | 4–6 weeks |
| Wine caps (Stropharia rugosoannulata) | Easy | Wood chips, straw | Outdoor garden bed | 4–8 weeks |
| Reishi (Ganoderma lucidum) | Moderate–hard | Hardwood sawdust blocks | Indoor block | 8–16 weeks |
If this is your first grow, start with oyster mushrooms. They colonize fast, tolerate a wider temperature range (60 to 80°F works for most varieties), forgive minor contamination pressure better than most species, and produce impressive yields. Once you've seen a full cycle through from inoculation to harvest, branching into shiitake or lion's mane feels much less intimidating. For outdoor growing, wine caps are the equivalent of oysters: aggressive, forgiving, and rewarding.
Indoor vs outdoor growing
Indoor growing gives you control over temperature, humidity, and light, which means more predictable results year-round. You can grow in a closet, a spare bathroom, or a dedicated tent. Outdoor growing, particularly on logs or in garden beds, is lower maintenance once set up but slower and season-dependent. A shiitake log inoculated in spring may not produce its first flush until fall or even the following year. That said, outdoor logs can produce for 3 to 7 years with almost no ongoing effort beyond occasional soaking. Many growers do both: indoor blocks for quick harvests and outdoor logs for long-term production.
Spores vs spawn: what to use and where to start
Spores are the fungal equivalent of seeds. They need to germinate, mate (most edible species require two compatible spores to fuse), and then develop into mycelium before they can colonize anything. This process is slow, vulnerable to contamination, and requires sterile agar work or specialized syringes. For beginners, spores are the harder route and the more likely path to frustration. They're primarily used by experienced cultivators who want to work with genetics they've collected themselves or who are doing agar culture work.
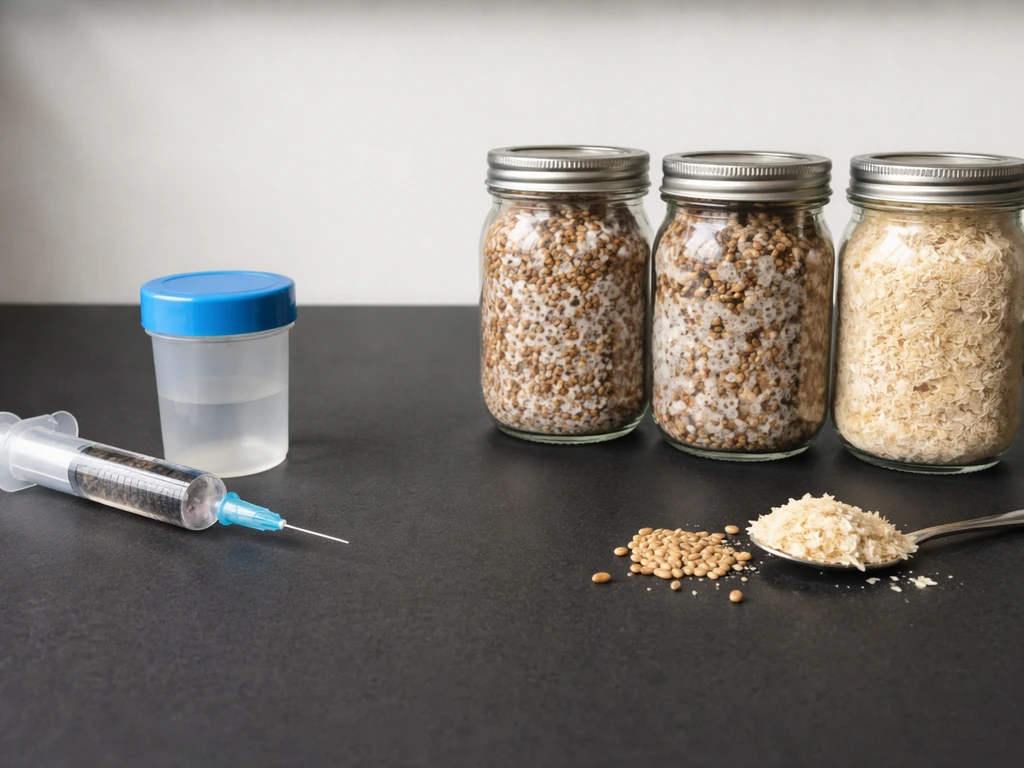
Spawn is already-colonized material: grain, sawdust, straw, or another substrate that has been fully overtaken by mycelium and is ready to transfer its growth to a fresh substrate. Think of spawn as a starter culture, similar to sourdough starter. It's vigorous, fast, and far more contamination-resistant than spores. For your first grow (and honestly for most grows after that), use spawn. You can buy grain spawn or sawdust spawn from reputable mushroom suppliers, or produce it yourself once you're comfortable with sterilization.
- Grain spawn: best for inoculating bulk substrates like straw or supplemented sawdust; spreads aggressively
- Sawdust spawn: ideal for inoculating logs and woody substrates; also works well for blocks
- Plug spawn (wooden dowels): specifically designed for log cultivation; easy to hammer in and seal with wax
- Liquid culture: a mycelium-infused solution used to inoculate grain jars; faster than spores but still requires sterile technique
When buying spawn, choose a supplier with good reviews and fast shipping. Spawn is perishable. If it arrives smelling sour or showing green or black patches, it's contaminated and you should not use it. Healthy spawn looks white or off-white, may have a faint mushroomy smell, and the mycelium threads should be visible throughout.
Substrate prep: what mushrooms eat and how to prepare it
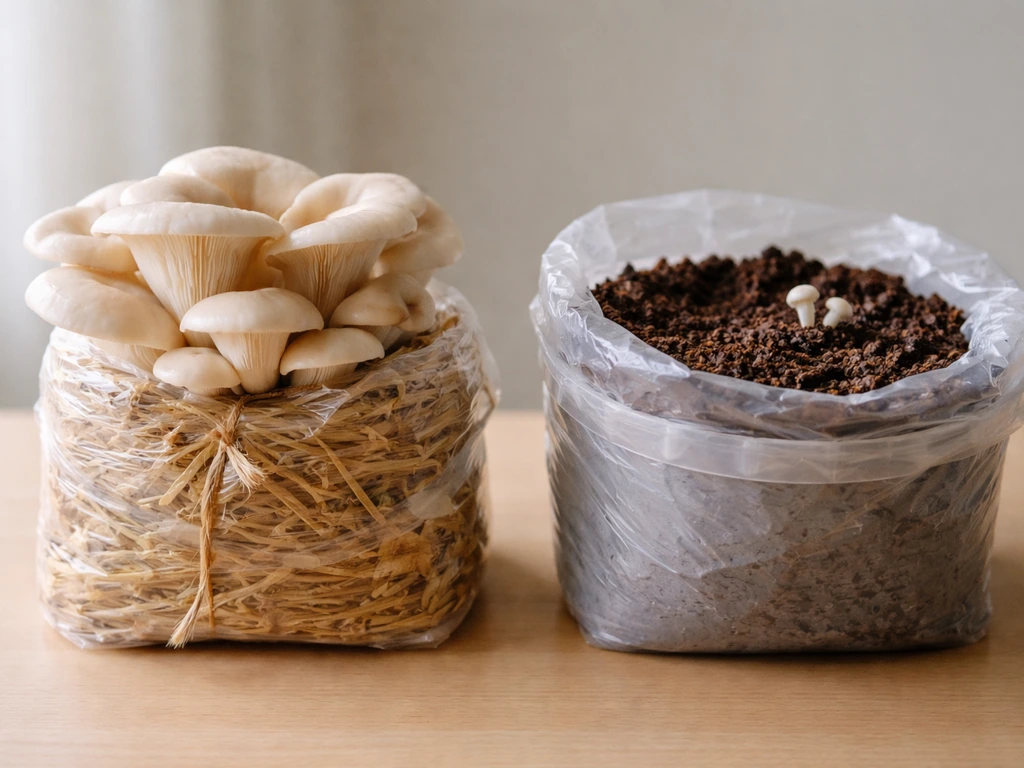
Substrate is the growing medium, the food source that mycelium colonizes. Different species prefer different substrates because they've evolved to break down specific materials. Oyster mushrooms thrive on straw, coffee grounds, and cardboard. Shiitake and lion's mane need hardwood. Wine caps love wood chips mixed with straw. Matching the substrate to the species isn't optional; it's what determines whether your grow succeeds or stalls.
Pasteurization vs sterilization
Raw substrate is full of competing organisms: bacteria, molds, and other fungi that will outcompete your mushroom mycelium if given the chance. You need to knock back that competition before introducing spawn. The method you use depends on the substrate and species.
Pasteurization heats the substrate to around 160 to 180°F (71 to 82°C) for 1 to 2 hours, killing most competitors while leaving some beneficial organisms that actually help suppress contamination after inoculation. This is the right approach for straw and coffee grounds, which are used with aggressive colonizers like oyster mushrooms. You can pasteurize straw by submerging it in a large pot or bucket of hot water (heated to the target range) and keeping it covered for 1 to 2 hours, then draining and cooling before inoculation.
Sterilization takes it further, typically using a pressure cooker at 15 PSI for 2.5 to 3 hours, eliminating all competing life. This is required for supplemented sawdust blocks and grain spawn jars, which are nutrient-dense enough to support aggressive mold growth that pasteurization won't prevent. If you're making your own grain jars or hardwood blocks, a pressure cooker is essential. A 23-quart pressure canner handles most home-scale batches.
Field capacity: the detail most beginners skip
After pasteurization or sterilization, your substrate needs to be at field capacity before you add spawn. Field capacity means the substrate holds as much water as it can without excess pooling. To test it, grab a handful and squeeze hard. You should see just a few drops of water, not a stream. Too wet and anaerobic pockets form, inviting bacterial contamination. Too dry and mycelium colonizes slowly or not at all. Getting moisture right is one of the most impactful things you can do for a healthy grow.
Inoculation, incubation, and keeping things clean
Inoculation is the moment you introduce spawn to substrate. This is also the moment contamination risk is highest, because you're opening containers and exposing your substrate to the open air. The principles are straightforward: work quickly, work clean, and minimize exposure.
- Clean your workspace thoroughly. Wipe all surfaces with isopropyl alcohol (70% is more effective than 99% for killing microbes). Close windows to reduce airflow and airborne contamination.
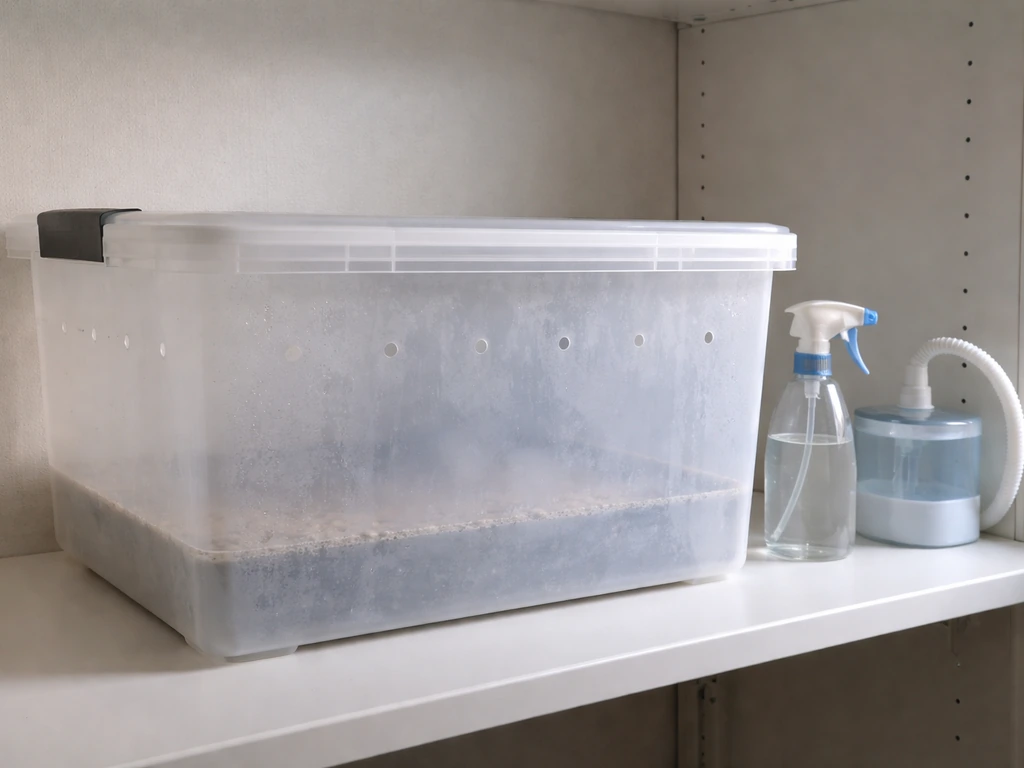
- Wash your hands thoroughly and wear gloves. If you have a still-air box (a clear tote with arm holes cut in the side), use it. It creates a low-turbulence environment that dramatically cuts contamination risk without requiring a laminar flow hood.
- Mix spawn into cooled, pasteurized or sterilized substrate at a rate of roughly 10 to 20% spawn by weight. Higher spawn rates mean faster colonization and less opportunity for contaminants to establish.
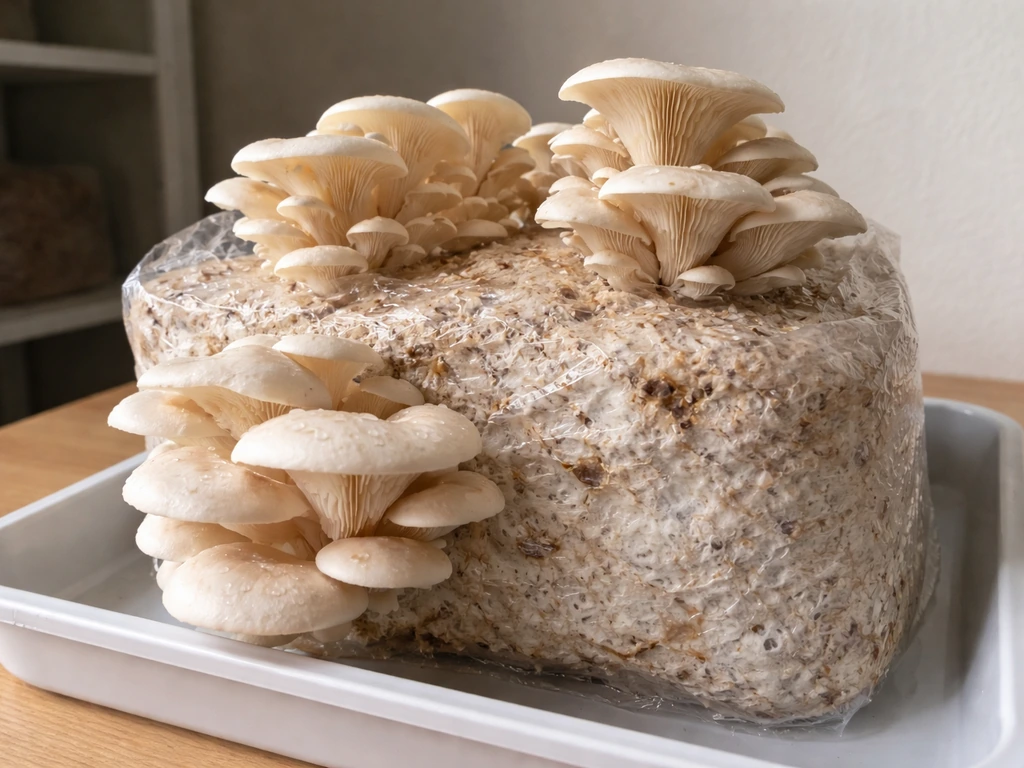
- Pack the inoculated substrate into your growing container. For oysters, a plastic bag with a few small holes or a filter patch works well. For blocks, a polypropylene bag sealed with an impulse sealer is standard. For logs, hammer plug spawn into pre-drilled holes and seal with cheese wax.
- Label everything with the species, substrate, and date. You'll thank yourself later.
Once inoculated, your containers go into incubation. This means a warm, dark location with stable temperature appropriate for your species. Oyster mushrooms colonize well between 65 and 75°F. Shiitake spawn run typically happens at 60 to 75°F. Avoid temperature swings. A spare closet, a cabinet, or even a cardboard box in a warm room works fine. You don't need any special equipment for incubation beyond a thermometer. During this phase, resist the urge to open containers constantly. Every time you open them, you introduce contamination risk. Check the exterior of bags or jars daily for signs of growth or problems, but leave them closed until colonization is complete.
Healthy colonization looks like white, fluffy, or rope-like mycelium spreading through the substrate. It may smell faintly mushroomy or earthy. If you see green, black, or pink patches, or smell something sour, you likely have contamination and that container needs to be removed from the grow area immediately and disposed of outside (bagged) to prevent spores from spreading.
Triggering fruiting: humidity, fresh air, temperature, and light
Once your substrate is fully colonized, white mycelium visible throughout with no bare spots, it's time to switch from incubation mode to fruiting mode. Pinning is triggered by a combination of environmental shifts that signal to the mycelium that conditions are right for reproduction. In nature, these cues are seasonal changes: dropping temperatures, rain, longer nights. In your grow space, you replicate them deliberately. Toadstools grow from mycelium that colonizes an appropriate substrate, then forms mushrooms when blank" rel="noopener noreferrer">humidity, fresh air, temperature, and light trigger fruiting.
The four environmental levers
- Humidity: Raise relative humidity to 85 to 95% for most species. This is usually done by misting the grow area (not directly onto the substrate surface) 2 to 4 times daily, or by using an ultrasonic humidifier in a fruiting chamber. Low humidity is the number one reason pins dry out and abort.
- Fresh air exchange (FAE): Mycelium produces CO₂ as it metabolizes. During incubation, some CO₂ buildup is fine. During fruiting, elevated CO₂ causes long, thin, leggy mushrooms with small caps. Fan the fruiting area or open it for a few minutes several times a day. For oysters especially, FAE is critical.
- Temperature: Many species want a slight temperature drop to trigger pinning. Shiitake primordia initiation happens at 50 to 65°F after the spawn run completes at warmer temperatures. Oysters can pin at room temperature but often respond to a brief cold shock (moving them to a cooler space for 12 to 24 hours). Lion's mane fruits best between 65 and 75°F.
- Light: Mushrooms don't photosynthesize, but light does influence fruiting direction and pin formation. Indirect ambient light for 12 hours a day is sufficient for most species. Shiitake needs some light during primordia formation. Total darkness isn't ideal during fruiting.
A simple fruiting chamber for beginners is a clear plastic storage tote with holes drilled in the sides, stuffed loosely with perlite moistened with water. The perlite acts as a passive humidity reservoir. Place your colonized substrate inside, fan it a few times a day, and mist the perlite (not the substrate directly) to maintain humidity. This setup, sometimes called a shotgun fruiting chamber, costs under $20 and works reliably for oysters and other fast-fruiters. For shiitake logs outdoors, fruiting can be triggered by soaking the log in cold water for 24 to 48 hours, which mimics the moisture and temperature cue of a rain event.
Harvesting, what comes next, and realistic timelines
Harvest just before or as the caps begin to flatten out and their edges start to turn upward. For oysters, this is typically when the caps are still slightly curved downward at the edges. For shiitake, harvest when the veil under the cap is still partially intact. Waiting too long results in spore dumps (the mushrooms release a thick cloud of spores that coats everything nearby and can irritate lungs), reduced flavor, and mushrooms that don't store as well. Twist and pull the cluster at the base, or cut it close to the substrate surface with a clean knife.
After the first flush, remove any remaining stumps or dead material from the substrate surface and allow the block or bag to rest for 5 to 14 days. Mist lightly to keep the surface from drying out. Most substrates will produce 2 to 4 flushes, with the first and second being the most productive. Grain-based blocks tend to exhaust faster than logs. A well-maintained shiitake log can produce for 3 to 7 years with seasonal flushes.
| Species | Colonization Time | Time to First Flush After Fruiting Trigger | Expected Flushes |
|---|---|---|---|
| Oyster mushrooms | 7–14 days | 5–10 days | 3–5 per block |
| Shiitake (block) | 30–60 days | 7–14 days after cold soak | 2–4 per block |
| Shiitake (log) | 6–12 months | After seasonal trigger or soaking | Multiple per season for years |
| Lion's mane | 14–28 days | 7–14 days | 2–3 per block |
| Wine caps (outdoor) | Variable | 4–8 weeks after bed setup | Multiple per season |
Fresh mushrooms store in the fridge for 5 to 10 days in a paper bag (not plastic, which traps moisture and accelerates spoilage). For longer storage, dehydrate at 95 to 115°F until completely dry and store in an airtight jar. Dried mushrooms keep for a year or more and often have more concentrated flavor than fresh.
When things go wrong: common problems and how to fix them
Green, black, or pink patches on the substrate
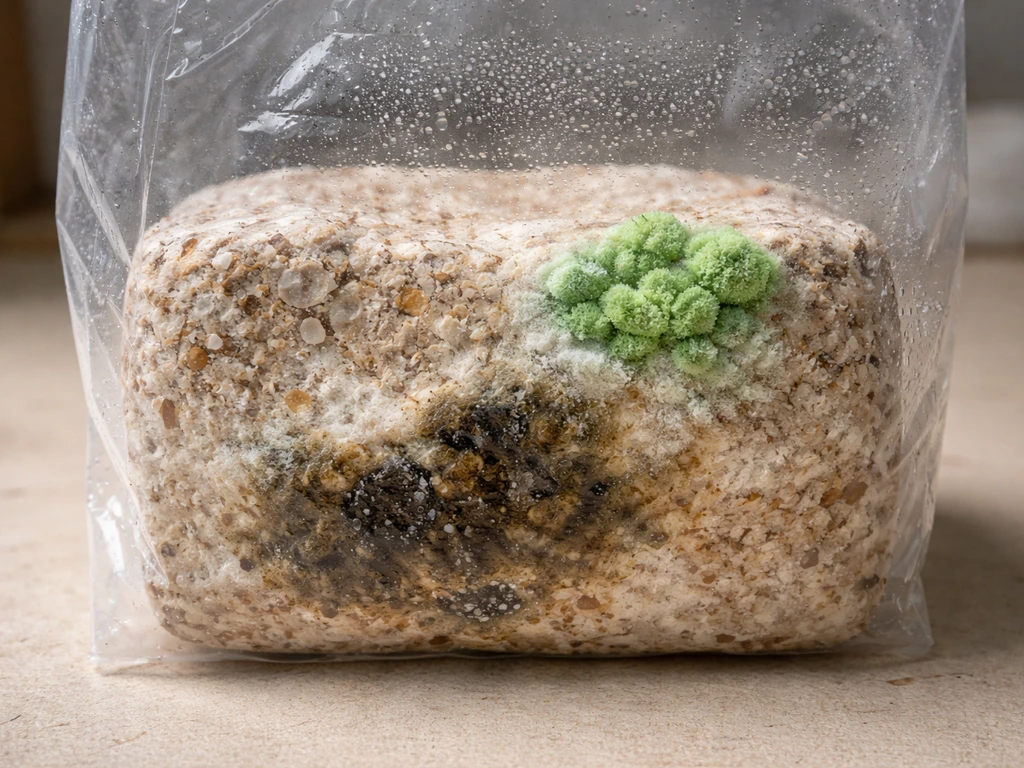
This is contamination, most commonly Trichoderma (green mold) or Bacillus (wet, sour-smelling slime). Once contamination is established in a block or bag, you can't reverse it. Remove the contaminated container from your grow space immediately, seal it in a bag, and dispose of it outside. Don't try to cut out the moldy part and keep going; the invisible mycelium of the contaminant has already spread further than the visible patches. Prevention is the only real solution: work clean, use higher spawn rates, don't over-supplement your substrate, and make sure sterilization was adequate.
No growth or very slow colonization
First, check your spawn. If it was old, stored at high temperatures, or arrived damaged, it may simply be dead. Healthy spawn should start showing visible growth into a new substrate within 3 to 7 days at the right temperature. If nothing is happening at day 10, the spawn is probably bad or the substrate is too hot, too cold, too wet, or too dry. Check your incubation temperature against the species requirements and re-examine substrate moisture. If you sterilized your substrate and then let it cool for only 30 minutes before inoculating, residual heat may have killed the spawn.
Pins form but abort before developing
Aborted pins almost always mean low humidity or a sudden environmental disruption. For Agaricus bisporus, Penn State Extension recommends keeping relative humidity at 95% or higher to help preserve substrate moisture low humidity.
A draft, a temperature spike, forgetting to mist for a day, these are enough to abort young pins. Increase misting frequency, check for air leaks in your fruiting chamber, and try to keep conditions as stable as possible during the first 48 to 72 hours after pins appear. Penn State Extension for Agaricus also advises applying water intermittently during casing or cover management to raise moisture to field capacity before mushroom pins form [keep conditions as stable as possible](https://extension. psu.
edu/basic-procedures-for-agaricus-mushroom-growing/). If you suspect warped or deformed mushrooms, adjust your humidity and fresh-air exchange to reduce stress on the developing pins how to grow warped fungus. Once pins are past about 1 cm, they're more resilient.
Long, leggy mushrooms with small caps
This is a CO₂ problem. The mycelium is growing toward a perceived source of oxygen, producing elongated stems and underdeveloped caps. Increase fresh air exchange significantly: fan the chamber more often, add more holes to your tote, or leave the lid cracked. For oysters especially, this fix is almost instant. Subsequent flushes with better FAE will grow normally.
Good growth during incubation but no pins
If colonization looks complete but pins aren't forming after 2 to 3 weeks in fruiting conditions, the fruiting trigger may not be strong enough. If you are targeting crimson fungus, strengthen the fruiting trigger by adjusting humidity, light, and making sure your temperature and fresh air cues are aggressive enough to initiate pinning how to grow crimson fungus.
If you are aiming for red mushrooms specifically, the biggest factors are choosing the right species, matching the substrate to that species, and using temperature and humidity targets that match its pinning needs how to grow red mushrooms. Try a more dramatic temperature drop (move the block to the refrigerator for 12 to 24 hours), increase humidity, and make sure there's enough light in the fruiting space.
For shiitake blocks specifically, try a full cold water soak for 12 to 24 hours before returning to fruiting conditions. Sometimes the mycelium just needs a more emphatic signal.
Low yields on second and subsequent flushes
This is normal. Each flush draws more nutrients from the substrate, and later flushes are naturally smaller. If yields drop off dramatically after the first flush, make sure you're giving the block adequate rest time between flushes (at least 5 to 7 days) and keeping it hydrated during the rest period. Some growers submerge spent blocks in water for 4 to 12 hours between flushes to rehydrate the substrate, which can meaningfully boost subsequent flush size.
Your next steps from here
If you're just getting started, the fastest path to a successful first grow is a pre-made oyster mushroom kit or a bag of pasteurized straw with grain spawn. It removes several variables and lets you focus on learning the fruiting conditions and timing. Once you've got one flush under your belt, you'll have the intuition to start making your own substrate and buying bulk spawn.
From there, the learning curve for more complex species like shiitake, lion's mane, and even specialty varieties gets much easier because you already understand the fundamental cycle. Many growers also expand outdoors with logs or garden beds once they're comfortable indoors, and specialty types like snow fungus, reishi, and others each have their own fascinating cultivation quirks worth exploring as your skills grow.
FAQ
When people say “how to grow fungi,” do they mean growing mushrooms themselves or something earlier?
For most edible mushrooms, “grow fungi” means growing mycelium first, then forcing it to form fruiting bodies. In practical terms, you need two separate environments: stable warmth and darkness for colonization, then a separate setup with humidity and fresh air for pinning and fruiting.
Can I grow multiple mushroom species in the same bag or container?
It’s usually a bad idea to try. Different species tolerate different conditions, and mixing substrates can also change how fast the block colonizes and how much competing mold survives. If you want variety, do one species per container or per batch, and only combine later once you already know your process works.
Can I use pasteurization for everything, or is pressure sterilization always necessary?
Pasteurization does not sterilize. If you are working with a supplemented or nutrient-dense substrate (for example, many sawdust blocks or grain jars), you generally need sterilization with a pressure cooker to prevent fast-growing contaminants from taking over.
How can I tell whether my substrate moisture is the right level before inoculating?
If your substrate is too wet, you can create anaerobic pockets that encourage bacterial slime, even if everything else is clean. If it’s too dry, colonization stalls and you can end up with weak, patchy mycelium that pins poorly later. Aim for the “few drops” squeeze test, then adjust slightly next run if you see consistent problems.
How long should I cool sterilized substrate before adding spawn, and how can heat ruin my grow?
Yes. Residual heat after sterilization or poor cooling can kill spawn, and temperature overshoots during incubation can also stress or stall colonization. A simple thermometer check before inoculation and consistent incubation temperatures are more reliable than “feels cool” estimates.
Should I add more fresh-air holes if I suspect CO2 is high?
More holes are not always better. Too much opening can drop humidity and increase CO2 swings, leading to aborted pins or deformed growth. Start with the beginner fruiting-chamber approach described (like perlite reservoir plus controlled ventilation), then adjust in small steps based on pin response over 48 to 72 hours.
What’s the difference between a CO2 problem and a humidity problem when pins are growing?
Even if your humidity looks fine, CO2 management can still be the real issue. If stems elongate and caps lag, increase fresh air exchange, not just misting. If pins form but stop, check for a recent temperature or airflow change that coincided with the stall.
If colonization completes but nothing pins after a couple of weeks, what should I check first?
Often the cause is either an underpowered fruiting trigger or uneven surface moisture. Make sure the surface is evenly hydrated (misting per the chamber setup, not soaking the substrate), and ensure you have enough fresh air and light for your species. A stronger cue sometimes means a bigger temperature swing plus consistent humidity for a full day, not random changes.
Can I salvage a contaminated grow by cutting out the green mold or removing the affected area?
Yes, partially. Cutting away visible mold usually fails because contaminant mycelium and spores are already present beyond what you can see. The safest move is to remove the whole container immediately, seal it, and dispose of it outdoors to prevent spore spread.
What should I do if one bag looks contaminated, can I re-use the substrate or spawn?
Discard it. Do not open it near your grow area, and do not try to “rescue” the substrate by re-inoculating. Contamination often spreads invisibly, and reusing compromised materials can infect future batches.
If growth is slow, how long should I wait before assuming my spawn or substrate is the problem?
For faster confirmation, check daily during the first week of incubation and look for consistent white or off-white growth throughout the surface and inner mass. If you see no meaningful progress by around day 10, something is likely off (temperature, moisture, or dead spawn), and you should troubleshoot before investing more time.
Do the same steps and timing work for shiitake, lion’s mane, and wine caps like they do for oysters?
Yes. Some species require more aggressive environmental triggers than oysters. If you switch species after your first successful grow, re-check the specific incubation and fruiting temperature ranges, substrate match, and fruiting cue method for that species, rather than assuming the oyster “recipe” transfers directly.
How should I store freshly harvested mushrooms to prevent them from going bad quickly?
Fresh mushrooms should be harvested at the right maturity window, but storage is a separate variable. Keep them in a paper bag in the fridge to reduce condensation, and avoid stacking wet caps together. For best flavor and shelf life, refrigerate promptly after harvest and use within about a week.
What’s the best way to dehydrate mushrooms, and does harvest timing affect the final dried quality?
If you plan to dehydrate, harvest at the proper maturity window so the texture dries well, then dehydrate until fully dry and store airtight. Rehydration for cooking is often better when mushrooms were dried evenly, so use airflow and avoid overloading the dehydrator tray.
What are common hidden reasons grows fail even when the process is followed?
A typical beginner mistake is over-supplementing to “speed up” growth, which can actually increase mold risk. Stick to species-appropriate substrate recipes, use the right spawn amount, and keep sterilization or pasteurization steps accurate rather than improvising.