Growing Agaricus bisporus at home, the species behind button, cremini, and portobello mushrooms, is absolutely doable, but it takes a bit more setup than oyster or shiitake mushrooms. You need a manure-based compost substrate, a casing layer on top, and precise temperature shifts to trigger fruiting. Get those three things right and you will reliably harvest flushes of mushrooms from a home setup. Skip any one of them and you will likely end up staring at a tray of dirt wondering what went wrong.
How to Grow Agaricus bisporus at Home: Step-by-Step Guide

Marcus Holloway
5 Jun 2026

Choosing the right approach before you spend a dollar
The most important decision upfront is whether you want to start with a pre-made mushroom kit or build your own grow from scratch. Kits are genuinely the best starting point if you have never grown Agaricus before. They come with colonized or partially colonized substrate that just needs a casing layer and some humidity management. You skip the composting and pasteurization steps entirely, and you will usually have your first harvest within three to four weeks of opening the box.
If you want to build your own setup, plan for a longer process. A full DIY cycle from substrate preparation to first harvest is typically eight to twelve weeks, and the composting/pasteurization phase alone adds one to two weeks upfront. That said, a DIY setup lets you scale up, reuse materials, and fine-tune genetics, which matters a lot once you get comfortable with the process.
Indoors is the right call for most home growers. Agaricus bisporus wants stable temperatures in the 16 to 18°C (60 to 65°F) range during fruiting, which is hard to maintain reliably outdoors unless you live somewhere with naturally cool, stable weather. Outdoor beds in garden soil are possible in spring and autumn in temperate climates, but they are unpredictable. A spare room, basement, or even a large storage bin indoors gives you real control. Most successful home growers use plastic storage tubs, wooden trays, or growing bags, and the tub or tray approach is easiest to manage at the 10 to 25 litre scale.
Spawn and genetics: what to buy and why it matters
Buy spawn, not spores. This is the single most important advice I can give a new Agaricus grower. Spores require germination into mycelium, selective isolation, and multiple rounds of testing before they are useful for growing. Spawn is already colonized grain or rye, ready to go directly into your substrate. It is the equivalent of a starter culture rather than a raw seed. Reputable suppliers sell grain spawn specifically for Agaricus bisporus and ship it ready to use.
Spawn is technically a cereal grain and mycelium mixture. You mix it into your prepared compost at the end of the substrate preparation phase, and the mycelium spreads out from those grain kernels into the surrounding substrate. The more evenly you distribute spawn through the compost, the faster it colonizes, and a faster colonization reduces the window in which competitors and contaminants can take hold.
For strain selection, standard white button strains (often sold as A15 or similar commercial varieties) are the most reliable for beginners because they are well-studied and widely available. Cremini and portobello are simply strains left to grow to a larger size, so the cultivation method is identical. If you want to experiment with specialty brown or cream strains, go for it once you have a successful grow under your belt. Stick to a proven white button strain for your first run.
Getting the substrate right
Agaricus bisporus is a compost-loving species. It evolved to grow in nutrient-rich, decomposed organic material, and you cannot substitute a generic hardwood sawdust mix the way you might for oysters. You need a manure-based substrate. The classic home-grower mix is roughly equal parts aged horse manure and straw, though you can also use a blend of composted manure, wheat straw, gypsum, and a nitrogen supplement like soy hulls or cottonseed meal. Commercial growers call this Phase I and Phase II compost, but at home you are essentially working with well-aged, thermophilically composted organic matter.
If you do not have access to horse manure, bagged mushroom compost from a garden center works as a base, though yields are usually lower. Whatever you use, the substrate needs to be pasteurized before spawning, not fully sterilized. The goal is to knock back competing organisms while preserving the beneficial bacteria that actually support Agaricus growth. You do this by bringing the substrate to around 60 to 70°C (140 to 160°F) and holding it there for one to two hours, either by baking it in a covered roasting pan, using a steam pasteurizer setup, or by hot water soaking and draining.
After pasteurization, let the substrate cool to below 30°C before you do anything else. Spawning into hot substrate kills mycelium fast. Target a moisture content where the substrate holds together when squeezed but does not drip free water. Free water in your substrate creates conditions that favor bacterial diseases, including a problem historically called mummy disease, so err on the damp side rather than wet.
The casing layer: do not skip this step
Agaricus bisporus will not fruit reliably without a casing layer applied over the colonized substrate. This is one of the things that makes it different from most other mushrooms people grow at home. The casing layer is not a food source for the mycelium. It is a physical and microbial trigger that switches the fungus from vegetative growth to producing fruiting bodies. Without it, you will just keep growing mycelium indefinitely.
The standard casing mix is about 80% peat moss and 20% agricultural lime (calcium carbonate or dolomite lime). Mix them together, add water until the mixture reaches about 70 to 80% moisture (it should feel wet and compress easily but not drip), and then pasteurize the casing separately before use. You can pasteurize casing by spreading it on a baking tray and heating it at around 82°C (180°F) for an hour, or by soaking it in hot water and draining.
Apply the casing layer at 3 to 5 cm (roughly 1.5 to 2 inches) thick, spread evenly over the fully colonized substrate. Uneven casing depth causes uneven pinning, so take a few extra minutes to level it off. After applying the casing, mist it lightly if it looks dry on the surface, and then go back to maintaining high humidity while the mycelium grows up through the casing layer.
Inoculation and colonization: the patience phase
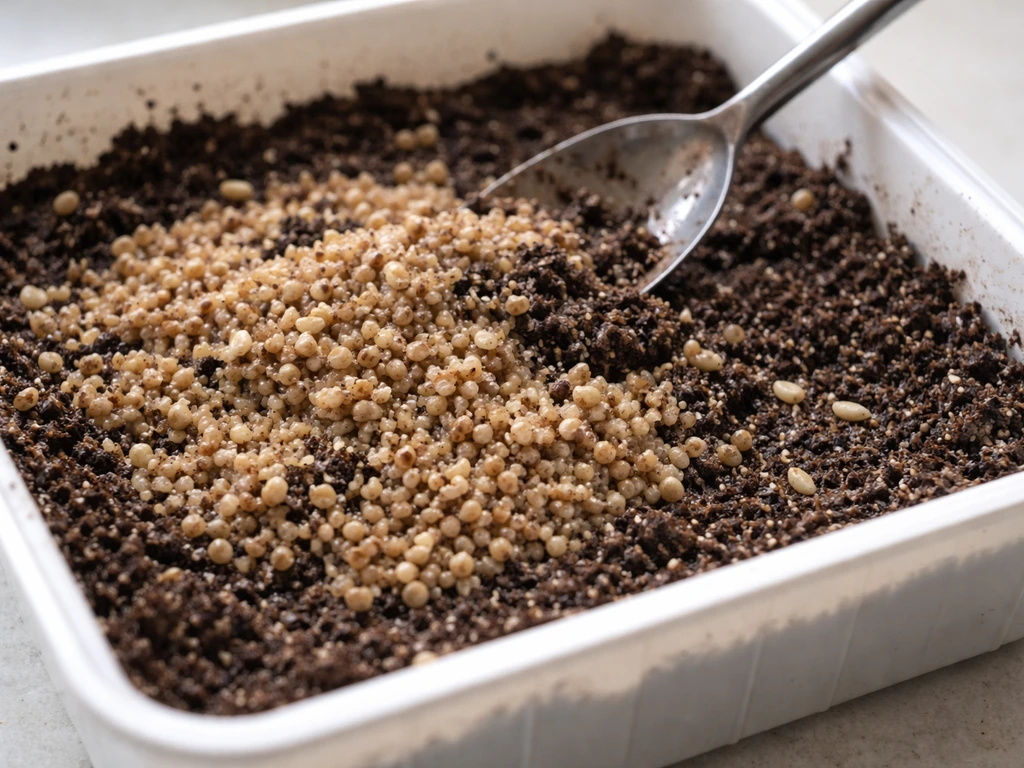
Once your substrate has cooled to below 25°C after pasteurization, mix in your spawn thoroughly. A spawning rate of around 2 to 3% by weight of substrate is typical for home grows, though you can go up to 5% if you want faster colonization. Mix the spawn in evenly by hand or with a clean tool, then press the substrate down into your container and smooth the surface. You want good contact between the substrate and the container walls, with no large air pockets.
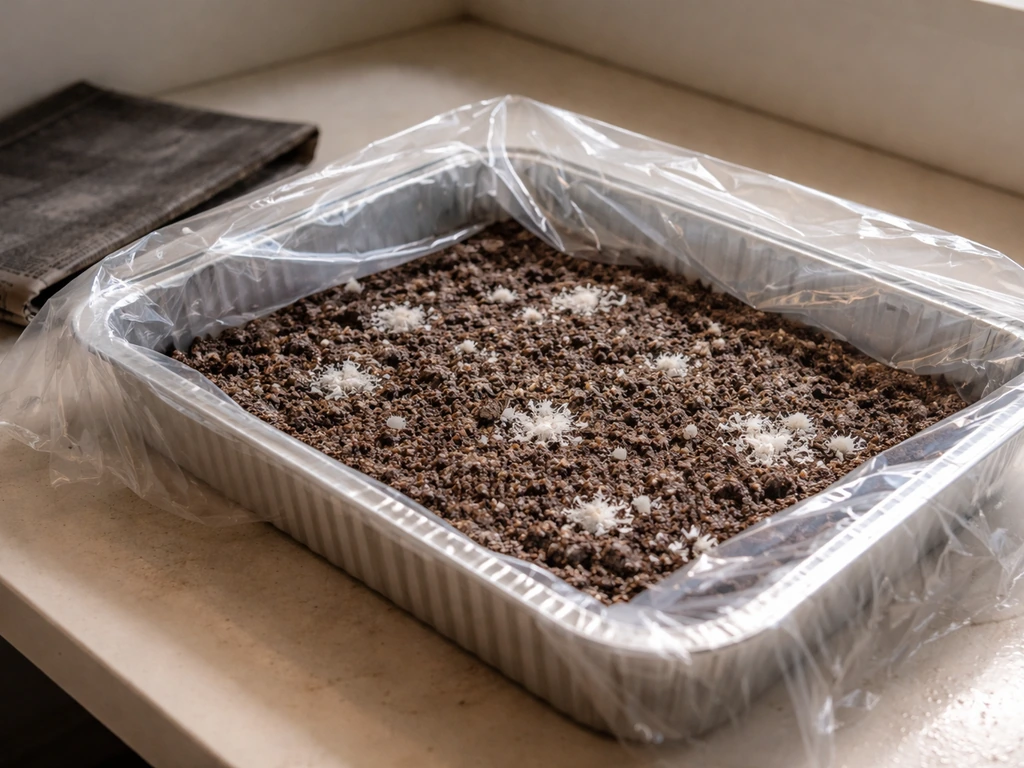
Cover the surface loosely with a plastic sheet or damp newspaper to hold moisture during the colonization phase. Some growers place the whole container inside a plastic bag with a few small holes for minimal gas exchange. During this spawn-run phase, keep the temperature between 22 and 25°C (72 to 77°F). CO₂ levels can be high during this phase, in the range of 10,000 to 15,000 ppm, which actually helps the mycelium run. Do not vent aggressively during colonization.
Colonization typically takes 14 to 21 days. You will see white mycelium spreading through the substrate as it progresses. Watch the temperature carefully: if the compost heats above 27 to 29°C (80 to 85°F) due to metabolic activity, you risk damaging or killing the mycelium. Check the actual substrate temperature, not just the air temperature, and cool the room down if needed. Once the substrate is fully colonized and you can see white mycelium across the surface, you are ready to apply the casing layer.
Avoiding contamination during colonization
The most common contamination in Agaricus grows is green mold (Trichoderma species), which thrives when substrate moisture is too high, temperature is too warm, or the pasteurization step was not thorough enough. Work cleanly at every step: wipe down surfaces with isopropyl alcohol, use clean tools, and wash hands well before handling spawn. If you see green or black patches spreading through the substrate early in colonization, those sections are contaminated and the affected material should be removed and discarded.
Fruiting conditions: the temperature shift is everything
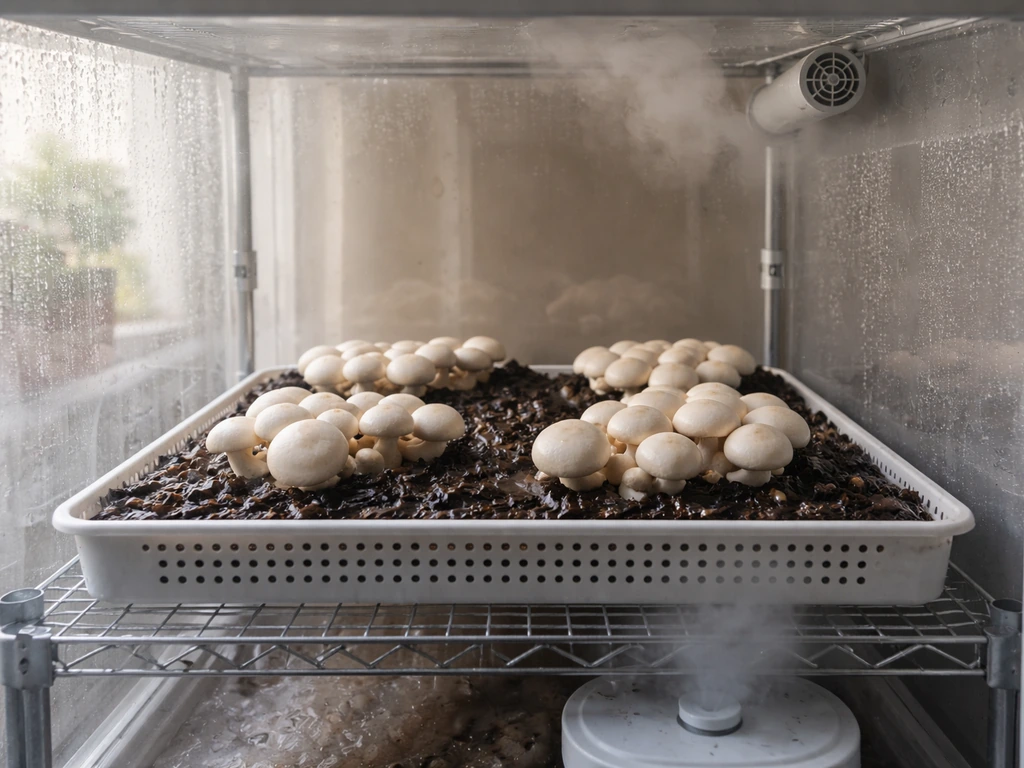
Once the casing layer is applied and the mycelium has grown up into it (usually seven to ten days after casing), it is time to trigger fruiting. The main trigger is a temperature drop combined with increased fresh air exchange. Move from your 22 to 25°C spawn-run conditions down to 16 to 18°C (60 to 65°F). At the same time, increase ventilation to bring CO₂ levels down from the 3,000 to 5,000 ppm range during case run to somewhere around 800 to 1,500 ppm during fruiting. At home this means opening your fruiting chamber or increasing fresh air exchange several times a day.
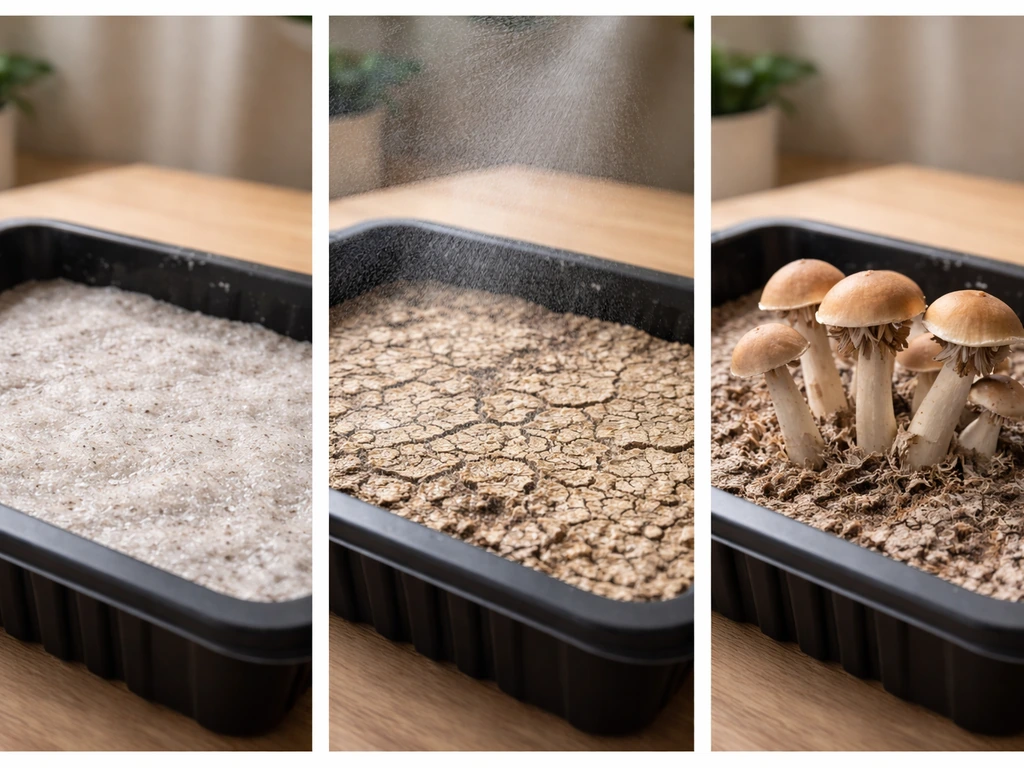
Relative humidity during fruiting should sit around 85 to 90%. Too low and the casing dries out and pins abort. Too high and you risk bacterial blotch. Mist the walls of your fruiting chamber rather than directly misting the developing pins, which can cause surface spotting. Agaricus bisporus is one of the few culinary mushrooms that actually prefers low light or darkness during fruiting, so you do not need grow lights or even a window. A dark corner works fine.
Pinning typically begins seven to fourteen days after the temperature drop and casing. You will see tiny white knots forming just below the surface of the casing layer, then they push through and develop into recognizable mushroom caps. From first pin to harvest-ready button is usually four to seven days depending on temperature.
Harvesting timing
Harvest by maturity, not by a fixed size. Button mushrooms are ready when the cap is still fully closed and the veil connecting the cap edge to the stem has not yet torn. Once that veil breaks and the gills are exposed, the mushroom is at the cremini stage and will continue into portobello territory quickly. For the classic button look, harvest before the veil breaks. Twist and pull rather than cutting to minimize leaving stem stumps that rot in place and invite bacteria.
Troubleshooting common problems
| Problem | Likely Cause | Fix |
|---|---|---|
| No pins after casing | Temperature too high, CO₂ too high, or casing too dry | Drop temp to 16–18°C, increase fresh air exchange, mist casing surface |
| Green or black mold patches | Contamination from Trichoderma or other molds | Remove affected areas, improve sanitation, check pasteurization process |
| Thin, leggy pins with elongated stems | CO₂ too high during fruiting | Increase fresh air exchange, ventilate more frequently |
| Pins aborting (turning yellow or brown) | Casing drying out, sudden temperature spike, or over-misting | Stabilize humidity at 85–90%, avoid misting directly on pins |
| Weak first flush, almost nothing in later flushes | Substrate too wet or too dry, or spawn rate too low | Check substrate moisture, increase spawn rate next grow |
| Mycelium not colonizing substrate after 3+ weeks | Spawn stored too long, substrate too hot at inoculation, or contamination | Use fresh spawn, verify substrate cooled below 25°C before spawning |
| Bacterial blotch (brown, slimy patches on caps) | Excess free water on caps, humidity too high | Reduce surface misting, improve air circulation, harvest affected mushrooms early |
The most demoralizing failure I see with beginners is skipping or rushing the pasteurization step because the substrate smells fine and looks okay. Raw or under-pasteurized compost is loaded with competitor organisms that will outcompete Agaricus mycelium every time. Do not skip it. The hour you spend pasteurizing is the hour that decides whether your whole grow succeeds or fails.
Scaling up and keeping your workflow clean
Start with one or two trays totaling around 10 to 15 litres of substrate. At that scale you can manage everything by hand, dial in your specific conditions, and understand where your setup tends to fail. A single 10-litre tray of well-managed substrate can yield 200 to 400 grams of mushrooms across two or three flushes, with the first flush being the heaviest. Do not expect commercial yields from a home setup, especially at first.
Once you have two or three successful grows, you can scale up by running multiple trays at staggered stages. While one tray is fruiting, another is colonizing, and a third is having its casing applied. This gives you a near-continuous harvest rather than feast-and-famine cycles. At the 50 to 100 litre scale you will want a dedicated fruiting chamber, which can be as simple as a large plastic storage bin with a lid and some holes drilled for air exchange.
A simple sanitation routine makes a huge difference at any scale. Before and after each grow cycle, wipe down all containers and surfaces with 70% isopropyl alcohol or a diluted bleach solution (1 part bleach to 10 parts water). Let everything dry fully before the next use. Used substrate should be composted or discarded away from your growing area, because spent mushroom substrate can harbor competing organisms and pathogens that will re-infect your next grow if it sits nearby.
Food safety, handling, and storage
Fresh Agaricus bisporus mushrooms have a short shelf life at room temperature: expect one to three days at 20 to 25°C before quality degrades noticeably. Refrigerating them immediately after harvest extends that to five to eight days. A ScienceDirect study on white mushrooms (Agaricus bisporus) similarly finds that refrigerated storage slows mushroom metabolism, while very prolonged storage can reduce quality. Store them in a paper bag or a container with a paper towel inside to absorb excess moisture. Plastic bags trap humidity and cause slimy deterioration quickly. For longer storage, slice and dry them in a food dehydrator at around 40°C until fully brittle, or freeze them after briefly blanching in boiling water.
Handle freshly harvested mushrooms as you would any fresh produce. Do not harvest with dirty hands, and avoid letting them sit in standing water. Mushrooms grown on properly pasteurized, manure-based substrate are perfectly safe to eat when handled cleanly and cooked. If you grow on unverified or improperly prepared substrate, or if you notice any unusual smells, sliminess beyond normal surface moisture, or unusual colors on your caps, discard those mushrooms.
After each flush, remove any remaining stumps, dead pins, and debris from the casing layer surface before the next flush develops. This debris harbors bacteria that cause blotch and reduces the yield of subsequent flushes. Water the casing lightly after cleaning to rehydrate it, hold humidity, and wait for the next wave of pins. Most home grows produce two to three good flushes before the substrate is spent. After that, the compost makes excellent garden fertilizer.
A realistic summary of the full cycle
- Prepare and pasteurize your manure-based substrate (1 to 2 days, including cooling time)
- Mix in grain spawn at 2 to 5% by weight and pack into trays or containers
- Colonize at 22 to 25°C with humidity at 95% and high CO₂ for 14 to 21 days
- Prepare and pasteurize your peat-lime casing mix separately
- Apply casing at 3 to 5 cm thickness over fully colonized substrate
- Case run: hold 22 to 25°C until mycelium grows up into casing (7 to 10 days)
- Trigger fruiting: drop temperature to 16 to 18°C, increase fresh air exchange to reduce CO₂ to 800 to 1,500 ppm, maintain humidity at 85 to 90%
- Pins appear 7 to 14 days after the temperature drop; harvest before the veil breaks
- Clean casing surface after each flush, rehydrate lightly, and wait for the next flush
- Repeat for two to three flushes, then compost spent substrate
Agaricus bisporus is more involved than oyster mushrooms and has a longer cycle, but it is far from impossible at home. The substrate and casing steps are where most beginners struggle, so read those sections more than once before you start. If you are also curious about other Agaricus-related grows, the cultivation approach for this species is quite different from what would be involved with fly agaric, which is a mycorrhizal mushroom and cannot be grown on compost the same way. Stick with bisporus, nail the pasteurization and casing steps, and you will have fresh homegrown mushrooms on the table within a couple of months. To learn the full process step by step, follow this guide on how to grow agarikon mushrooms from substrate prep through fruiting. If you are wondering can you grow fly agaric mushrooms, the approach is different from edible Agaricus and requires extra caution.
FAQ
How do I know whether I am checking the right temperature (air vs substrate) during colonization?
In most home setups you should use temperatures and a timing window based on the substrate itself, not the room. Even if the air is 22 to 25°C, the compost can climb above 27 to 29°C during colonization, which stresses or kills the mycelium. Use a probe thermometer to check the center of the tray, and lower room temperature or increase airflow if the substrate temperature rises.
What should I do if my casing layer is drying out or cracking?
Do not aim for “fully dry” casing. If the casing feels powdery or cracks when you touch it, rehydrate by misting lightly around the chamber and, if needed, misting the casing surface very gently, then wait for rehydration to absorb before re-ventilating. Sudden over-wetting can trigger bacterial blotch, so adjust moisture incrementally rather than soaking.
How can I tell the difference between normal compost smell and contamination in Agaricus?
If your substrate smells strongly sour, ammonia-like, or putrid after pasteurization, or you see green patches early, treat it as contaminated and remove it rather than trying to salvage it. A mild earthy compost smell is normal, but foul odors or fast-spreading discoloration are red flags that pasteurization or handling was inadequate.
Can I pasteurize with a steam method instead of hot water soaking, and what can go wrong?
Yes, you can use a steam approach, but your goal is the same heat exposure, around 60 to 70°C held for about one to two hours, with consistent penetration. Steam methods fail when the substrate is too thick for heat to reach the center, so use smaller batch sizes or thinner layers and verify with a probe thermometer.
Is casing thickness important, and what happens if I apply too little or too much?
A thicker casing depth is not always better. Too thin casing can lead to sparse pinning, uneven mushrooms, or pin abortion, but too thick can delay pinning and make the surface harder to manage. Staying within about 3 to 5 cm and spreading evenly is the practical target for home trays.
How do I choose the right harvest moment when growth dates vary?
Harvest timing should follow veil condition, not a fixed day count, because temperature and fresh air exchange change development speed. If you wait until the veil breaks, the mushroom will quickly shift toward cremini and then portobello, with a different texture and shorter culinary window for the “button” style.
Why do my second or third flush pins come in unevenly, and how do I fix it?
After cleaning the casing surface, lightly rehydrate it, then avoid spraying developing pins directly. The typical approach is to clean first, mist the chamber walls (not the pins), and keep humidity around the high 80s. If you see surface spotting or patchy growth, reduce direct wetting immediately.
What are the most common reasons for poor pinning after casing?
If you get weak pinning after casing, the usual causes are casing dryness, insufficient fruiting fresh air exchange, or casing that was not pasteurized. Check that your fruiting chamber can drop to about 16 to 18°C and that you are actually exchanging air enough to reduce CO₂, then verify casing moisture and rehydrate cautiously if it is too dry.
Should I keep the grow area sealed or vented during colonization versus fruiting?
Many growers do it in sealed bags or covered bins early on, but you still need some controlled gas exchange. During colonization, avoid aggressive venting, while during fruiting you should increase fresh air several times a day. If you see long stems and small caps, that often points to CO₂ and airflow imbalance during fruiting.
How do I prevent condensation problems in a small fruiting chamber?
You can, but avoid building a system that traps condensation on caps and casing. Use paper towels or absorbent material inside the chamber to control drips, and keep surfaces dry while maintaining humid air. Condensation can fuel bacterial blotch and leave mushrooms with mottled spots.
When should I change variables like strain, spawn rate, or substrate mix?
For your first runs, stick to pasteurized manure-based substrate and a proven white button spawn supplier. If you want to switch to another strain later, keep everything else the same (spawn rate, casing mix, fruiting temperature) for at least one cycle so you can attribute changes to genetics rather than setup differences.
Are homegrown Agaricus safe to eat if something looks slightly off?
Food safety depends on the inputs and your observation. If you used unverified substrate, see unusual colors, or notice strong spoilage odors or sliminess beyond normal moisture, discard the mushrooms. Cooking reduces risk from normal soil-like handling, but it does not make contaminated or spoiled products safe to eat.
What is the best response if I see green mold starting during colonization?
If green mold appears, remove the affected sections promptly, but consider discarding the whole tray if contamination spreads quickly or extends deep into the substrate. Clean surrounding tools and surfaces, reduce excess moisture, and confirm pasteurization parameters for the next batch. Trying to “wait it out” often wastes substrate and can seed contamination into the fruiting area.
Does spawning technique affect yield, and how should I mix and place spawn in the tray?
Spreading spawn more evenly helps, but pressing and smoothing matters too. Large air pockets along tray surfaces can slow colonization and create weak areas that later fruit unevenly. Mix thoroughly, distribute at a consistent rate, then compact lightly so the substrate makes good contact with container walls.