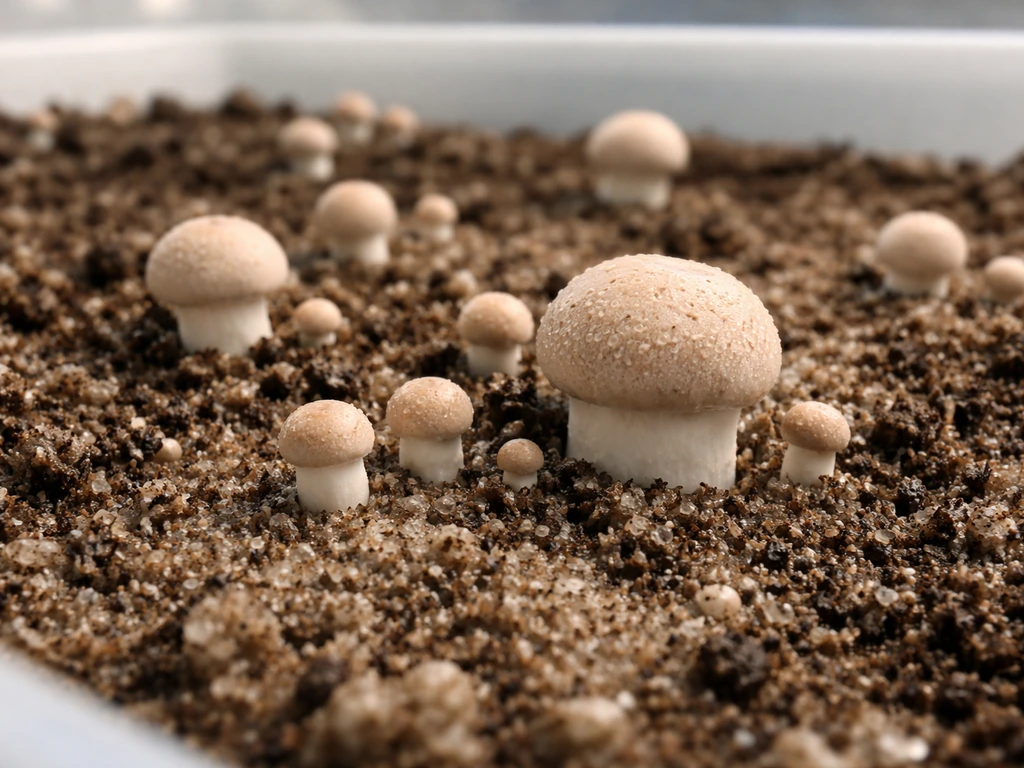
Growing Agaricus bisporus at home is absolutely doable, but it works differently from most other mushrooms you might have tried. These same incubation and fruiting principles are the core of how to grow agarikon mushrooms too, even though you will adjust the wood-based approach. Button mushrooms need a composted substrate, a casing layer on top, and specific temperature and CO2 conditions to pin. Get those three things right and you will reliably pull multiple flushes of firm, white mushrooms from a single bed. Skip or rush any one of them and you will spend weeks staring at a flat, inert surface wondering what went wrong.
Agaricus bisporus How to Grow: Step-by-Step Guide

Marcus Holloway
15 May 2026
What you need to get started
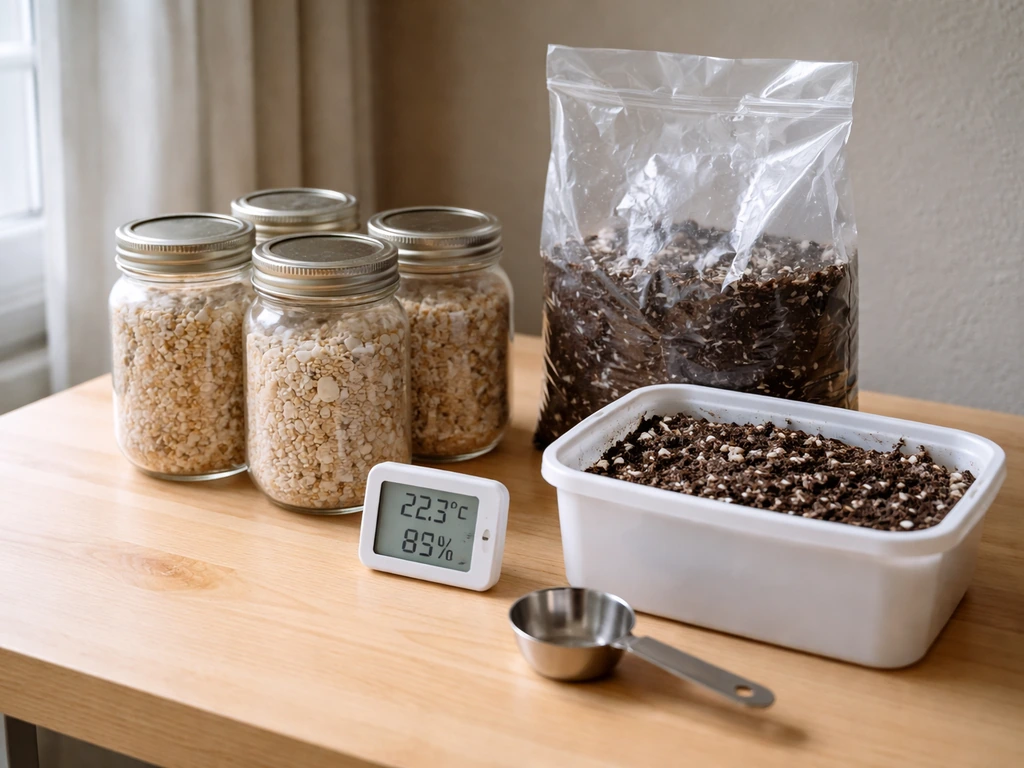
Agaricus bisporus has more specific requirements than oyster mushrooms or lion's mane, so it helps to gather everything before you begin rather than improvising mid-grow.
Spawn
Use grain spawn, not spores. Home growers sometimes ask about spore syringes, but Agaricus spores are notoriously difficult to work with and commercial strains are produced vegetatively anyway. Grain spawn (rye or wheat berries colonized with Agaricus mycelium) is widely available, affordable, and gives you reliable, consistent results. Buy from a reputable supplier and check the production date. Fresh spawn colonizes faster and resists contamination better.
Substrate
Agaricus bisporus is a compost-loving species. It does not colonize hardwood sawdust the way oysters do. Your substrate needs to be a well-composted, nitrogen-rich material. At home, the most practical option is either a purpose-made mushroom compost (sometimes sold as Phase II compost, meaning it is already pasteurized and conditioned) or a DIY blend of straw, horse manure, and gypsum that you compost yourself. Buying Phase II compost is the strong recommendation for beginners. It removes the messiest and most technically demanding step from the process.
Casing material
You need a casing layer to trigger fruiting. Agaricus will colonize compost happily but will not produce mushrooms without a non-nutritional surface layer applied on top. Traditional casing mixes use peat moss blended with ground limestone (to bring pH up to around 7.5), but coconut coir mixed with hydrated lime works as a solid peat-free alternative. You can also use a mix of spent compost and garden lime in a pinch. Whatever you use, it needs to hold moisture well and have a near-neutral to slightly alkaline pH.
Equipment and containers
- Shallow trays or beds: plastic storage totes, wooden trays, or raised beds work well. Depth of 6–8 inches (15–20 cm) is enough for compost plus casing.
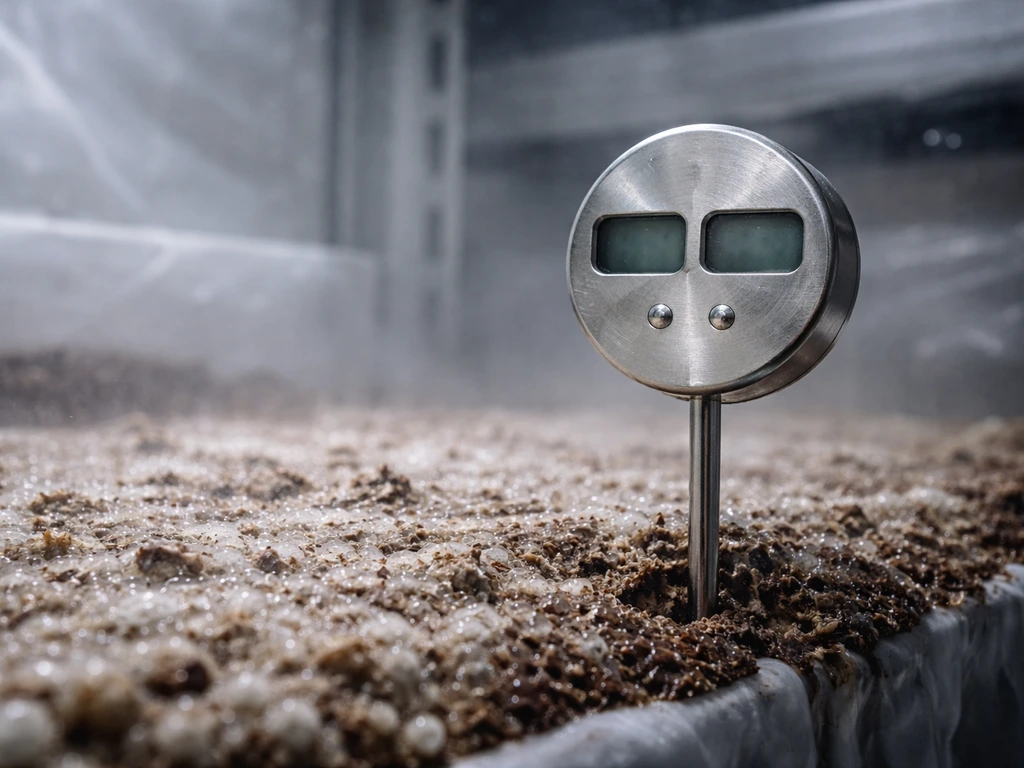
- Thermometer and hygrometer: non-negotiable. You need to track both temperature and relative humidity.
- Spray bottle or low-pressure garden sprayer for misting the casing layer.
- Plastic sheeting or a humidity tent to maintain moisture during incubation.
- A space you can keep cool (around 16–18°C / 61–65°F) during fruiting, like a basement, garage, or cool spare room.
- Optional: a small fan for fresh air exchange and a humidifier for larger setups.
Substrate prep and inoculation, step by step
If you bought ready-made Phase II compost, much of the hard work is done. The compost has already been through pasteurization (heated to around 60–65°C to kill competitors and pathogens) and conditioning (gradually cooled to around 45°C over several days to allow beneficial bacteria to stabilize the substrate).
Conditioning in that study involved pasteurizing compost at about 60°C for roughly 6, 10 hours, then gradually cooling to around 45°C over 4, 5 days before cooling to about 25°C for spawning pasteurizing at ~60°C for ~6–10 hours. By the time it reaches you, it should be cooled to roughly 25°C and ready to spawn.
If you are making your own compost, you need to replicate that process before you touch it with spawn.
- Confirm substrate temperature is at or below 25°C before spawning. Spawning into hot compost kills the mycelium immediately. If in doubt, wait.
- Measure out your spawn. A good rate for home growers is approximately 1 unit of spawn per 4–5 square feet of bed surface, which corresponds to roughly 3% or more of the compost dry weight. You can go lighter (1 unit per 5–7 sq ft, around 1–2% dry weight) to save on spawn cost, but colonization will be slower and contamination risk rises.
- Break up the spawn thoroughly and mix it evenly through the top half of the compost. Even distribution is more important than total quantity. Clumps of spawn in one spot and bare areas elsewhere leads to patchy colonization.
- Fill your trays to a depth of about 4–6 inches (10–15 cm) of spawned compost.
- Cover the surface loosely with plastic sheeting or damp newspaper to retain moisture and block airborne contaminants.
- Move trays to your incubation space. Target temperature is 24–25°C for spawn run. This is warmer than your fruiting temperature, so you may need a separate warm spot for this stage.
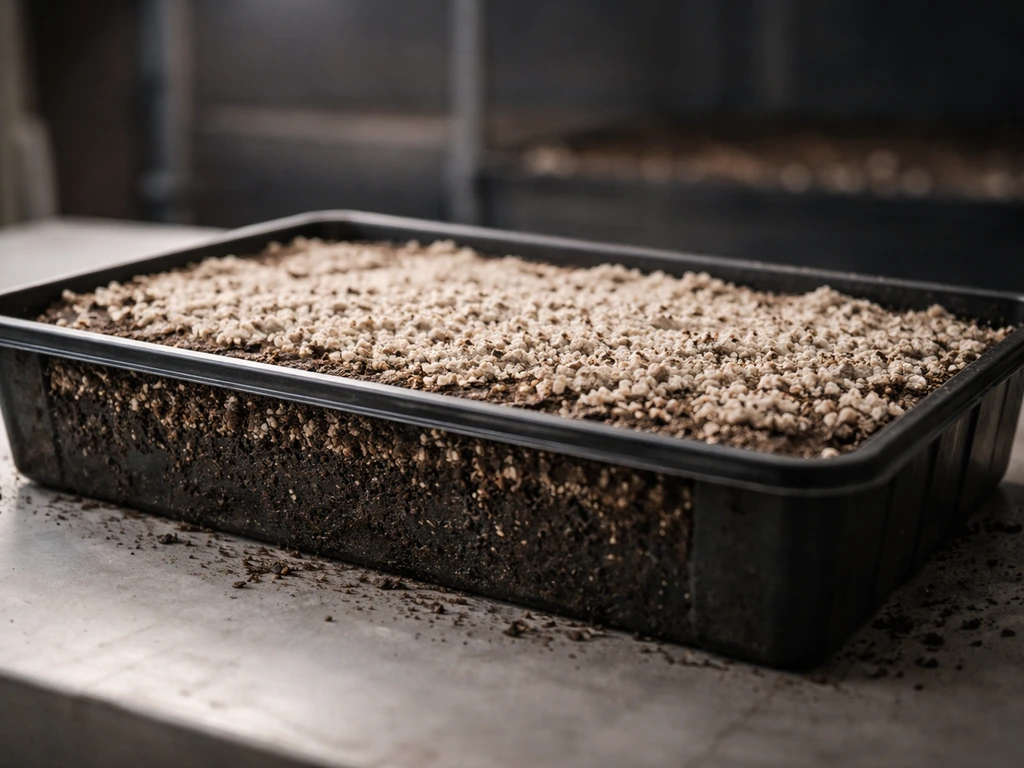
Applying and managing the casing layer
Casing is the step most beginners underestimate, and it is genuinely the difference between a productive crop and a frustrating failure. The casing layer does not feed the mushrooms. Its job is to hold moisture at the surface, maintain a microclimate that triggers the fungus to switch from vegetative growth to reproduction, and physically support the developing pins.
Wait until the mycelium has fully colonized the compost surface before casing. You will see white, fluffy growth covering the compost, often with rope-like strands called rhizomorphs forming. This usually takes 10–14 days from spawning at the right temperature. Do not rush this step. Casing over under-colonized compost gives you a weak crop at best.
- Prepare your casing mix. A simple home recipe: 2 parts peat moss to 1 part hydrated lime (or ground limestone), mixed well, with water added until the mix feels like a wrung-out sponge. Check pH if you can; target 7.0–7.5.
- Apply the casing in an even layer, 1.5 to 2 inches deep (approximately 4–5 cm). This depth is important. Too thin and pins struggle to form properly; too thick and CO2 can get trapped near the surface.
- Smooth the surface gently without compacting it. The casing needs to stay loose and porous.
- Return the trays to your incubation space (24–25°C) and cover loosely with plastic to slow moisture loss.
- Mist the surface lightly every day or two. Your goal is to keep the casing at field capacity, meaning it holds moisture like a damp sponge without water pooling on the surface. Under-watering at this stage is one of the most common reasons pins never develop.
- After 5–7 days you should start to see white mycelium growing up into the casing. Once it reaches the surface and forms rhizomorphs, you are ready to initiate fruiting.
Fruiting conditions: dialing in the environment
Transitioning from incubation to fruiting requires two deliberate changes: drop the temperature and increase fresh air. These environmental shifts signal to the mycelium that it is time to produce mushrooms. Getting this transition right is the single most reliable way to trigger pinning.
Temperature
Drop from your incubation temperature of 24–25°C down to 16–18°C (61–65°F). This cooler range is where Agaricus bisporus produces its best yields. Higher temperatures push the mushrooms to mature faster but reduce quality and total yield. Lower than 14°C slows everything down significantly. A basement or cool garage in spring or autumn can naturally hit this range, which makes seasonal growing outdoors in beds a viable option if indoor climate control is difficult.
Humidity
Keep relative humidity at 80–90% in your growing space. Below 80% and the surface of the casing will dry out between mistings, causing pins to stall or caps to crack. Above 90% consistently can encourage bacterial blotch and other surface issues. Mist the casing (not the pins themselves once they appear) once or twice daily as needed. In a small tent setup, a hand sprayer works fine. For a larger shelf or tray setup, a small cool-mist humidifier on a timer makes life a lot easier.
Fresh air and CO2
CO2 management matters more for Agaricus than for most other home-grown species. High CO2 levels suppress pinning and cause long, thin stems with small caps. Ambient outdoor air is around 400 ppm CO2. For fruiting, you want to keep levels low by exchanging air regularly. In practice this means fanning or opening your grow space for at least 10–15 minutes several times a day, or running a small PC fan on a timer for fresh air exchange. Do not blast cold, dry air directly over the surface, though, or you will dry out the casing and stall pin development. Indirect airflow around the trays is what you want.
Light
Agaricus bisporus does not need light to fruit and actually grows in complete darkness in commercial setups. Indirect ambient light is fine and will not hurt anything, but do not waste money on grow lights for this species. If anything, avoid direct strong light which can dry the surface.
Timeline: what to expect from spawn to harvest
Agaricus bisporus is not a fast mushroom compared to oysters. Plan for roughly 6–9 weeks from spawning to first harvest, depending on how quickly you sourced your compost and how well you manage the environment. Penn State Extension notes that harvest typically begins about 15, 21 days after casing, which is roughly 7, 8 weeks after composting starts harvest typically begins about 15–21 days after casing.
| Stage | Timeframe | What to look for |
|---|---|---|
| Spawn run (compost colonization) | 10–14 days at 24–25°C | White fluffy mycelium spreading through and over compost surface |
| Casing applied | Day 10–14 after spawning | Even 1.5–2 inch layer applied, surface kept moist |
| Casing colonization | 5–10 days after casing | Mycelium grows up into casing, rhizomorphs visible at surface |
| Pinning begins | 15–21 days after casing | Tiny white pin heads appear across casing surface |
| First harvest (flush 1) | 18–21 days after casing | Caps reach desired size, veils still intact or just breaking |
| Between flushes | 7–10 days rest | Surface maintenance, light watering, wait for next flush |
| Subsequent flushes | Every 7–10 days for 3–5 flushes | Yields typically decline after flush 2–3 |
Three to five flushes from a single tray is realistic. The first two flushes are usually the most productive. By flush four or five, the compost is largely spent and contamination risk increases. Commercial growers often pull crops after three flushes, which is a reasonable benchmark for home growers too.
Troubleshooting the most common problems
No pins forming
This is the most common complaint and it almost always comes down to one of three things: CO2 is too high (not enough fresh air exchange), temperature is still too warm (did not drop to 16–18°C), or the casing is too dry. Go through each one systematically. Increase your fresh air exchanges, confirm your thermometer reading against a second source, and mist more frequently to bring the casing back to a moist but not waterlogged state. Rhizomorphs need to form in the casing before pins appear, so if you have not seen white strands growing up through the casing at all, the mycelium may still be colonizing and you need to wait.
Green mold (Trichoderma)
If you see patches of bright green powdery mold on your casing or compost surface, that is Trichoderma. It spreads fast, creates non-productive dead zones, and can wipe out a crop if it gets established. It usually enters through contaminated tools, unwashed hands, or spawn that was not handled cleanly. Affected areas will not recover. Remove contaminated sections immediately and dispose of them away from your growing area. For the rest of the tray, increase fresh air, reduce surface moisture slightly, and sterilize any tools you use in the space. Prevention is far easier than treatment: always wash hands, use clean tools, and do not reuse substrate bags or containers without sterilizing them.
Cobweb mold
A fine, spider-web-like white growth spreading rapidly over the casing surface is likely cobweb mold (Cladobotryum species). It looks alarming but is usually manageable. Mist the affected area lightly with water and fan off the excess moisture. Cobweb mold thrives in high humidity with stagnant air, so increasing fresh air exchange usually stops its spread. If it is touching developing mushrooms, wipe it off gently with a damp cloth.
Dry bubble (Verticillium/Lecanicillium)
Dry bubble causes malformed, lumpy mushrooms that look like small, irregular masses rather than normal caps and stems. It is caused by Lecanicillium fungicola, a fungal pathogen that attacks Agaricus during the fruiting phase and lives in the casing layer. There is no effective home treatment once it appears. Remove affected mushrooms immediately, do not let them sporulate, and discard the casing from affected areas. Sterilize your tools and hands thoroughly. Prevention means sourcing clean spawn and casing material and avoiding cross-contamination between grows.
Weak yields or drying out between flushes
If pins form but stay small, caps crack, or the flush is thin, the most likely cause is the casing drying out too fast. This often happens when air circulation is too direct or continuous. You want fresh air exchange, not a constant wind blowing over the surface. Redirect your fan so air flows around the trays rather than across them, increase misting frequency, and consider tenting the trays loosely with plastic between flushes to conserve moisture. Between flushes, after you have harvested and cleaned up any leftover stem bases, apply a light surface misting and leave the casing undisturbed to allow the next flush to develop.
Casing not colonizing or staying bare
If no mycelium is growing up through your casing after 10 days, check the pH of your casing mix. Too acidic a casing (below pH 6) can inhibit growth. Also check that the compost was genuinely fully colonized before you applied the casing. Applying casing too early is a common mistake. If the compost was not ready, the mycelium needs more time before it will push into the casing. In some cases, a thin additional layer of fresh casing applied over a bare surface can help restart colonization.
Harvesting, storing, and running the next flush
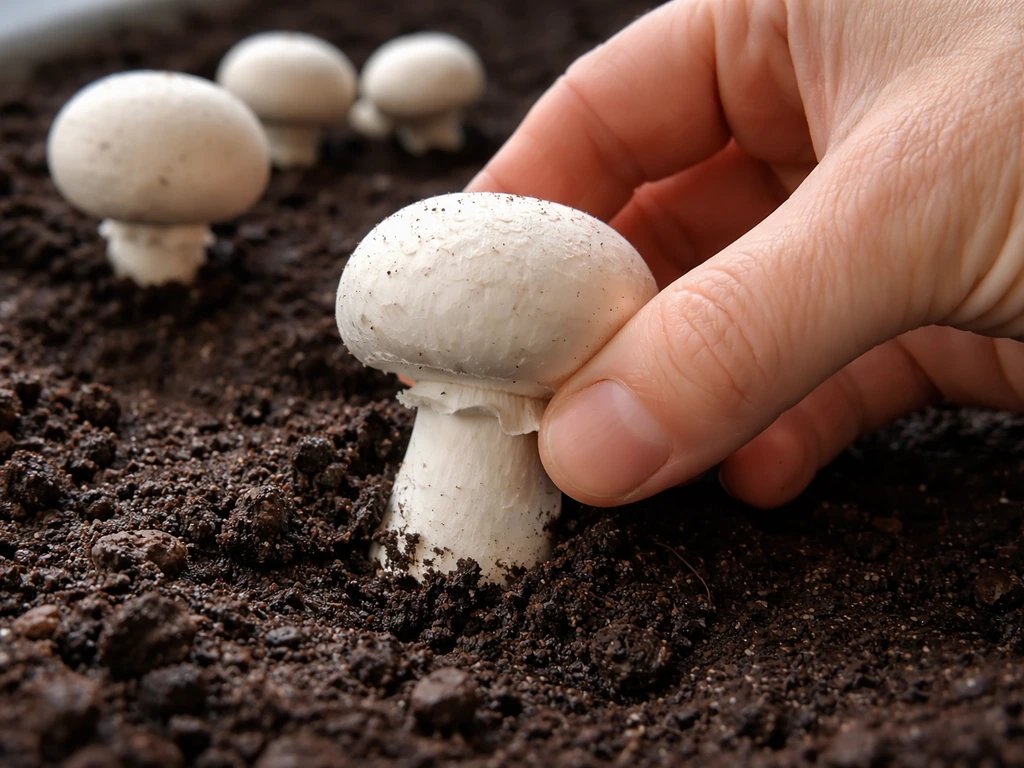
Harvest button mushrooms just before or as the veil underneath the cap begins to break. At this stage the caps are still firm, the flavor is at its best, and shelf life is longer. Once the veil tears and the gills are exposed, the mushroom is technically mature and will keep for a shorter time. For crimini or portobello style (just larger, more mature Agaricus bisporus), let them grow bigger and allow the cap to open more fully.
To harvest, grip the mushroom firmly and twist slightly while pulling upward. Do not cut at soil level if you can avoid it. Leaving stumps in the casing creates rotting entry points for bacteria. After each harvest, clean up any remaining stem bases and damaged mushrooms from the casing surface. These remnants encourage bacterial blotch and mold if left behind.
Fresh Agaricus bisporus stores well in a paper bag in the refrigerator for up to a week. Avoid sealed plastic bags which trap moisture and accelerate softening. For longer storage, slice and dry them at 40–50°C in a food dehydrator, or sauté and freeze.
Between flushes, rest the bed for 7–10 days. Keep the casing lightly moist and the space at fruiting temperature. You do not need to re-spawn or add more compost between flushes. The mycelium is still active in the compost below and will produce another wave of pins when conditions remain right. Yields will gradually decrease with each flush, and by flush three or four, it is worth thinking about whether to start a fresh bed. At that point, the spent compost is excellent for the garden as a soil amendment.
Indoor vs outdoor growing: a quick comparison
Most of this guide assumes an indoor setup with controlled conditions, which is the most reliable approach. But Agaricus bisporus can also be grown in outdoor beds during cool, stable weather in spring or autumn when temperatures naturally sit in the 16–18°C range. Outdoor beds in shaded garden spots can work well and require less equipment, but you lose control over temperature swings, rain, and pest access. For a first grow, indoor trays give you far more control over the critical variables and a much better chance of understanding what is working and what is not.
If you enjoy this species and want to branch out, Agaricus bisporus is part of a larger family worth exploring. The cultivation approach here is quite different from species like fly agaric, which has its own very specific and challenging requirements, or agarikon, which is an entirely different genus with a long-term woody growth habit. Fly agaric mushrooms have very specific requirements, so it is worth planning the grow differently from Agaricus bisporus.
Fly agaric has its own very specific and challenging cultivation requirements, so it helps to follow a dedicated guide for temperature, substrate choices, and safety precautions. Staying with Agaricus bisporus as your base and getting the compost-casing-fruiting workflow dialed in is genuinely one of the most satisfying grows in home mushroom cultivation, and the techniques transfer well when you are ready to explore other varieties.
FAQ
Can I spawn Agaricus bisporus into warm compost from the bag?
Yes, but only if your compost is temperature-cured. If Phase II compost is still warm, spawning into it can trigger poor colonization and uneven casing fill-in. Let the bag sit until it has cooled to about room temperature, then spawn promptly and avoid leaving it for days at intermediate warmth.
How wet should the casing be, and what does “too wet” look like?
For humidity, focus on keeping the casing surface moist, not dripping. If you see water pooling on top of the casing, that is too wet and can favor bacterial blotch or malformed caps. A good target is a surface that feels consistently damp, glistens slightly, but does not shed drops when you tilt or lightly touch (with clean gloves).
What should I do if I can’t vent the grow space several times a day?
If you have to pause fresh-air exchange, do it gradually. Abruptly closing vents or stopping a fan for long periods often delays pinning or produces long, thin stems. A practical compromise is to maintain low, intermittent airflow, for example a short ventilation burst every few hours rather than one continuous blast.
My thermometer says I’m at 16–18°C, but pins are failing. How can I verify the temperature?
Test your thermometer before blaming the grow. Put both your thermometer and a second, known-good thermometer in the same spot for 10 to 15 minutes and compare readings. Miscalibration is a common reason people believe they hit the 16 to 18°C fruiting range when they are actually several degrees warmer.
Can I use tenting or a plastic cover to prevent casing from drying out?
Yes, if you notice you are getting fast drying between mist cycles. In that case, increase the humidity holding strategy rather than adding nutrients. Loosely tenting trays between flushes (while still allowing fresh air exchange) can reduce casing dry-out, and you can also mist slightly more frequently with shorter intervals.
Do I need to add new casing after each flush?
No. After harvesting, you typically do not need to “re-case” with fresh casing every time. The key is to remove damaged mushrooms and leave the existing casing intact, then lightly mist the surface and keep fruiting conditions stable for the next wave.
Should I mist directly on the pins once they start forming?
Around pin stage, misting should stay aimed at the casing surface and the air, not directly at newly forming pins. Direct sprays can knock pins loose, create puddling, and increase surface problems. Use a fine mist, apply lightly, and let the surface absorb before misting again.
How do I grow Agaricus bisporus into larger crimini or portobello types without reducing quality?
For crimini or portobello-style sizes, the goal is longer time and stable conditions, not warmer temperatures. Keep the same cooler fruiting range, and resist the urge to raise heat to “speed it up,” because higher warmth often reduces quality and total yield. Also ensure adequate airflow so stems stay thick rather than elongated.
If I find Trichoderma on one area, can I save the rest of the tray?
If Trichoderma appears, assume that particular section is not salvageable. Remove contaminated pieces quickly, keep them contained away from the main grow, and clean tools with an appropriate disinfecting step before returning. For the rest of the tray, reduce surface wetness slightly and increase fresh air, but do not expect the affected spots to recover.
What’s the best way to stop cobweb mold from returning after wiping it?
Cobweb mold is often controlled by improving airflow and reducing standing moisture, but it can come back if conditions stay stale. After you fan off excess moisture and wipe gently, keep fresh air exchange consistent and avoid over-misting the same zone repeatedly. If you see it recurring every cycle, reassess your venting schedule and how direct the airflow is over the casing.
If the casing seems to be too acidic, can I fix pH mid-grow and recover the crop?
If pH is the culprit, you will usually see slow or incomplete casing colonization, not random die-off later. The safest move is corrective prevention next grow: use a casing mix with the right alkalinity and do not keep repeatedly re-casing thin layers over and over. For the current grow, you may improve odds by waiting longer for the compost to catch up, then apply casing only once it is clearly ready.