Growing psychedelic mushrooms in Wisconsin is illegal under both state and federal law. Psilocybin and psilocin are Schedule I controlled substances in Wisconsin under Ch. 961 of the Controlled Substances Act, and manufacturing or cultivating them carries felony penalties. Spores themselves occupy a legal gray zone at the federal level since they don't yet contain psilocybin, but the moment you germinate them with intent to produce fruiting bodies, you're in territory that Wisconsin law treats as manufacturing a controlled substance. Before you go any further, verify the current state and federal rules yourself, because laws around psilocybin are shifting fast across the country. Before you try how to grow psychedelic mushrooms in Utah, make sure Utah and federal laws allow your plan verify the current state and federal rules yourself. What's true in Colorado or Oregon isn't true in Wisconsin right now.
How to Grow Psychedelic Mushrooms in Wisconsin: A Step-by-Step Guide


The legal reality for Wisconsin growers
Wisconsin Statutes § 961.41 makes it unlawful to manufacture, distribute, or deliver a controlled substance, and psilocybin is explicitly Schedule I under Wisconsin law. The penalties scale with amount and intent, but they're felony-level across the board. There's no state exemption for personal cultivation, home research, or ceremonial use as of May 2026.
At the federal level, psilocybin and psilocin are Schedule I under 21 CFR § 1308.11, classified by the DEA as having high potential for abuse and no currently accepted medical use. The DEA has acknowledged that dormant spores, which don't contain psilocybin or psilocin, may not themselves be controlled substances under the Controlled Substances Act. However, purchasing spores with the documented intent to cultivate them into psilocybin-producing mushrooms can still create liability. The legal line is thin and the risk is real.
The situation is genuinely different in other states. Colorado, for instance, has moved toward decriminalization and regulated access. Because the rules and access paths differ, you should only apply Colorado-specific guidance after checking current Wisconsin requirements. If you're curious how the legal landscape shapes cultivation guidance elsewhere, the approaches in places like Colorado or Illinois follow the same cultivation biology but under very different legal contexts. If you are looking for Illinois-specific guidance, review how Illinois treats psilocybin and cultivation so you can plan legally before you set up any grow. Wisconsin has not made those moves yet. Don't assume what applies elsewhere applies here.
The practical takeaway: consult a Wisconsin attorney familiar with controlled substance law before sourcing anything or setting up a grow. Laws are moving, and a specific legal opinion beats anything written in an article. This guide walks through the full cultivation workflow so you understand the process, but do not start until you've confirmed your legal standing. If you are looking for how to grow psychedelic mushrooms in Maine, focus first on Maine's current legality and any state-specific rules before planning a cultivation approach. Because the legality is a big part of the planning, make sure you understand the legal rules before you follow cultivation steps.
Choosing your species and matching the grow method
The most commonly cultivated psilocybin-containing species is Psilocybe cubensis. It's the starting point for most home growers because it's forgiving, colonizes quickly, and works with a wide range of substrates. P. cubensis is what the bulk of cultivation guides, including the steps below, are built around. If you're a beginner, this is the species your workflow should be designed for.
Other species like Psilocybe cyanescens or Psilocybe azurescens grow outdoors on wood chips in cooler temperatures, which actually suits Wisconsin's climate in shoulder seasons. However, outdoor cultivation introduces complexity: exposure, wildlife, weather unpredictability, and far less control over contamination. For a first grow, indoor P. cubensis on a grain-to-bulk workflow is easier to manage and troubleshoot.
The grow method you choose depends on your space, budget, and how much hands-on time you want to put in. The two most reliable beginner methods are the PF Tek (brown rice flour and vermiculite in half-pint jars) and grain-to-bulk (rye or wheat berries colonized in jars, then transferred to a bulk substrate like coco coir or pasteurized manure). PF Tek is simpler and lower yield. Grain-to-bulk takes a bit more preparation but produces significantly more mushrooms per cycle and scales easily.
| Method | Substrate | Difficulty | Yield per cycle | Best for |
|---|---|---|---|---|
| PF Tek | Brown rice flour + vermiculite | Beginner | Low to moderate (5–15g dry per jar) | First-time growers, small spaces |
| Grain-to-bulk | Rye berries + coco coir or pasteurized manure | Intermediate | Moderate to high (20–60g dry per tub) | Growers wanting bigger yields and multiple flushes |
| Outdoor wood chip beds | Hardwood chips | Intermediate–Advanced | Variable, season-dependent | Experienced growers, wood-loving species |
What you need before you start
Getting your supplies sorted before inoculation day matters. Running out of micropore tape mid-process or not having your fruiting chamber ready when colonization finishes are the kinds of small failures that tank a whole grow. Here's what you need for a grain-to-bulk P. cubensis setup:
Spores and spawn
Spore syringes or spore prints are sold legally in many states for microscopy purposes. Grain spawn, liquid culture, or agar transfers are your other starting points if you're working from an established culture. For a beginner, a quality spore syringe from a reputable supplier is the simplest starting point. Look for suppliers that test for contamination and have a history of viable genetics.
Substrates
- Rye berries or wheat berries for grain jars (grain spawn)
- Coco coir and vermiculite mixed 50/50 for bulk substrate (inexpensive, low contamination risk)
- Pasteurized manure and coco coir blend for higher-nutrient bulk grows (higher yield, higher contamination risk)
- Brown rice flour and vermiculite if using PF Tek
Equipment and tools
- Quart-sized wide-mouth mason jars with modified lids (polyfill filter holes or self-healing injection ports)
- Pressure cooker (15 PSI capable) for sterilizing grain jars — a 23-quart All American or similar works well
- 70% isopropyl alcohol for surface sterilization
- Still air box (a clear tote with arm holes cut in) or a flow hood for inoculation
- Latex or nitrile gloves and a face mask
- Micropore tape for sealing jar ports
- Monotub (66-quart clear storage tote) or a shotgun fruiting chamber (SGFC) for fruiting
- Spray bottle for misting
- Digital thermometer/hygrometer combo
- Isopropyl wipes and a still-air workspace
Substrate prep and inoculation, step by step
This is the stage where most beginners lose their grow to contamination, usually because they rushed sterilization, inoculated in a dirty environment, or didn't let jars cool fully before injecting. Take your time here.
- Rinse and simmer rye berries for 15–20 minutes until slightly swollen but not split. Drain and dry the surface so berries are moist inside but not wet on the outside. Wet grain surfaces are a fast path to bacterial contamination.
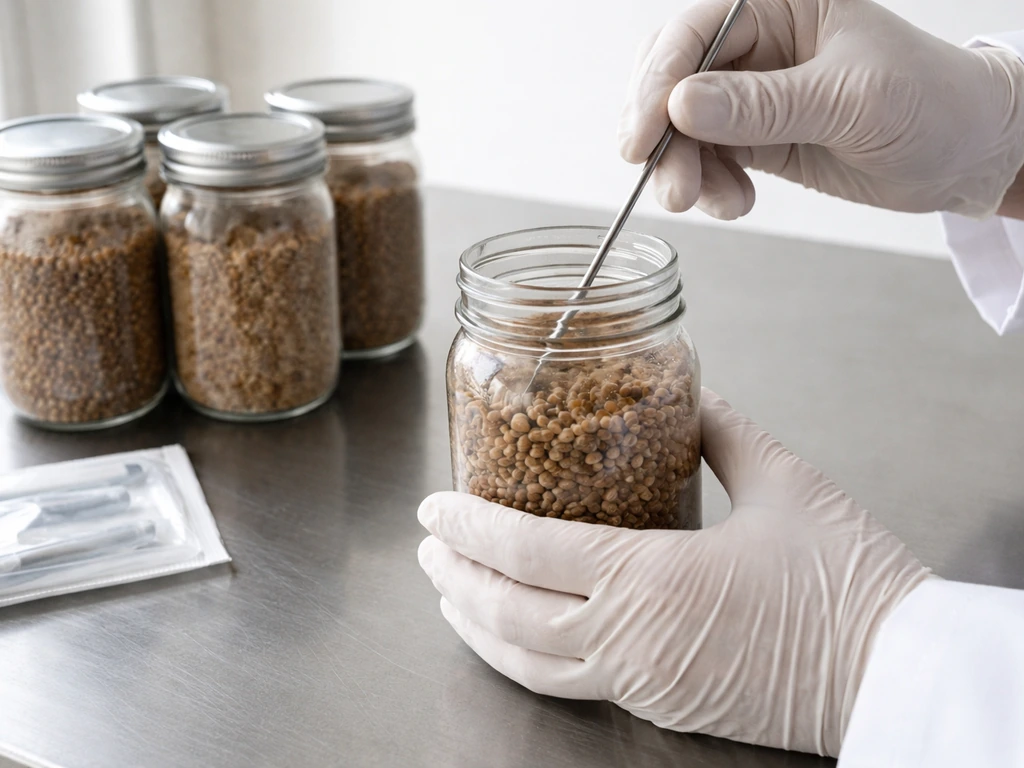
- Fill quart mason jars about two-thirds full with prepared grain. Place a layer of dry vermiculite on top as a contamination barrier. Put lids on with a polyfill-stuffed hole or a self-healing injection port covered with micropore tape.
- Load jars into your pressure cooker with 2–3 inches of water. Sterilize at 15 PSI for 90 minutes (quart jars). Let pressure drop naturally, then let jars cool to room temperature — at least 4–6 hours, ideally overnight. Never inoculate warm jars.
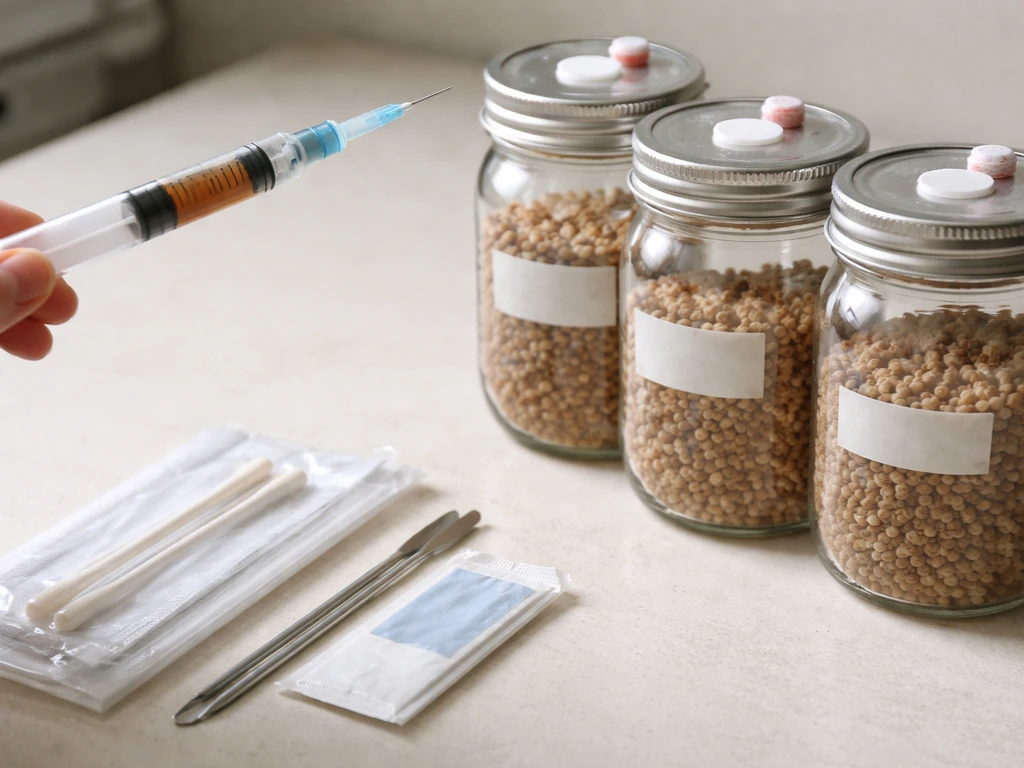
- Set up your still air box. Wipe down the interior with 70% isopropyl, let it settle for a minute, then move slowly inside it. Flame sterilize your needle, let it cool, wipe with alcohol, and inject 1–2 cc of spore solution per jar through the injection port.
- After inoculation, wrap ports with fresh micropore tape and move jars to your incubation space. Do not shake or disturb jars for at least 5–7 days.
The biggest contamination prevention lever you have is environment control during inoculation. A still air box is cheap and effective. If you're seeing green, black, or pink patches on your grain within the first week, that's almost always traced back to either dirty inoculation technique or insufficiently sterilized grain.
Incubation and creating the right fruiting environment
Incubation
P. cubensis colonizes best between 75–81°F (24–27°C). Keep your jars somewhere consistently warm and dark. A heating mat under jars with a thermostat works well, or an insulated cabinet with a seedling mat. Avoid temperatures above 85°F as they stress mycelium and create conditions where competitors thrive. Expect full grain colonization in 2–4 weeks depending on inoculation density and temperature stability. Mycelium should be white and ropy. Any off colors, green, black, pink, orange, mean contamination and the jar needs to go outside immediately.
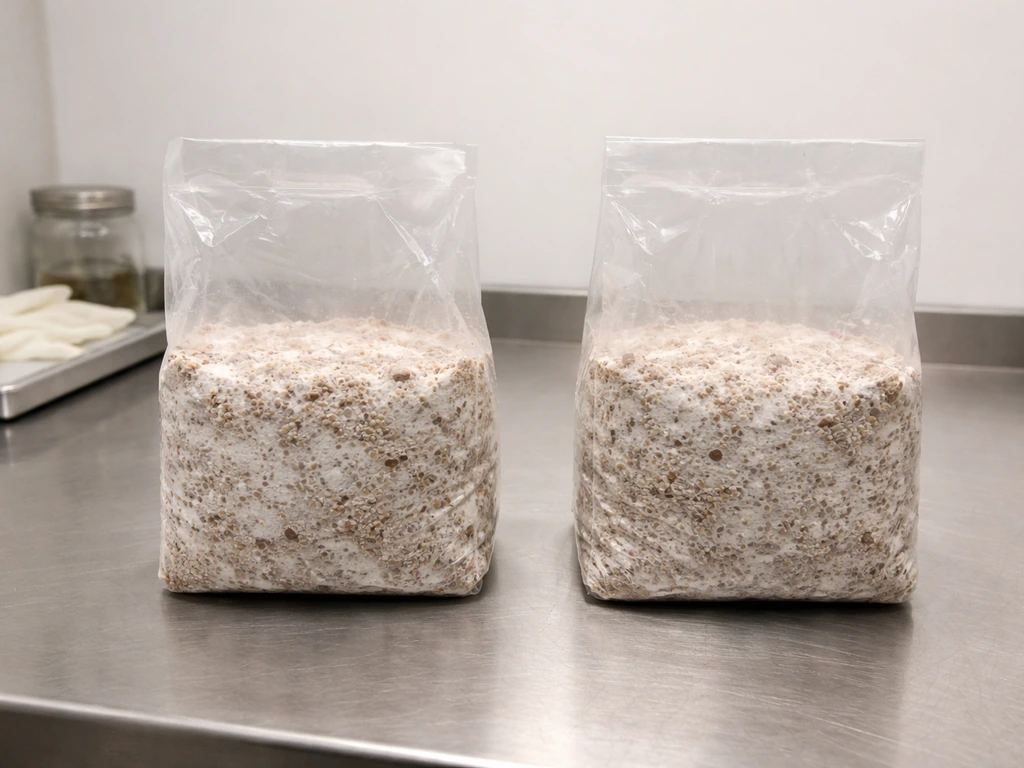
Once grain jars are 100% colonized, it's time to introduce bulk substrate and initiate fruiting. Mix your coco coir and vermiculite 50/50 by volume, add boiling water until field capacity (squeeze a handful and only a few drops should fall), and let cool. Layer colonized grain and bulk substrate in your monotub in alternating layers, finishing with a thin casing layer of straight vermiculite on top. This is called the grain-to-bulk transfer.
Fruiting environment
After the bulk substrate is colonized (another 5–10 days), initiate fruiting by introducing these conditions:
- Temperature: Drop to 70–75°F (21–24°C). The slight temperature drop signals the mycelium to fruit.
- Humidity: Maintain 90–95% relative humidity inside the fruiting chamber. Mist the walls (not directly on the substrate surface) 1–3 times per day.
- Fresh air exchange (FAE): Fan or fan the tub open for 30–60 seconds twice a day to bring in CO2-free air. Elevated CO2 causes long, spindly stems and poor cap development. This is one of the most common fruiting failures.
- Light: 12 hours of indirect light per day. It doesn't need to be bright — a normal room light on a timer works fine. Light helps orient pin development.
Expect pins to appear within 5–14 days of introducing fruiting conditions. If nothing is happening at 3 weeks, something is off with humidity, FAE, or temperature, not the mycelium itself. Don't give up too early.
Harvesting, drying, and setting up for the next flush
Harvest just before or as the veil underneath the cap starts to tear. Once the veil breaks, spores drop and reduce the potency of the remaining mushrooms in the flush. Twist and pull each mushroom at the base rather than cutting, you want to remove the whole stem cleanly so nothing rots in the substrate.
Dry mushrooms immediately after harvest. Fresh mushrooms are about 90% water, so they'll degrade fast if left out at room temperature. Use a food dehydrator at 95–115°F until mushrooms are bone dry and cracker-crisp. If you don't have a dehydrator, a fan over a rack in a dry room works but takes longer and leaves room for mold. Properly dried mushrooms stored in an airtight jar with silica gel desiccant last 6–12 months without significant potency loss.
After harvesting, remove any aborted pins, do a light scraping of any old substrate surface that looks spent, re-mist, and let the tub rest for 5–7 days. Most healthy tubs produce 2–4 flushes before yields drop off significantly. The second and third flushes are often the largest. After the last flush, the substrate can be composted or buried outdoors (in states where this doesn't create legal issues).
When things go wrong: troubleshooting common failures
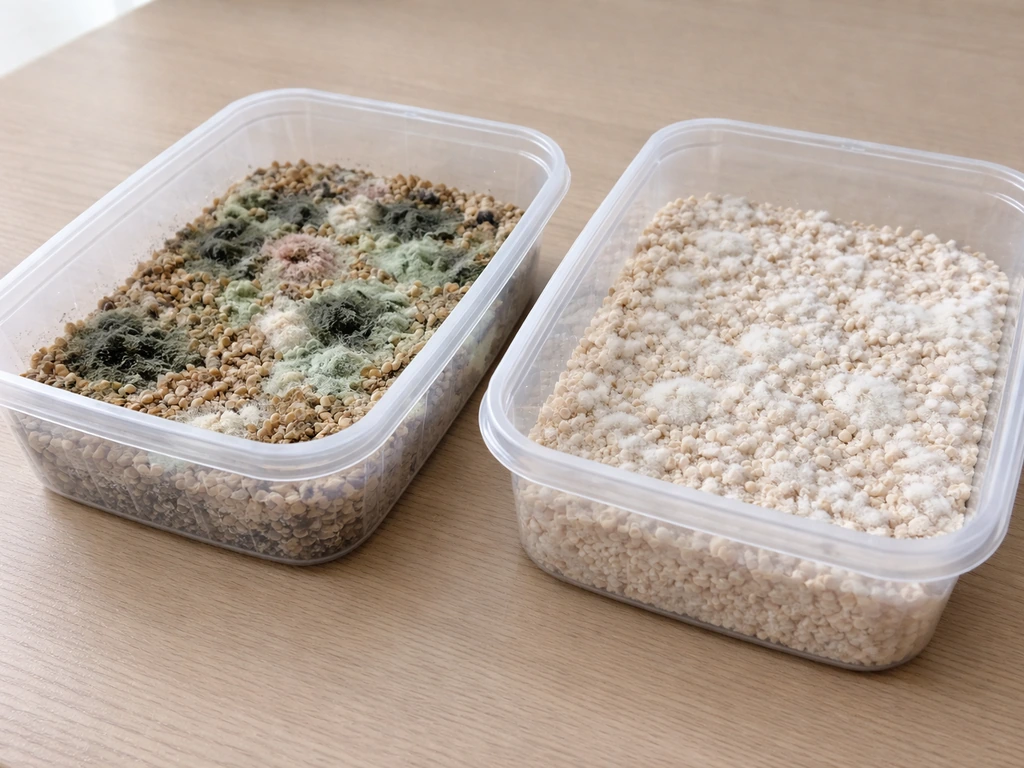
Green, black, or pink patches on grain or bulk
This is Trichoderma, Cobweb mold, or bacterial contamination. Isolate the tub or jar immediately, outside the grow space, not just across the room. If contamination is confined to one corner of a bulk tub and the rest looks healthy, some growers try removing the affected section and continuing. In grain jars, contamination almost always means a full loss. Don't open contaminated jars inside your grow space.
Mycelium colonized but no pins forming
Nine times out of ten this is a CO2 or humidity problem. Check that you're doing adequate fresh air exchange, even small tubs need it. If humidity is above 90% and FAE is good, try a temperature drop of 5°F for 24 hours to shock pins. Sometimes a cold water soak (dunking the whole substrate block in cold water for 6–12 hours) resets the fruiting trigger.
Long, leggy stems with small or no caps
Classic CO2 buildup sign. Increase your fresh air exchange frequency. Even just cracking the tub lid and waving a piece of cardboard a few times counts. If you're using a shotgun fruiting chamber, make sure the holes aren't clogged.
Yields drop dramatically after the first flush
Normal to some degree, but if the second flush is very weak, the substrate may be depleted or drying out. Try a cold water dunk between flushes, and make sure misting is reaching the substrate edges, not just the walls. If the tub smells off or looks dark and wet, it may be past its productive life.
Grain jars stalling partway through colonization
If white mycelium growth stops at 30–60% and won't advance, the jar may be too wet, too cold, or just slow. Try gently shaking the jar once (breaking up colonized sections spreads inoculant through uncolonized grain) and moving it somewhere slightly warmer. If it stalls for more than 2 additional weeks with no growth, assume contamination that isn't visually obvious yet.
Wisconsin-specific considerations for timing and environment
Wisconsin's climate is a real factor in how you plan your grow. Winters are cold and dry, indoor humidity in a Wisconsin home from November through March can drop to 20–30% relative humidity without humidification. Your fruiting chamber will need more active humidity management, whether that's more frequent misting, a humidifier in the same room, or a Martha tent setup with an ultrasonic humidifier on a timer.
On the flip side, winter is actually a great time to run an indoor P. cubensis grow because ambient temperatures are easier to control with a heating mat. You're not fighting a hot house in summer where temperatures inside a tub can creep past 85°F and stress your mycelium.
Summer in Wisconsin brings heat and high outdoor humidity, which helps if you're running a fruiting chamber but can also encourage faster mold growth if your space isn't clean. Midwest summers with temps regularly hitting 85–90°F outdoors mean your grow room needs climate control or you risk heat stress during colonization.
For outdoor wood-loving species like P. cyanescens, Wisconsin's cool, wet springs and falls (April through May and September through October) are the natural fruiting windows. Outdoor beds inoculated in late spring can fruit in fall if conditions align. However, outdoor grows are far less controllable and the legal exposure of having an outdoor bed is arguably greater than an indoor setup, so factor that into your decision.
Wisconsin's freeze-thaw cycles can also damage outdoor substrate beds if they're not protected through winter. If you set up an outdoor wood chip bed, plan to mulch heavily and expect the first significant fruiting the following fall rather than the same season. Patience is the operative word for outdoor growing in this climate.
The bottom line: indoor growing is more controllable and more practical for most Wisconsin growers year-round, especially in winter. Plan your grow cycles around your home's seasonal temperature swings, invest in a decent thermometer/hygrometer combo, and account for low winter humidity before you're halfway through a grow and watching your substrate dry out. Getting those environmental basics right separates successful grows from expensive, time-consuming failures.
FAQ
Are dormant spores themselves legal in Wisconsin, and what steps make it risky?
Yes. In Wisconsin and federally, there are still meaningful differences between keeping spores for legal, passive microscopy purposes and taking steps that show intent to cultivate into psilocybin-producing mushrooms. The practical takeaway is that you should assume “converting” spores into fruiting organisms is treated as manufacturing, even if spores themselves are not yet controlled. If you are trying to stay on the legal side, do not germinate or move toward fruiting conditions.
Is it safer to avoid certain supplies, like grain packs or fruiting instructions?
A common mistake is buying “cultivation starter kits” that include more than spores (for example, ready grain packs, transfer agar, or instructions for fruiting). Even if your intent is personal, the kit can be used as evidence of manufacturing intent. If you are evaluating the legal risk, focus on what exactly is being purchased and possessed, not just the legality of spores.
What should I check first if colonization looks fine but pinning never starts?
If you do everything else correctly but fail to maintain a consistent microclimate during fruiting, you can get very different outcomes, including stalled pinning that looks like “mycelium stopped working.” For troubleshooting, treat each variable separately: confirm humidity (target range), confirm fresh air exchange, and confirm temperature stability for at least 24 hours before making multiple changes. Making several changes at once makes the cause impossible to pinpoint.
How do I prevent winter dry air from ruining fruiting in Wisconsin?
Drying out during winter is a frequent “slow failure” in Wisconsin homes. Even when the tub looks humid, the surface can be drying if the chamber air is too dry. Instead of relying only on “room feel,” use a hygrometer inside the grow space and verify humidity at the substrate level, then adjust with a humidifier or tent setup rather than only adding occasional mist.
What are early signs of contamination that are easy to miss?
Cross-contamination risk isn’t only about visible green or black patches. Bacterial contamination can start subtly with unusual smells (sour, ammonia-like, or “off” odors) and wet, darkened areas before clear mold appears. As a decision aid, if you smell something abnormal or see persistent sour moisture, isolate immediately and do not open jars in the grow area.
Is isolating a contaminated tub in the same room enough to stop spread?
If one contaminated tub or jar is in your grow room, “still seems contained” is not a reliable safety strategy. Spore and microbe spread can happen when handling equipment, opening lids, or moving between locations. A practical mitigation is to separate workflow zones (clean to dirty), dedicate tools to each grow, and dispose of contaminated substrate in sealed waste to reduce spread.
Why do my second and third flushes get much weaker, and what’s the most common cause?
Some growers think weak second and third flushes are always “normal,” but in many cases it is caused by surface dehydration or poor fresh air exchange between flushes. The practical approach is to rehydrate correctly after harvesting (proper surface misting, not soaking the whole mass), then run a controlled rest period and re-check airflow before assuming the genetics are failing.
What’s the danger of pushing humidity too high during Wisconsin winter growing?
For Wisconsin winters, it is easy to overshoot humidity when trying to compensate for dry air, which can increase the chance of bacterial issues and mold. Instead of chasing a single humidity number, monitor trends over several hours and keep fresh air exchange consistent. If humidity repeatedly stays above a safe upper range while CO2 is not dropping, adjust airflow and temperature first, then fine-tune humidification.
How strict do I need to be about harvest timing to avoid potency loss?
Harvest timing affects more than yield. If you wait until spores start dropping, you can reduce potency of remaining mushrooms in the same flush and increase the likelihood of messier, contaminated conditions in the grow space. A practical rule is to harvest right at veil break and then handle drying immediately so you do not create a wet storage window.
Does drying, storage, or disposal change the legal risk?
Legal exposure can vary depending on what you do after cultivation, including drying, storage, and disposal. Even if growing is the main focus, storing dried material or discarding it in a way that ties back to controlled-substance activity can increase risk. If you are asking for “what to do next,” consult a Wisconsin attorney before you make any post-harvest plans.