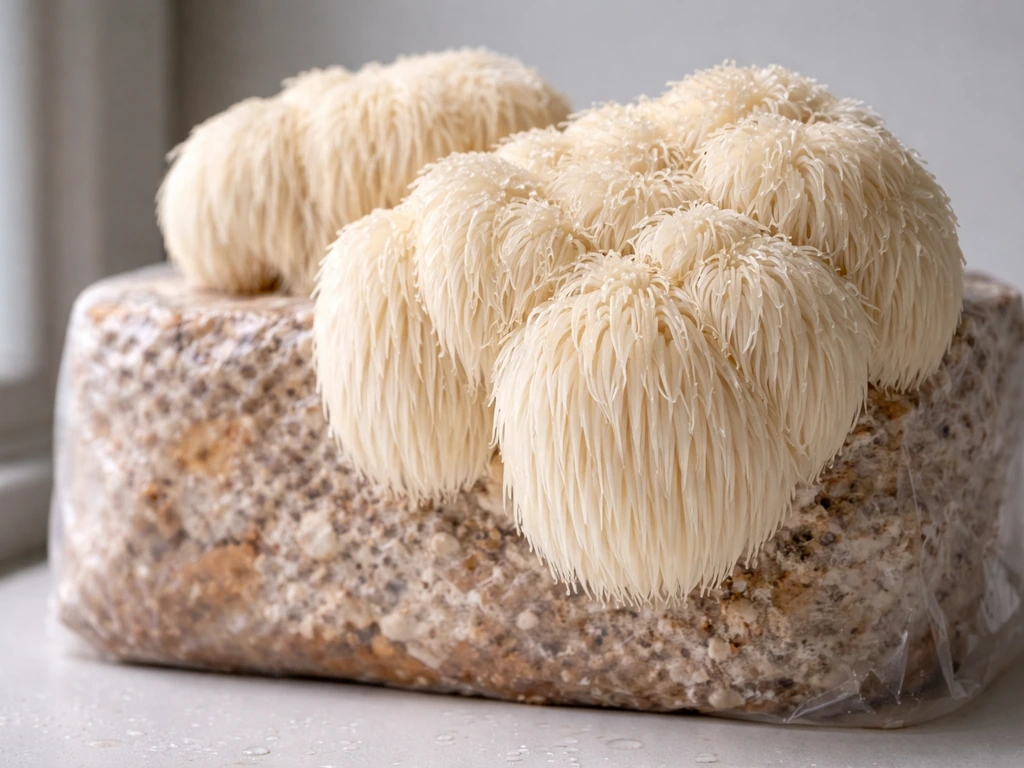
You can grow lion's mane from spores at home, but it takes a few more steps than starting from ready-made spawn. The full process goes: spores to agar culture, agar culture to grain spawn, grain spawn to a hardwood fruiting block, and then into fruiting conditions. Done right, you can expect colonized blocks and your first harvest roughly 10 to 14 weeks after you crack open a spore syringe. Done sloppily, you'll fight contamination at every stage. This guide walks you through the whole thing, honestly. This same workflow is the backbone of how to grow shaggy mane mushrooms from spores at home.
How to Grow Lion’s Mane From Spores Step by Step

Marcus Holloway
23 May 2026
Spores vs spawn: why the distinction actually matters
A lot of beginner guides treat spores and spawn as interchangeable. They are not. Spawn is mycelium that has already been established and colonizing a carrier substrate, typically grain or sawdust. As Penn State's mushroom research puts it, spawn is the grain-and-mycelium mixture you use to seed a fruiting substrate. It's ready to go. Spores, on the other hand, are the sexual reproductive cells of the mushroom. They haven't germinated yet. You can't drop a spore syringe directly into a fruiting block and expect results, not reliably anyway.
Growing from spores means you're responsible for getting spores to germinate, establishing a clean mycelium line (ideally on agar first), and then expanding that culture onto grain to create your own spawn. It's one or two extra stages compared to buying ready-made grain spawn, but it gives you full control over your genetics, saves money long term, and is honestly a satisfying skill to develop. The tradeoff is that spore work requires sterile technique and a bit of patience, especially since lion's mane mycelium is naturally wispy and slow, which can make early colonization look more alarming than it actually is.
Getting your spores and keeping them alive
Lion's mane spore syringes are available from reputable online suppliers. Look for vendors who pressure-test their syringes, include a needle, and list a production date. Spore prints are also an option, and experienced growers sometimes prefer them because they store longer in dry conditions. Either way, source from someone with verifiable reviews and a track record, because a contaminated or dead spore source will waste weeks of your time.
Storage matters more than most people think. Heat and direct sunlight are the main killers. Don't freeze a spore syringe, because ice crystals will physically destroy the spores. Instead, keep syringes in the refrigerator at around 2 to 4°C, wrapped in foil or stored in a dark bag to block light. Spore prints should go into a sealed, airtight container with a small desiccant pack to control moisture. Moisture and warmth are both contamination risks and viability killers. Properly stored spores can remain viable for a year or more; poorly stored spores might be dead in weeks.
How to check spore viability before you commit
You can't look at a spore and know it's alive, but there are a couple of practical checks. First, look at the syringe under a light: you should see visible cloudiness or small suspended particles, which are spore clusters. A clear or watery syringe is a bad sign. Second, and more reliably, inoculate one small agar plate or slant from your syringe and watch for germination over 5 to 10 days at around 24°C before committing the rest of your syringe to multiple plates or jars. If mycelium starts showing by day 10 to 14, your spores are alive. No growth after 3 weeks almost always means dead or heavily contaminated spores.
Setting up a clean workspace before anything else
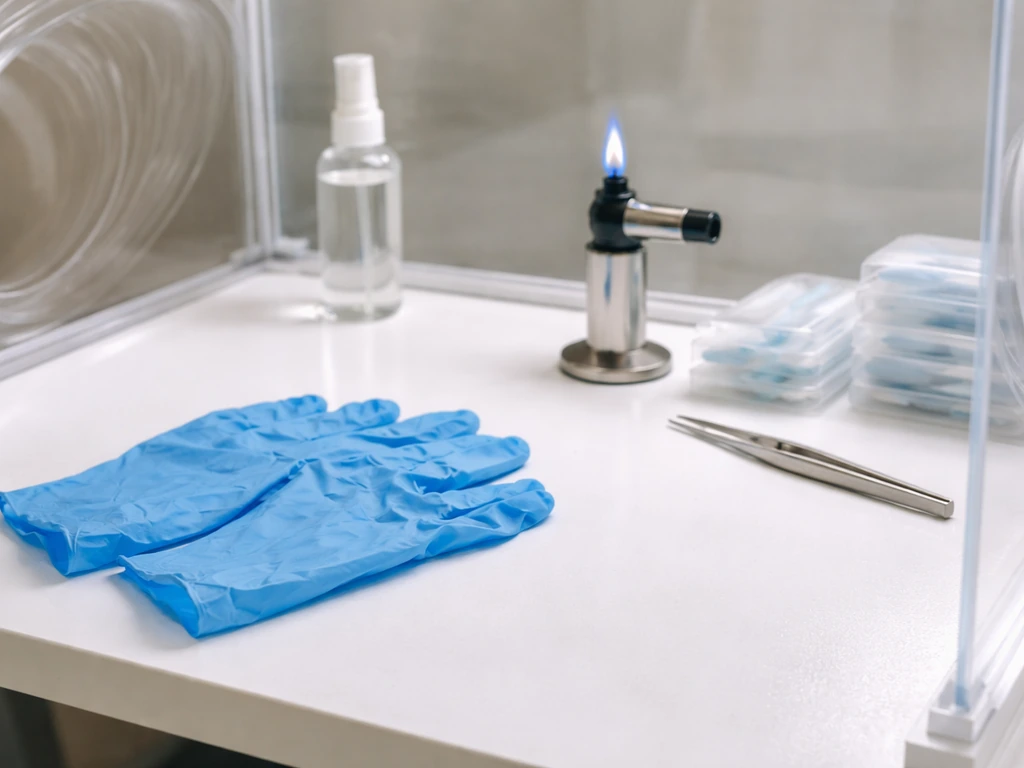
Sterile technique is the single biggest factor separating successful spore work from a bag of green mold. You don't need a lab or a flow hood to get started, but you do need to be deliberate. A still air box (SAB) is the most accessible tool for home growers. It's a large, clear plastic tote with two arm holes cut into one end. You work inside it with your hands through the holes, and the enclosed space reduces air turbulence so that floating contaminant particles settle rather than drift into your open containers. An SAB doesn't create a sterile environment, but it dramatically reduces your contamination rate compared to working in open air.
If you're planning to do ongoing spore work or scale up at all, a laminar flow hood is a real upgrade. It pushes HEPA-filtered air across your workspace in a steady laminar sheet, giving you genuinely sterile working conditions. The cost is higher (typically $300 to $600 for a decent unit), but the contamination reduction is significant. Either way, prep your workspace before inoculation: wipe every surface with 70% isopropyl alcohol, let it dry, flame-sterilize your loop or scalpel, and always work quickly once containers are open.
You'll also need a pressure cooker capable of reaching 15 PSI. This is non-negotiable for sterilizing grain and supplemented substrates. A standard 23-quart stovetop pressure cooker works fine for home-scale growing. Have your isopropyl alcohol, gloves, a lighter or alcohol lamp, and a clean scalpel or inoculation loop ready before you start any spore or agar work.
Why starting on agar is worth the extra step
Technically, you can inoculate grain directly from a spore syringe. Plenty of growers do it. But starting on agar first is strongly recommended for lion's mane specifically, and here's why: lion's mane mycelium from spores is monokaryotic at first, meaning it grows slowly and looks wispy and sparse compared to what you'd expect from a fully established culture. To learn the full step-by-step workflow for this, see the detailed guidance on how to grow lion's mane mycelium from start to finish. On agar, you can actually see what's growing, identify and cut away contamination, select the healthiest-looking sectors, and transfer only clean mycelium forward. Skipping agar means any contamination that lands in your grain jar is basically a loss, and you won't know for days.
Malt extract agar (MEA) is the go-to for lion's mane. A standard recipe uses about 18.9 g/L malt extract, 18.9 g/L glucose, 0.9 g/L peptone, and 15 g/L agar. Potato dextrose agar (PDA) also works well and is easy to find in pre-made powder form. Pour your agar into petri dishes, let it solidify, and store the plates inverted in a sealed bag in the fridge until you're ready to use them.
Inoculating and growing out your agar plates
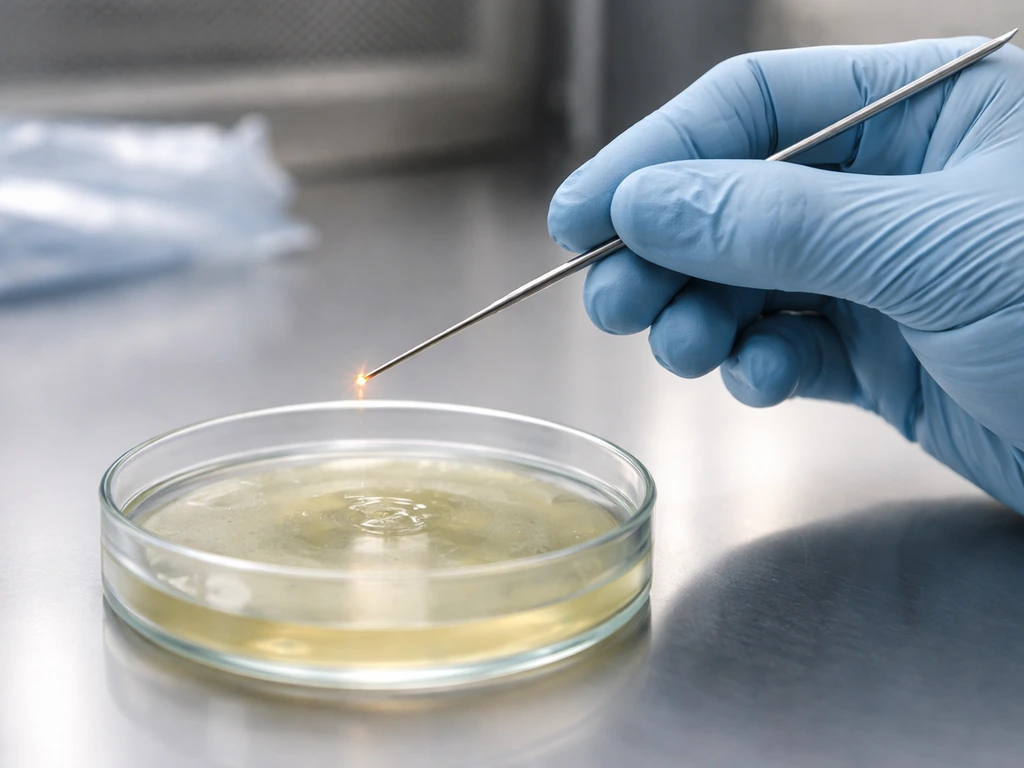
Inside your SAB or under your flow hood, flame your inoculation loop until it glows, let it cool for 5 to 10 seconds, then introduce 2 to 3 drops from your spore syringe onto the surface of the agar. Spread lightly, seal the plate with Parafilm or painter's tape, and label it with the date. Incubate at around 24°C in darkness. Lion's mane monokaryotic mycelium on MEA typically reaches around 90 mm of growth in roughly 27 days, so don't panic if things look slow in the first week. You're looking for thin, fuzzy white growth radiating outward from the inoculation point. Any green, black, or pink patches are contamination: cut around them or discard the plate.
Once you have a clean mycelium sector, use a flame-sterilized scalpel to cut a small agar plug (roughly 1 cm square) from the leading edge of the growth and transfer it to a fresh plate. This is called isolation, and doing it two or three times gives you a much cleaner, more vigorous culture. Your cleanest, fastest-growing sector from that final plate is what you take forward to grain.
From agar to grain spawn: the inoculation workflow
Grain spawn is the bridge between your agar culture and your fruiting block. Rye berries, wheat berries, and popcorn are the most common options for home growers. Rye is popular because it colonizes quickly and is easy to find. Here's the general prep: soak grain for 12 to 24 hours, simmer until the kernels are just cooked through (not split or mushy), drain and dry the surface, then load into mason jars or polypropylene bags with filter patches. Sterilize at 15 PSI for a minimum of 90 minutes for quart jars (2 to 2.5 hours for larger batches). Let jars cool completely, at least 12 hours, before inoculating.
Inside your SAB or flow hood, take an agar plug from your clean lion's mane culture and drop it into the cooled grain jar through the lid (use a self-healing injection port lid if you have one, otherwise work fast). Alternatively, for spore syringe to grain direct inoculation, inject 1 to 2 mL per quart jar through an injection port, flame-sterilizing the needle before each jar. Either way, seal and label. Incubate grain jars at 21 to 24°C (70 to 75°F) in darkness. Shake jars once the grain is about 30% colonized to distribute mycelium and speed things up. Expect full grain colonization in roughly 2 to 4 weeks depending on your inoculation source (agar plug colonizes faster than spores directly).
Preparing the lion's mane substrate and filling your blocks
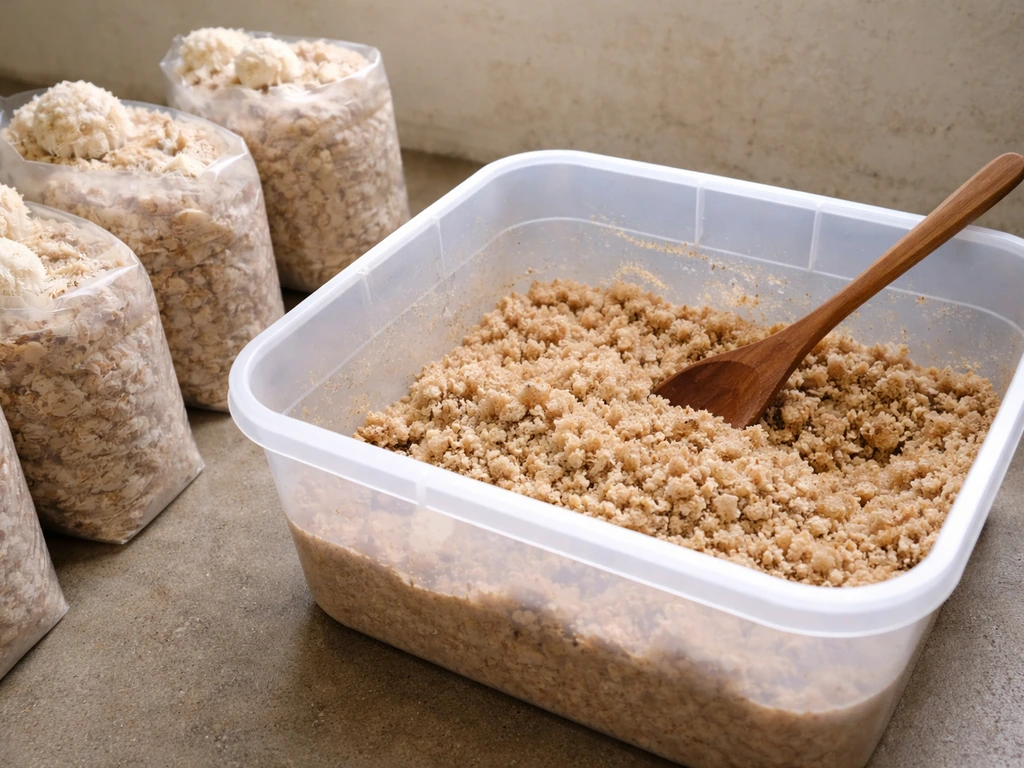
Lion's mane is a wood-decomposing species, so hardwood sawdust is the core of your fruiting substrate. Oak, beech, and alder are excellent choices. Avoid softwoods like pine, which contain resins that inhibit growth. The most effective home substrate formula is hardwood sawdust supplemented with wheat bran or oat bran. A commonly used and well-supported ratio is hardwood sawdust with around 20% wheat bran by dry weight, sometimes with 1 to 2% gypsum added to improve texture and moisture distribution.
A practical starting recipe for one 5-pound block looks like this:
- Hardwood sawdust or hardwood fuel pellets (rehydrated): about 850 g dry weight
- Wheat bran or oat bran: about 200 g (roughly 20% of dry weight)
- Gypsum: 10 to 15 g (optional but helpful)
- Water: enough to bring field capacity to around 60 to 65% moisture (the substrate should clump when squeezed but release only a few drops)
Because this substrate is supplemented with bran, it must be fully sterilized, not just pasteurized. Pasteurization is fine for plain straw, but supplemented hardwood blocks need 15 PSI for 2.5 to 3 hours minimum. Load substrate into polypropylene mushroom bags (typically 5-pound capacity), seal with a filter patch, and pressure cook. Let blocks cool to room temperature before inoculating, which usually means overnight.
To inoculate, break up your fully colonized grain jar, open the substrate bag in your SAB or under your flow hood, and mix in the grain spawn at a rate of around 15 to 20% grain to substrate by weight. Seal the bag, label it, and move to incubation. Higher spawn rates speed up colonization and reduce contamination risk, so don't be stingy.
Incubation and fruiting conditions
Incubation: getting the block fully colonized
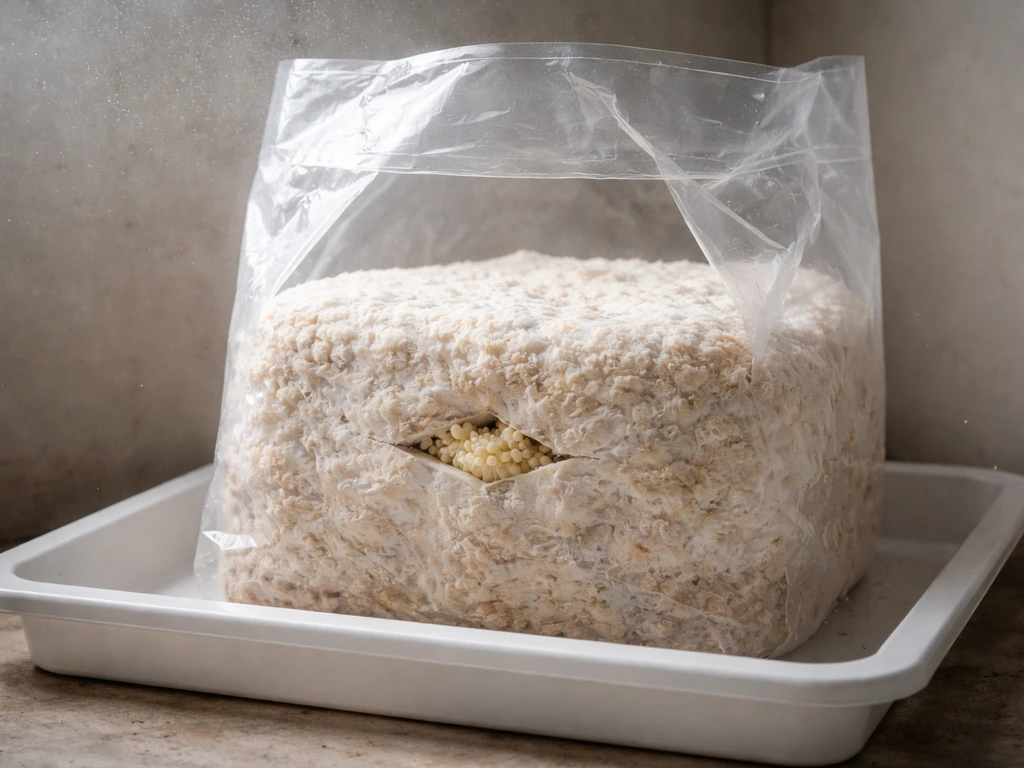
During incubation, your block needs warmth, darkness, and minimal disturbance. Keep colonizing blocks at 21 to 24°C (70 to 75°F). Lion's mane colonizes more slowly than oyster mushrooms, so expect 3 to 5 weeks for a fully colonized 5-pound block depending on spawn rate and genetics. The mycelium will look thin and wispy inside the bag, which is normal. As long as it's white and there's no visible green, black, or pink contamination, you're on track.
Triggering pins and fruiting
Once your block is fully white with mycelium (no remaining brown patches of uncolonized substrate), it's time to trigger fruiting. The most reliable trigger for lion's mane is a temperature drop combined with increased fresh air and humidity. Move your block to a cooler area: the target fruiting temperature range is roughly 10 to 18°C (50 to 65°F). Some growers report primordia initiation happening at slightly warmer temps of 18 to 22°C, but quality tends to be better on the cooler end. Temperatures above 23°C can slow growth and deform fruit bodies. Below 6°C, growth essentially stops.
Cut an X or a small opening in the bag face or remove the block from the bag entirely, then place it in your fruiting environment. Here are the key environmental targets for the fruiting stage:
| Parameter | Target Range | Notes |
|---|---|---|
| Temperature | 10–18°C (50–65°F) | Cooler end produces denser, better-quality fruit bodies |
| Relative Humidity | 85–95% RH | Mist walls/floor of chamber, not directly on mycelium |
| CO2 | Below 1000 ppm | High CO2 causes elongated, sparse fruiting; increase FAE |
| Fresh Air Exchange | 5–8 times per hour | Fan or regular manual fanning to keep CO2 down |
| Light | 200–1000 lux, diffuse | Indirect light for 12 hrs/day; needed for primordia differentiation |
At home, you can hit these targets with a Martha tent setup or a monotub with a cool mist humidifier, a small fan on a timer, and a basic LED or fluorescent light. Mist the walls and floor of your chamber 2 to 4 times per day, not the mycelium directly. Pins should appear within 1 to 2 weeks of moving to fruiting conditions. Once pins appear, back off humidity slightly and keep air exchange consistent. Fruit bodies should be harvest-ready roughly 15 to 20 days after pinning.
Troubleshooting common problems and realistic timelines
Contamination during spore and agar work
This is the most common failure point for spore growers. Green (Trichoderma) or black mold on agar plates almost always means your technique slipped: not enough alcohol, tools cooled insufficiently before use, or a draft blew into your workspace. If you see contamination on a plate early, isolate and discard it before it sporulates. If you see it in a grain jar, throw the jar out, don't try to save it. Prevention is everything: work slowly and deliberately inside your SAB, always alcohol-wipe the outside of your syringe needle before use, and never rush.
Slow or patchy colonization
Lion's mane is genuinely slower than most species. Wispy, thin mycelium on grain is normal. If colonization has completely stalled for more than 2 weeks with no visible growth and no contamination, check your temperature first. Below 18°C, colonization slows dramatically. Also check substrate moisture: too wet and grain gets anaerobic and sour, too dry and mycelium desiccates. Properly prepared grain has a matte surface, not shiny or wet-looking.
No pins forming
If your block is fully colonized but refuses to pin after 2 to 3 weeks in fruiting conditions, revisit temperature and CO2 first. High CO2 is a very common culprit. If you're fruiting in a closed chamber with minimal air exchange, CO2 accumulates and suppresses pinning. Increase manual fanning or run a small fan more frequently. Also make sure your block is actually getting some light: even 200 to 400 lux of indirect light for 12 hours a day is needed for primordia differentiation in lion's mane. A room with a window works if you don't have a dedicated light.
Malformed or icicle-like fruit bodies
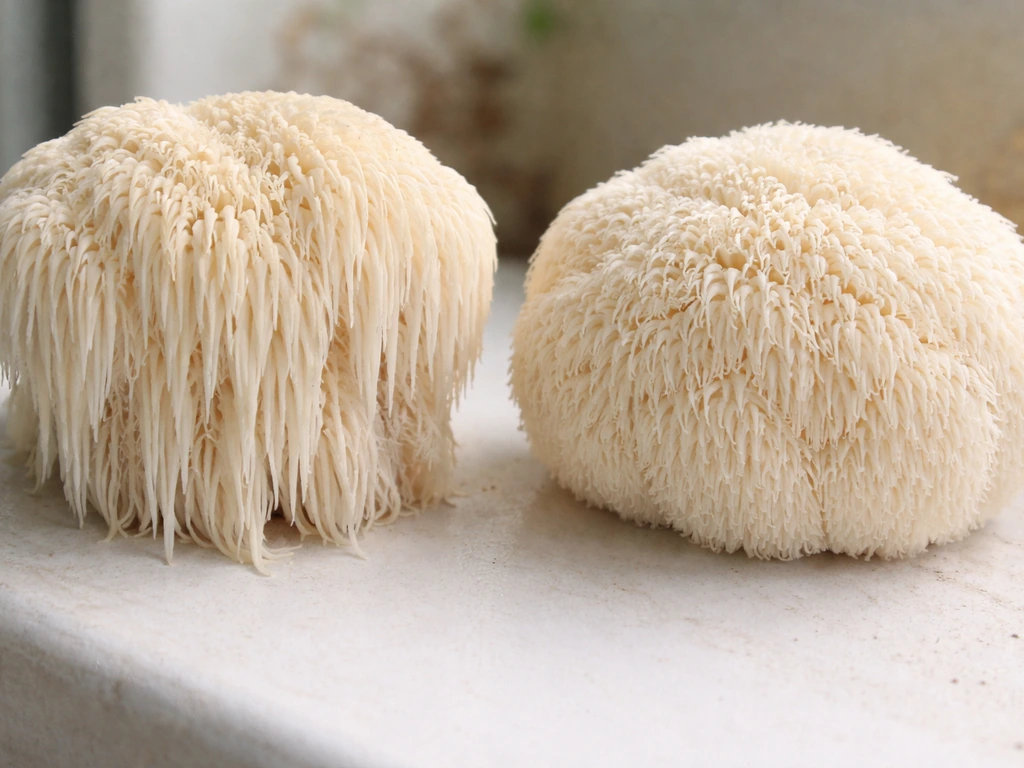
Lion's mane is supposed to look like a white pom-pom of cascading spines. If your fruit bodies are coming out elongated, stringy, or icicle-shaped, that's almost always a CO2 problem. The mushroom is reaching for oxygen and stretching toward fresh air. Increase your fresh air exchange significantly. If you're fruiting in a bag with just an X cut, open the bag further or move the block to a more open environment.
Yellowing or browning fruit bodies
Yellowing usually means your humidity dropped too low, or temperatures spiked above 23°C. Lion's mane is sensitive to heat stress and dryness at the fruiting stage. If you catch it early, correcting humidity and temperature can slow the damage. Harvest as soon as the spines are well-developed but before any yellowing spreads, because once it starts it tends to keep going.
Realistic timeline from spores to harvest
| Stage | Estimated Duration | What to Watch For |
|---|---|---|
| Spore germination on agar | 5–14 days | Thin white mycelium radiating from inoculation point |
| Agar isolation (2–3 transfers) | 3–6 weeks total | Progressively faster, cleaner growth; discard contaminated plates |
| Grain spawn colonization | 2–4 weeks | White mycelium threading through grain; shake at 30% |
| Substrate block colonization | 3–5 weeks | Block turns fully white; normal to look wispy |
| Pinning after fruiting trigger | 1–2 weeks | Small white bumps appear at cut or opening in bag |
| Fruit body development to harvest | 1–2 weeks after pinning | Spines elongate; harvest before yellowing begins |
| Total from spore to first harvest | 10–16 weeks | Faster with agar-plug inoculation vs spore-to-grain direct |
After your first harvest, leave the block in fruiting conditions and you'll usually get a second flush within 1 to 2 weeks. Lion's mane blocks typically yield 2 to 3 flushes before the substrate is spent, with subsequent flushes smaller than the first. Starting from spores is more work up front, but once you have a clean agar culture you can store it in the fridge almost indefinitely and use it to make spawn for future grows without buying spores again.
If you're based in Australia and working with local climate constraints, the approach is the same but temperature management during fruiting deserves extra attention given warmer ambient conditions. If you're wondering how to grow lion's mane mushroom australia specifically, the same spore, agar, and substrate steps apply, but you need tighter temperature control during fruiting. And if your primary interest is building out a robust mycelium culture for medicinal use rather than fruiting, the agar isolation and grain expansion stages covered here apply directly to that goal too.
FAQ
How can I tell if my lion's mane spore syringe is actually alive before I commit jars and time?
For lion's mane, germination checks on agar are more informative than waiting to “see” life inside the syringe. In practice, inoculate one small plate, incubate around 24°C, and use day 10 to 14 as your decision point. If there is no clear growth by about 3 weeks, treat the syringe as dead or heavily contaminated and do not waste time scaling up.
What should I do if my agar plates show contamination, can I save it and transfer to grain?
If you see contamination on agar early, don’t try to salvage by transferring “nearby” tissue, because mold can spread invisibly through the agar. The safest approach is to isolate only from a clean, fastest-growing sector that is clearly free of green, black, or pink growth, and discard any plate where contamination appears to have touched the target area.
What are the most common sterile-technique mistakes that cause failures specifically when working from spores?
Sterile technique matters most at the moment containers are open. A good rule is to minimize exposure time, avoid talking or breathing directly over openings, and work in a draft-free spot. If you’re using a SAB, close the arm holes as much as practical, and keep your hands and tools moving smoothly so you do not “sweep” airborne particles toward the open containers.
Can I keep my lion's mane in the same tent from colonization through fruiting?
Yes, but only if you have a reliable way to add fresh air and manage CO2 during the incubation and fruiting transition. In general, grain incubation should be mostly closed in darkness, then fruiting needs fresh air exchange and humidity. If you keep the fruiting chamber too closed, pins can fail even when the block is fully colonized.
My lion's mane mycelium looks wispy and slow, how do I know if it’s normal versus actually failing?
Monokaryotic growth can look thin and slow early, so don’t judge your culture by “speed” alone. Use structure instead: healthy growth on agar should be white and uniform, and grain should progressively whiten without brown, sour-smelling wetness. If growth stops entirely for more than 2 weeks, then verify temperature, substrate moisture, and whether the grain was sterilized properly.
What’s the best way to transition from incubation to fruiting without shocking the block?
Temperature swing tolerance is limited, so avoid rapid changes. For example, moving directly from a warm incubation room to a cold fruiting area can cause stress and delayed pinning. A practical approach is to move the block to the fruiting area when it’s stable, then allow 12 to 24 hours to equilibrate before making big environmental changes like increasing fresh air or misting frequency.
My lion's mane is fully colonized but won’t pin, what troubleshooting steps should I try first?
If your blocks are colonized but do not pin after 2 to 3 weeks, prioritize CO2 and fresh air exchange first, then confirm you’re in the correct temperature band. A common fix is to increase fanning cadence or run a small fan on a timed schedule, and to ensure the chamber is actually exchanging air rather than just circulating the same humid air.
Do I really need a light source for lion's mane pins, or is window light enough?
Light influences primordia formation, not mycelium growth speed. If you’re using a window, use a timer and rotate the block so it receives indirect light consistently for about 12 hours a day. If you use LEDs, keep them indirect and avoid heat buildup, because heat spikes can cause deformation or yellowing.
How sensitive is lion's mane to the exact sawdust-to-bran ratio, and what supplements should I avoid overdoing?
Yes, but be careful with supplementation. If you add gypsum, keep it low (around 1 to 2% by dry weight) to avoid overly hard or water-retentive substrate. For bran supplementation, around 20% wheat bran is a typical starting point. Over-supplementing can increase contamination risk and make moisture management harder, even when sterilization is correct.
When is the right time to harvest, and how should I manage conditions between flushes?
Harvest timing affects both texture and shelf life. Don’t wait for heavy yellowing; once the spines show good development, harvest promptly. After harvesting, keep the block in the same fruiting environment for the next flush, but slightly reduce misting if you see overly wet surfaces.
How do I preserve good genetics from spores so I don’t have to start from syringes every time?
If you plan repeat grows, the best time to “lock in” good genetics is after you’ve isolated clean agar sectors. Store your best-performing agar culture in the fridge and subculture periodically if growth slows. This reduces reliance on buying new syringes and helps you avoid variability between spore batches.
Are spore prints better than spore syringes for lion's mane, and how should I store them to keep viability high?
Spore prints can be less expensive up front, but syringes are often more convenient. Either is fine, but moisture control is critical for prints: store them sealed with a desiccant in a dark area, and label by date. If you’re getting poor results, the more likely issues are viability loss from heat, moisture leaks, or long storage conditions rather than the print method itself.